Note
Access to this page requires authorization. You can try signing in or changing directories.
Access to this page requires authorization. You can try changing directories.
You can cancel or resubmit your flow runs in bulk instead of one at a time, which can be a huge time saver.
Resubmit flow runs initiated by instant triggers
Administrators can enable users to resubmit flow runs initiated by instant triggers. Instant triggers, which are used to manually start flows, can be activated through Power Automate, a mobile app, or a button in a canvas app, among other methods.
Important
Starting on February 6, 2025, we'll change the functionality of the Power Platform Admin setting Power Automate flow run resubmission. Previously, users could disable flow run resubmissions initiated by instant triggers for all users. With the update, users can resubmit their own flows initiated by instant triggers but aren't able to resubmit flows initiated by others. The state of the Power Platform admin center toggle on your tenant remains unchanged, as this update is rolled out in February.
| Scenario matrix | January 2025 feature release | February 2025 feature update (currently rolling out) |
|---|---|---|
| Feature setting disabled in Power Platform admin center | User can't resubmit their own flows initiated by instant triggers, or resubmit flows initiated by another user. | User can resubmit their own flows initiated by instant triggers, but disallowed to resubmit flows initiated by another user. |
| Feature setting enabled in Power Platform admin center | User can resubmit their own flows initiated by instant triggers and also resubmit flows initiated by another user. | User can resubmit their own flows initiated by instant triggers and also resubmit flows initiated by another user. |
There are two options to enable flow run resubmission for flows initiated by instant triggers, which are through Power Platform admin center and by using PowerShell.
Power Platform admin center
- Sign in to your Power Platform admin center account.
- Select Settings and then search for Power Automate flow run resubmission.
- Choose whether to enable or disable the functionality using the toggle.
Apply tenant setting using PowerShell prerequisites
To perform the administration operations in the cmdlets, you need the following:
Any of these roles from Microsoft Entra ID: Tenant admin, Power Platform administrator, or Dynamics 365 Service Administrator. These roles can access the Power Apps admin PowerShell cmdlets without requiring a Power Apps plan for administrative access. However, these administrators need to sign in to the Power Platform admin center at least once before using the PowerShell cmdlets. If this isn't done, the cmdlets fail with an authorization error.
Power Platform administrator or Dynamics 365 administrator permissions are required to search through another user's resources. Environment admins only have access to those environments and environment resources for which they have permissions.
For Dataverse for Teams environments, you must be a Power Platform administrator to manage environments where you aren't the owner of the team in Microsoft Teams.
Note
It takes approximately an hour for the function to become enabled after the PowerShell commands are applied.
- Sign in to your tenant account:
Add-PowerAppsAccount -Endpoint "prod" -TenantID <Tenant_ID>
- Retrieve and store your tenant settings in TenantSettings:
$tenantSettings = Get-TenantSettings
- Set the
powerPlatform.powerAutomate.disableFlowRunResubmissionflag to False, to allow flow run resubmissions for cloud flows initialized by instant triggers.
 $tenantSettings.powerPlatform.powerAutomate.disableFlowRunResubmission= $False
 Set-TenantSettings -RequestBody $tenantSettings
Learn more about PowerShell commands in PowerShell support for Power Apps and Power Automate.
Resubmit flow runs
You can resubmit previous runs of a flow in bulk. To do this, follow these steps:
Sign in to Power Automate.
On the left panel, select My flows.
On the right panel, select the cloud flow that you want to resubmit or cancel.
Select All runs.
Tip
- The flow must have runs to cancel or resubmit the flow runs.
- You can resubmit or cancel up to 20 flows at a time.
On the Run history page, select the flow runs that you want to resubmit or cancel.
Select Resubmit flow run(s).

Important
The number of flows that you can resubmit is limited based on the maximum number of API calls for the connectors in the flow.
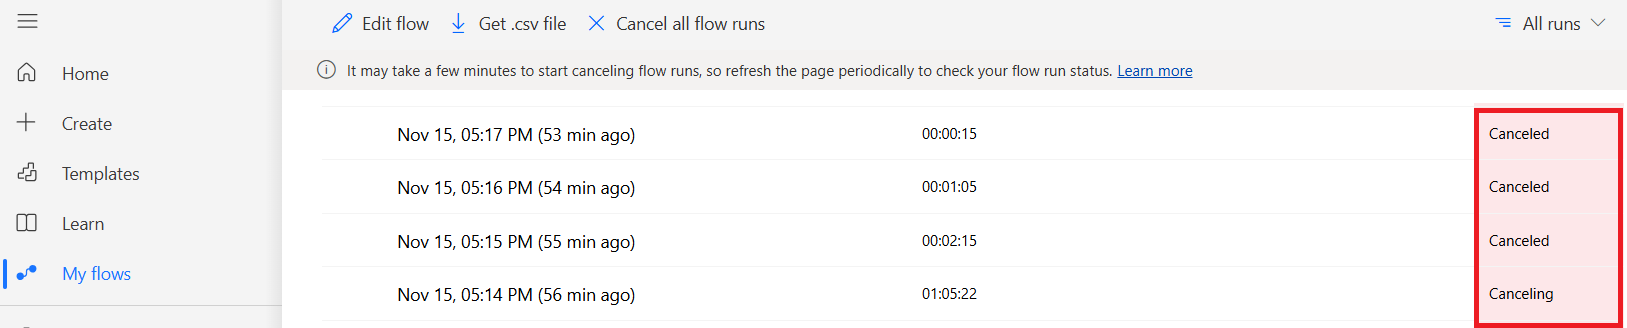
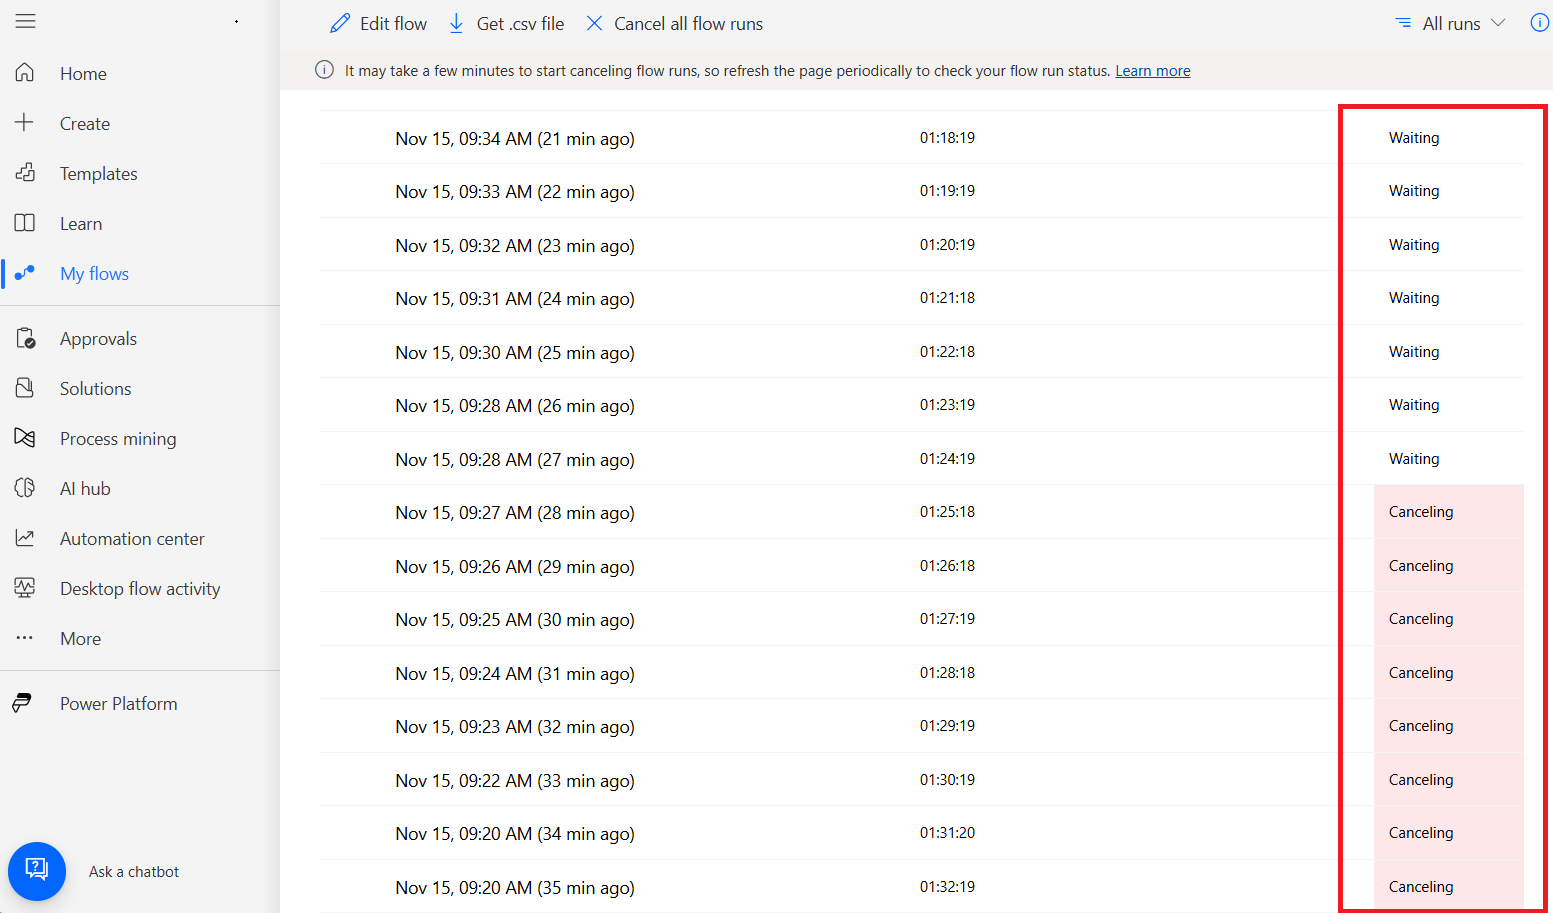
Cancel flow runs
The bulk cancel feature enables you to initiate the cancellation process for any flows in the queue that are currently in the Running or Waiting state, without needing to select individual flow runs. This is useful during incidents involving numerous erroneous flows. By using this feature, all flow runs in the queue are immediately suspended and are no longer processed. While suspended, their status displays as Waiting and systematically transitions to Canceling and finally to Cancelled.
Tip
- If a flow is turned off, pending canceled flows remain Waiting, and the queue doesn't clear until the flow is turned back on.
- If the flow was throttled, allocate some capacity or the queue remains stuck and doesn't clear. Contact your environment administrator to assign capacity to the environment, which can be applied to the flow.
- To expedite cancellation on flows with concurrency settings, adjust the setting to the maximum value (100) so erroneous queued runs can clear (100) at a time.
Cancel flow runs in bulk on the flow 'Run history' page
To cancel flows, navigate to the flow portal and select My flows.
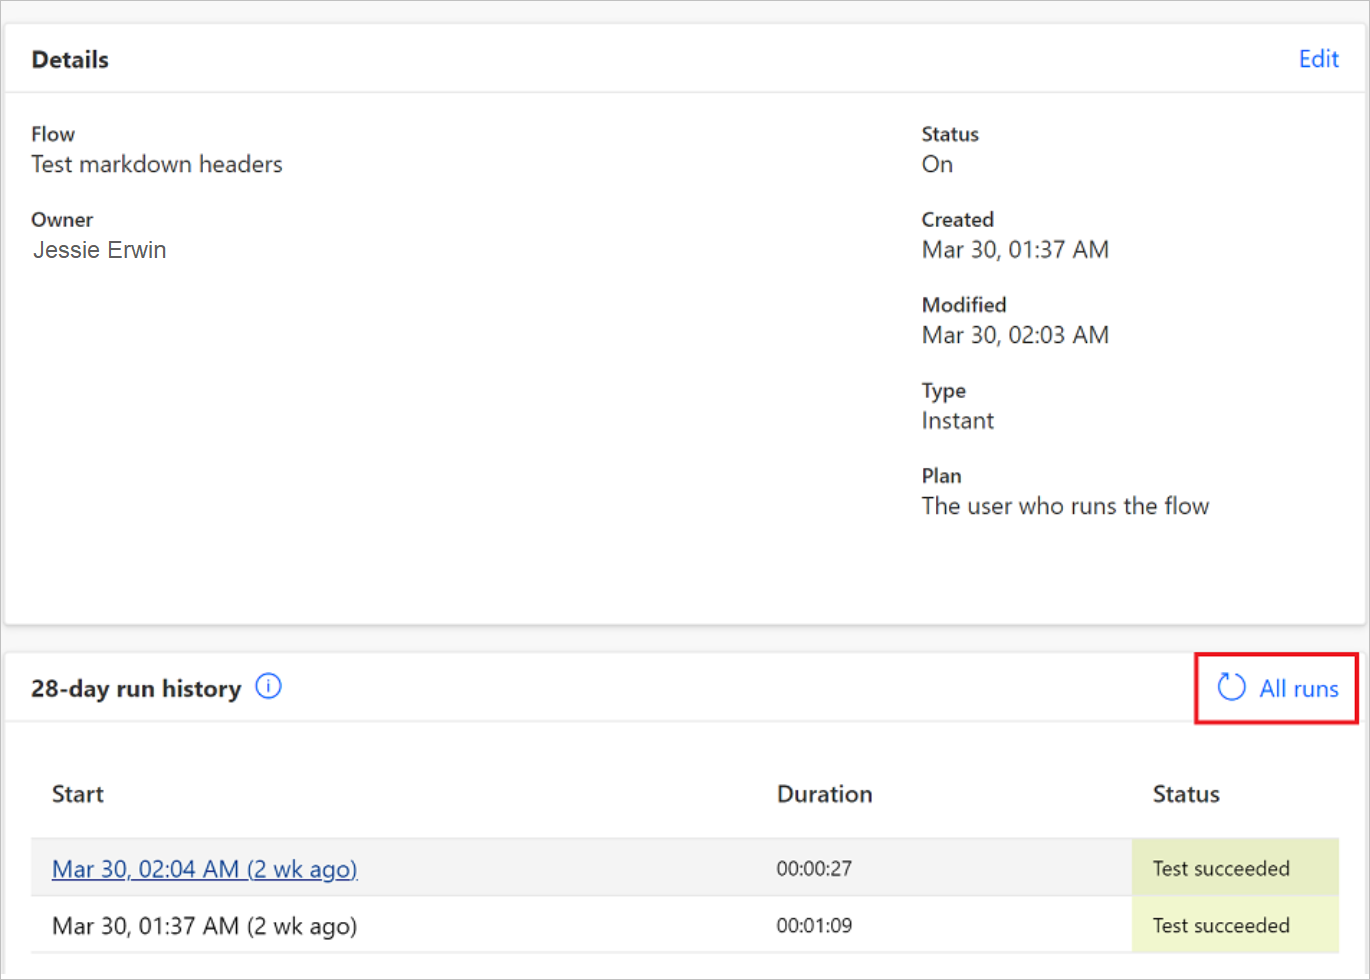
Next to the flow, select the ellipses (…) > Run history.
Alternatively, you can select the flow name > All runs from the 28-day run history list.
You can manually select up to 20 flows that are in Waiting or Running state.
To initiate the bulk cancellation feature instead, select Cancel all flow runs in the Run history menu at the top of the screen.
After you select Cancel all flows, a message appears asking you to initiate the bulk utility. Select Yes. Optionally, you might choose to select the checkbox to stop your flow and address any underlying issues that are triggering faulty runs. Any queued flows show as Waiting and don't clear until the flow is turned back on.
Get the updated status changes in the run history list by periodically refreshing your browser screen.
Note
- Flows in the Running state are suspended and change to a state of Canceling before eventually changing to Canceled.
- This process can sometimes take up to 24 hours more.
- In this scenario, the flows are suspended, and no further actions are executed.
- If you select a flow run in the Canceling state, it might appear that the spinner near an action is in motion, but it's in a suspended state. When flows are actually running, a notification banner displays to indicate your flow is running. This isn't the case for suspended flows in the Canceling state.
Flows that exceeded the concurrency setting might be visible in the Waiting state alongside other flow runs in the Canceling state. This is by design. Bulk cancelation can be sped up by adjusting concurrency limits to (100), otherwise it slows the process even further. The state changes to Canceling when their turn to be processed comes up in the queue.
You can ensure that flows in the Running or Waiting state before submitting a bulk cancel request were suspended and eventually change to the Canceled state.