Note
Access to this page requires authorization. You can try signing in or changing directories.
Access to this page requires authorization. You can try changing directories.
APPLIES TO:
Power BI Desktop
Power BI service
Dynamic per recipient subscriptions are designed to simplify distributing a personalized copy of a report to each recipient of an email subscription. You define which view of the report an individual receives by specifying which filters are applied to their version of the report.
Dynamic per recipient subscriptions are available for paginated reports and for Power BI reports. This article pertains to Power BI reports. To learn about dynamic subscriptions for paginated reports, see Dynamic per recipient subscriptions for paginated reports.
The dynamic subscription filters are stored in a separate Power BI semantic model. The semantic model defines the mapping between recipients and respective filters. When it’s time to send out the report, the latest data available in your semantic model determines who receives a subscription and with what filters applied. In the example used in this article, the separate semantic model contains employee data, including email addresses. Our task is to create subscriptions for managers. Each manager receives only data for their own employees.
Prerequisites
- A report to share that is saved in a workspace backed by a capacity (Power BI Premium capacity, Microsoft Fabric trial, or Microsoft Fabric capacity).
- Build permissions to a Power BI semantic model that contains recipient data. This data includes the email addresses of your recipients and filter values that should be applied for each recipient.
- A Contributor, Member, or Admin role in that workspace. You know that you have the Contributor, Member, or Admin role in a workspace if you're able to edit reports or dashboards in that workspace. Read more about Roles in workspaces.
Create a dynamic subscription
Do you want to create one subscription that sends customized views of a report to your subscribers based on filters that you set? Perhaps you're a regional director and want to send a report to various managers, each interested in the sales by each of their employees. Now you can create a subscription and customize the report so that each manager only sees data related to their own employees. To do this, Power BI connects to two different semantic models. One contains subscription recipient data, including email addresses of the managers. The other contains the data and defines the mapping between recipients and filters. When it's time to send the report, the latest data available in this second semantic model determines which manager receives a report in their inbox, and what filters are used in that report.
For users familiar with SQL Server Reporting Services (SSRS), this feature is similar to data-driven subscriptions.
Connect to recipient data
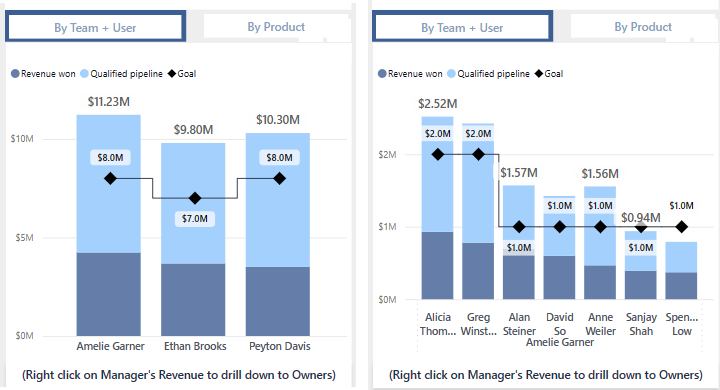
The sample Regional sales report has a table that we can use. The stacked column chart By team + user has data for managers and their employees. Select By Team + User if it isn't already active. Right click one of the bars and select Drill down to see the employees for that manager.
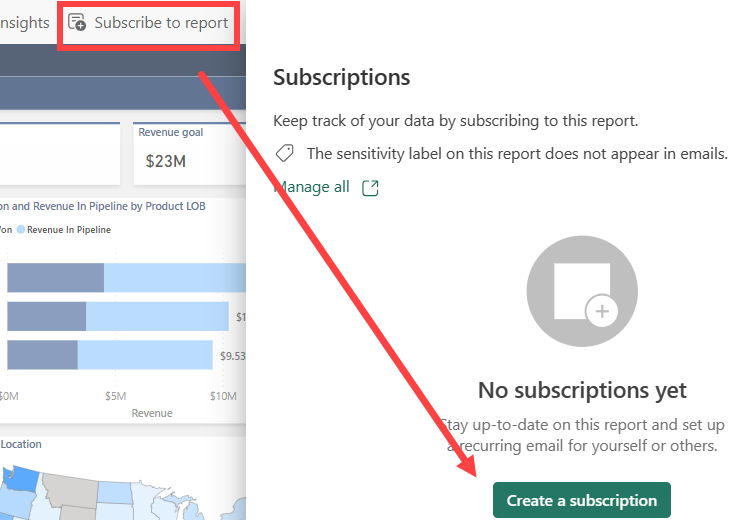
Select Subscribe to report > Create a subscription.
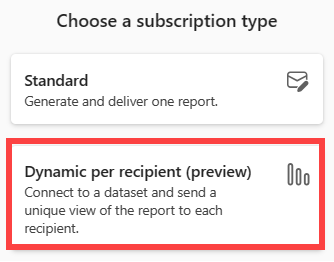
Select Dynamic per recipient.
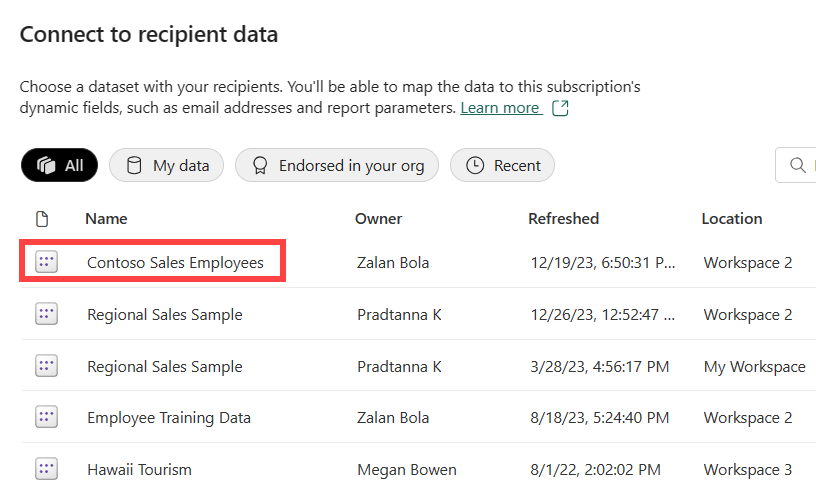
Highlight the Power BI semantic model that contains your recipient data. Recipient data includes columns for email address, filters that can be varied per recipient, and optionally, attachment type and email subject.
In some organizations, there might be a corporate employee Power BI semantic model that fits the purpose. Or, you might need to create a new semantic model that contains email addresses, and values for report filters. The critical piece of data is the email addresses. In order for you to set the filters on a per-recipient basis, the semantic model needs to include the email addresses of all potential recipients. Select Next. In this example, our mapping semantic model is named Contoso sales employees.
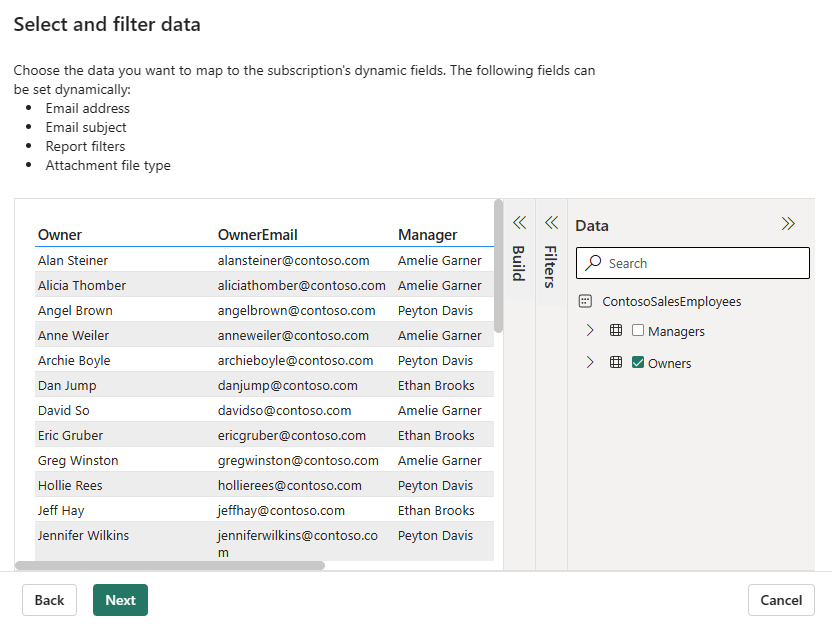
Select and filter data
The Select and filter data window lists the fields that can be set dynamically. In this example, we have a field for email address and we have several filters. Select the columns from your semantic model that you want to be varied for each recipient. Email address and filters can be set dynamically based on data in the Power BI semantic model.
The Select and filter data window displays the list of fields from the Contoso sales employee semantic model that can be used to dynamically filter your Regional Sales report subscription. Select the Owners table. This table has data for Owner, OwnerEmail, and Manager. These fields from the Contoso sales employee semantic model can be tied to the subscription.
Enter email details
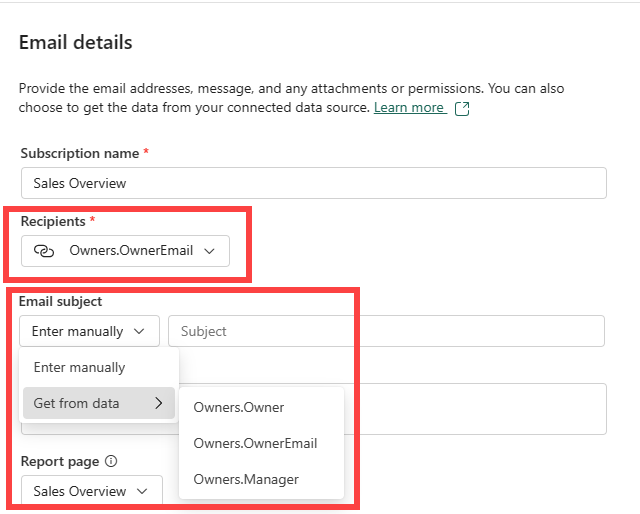
In the Email details window, fill in the required fields and any other fields that you'd like to include. Use the dropdowns to autopopulate with dynamic content from the Contoso sales employee semantic model. Or, enter the information manually. If you're typing recipients, separate them by commas or semicolons.
In this example, we use dynamic content for Recipients and Email subject. The link icon ![]() lets you know that dynamic content is being used.
lets you know that dynamic content is being used.
For Recipients, select the dropdown option for Get from data and choose a column from the Owners table. The column in the Owners table that contains email addresses is Owners.OwnerEmail.
For Email subject, select the dropdown option for Get from data and choose a column from the Owners table. The column in the Owners table that contains employee names is Owners.Owner.
Add optional details. Type a message to recipients. Use the dropdown to select a specific report page. If you toggle Link to report in Power BI, the link takes you to this report page. Also, this page is the one that displays if you select Report page preview. The preview image displays the report with the recipient's unique filters applied.
Select the Attach full report dropdown to display the list of options. Select a format. Sensitivity labels are applied to the email attachment and the attachment respects all privacy labels for the report. The size of the attachment is limited to less than 25 MB.
Add dynamic filters
Use the Map your data window to set dynamic filters. To use the current state of the report as your starting point, select Include my changes. This selection creates the subscription with updates you made to filters, spotlights, drill states, and more. If you don't want dynamic filters to be applied to the current state of the report, uncheck Include my changes. Unchecking this option uses the default state of the report.
Select which report field is used to map to a value in the Contoso sales employee semantic model. In this example, both fields have the same name which isn't the case in most situations.

Set the schedule
In the Set the schedule window, create a schedule for your dynamic subscription.
Select a Start date and optionally, an End date for your subscription. By default, the start date is the date you created the subscription and the end date is one year later. You can change it to any date in the future at any time before the subscription ends. When a subscription reaches an end date, it stops until you re-enable it. You receive notifications before the scheduled end date to ask if you'd like to extend.
Use the Repeat dropdown to select a frequency for your subscription. You might choose daily, weekly, or monthly. You also can adjust your time zone.
Tip
To receive a subscription email only on certain days, select Weekly and then select the week day checkboxes. If you select Monthly, enter the day(s) of the month you wish to receive the subscription email.
Choose a scheduled time for the subscription. You can have it run on the hour, or at 15, 30, or 45 minutes past for a specified time zone.
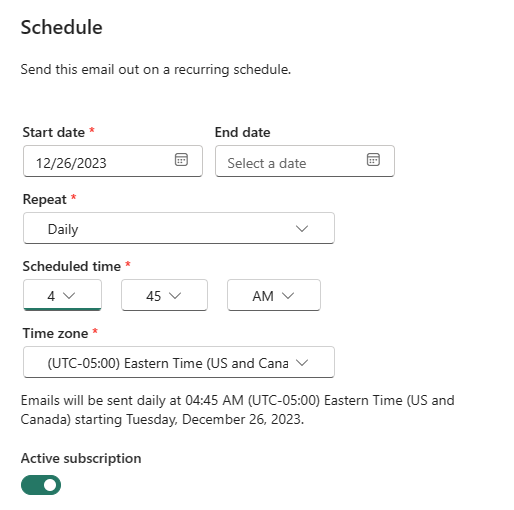
By turning off Active subscription, you have the option of triggering this subscription manually instead of having it run on a recurring basis.
Review and finish creating the dynamic subscription
In the Review and finish window, select a heading to review your settings. If all the settings look correct, select Save and close. If any settings need changes, select the pencil icon to make edits.
Your Subscriptions pane lists the new subscriptions. The link icon ![]() lets you know that dynamic content is being used.
lets you know that dynamic content is being used.
Another way to review your subscription is to select the down arrow to display details.
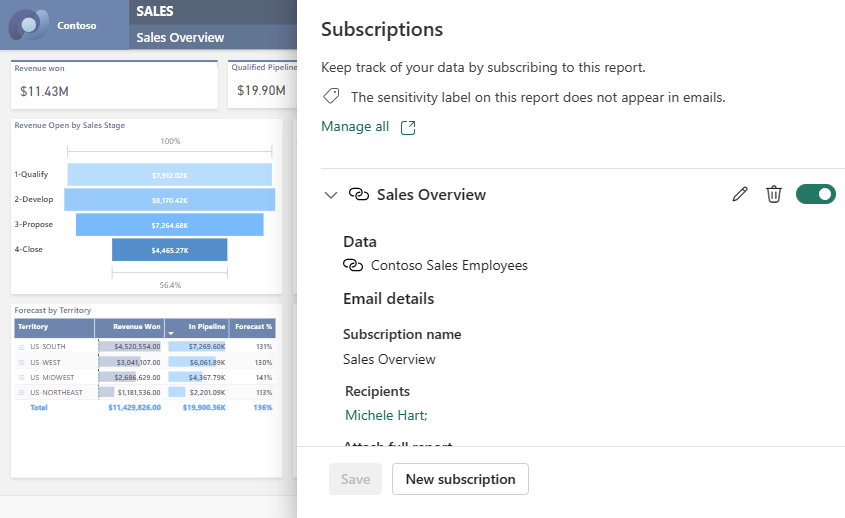
As with other subscriptions, you can edit, delete, turn on, and turn off the subscription.
Considerations and limitations
- Rendering the report uses some of your capacity. It's classified as an interactive activity.
- Your recipient semantic model has a limit of 1000 rows of recipients. If the recipient list exceeds 1000 rows at any point, only the first 1000 recipients receive the subscription email, and the subscription creator receives an error email.
- Receiving the subscription email doesn't guarantee access to the report. Report access is set separately.
- This feature supports single value filters and doesn't support filters with multiple value options.
- If the names of columns or tables are changed in the semantic model while the subscription is processing, dynamic filters might not be applied properly.
- Resolutions below 400px are not supported for Dynamic per recipient subscriptions.
- SSAS Live Connection is not supported
Related content
Troubleshoot Power BI subscriptions.
Search for and sort content.