Power Pages website development involves several configurations and customizations to achieve a desired experience for website end users.
After you have completed development or configuration of your website instance, you might want to migrate your latest website configuration from development to testing or the production environments.
Migration involves exporting the existing configuration from the source Microsoft Dataverse environment, and then importing it into the target Dataverse environment.
Preparing the target environment is a one-time process. You will need to provision a new website in order to install the managed Power Pages solutions on Dataverse as well as configure the Power Pages web application. The process also installs default website metadata which will be replaced with the website metadata from your source environment.
Ensure that the target environment's maximum attachment size is set to the same or greater size as your source environment.
The maximum size of files is determined by the Maximum file size setting in the system settings email tab in the environment system settings dialog box.
Note the difference between developer, trial, and production websites and developer, trial, sandbox, and production environments.
You can migrate a trial, developer, production website to another trial, developer, or production website on the same or another environment. Note that a production website will need to be provisioned on a sandbox or production environment.
Provision a new website in your target environment. Use the same website template as you provisioned on your source environment. For example, if you provisioned a site using the Dynamics 365 Customer Self-Service template on your source environment, provision the site using the Dynamics 365 Customer Self-Service template on your target environment.
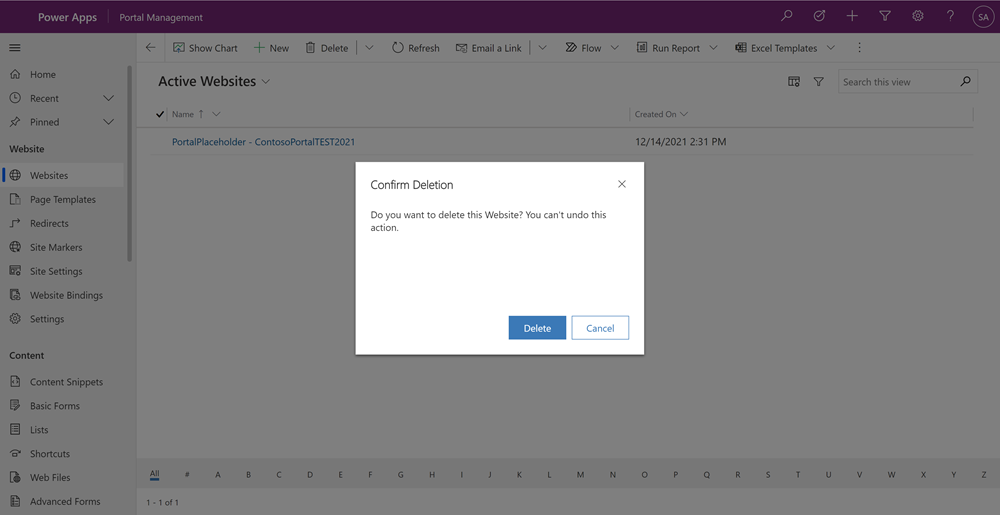
On the target environment, using the Portal Management app, delete the newly created website record. This will remove the default website configuration data from the target environment.
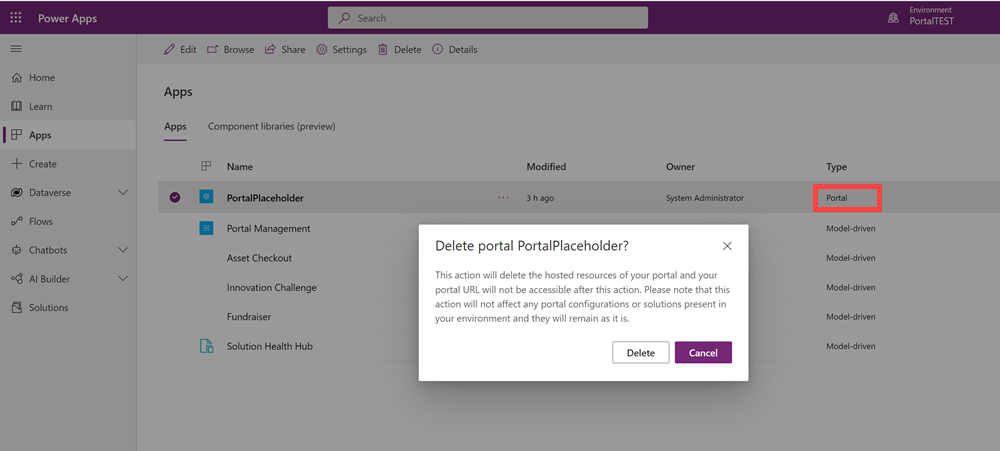
On the target environment, in Power Apps, delete the portal app. This will remove the website currently configured to render the default site.
Note
Do not delete the Portal Management app!
Transfer the website configuration to target environment
Transfer the site metadata from the source environment using the Power Platform CLI, the Configuration Migration Tool, or using solutions.
Reactivating site on target environment
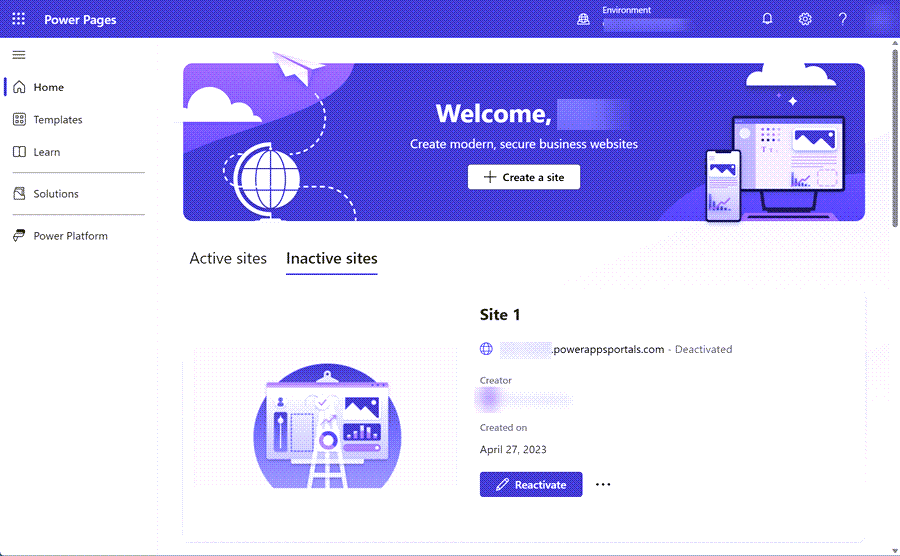
Once the website has been transferred to the target environment, you will need to reactivate the website.
On the target environment, on the Power Pages home screen, select Inactive sites, you should see the website you migrated to the environment.
Select Reactivate.
You can specify the Reactivated website name and Create a web address or leave default values.
Select Done.
The website updates from the source environment should be reflected in this new target environment. Going forward, you should be able to transfer configuration from your source to target environments by transferring the website configuration data.
Note
A website appearing in the Inactive sites list on the Power Pages home page will appear in the list of Active Websites in the Portal Management app.
Make sure the target environment is also has the enhanced data model enabled.
Transfer website configuration using Power Platform CLI
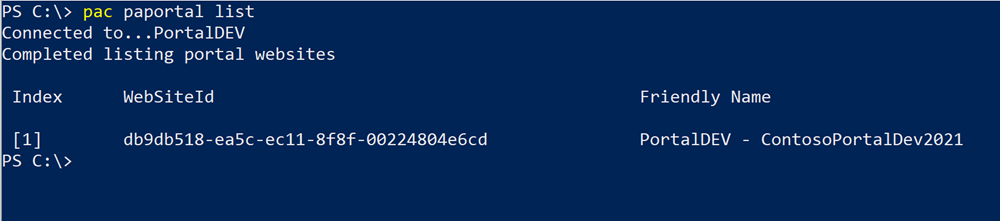
The Microsoft Power Platform CLI provides many features specifically for Power Pages. These commands allow you to download site configuration from a source environment and transfer it to a target environment. These commands can also be incorporated into your ALM processes.
Create Power Platform CLI authentication profiles to connect to both your source and target environments. You can give them a name to easily identify the target and source environments.
Download the website configuration data to your local workstation. Use the --overwrite option set to true if you have previous downloaded website configuration to the same path.
The Power Platform CLI tool does not migrate Dataverse tables or table schema. Migration may fail with missing elements such as tables and fields when configuration data is mismatched with selected schema.
During import, ensure the destination environment contains the same website template type already installed with any additional customizations such as tables, fields, forms or views imported separately as solutions.
Transfer website configuration using the Configuration Migration Tool
To export configuration data, you would need to use the Configuration Migration tool and a website-specific configuration schema file. For more information about this tool, see Manage configuration data.
Note
We recommend you to use the latest version of the Configuration Migration tool. The Configuration Migration tool can be downloaded from NuGet. More information for downloading the tool: Download tools from NuGet.
The minimum solution version of websites supported by schema files for configuration migration is 8.4.0.275. However, we recommend that you use the latest solution version.
Source and destination organizations must have same default language for the migration to work successfully.
Schema files are available for the following website types:
The default schema files contain information about website tables, relationships, and uniqueness definitions for each entity. More information: Export website configuration data
After exporting the configuration data, you must import it into the target environment. More information: Import website configuration data
Note
The Configuration Migration tool uses schema to export and import configuration data. The tool does not migrate Dataverse tables or table schema. Migration may fail with missing elements such as tables and fields when configuration data has mismatch with selected schema.
During export, ensure the source environment contains website tables as specified in Configuration Migration tool schema file. You can still alter the schema files to add, remove, and modify tables, attributes, and so on to migrate subset of configuration data.
During import, ensure the destination environment contains the same website type already installed with any additional customizations such as tables, fields, forms or views imported separately as solutions.
Export website configuration data
You can export website configuration data from a source system by using website-specific configuration schema files.
Download the Configuration Migration tool and extract to the desired folder.
Download website configuration schema file using links provided above for your website template type.
Double-click the DataMigrationUtility.exe file in the
<your_folder>\Tools\ConfigurationMigration folder to run the Configuration Migration tool, choose Export data in the main screen, and then select Continue.
On the Login screen, provide authentication details to connect to your Dataverse environment from where you want to export data. If you have multiple organizations on the Dataverse environment from where to export the data, select the Display list of available organizations check box, and then select Login.
If you have multiple organizations, and you had selected the Display list of available organizations check box in the previous step, the next screen allows you to choose the organization that you want to connect to. Select a Dataverse environment to connect to.
Note
If you do not have multiple organizations, this screen is not displayed.
In Schema file, browse and select the website-specific configuration schema file to be used for the data export.
In Save to data file, specify the name and location of the data file to be exported.
Select Export Data. The screen displays the export progress status and the location of the exported file at the bottom of the screen once the export is complete.
Select Exit to close the tool.
Import website configuration data
Run the Configuration Migration tool and choose Import data in the main screen, and then select Continue.
On the Login screen, provide authentication details to connect to your Dataverse environment from where you want to export data. If you have multiple organizations on the Dataverse environment from where to export the data, select the Display list of available organizations check box, and then select Login.
If you have multiple organizations, and you had selected the Display list of available organizations check box in the previous step, the next screen allows you to choose the organization that you want to connect to. Select a Dataverse environment to connect to.
Note
If you do not have multiple organizations, this screen is not displayed.
Ensure that the portal solution is already installed for the organization where you plan to import the configurations.
The next screen prompts you to provide the data file (.zip) to be imported. Browse to the data file, select it, and then select Import Data.
The next screen displays the import status of your records. The data import is done in multiple passes to first import the foundation data while queuing up the dependent data, and then import the dependent data in the subsequent passes to handle any data dependencies or linkages. This action ensures clean and consistent data import.
Select Exit to close the tool.
Create new website using migrated data
If the migration process is updating an existing website, the updates should now be visible in the target environment.
If the migration is for a new website, the migrated website will be listed in the Inactive sites tab on the Power Pages home page.
On the target environment, on the Power Pages home screen, select Inactive sites, you should see the website you migrated to the environment.
Select Reactivate.
You can specify the Reactivated website name and Create a web address or leave default values.
Select Done.
Tenant-to-tenant migration
PowerPages doesn't support tenant-to-tenant migration. To migrate a website from one tenant to another, you must follow these steps:
Tenant-to-tenant migration of model-driven apps in Dynamics 365 such as Sales, Customer Service, Marketing, Field Service, and Project Service Automation.