Note
Access to this page requires authorization. You can try signing in or changing directories.
Access to this page requires authorization. You can try changing directories.
Customers who use Azure Synapse Link for Dataverse can export audit logs easily to meet the external and internal auditing, compliance, security, and governance policies that are common to many enterprises.
Microsoft Dataverse auditing is supported on all custom and most customizable tables and columns. Audit logs are stored in Dataverse and consume log storage capacity. If you have Azure resources in the same region as the Dataverse environment, you can export audit logs to an Azure storage account using Azure Synapse Link for Dataverse and query the audit logs using Azure Synapse Analytics and Power BI Desktop.
Prerequisites
- An Azure subscription with admin permissions to create resource groups, workspace, and other Azure assets. More information: Create an Azure Synapse Link for Dataverse with your Azure Synapse Workspace
- You must have the Dataverse system administrator security role.
- Power BI.
Tasks to complete
Here are the high-level steps for creating the storage and workspace in Azure, then the Azure Synapse Link for Dataverse so you can create reports in Power BI:
- Create an Azure Synapse Link
- Create a resource group.
- Create an Azure Data Lake Storage Gen2 account with hierarchical directory enabled.
- Create a Synapse workspace.
- Create an Apache Spark pool for the Synapse workspace.
- To enable your app maker the ability to create an Azure Synapse Link for Dataverse, grant storage account and synapse workspace permissions to the Power Platform maker.
- Connect Dataverse audit table to Synapse workspace
- Verify the auditing table’s sync status.
- Create reports and dashboards using Power BI
Create an Azure Synapse Link
- Sign into the Azure portal.
- Create a resource group. More information: Create resource groups
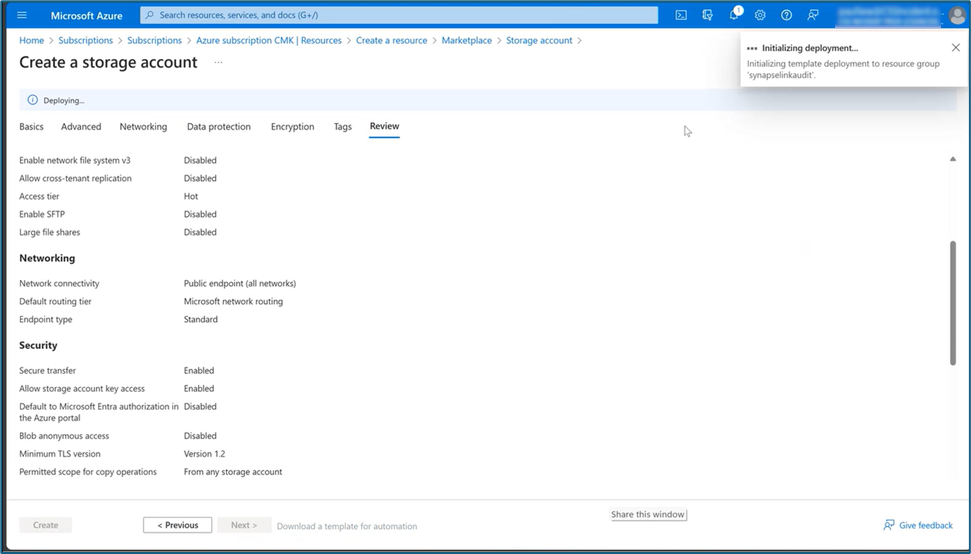
- Create a storage account. More information: Create a storage account
Under the Project details:Select the Subscription where the resource group was created.
Select the Resource group that you created earlier.
Enter a Storage account name.
Select the Advanced tab and enable the Hierarchical Namespace option.
- Grant Storage account access to the Power Apps admin who is connecting the Dataverse tables to this storage account.
- On the left pane, select Access control (IAM).
- Select Role assignments > + Add > Add role assignments.
- Under Add role assignment, select the Members tab.
- Select the Power Platform admin user, and then select the Privileged administrator roles tab.
- Enter owner in the Search box.
- Select the Storage Account contributor role.
- Enable Allow user to assign all roles (highly privileged) in What user can do.
- Repeat the previous steps for these roles:
- Storage Blob Data contributor
- Storage Blob Data owner
- Create a Synapse workspace.
Under the Project details:- Select the Subscription where the Resource group was created.
- Select the 'Resource group' that you created previously.
- Workspace name. Choose any globally unique name.
- Region. Select the region where your Dataverse environment is located.
- Select the Storage account name that you created earlier.
- Select Create new under the File system name.
- Enter a Name for the Data Lake Storage Gen2 file system.
- Create a Spark pool for the Synapse workspace.
- Go to the resource group of the Synapse workspace that was created earlier.
- The storage account and the Synapse workspace are listed under Resources. Select the Synapse workspace you created in the above step.
- Select + New Apache Spark pool to create a spark pool.
- On the new Apache Spark pool page:
- Enter an Apache spark pool name.
- Enter 5 in the Number of nodes.
- Select the Additional settings tab, and then enter 5 for the Number of minutes idle.
Note
- There are no costs incurred with the creation of Spark pools. Charges are only incurred once a Spark job is executed on the target Spark pool and the Spark instance is instantiated on demand. These costs are related to the usage of Azure Synapse workspace Spark and are billed monthly. The cost of conducting Spark computing mainly depends on the time interval for incremental update and the data volumes. More information: Azure Synapse Analytics pricing
- It's important to take these additional costs into consideration when deciding to use this feature as they're not optional and must be paid in order to continue using this feature.
Connect Dataverse audit table to Synapse workspace
To connect your Dataverse audit table to a Synapse workspace, you use the Azure Synapse Link that was created earlier in this article.
- With a user account that has the Dataverse system administrator security role, sign into Power Apps and then select the environment you want.
- Connect Dataverse to your Synapse workspace:
- On the left navigation pane, select Azure Synapse Link. If the item isn't available, select More > Discover all. Select New link.
- On the New link page:
- Select the Connect to your Azure Synapse Analytics workspace option.
- Select the Azure Subscription, the Resource group, and the Storage account.
- Select the Use Spark pool for Delta Lake data conversion job option.
- Select the Spark pool and Storage account.
- Select Next.
- Expand the Advanced tab and enter 480 minutes in the Time interval field. Later, you can change the duration for how frequent you want to refresh the Dataverse tables in the Synapse workspace.
- Under the list of tables, select the Auditing and User tables.
The tables you select must have change tracking enabled. More information: Enable change tracking to control data synchronization.
It takes a while for the Dataverse tables to get exported to the Synapse workspace. After the export completes, you can manage the table data to the Synapse workspace. More information: Manage table data to the Synapse workspace
Verify auditing table sync status
- In Power Apps, select Azure Synapse Link on the left navigation pane.
- Open the link that you created and verify the auditing table’s sync status. It should show as Active.
Create reports and dashboards using Power BI
Access the audit data using your Azure Synapse Analytics workspace with Power BI desktop. If you don't already have Power BI Desktop, download and install Power BI Desktop it. It's a free application that runs on your local computer.
Create reports using the Azure Synapse Analytics workspace connection
Use the Azure Synapse Analytics workspace connection for smaller volumes of data to build reports with Power BI.
- Start Power BI Desktop, and then in a new Power BI session, select Get data > More....
- In the left pane of the Get Data dialog pane, select Azure and then in the right pane select Azure Synapse Analytics workspace (Beta).
- Select Connect.
- Select Sign in, and enter or select your Organizational account, the account that has access to the Azure Synapse workspace that you created. Select Connect.
- Once signed in, select the workspace under the Navigator dialog pane.
- Expand the workspace and locate the Dataverse environment’s workspace. A list of Dataverse tables are displayed.
- Select the audit and the systemuser tables, and then select Load.
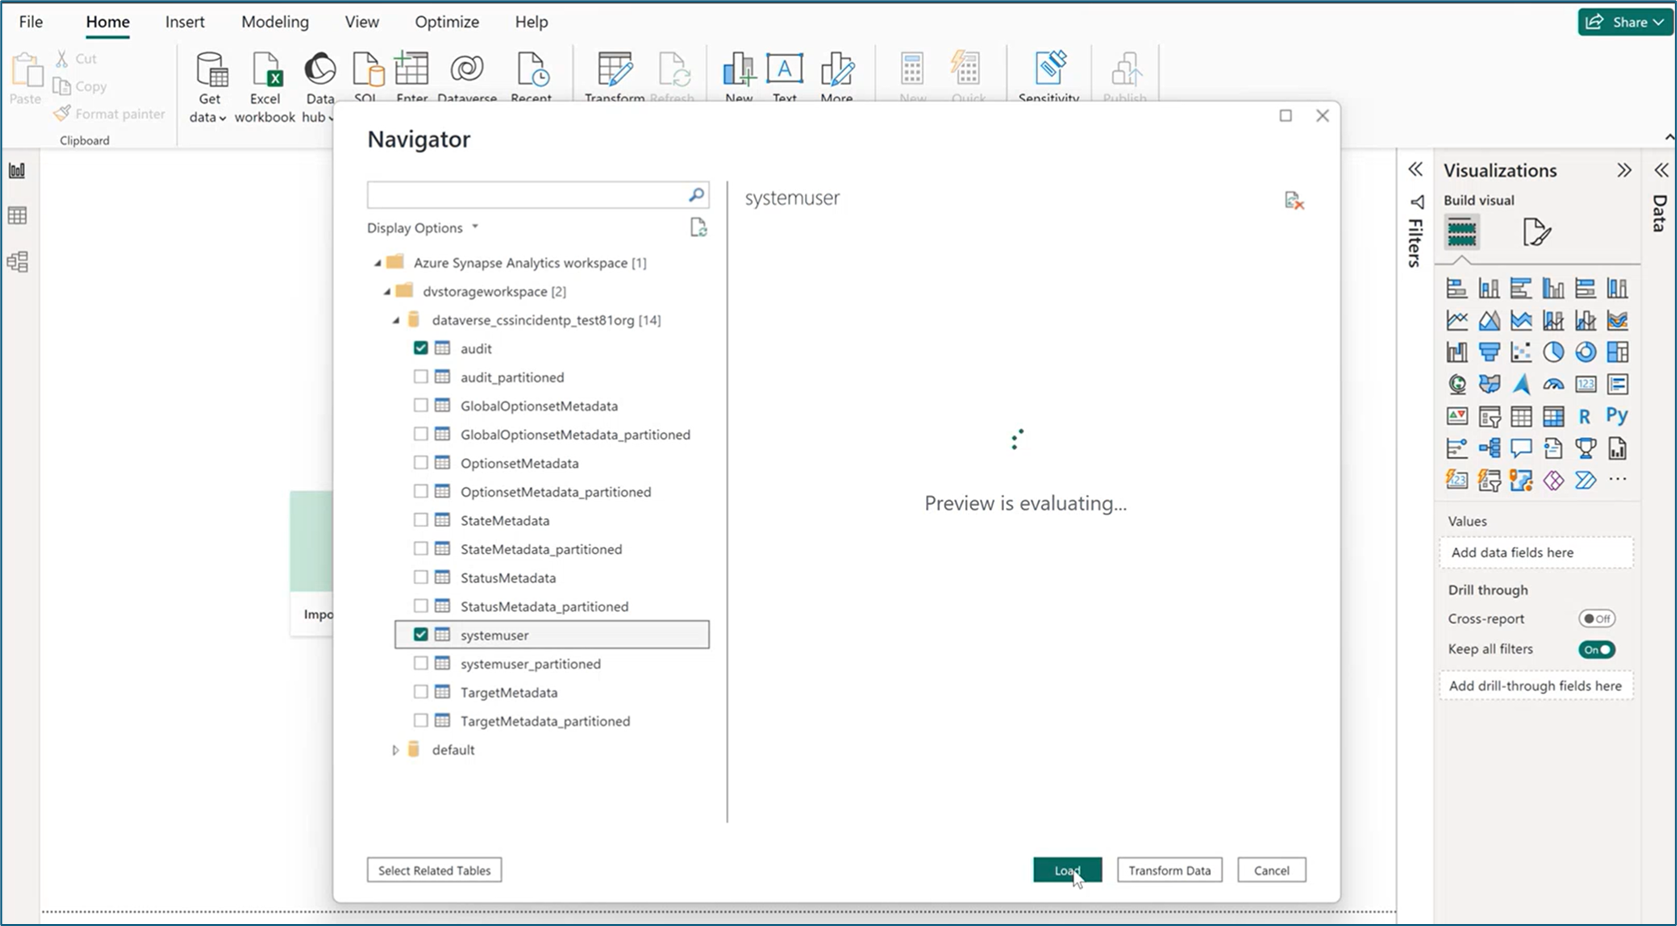
- With the tables selected, you can build Power BI visualizations.

Create reports using the Azure Synapse Analytics SQL connection
Use the Azure Synapse Analytics SQL connection for larger volumes of data to build reports with Power BI.
- Start Power BI Desktop, and then in a new Power BI session, select Get data > More....
- In the left pane of the Get Data dialog pane, select Azure, and then select Azure Synapse Analytics SQL.
- Select Connect.
- Enter the Server and Database names.
- The server name can be found in the Azure portal. Enter the workspace name in the Search bar, and then select the workspace. On the Overview page, copy the Serverless SQL endpoint and return to the Power BI SQL Server database page and paste it to the Server field.
- The database name can be found in the Azure Synapse Link in Power Apps (make.powerapps.com). Select Azure Synapse Link for Dataverse on the left navigation pane, select the Azure Synapse Link, and then select Go to Azure Synapse Analytics workspace on the command bar. Your database name can be found under the Lake database folder on the Data page.
- Select OK.