Note
Access to this page requires authorization. You can try signing in or changing directories.
Access to this page requires authorization. You can try changing directories.
With Power Query Editor, you can apply additional data transformations and filtering steps before you bring the data set from SAP BW into the Power BI Desktop or Microsoft Power Platform data model.
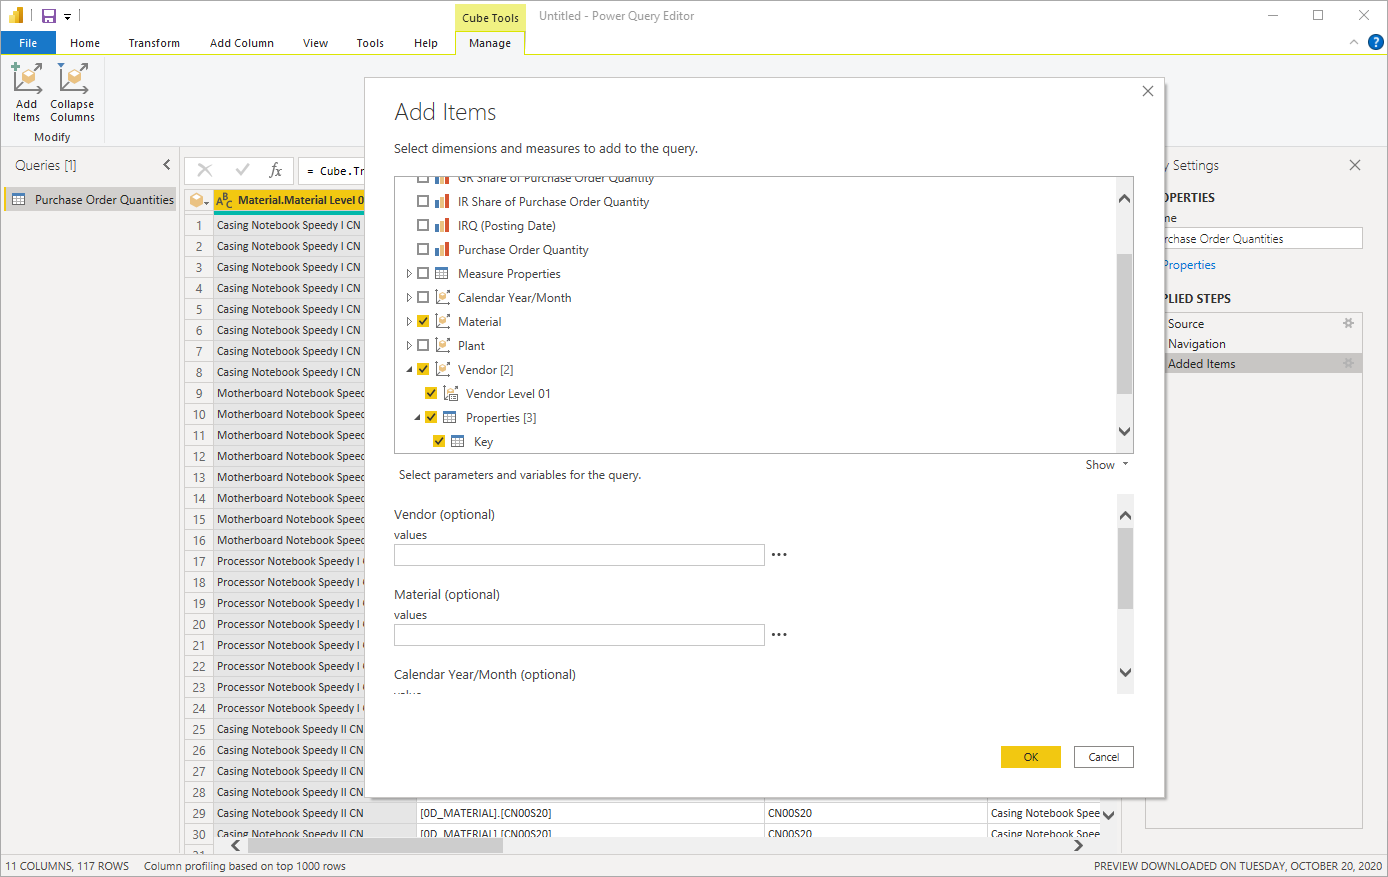
In Power Query Editor, the Applied Steps for the query are shown in the Query Settings pane on the right. To modify or review a step, select the gear icon next to a step.
For example, if you select the gear icon next to Added Items, you can review the selected data objects in SAP BW, or modify the specified query parameters. This way it's possible to filter a data set using a characteristic that isn't included in the result set.
You can apply additional filters on the data set by selecting the drop-down menu for one of the columns.
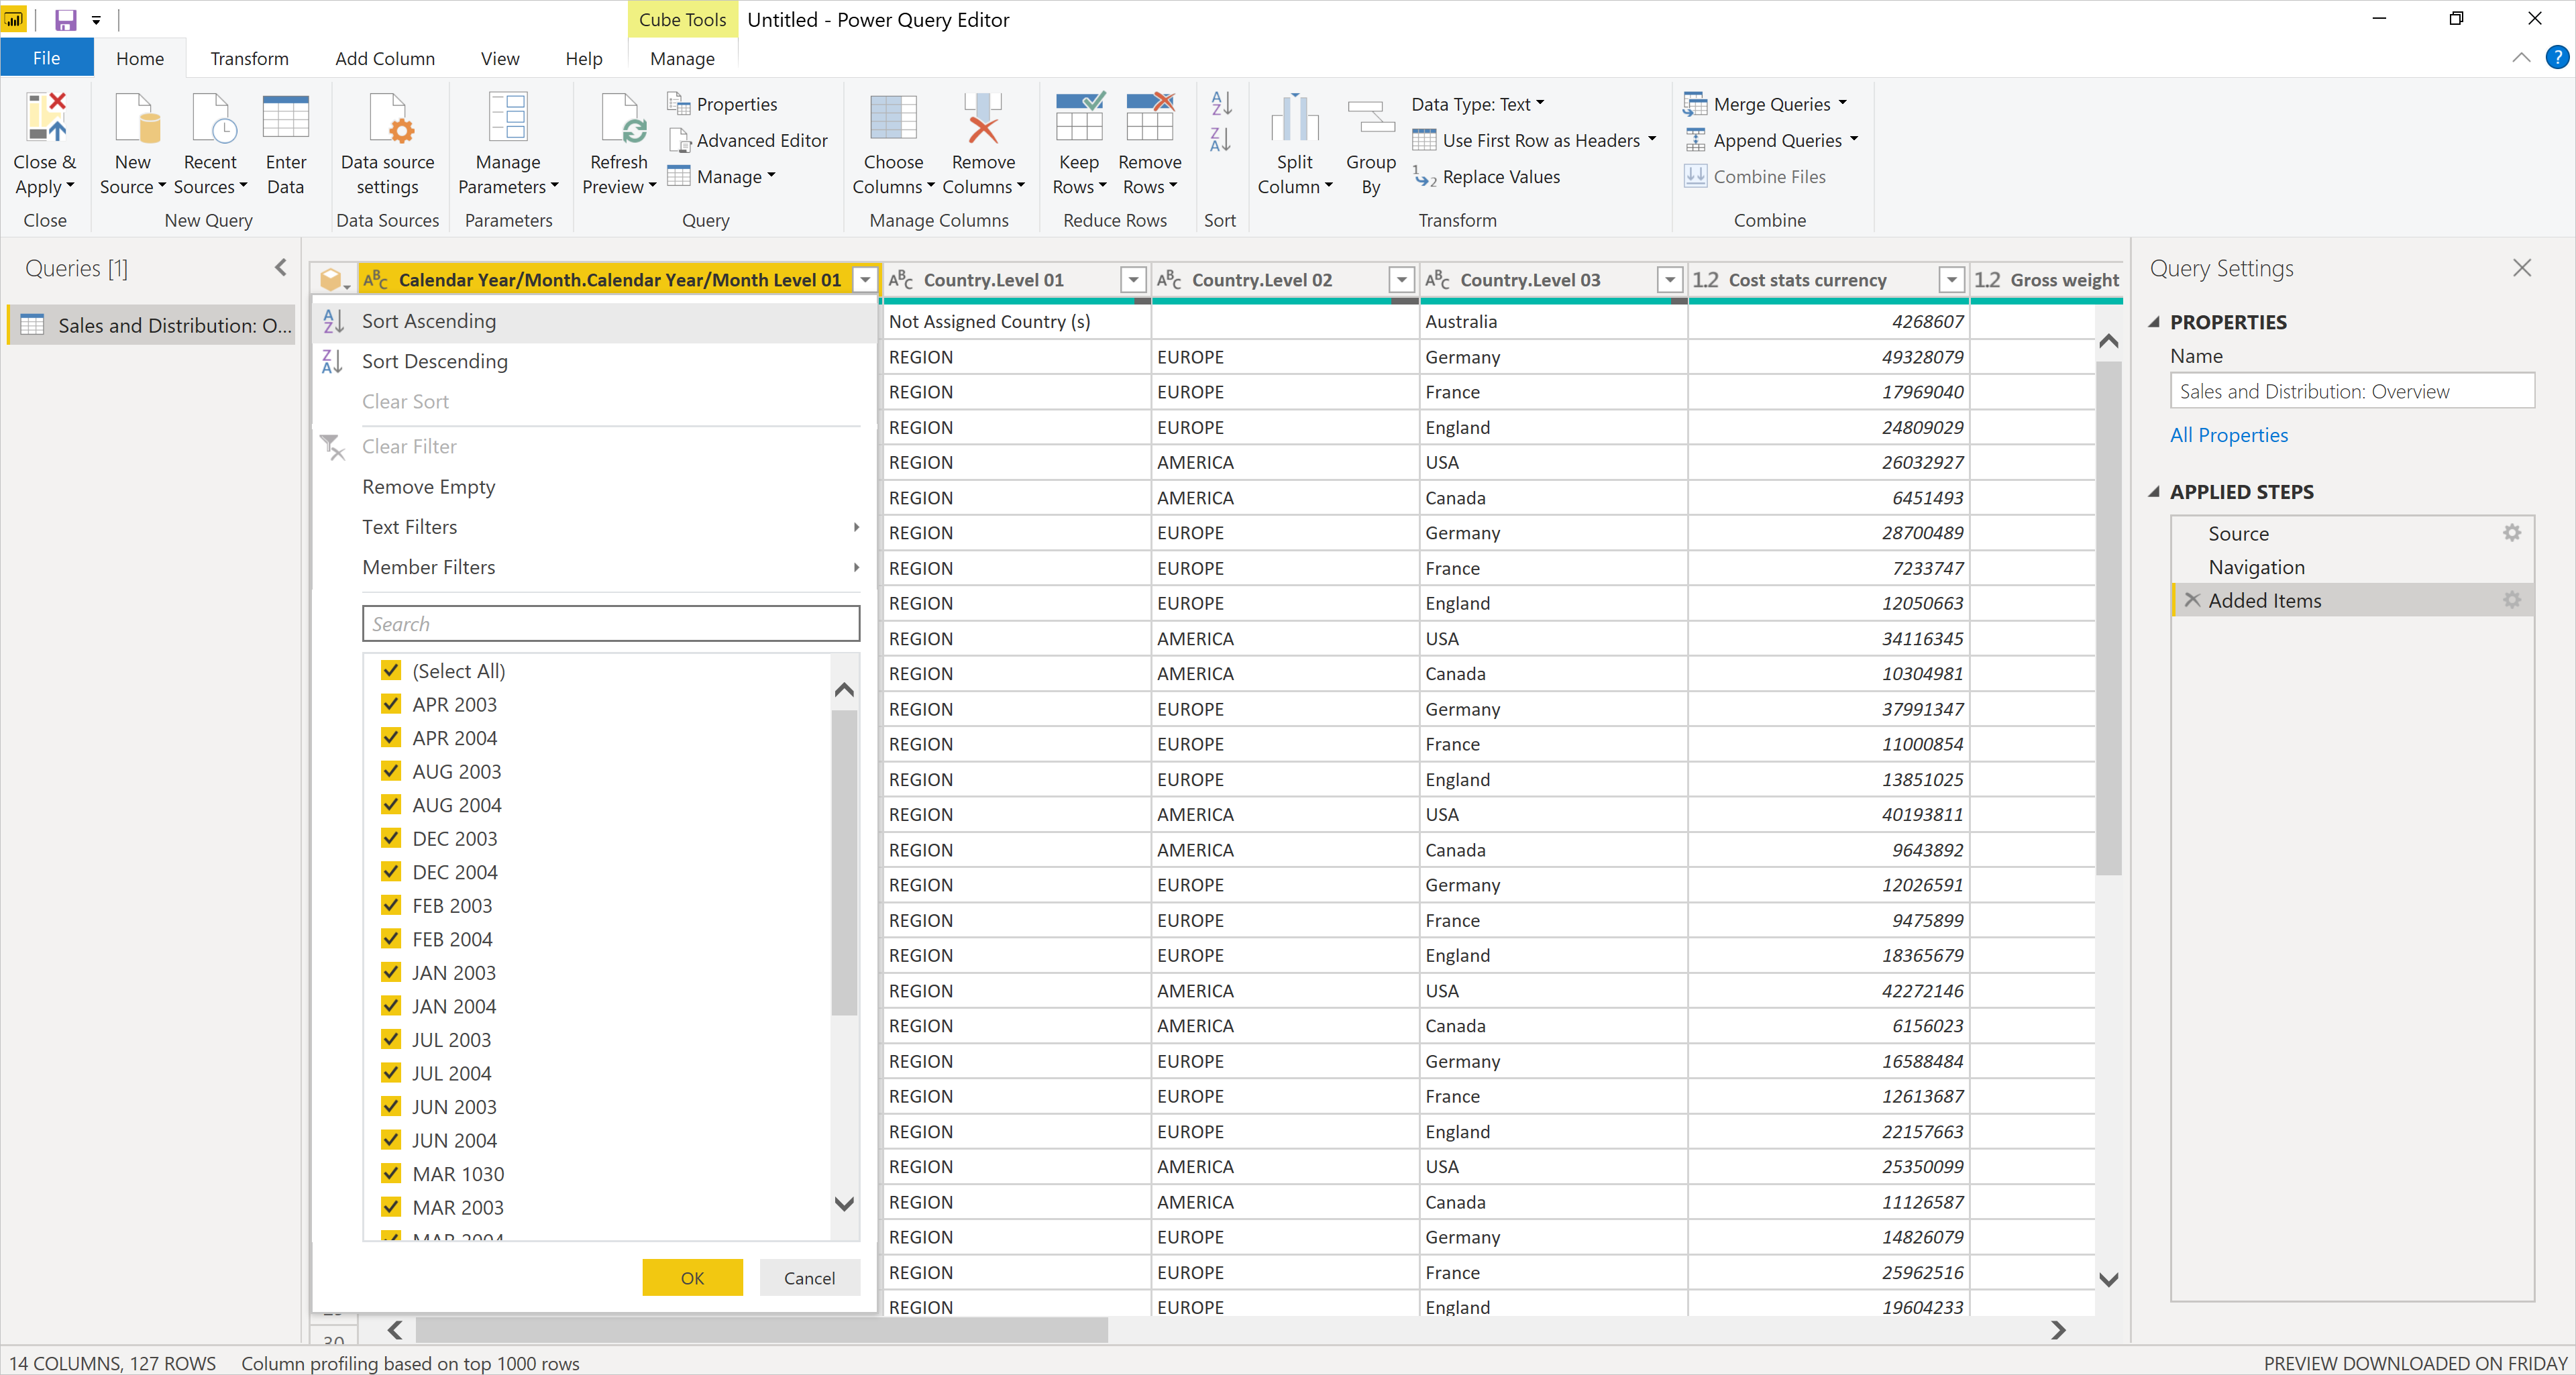
Another easy way to set a filter is to right-click on one of the values in the table, then select Member Filters or Text Filters.

For example, you could filter the data set to only include records for Calendar Year/Month FEB 2003, or apply a text filter to only include records where Calendar Year/Month contains 2003.
Not every filter will get folded into the query against SAP BW. You can determine if a filter is folded into the query by examining the icon in the top-left corner of the data table, directly above the number 1 of the first data record.
If the icon is a cube, then the filter is applied in the query against the SAP BW system.
![]()
If the icon is a table, then the filter isn't part of the query and only applied to the table.
![]()
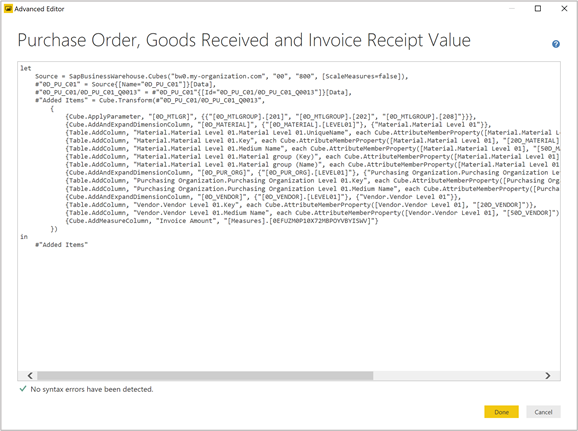
Behind the UI of Power Query Editor, code is generated based on the M formula language for data mashup queries.
You can view the generated M code with the Advanced Editor option in the View tab.
To see a description for each function or to test it, right-click on the existing SAP BW query in the Queries pane and select Create Function. In the formula bar at the top, enter:
= <function name>
where <function name> is the name of the function you want to see described. The following example shows the description of the Cube.Transform function.
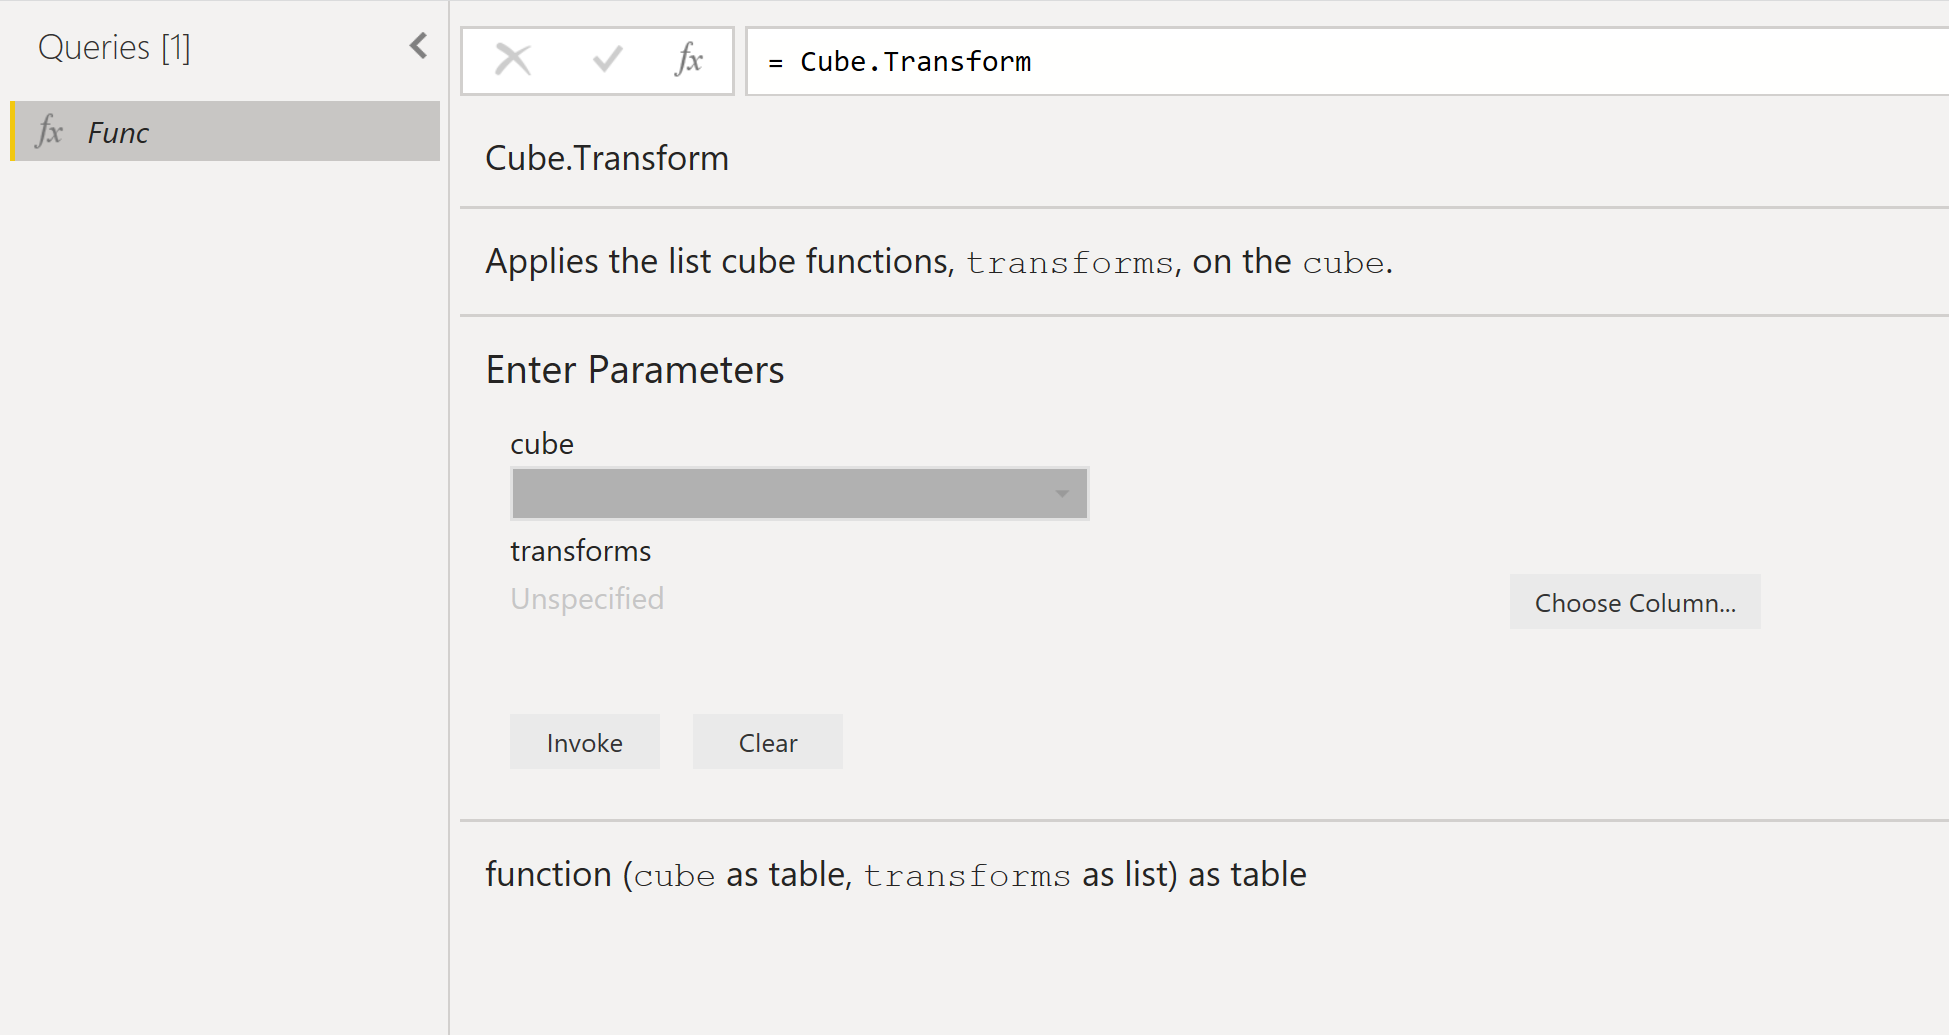
The following examples show some descriptions of various cube functions:
Cube.Transform: Applies the list of functions or transforms on the cube.Cube.ApplyParameter: Applies the specified values for a parameter.Cube.DisplayFolders: Returns a nested tree of objects representing the display folder hierarchy of the cube.Cube.Parameters: Returns a table with the set of parameters that can be applied to the cube.Cube.Dimensions: Returns a table with the set of dimensions for the cube.Cube.Measures: Returns a table with the set of measures for the cube.