Note
Access to this page requires authorization. You can try signing in or changing directories.
Access to this page requires authorization. You can try changing directories.
When your dataflow refresh completes or has been taking longer than expected, you might want your support team to investigate. With this tutorial, you can automatically open a support ticket, create a message in a queue or Service Bus, or add an item to Azure DevOps to notify your support team.
In this tutorial, we make use of Azure Service Bus. For instructions on how to set up an Azure Service Bus and create a queue, go to Use Azure portal to create a Service Bus namespace and a queue.
To automatically create a queue in Azure Service Bus:
Navigate to Power Automate.
Select Create > Automated cloud flow.
Enter a flow name, and then search for the "When a dataflow refresh completes" connector. Select this connector from the list, and then select Create.
Customize the connector. Enter the following information on your dataflow:
- Group Type: Select Environment when connecting to Power Apps and Workspace when connecting to Power BI.
- Group: Select the Power Apps environment or the Power BI workspace your dataflow is in.
- Dataflow: Select your dataflow by name.
Select New step to add an action to your flow.
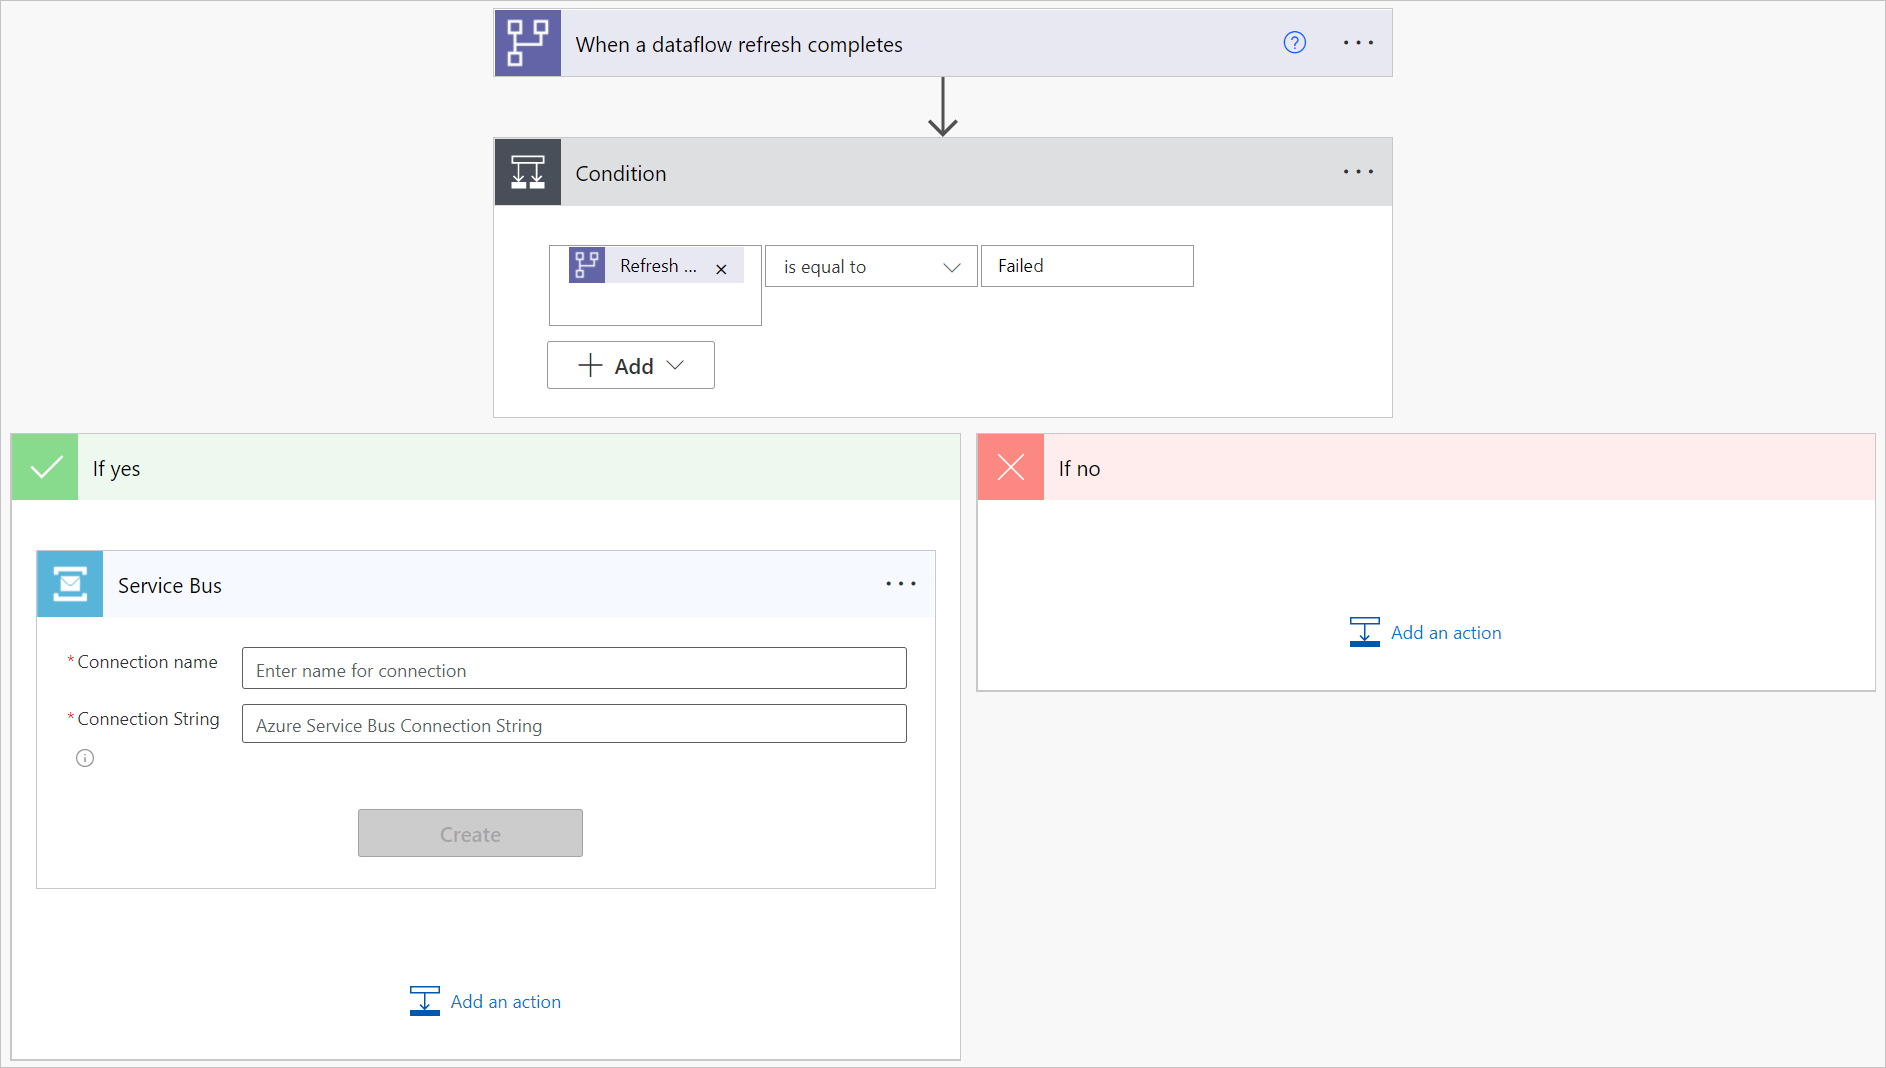
Search for the Condition connector, and then select it.
Customize the Condition connector. Enter the following information:
- In the first cell, add Refresh Status from the dataflow connector.
- Leave the second cell as is equal to.
- In the third cell, enter Failed.
In the If Yes section, select Add an action.
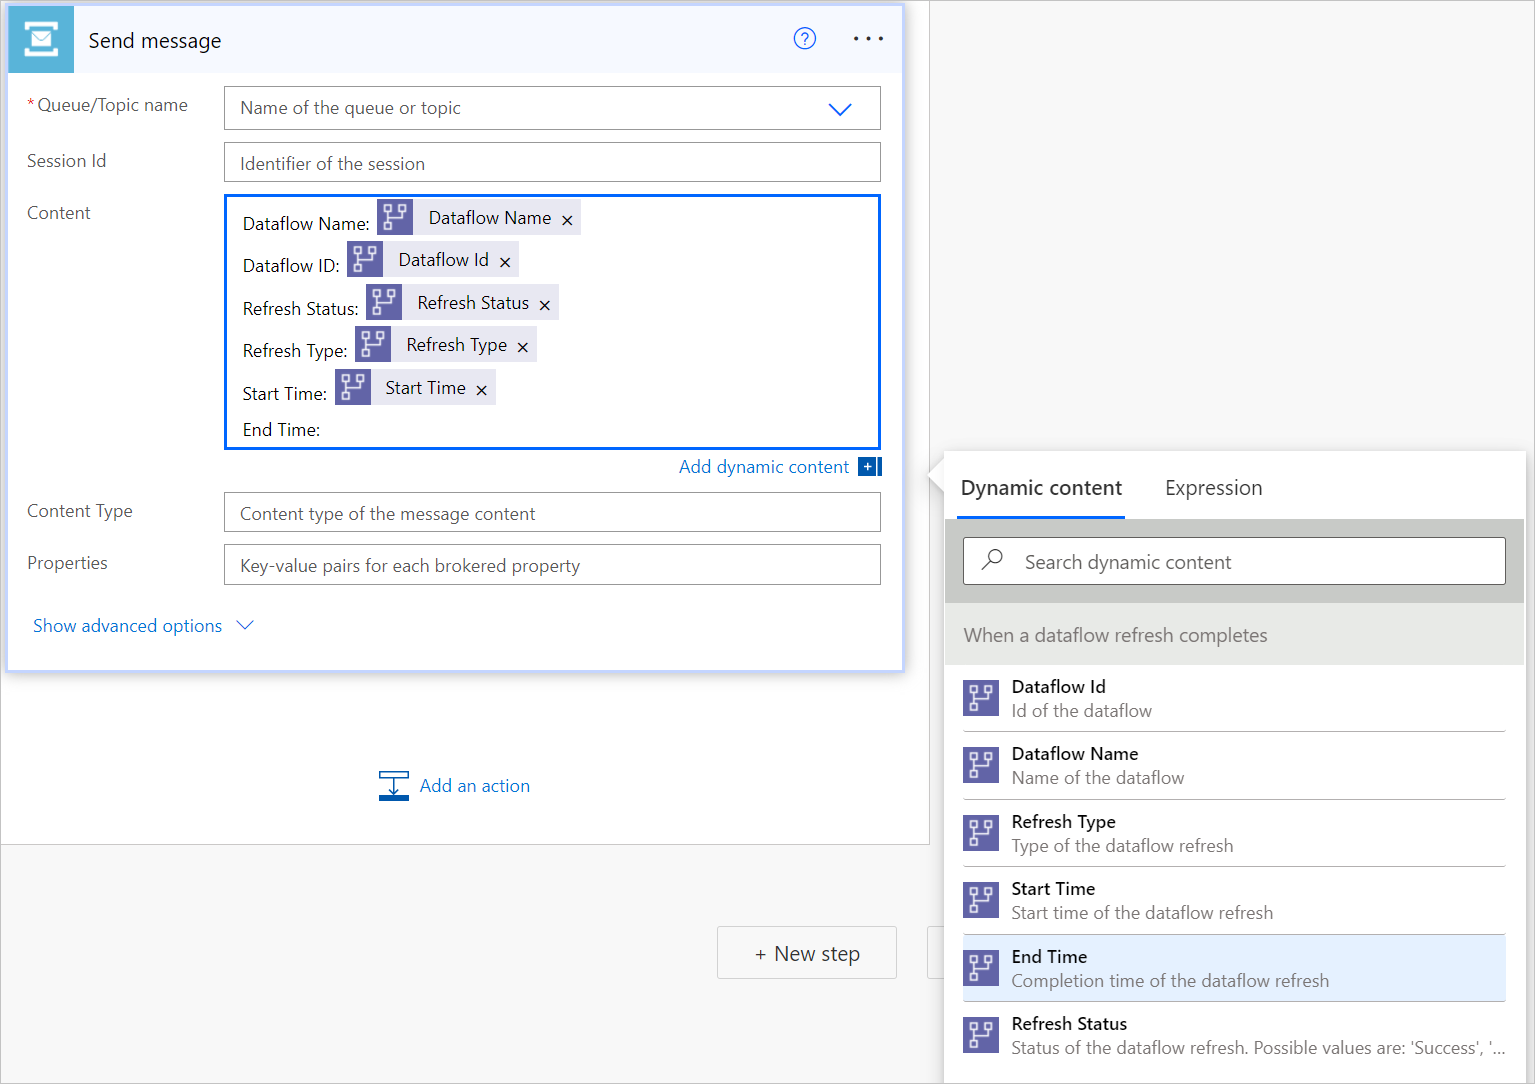
Search for the "Send message" connector from Service Bus, and then select it.
Enter a Connection name for this message. In Connection string, enter the connection string that was generated when you created the Service Bus namespace. Then select Create.
Add dataflow information to the content of your message by selecting the field next to Content, and then select the dynamic content you want to use from Dynamic content.