Note
Access to this page requires authorization. You can try signing in or changing directories.
Access to this page requires authorization. You can try changing directories.
Web resources are typically used by developers to extend an app using files that are used in web development. App users may need to manage web resources provided by a developer or designer.
Tip
For an in-depth discussion of web resources, see Developer Documentation: Web resources for model-driven apps.
What are web resources?
Web resources are virtual files stored in the system. Each web resource has a unique name that can be used in a URL to retrieve the file. Think of them this way: If you had access to the actual web server running the web app, you could copy files over to that website. But with most online services, you can't do this. Instead, you can use web resources to upload files to the system and then reference them by name just as though you had copied them as files to the web server.
For example, if you create an HTML page as a web resource named "new_myWebResource.htm", you could open that page in a browser using a URL like this:
<base URL>/WebResources/new_myWebResource.htm
where <base URL> is the part of the URL you use to view apps that end in dynamics.com. Because the web resource is data in the system, only licensed users for your organization can access them this way. Normally, web resources are included in forms rather than referenced directly. The most common usage is to provide JavaScript libraries for form scripts.
Because web resources are data in the system and are solution aware, you can move them to different organizations by exporting them as part of a solution and importing the solution into a different organization. You must use solution explorer to work with web resources.
Solution publisher prefix
Part of the name of any web resource you create is the solution publisher prefix. This is set based on the solution publisher for the solution you're working in. Make sure that you're working in the unmanaged solution where the publisher prefix is the one you want for this web resource. More information: Solution publisher
Add a web resource to a solution
- Sign in to Power Apps, and then on the left navigation pane select Solutions. If the item isn’t in the side panel pane, select …More and then select the item you want.
- Open an unmanaged solution, on the command bar select Add existing, point to More, and then select Web resource. The list of web resources available are displayed.
- To add a web resource to the unmanaged solution, select the web resource, and then select Add.
Create or edit a web resource for a solution
Sign in to Power Apps, and then on the left navigation pane select Solutions. If the item isn’t in the side panel pane, select …More and then select the item you want.
Open an unmanaged solution.
To edit an existing web resource that is part of the unmanaged solution, select it to display the Edit web resource pane. To create a new one, on the command bar select New, point to More, and then select Web resource.
Complete the fields on the right web resource pane to create or edit the web resource:
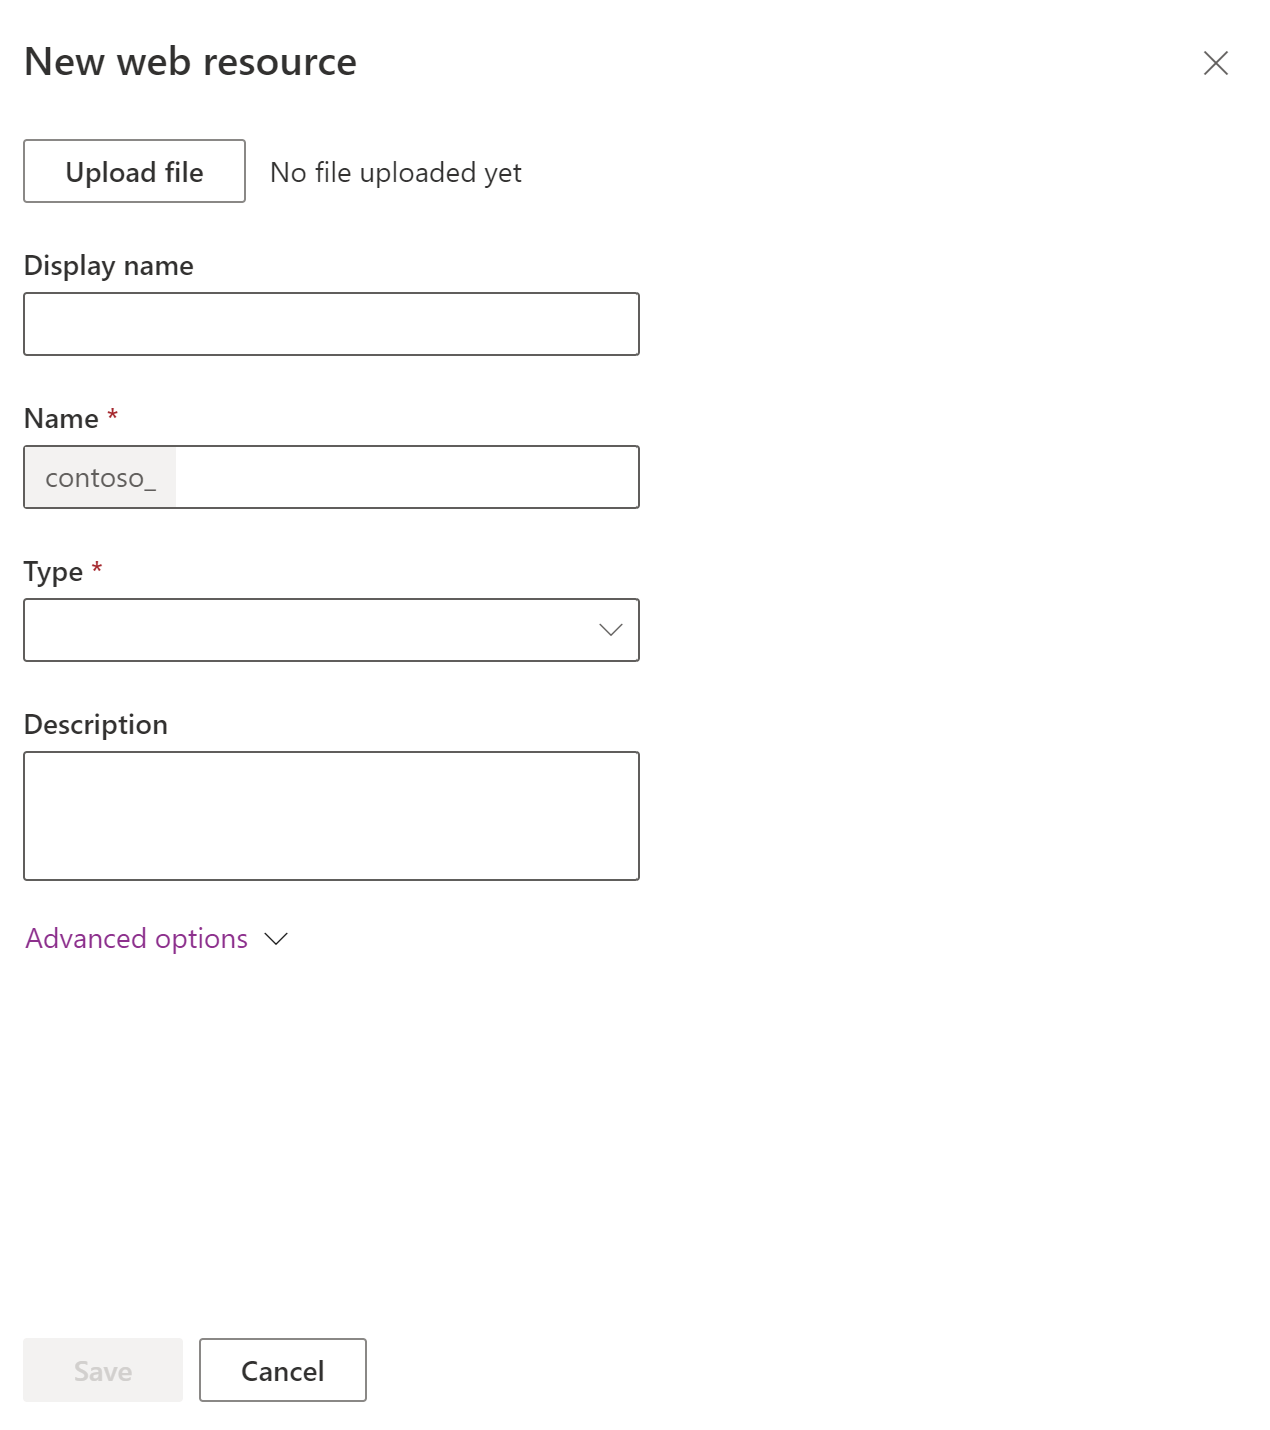
Column Description Upload file Select the Upload file button to choose a file to upload as a web resource.
• You can upload a file when creating a new web resource or to overwrite an existing web resource.
• The file name extension of the file must match allowed extensions.
• By default the maximum size file that can be uploaded as a web resource is 5MB. This value can be modified by using the System Settings > Email tab > Set file size limit for attachments setting. More information: System Settings dialog box - Email tabDisplay Name The name displayed if you view a list of web resources. Name Required. The unique name for this web resource. You can't change this after you save the web resource.
• This name can only include letters, numbers, periods, and nonconsecutive forward slash ("/") characters.
• The solution publisher customization prefix will be prepended to the name of the web resource.Type Required. This is the type of web resource. You can't change this after you save the web resource. Description A description of the web resource. Advanced options Expand Advanced options to reveal the Language field, which allows for a selection of a language. This option just tags the row that stores the web resource data. It doesn't change the behavior of the web resource. After you have added your changes, select Save and then select Publish. After you save the web resource, the URL to the web resource is displayed in the web resource definition. Select this link to view the web resource in your browser.
Note
Changes to a web resource will not be visible in the application until you publish it.
Add a web resource to a model-driven app form
Open the form where you want to add a web resource for editing.
Select the Components pane, expand Display, and then select the web resource type you want:
HTML Web resource. A webpage (HTML) you can use to create user interface elements for client extensions. More information: Webpage (HTML) web resources
Image web resource. Use image web resources to make images available for use in model-driven apps. Supported image formats are: PNG, JPG, GIF, ICO, and SVG (vector format). More information: Image web resources
Select the web resource from the list and then select Add. Alternatively, select New web resource to create the web resource you want. More information: Web resource properties for model-driven app forms
Note
You can't add a web resource to a form header or footer.
Add a web resource to an app (preview)
[This topic is pre-release documentation and is subject to change.]
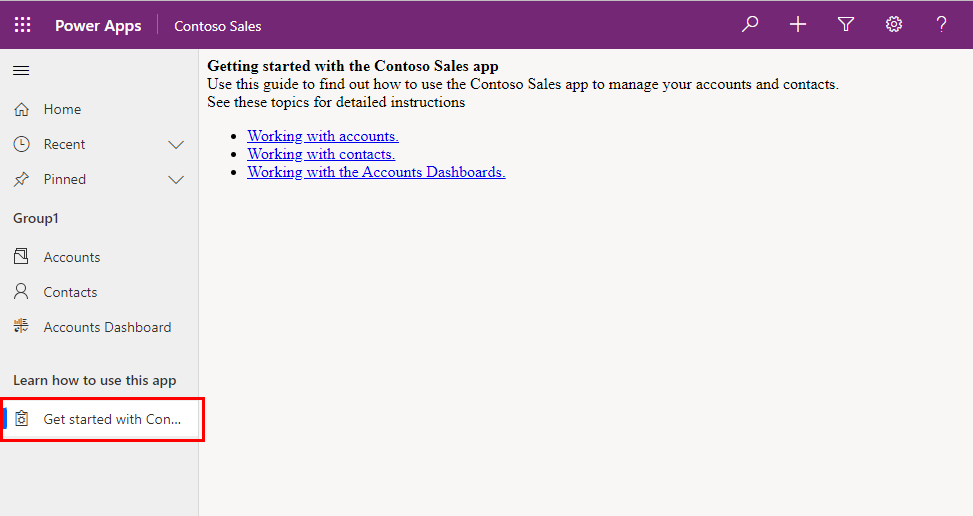
You can add a web resource as a subarea type in a model-driven app. Web resources are files you can use to extend a model-driven app. The web resource subarea can be HTML code or an HTML file, such as .htm or .html. When the user selects the subarea, the HTML is displayed in the app.
Note
By default, web resource subareas are disabled. To enable, go to Navigation pane options.
In the model-driven app designer, select Navigation > Add > Subarea.
In the subarea properties, enter the following information:
- Content type: Web resource.
- URL: Select an HTML web resource file name from the list to add the web resource's URL. More information: Create or edit model-driven app web resources to extend an app
- Title: Enter the title that will appear on the subarea in the app.
Select Save, and then select Publish.
Edit a web resource using the classic solution explorer
- Open an unmanaged solution and select the web resource.
- Select the vertical ellipsis > Edit > Edit in classic.
- Complete the form to create the web resource:
| Column | Description |
|---|---|
| Name | Required. This is the unique name for this web resource. You can't change it after you save the web resource. • This name can only include letters, numbers, periods, and nonconsecutive forward slash ("/") characters. • The solution publisher customization prefix will be prepended to the name of the web resource. |
| Display Name | The name displayed if you view a list of web resources. |
| Description | A description of the web resource. |
| Type | Required. Type of web resource. You can't change this after you save the web resource. |
| Text Editor | When the type of web resource represents a kind of text file, select this button to open a page to edit the content using the text editor. More information: Use the text editor appropriately |
| Language | Allows for a selection of a language. This option just tags the row that stores the web resource data. It doesn't change the behavior of the web resource. |
| Upload File | Select the Choose File button to choose a file to upload as a web resource. • You can upload a file when creating a new web resource or to overwrite an existing web resource. • The file name extension of the file must match allowed extensions. • By default the maximum size file that can be uploaded as a web resource is 5 MB. This value can be modified by using the System Settings > Email tab > Set file size limit for attachments setting. More information: System Settings dialog box - Email tab |
| URL | After you save the web resource, the URL to the web resource will be displayed here. Select this link to view the web resource in your browser. |
- After you have added your changes, select Save and then select Publish.
Use the text editor appropriately
The text editor provided in the application for web resources should only be used for simple edits of text files. You can use it to create and edit HTML web resources, but you should only edit HTML web resources that were created using the text editor. The text editor is designed for very simple HTML content.
Important
If the content of an HTML web resource wasn't created using the text editor, don't use the text editor to edit it.
The text editor uses a control that modifies the HTML source in a way that allows it to be edited. These changes can make the page behave differently in the browser and cause more sophisticated code to stop working. Opening an HTML web resource with the text editor and saving it without making any changes can break some HTML web resources.
We recommend that you use an external editor to edit text files and then save them locally before uploading them with the Upload File button. This way you can preserve a copy of the web resource if you need to return to an earlier version. You can use a simple editor like Notepad, but a text editor with more advanced capabilities is highly recommended. Visual Studio Community and Visual Studio Code are free and provide powerful capabilities for editing the text-based files used by web resources.
Create and edit a web resource on a form using solution explorer
Add or edit web resources on a form to make it more appealing or useful to users.
Open an unmanaged solution
From Power Apps select Solutions from the left navigation pane, and then on the toolbar, select Switch to classic. If the item isn’t in the side panel pane, select …More and then select the item you want.
In the All Solutions list open the unmanaged solution you want.
Navigate to a form
With solution explorer open, under Components, expand Entities, and then expand the table you want to work with.
Choose Forms, in the list locate a form of type Main, and then double-click or tap the entry to open and edit the form.
Add or edit web resource in a form
See Web resource properties for information about the properties you can set for web resources in a form.
Preview
To preview how the main form will appear and how events will function:
- On the Home tab, select Preview, and then select Create Form, Update Form, or Read-Only Form.
- To close the Preview form, on the File menu, select Close.
Save
When you finish editing the form, on the Home tab, select Save and Close to close the form.
Publish
When your customizations are complete, publish them:
- To publish customizations for only the component that you're currently editing, in the navigation pane, select the table you have been working on, and then select Publish.
- To publish customizations for all unpublished components at one time, in the navigation pane, select Entities, and then on the Actions toolbar, select Publish All Customizations.
See also
Web resource properties
Create and design forms
Understand model-driven app components
Developer Documentation: Web resources in model-driven apps
Create or edit model-driven app web resources (video)