Set up Azure IoT Hub to deploy over-the-air updates
Important
Retirement of Azure Percept DK:
Update 22 February 2023: A firmware update for the Percept DK Vision and Audio accessory components (also known as Vision and Audio SOM) is now available here, and will enable the accessory components to continue functioning beyond the retirement date.
The Azure Percept public preview will be evolving to support new edge device platforms and developer experiences. As part of this evolution the Azure Percept DK and Audio Accessory and associated supporting Azure services for the Percept DK will be retired March 30th, 2023.
Effective March 30th, 2023, the Azure Percept DK and Audio Accessory will no longer be supported by any Azure services including Azure Percept Studio, OS updates, containers updates, view web stream, and Custom Vision integration. Microsoft will no longer provide customer success support and any associated supporting services. For more information, please visit the Retirement Notice Blog Post.
Caution
The OTA update on Azure Percept DK is no longer supported. For information on how to proceed, please visit Update the Azure Percept DK over a USB-C cable connection.
Keep your Azure Percept DK secure and up to date using over-the-air updates. In a few simple steps, you will be able to set up your Azure environment with Device Update for IoT Hub and deploy the latest updates to your Azure Percept DK.
Prerequisites
- Azure Percept DK (devkit)
- Azure subscription
- Azure Percept DK setup experience: you connected your dev kit to a Wi-Fi network, created an IoT Hub, and connected your dev kit to the IoT Hub
Create a Device Update Account
Go to the Azure portal and sign in with the Azure account you are using with Azure Percept.
In the search bar at the top of the page, enter Device Update for IoT Hubs.
Select Device Update for IoT Hubs when it appears in the search bar.
Select the +Add button in the upper-left portion of the page.
Select the Azure Subscription and Resource Group associated with your Azure Percept device and its IoT Hub.
Specify a Name and Location for your Device Update Account.
Check the box that says Assign Device Update Administrator role.
Review the details and select Review + Create.
Select the Create button.
Once deployment is complete, click Go to resource.
Create a Device Update Instance
In your Device Update for IoT Hub resource, click Instances under Instance Management.
Click + Create, specify an instance name, and select the IoT Hub associated with your Azure Percept device. This may take a few minutes to complete.
Click Create.
Configure IoT Hub
In the Instance Management Instances page, wait for your Device Update Instance to move to a Succeeded state. Click the Refresh icon to update the state.
Select the Instance that has been created for you and click Configure IoT Hub. In the left pane, select I agree to make these changes and click Update.
Wait for the process to complete successfully.
Configure access control roles
The final step will enable you to grant permissions to users to publish and deploy updates.
In your Device Update for IoT Hub resource, select Access control (IAM).
Select Add > Add role assignment to open the Add role assignment page.
Assign the following role. For detailed steps, see Assign Azure roles using the Azure portal.
Setting Value Role Device Update Administrator Assign access to User, group, or service principal Members <Your account or the account deploying updates> 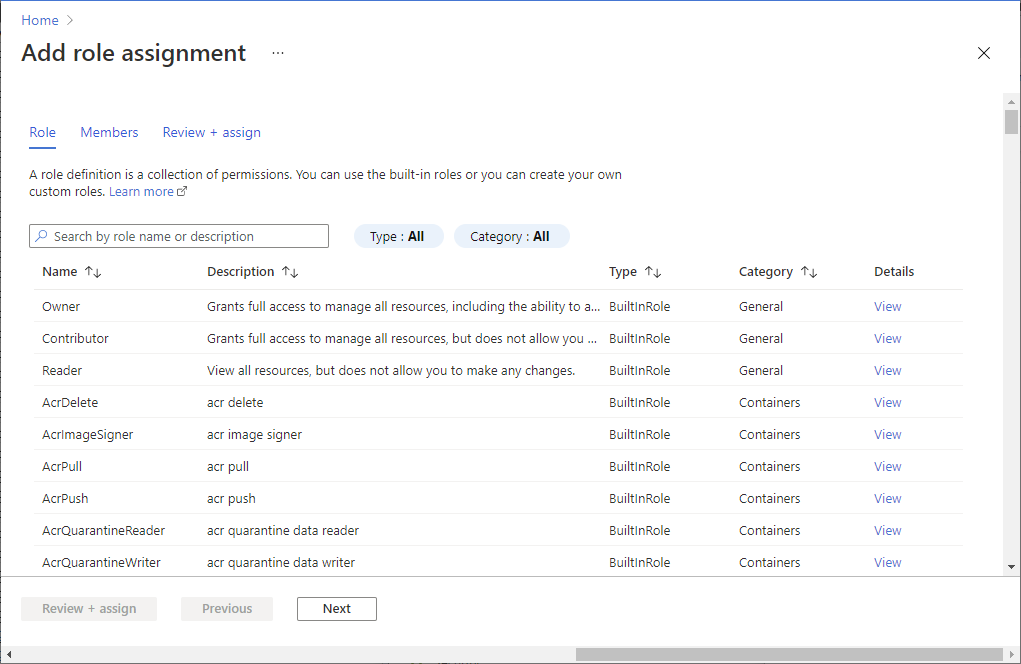
Tip
If you would like to give more people in your organization access, you can repeat this step and make each of these users a Device Update Administrator.
Next steps
You are now ready to update your Azure Percept dev kit over-the-air using Device Update for IoT Hub.