Note
Access to this page requires authorization. You can try signing in or changing directories.
Access to this page requires authorization. You can try changing directories.
Important
Retirement of Azure Percept DK:
Update 22 February 2023: A firmware update for the Percept DK Vision and Audio accessory components (also known as Vision and Audio SOM) is now available here, and will enable the accessory components to continue functioning beyond the retirement date.
The Azure Percept public preview will be evolving to support new edge device platforms and developer experiences. As part of this evolution the Azure Percept DK and Audio Accessory and associated supporting Azure services for the Percept DK will be retired March 30th, 2023.
Effective March 30th, 2023, the Azure Percept DK and Audio Accessory will no longer be supported by any Azure services including Azure Percept Studio, OS updates, containers updates, view web stream, and Custom Vision integration. Microsoft will no longer provide customer success support and any associated supporting services. For more information, please visit the Retirement Notice Blog Post.
In this tutorial, you will create a voice assistant from a template to use with your Azure Percept DK and Azure Percept Audio. The voice assistant demo runs within Azure Percept Studio and contains a selection of voice-controlled virtual objects. To control an object, say your keyword, which is a word or short phrase that wakes your device, followed by a command. Each template responds to a set of specific commands.
This guide will walk you through the process of setting up your devices, creating a voice assistant and the necessary Speech Services resources, testing your voice assistant, configuring your keyword, and creating custom keywords.
Prerequisites
- Azure Percept DK (devkit)
- Azure Percept Audio
- Speaker or headphones that can connect to 3.5mm audio jack (optional)
- Azure subscription
- Azure Percept DK setup experience: you connected your devkit to a Wi-Fi network, created an IoT Hub, and connected your devkit to the IoT Hub
- Azure Percept Audio setup
Create a voice assistant using an available template
Navigate to Azure Percept Studio.
Open the Demos & tutorials tab.
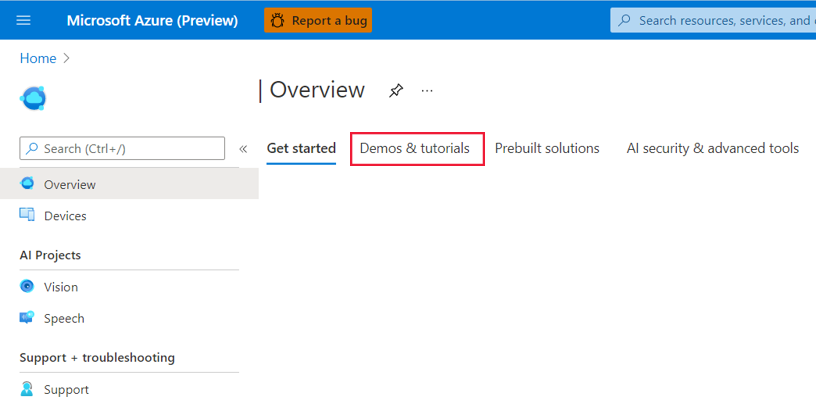
Click Try out voice assistant templates under Speech tutorials and demos. This will open a window on the right side of your screen.
Do the following in the window:
In the IoT Hub dropdown menu, select the IoT hub to which your devkit is connected.
In the Device dropdown menu, select your devkit.
Select one of the available voice assistant templates.
Click the I agree to terms & conditions for this project checkbox.
Click Create.

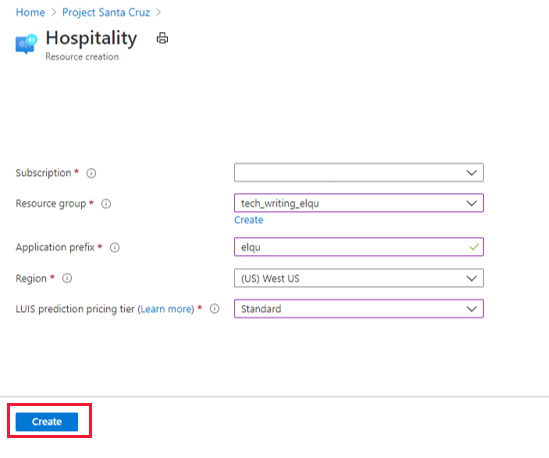
After clicking Create, the portal opens another window to create your speech theme resource. Do the following in the window:
Select your Azure subscription in the Subscription box.
Select your preferred resource group from the Resource group dropdown menu. If you would like to create a new resource group to use with your voice assistant, click Create under the dropdown menu and follow the prompts.
For Application prefix, enter a name. This will be the prefix for your project and your custom command name.
Under Region, select the region to deploy resources to.
Under LUIS prediction pricing tier, select Standard (the free tier does not support speech requests).
Click the Create button. Resources for the voice assistant application will be deployed to your subscription.
Warning
Do NOT close the window until the portal has finished deploying the resource. Closing the window prematurely can result in unexpected behavior of the voice assistant. Once your resource has been deployed, the demo will be displayed.
Test out your voice assistant
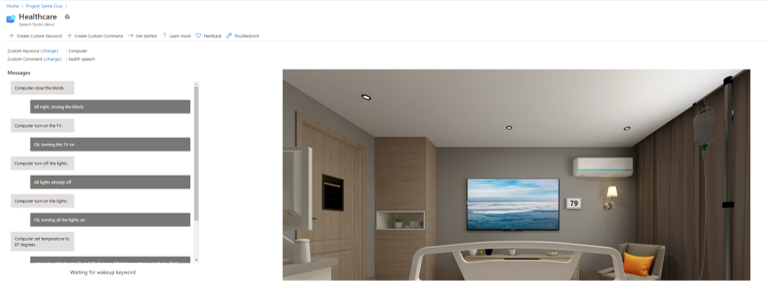
To interact with your voice assistant, say the keyword followed by a command. When the Ear SoM recognizes your keyword, the device emits a chime (which you can hear if a speaker or headphones are connected), and the LEDs will blink blue. The LEDs will switch to racing blue while your command is processed. The voice assistant's response to your command will be printed in text in the demo window and emitted audibly through your speaker/headphones. The default keyword (listed next to Custom Keyword) is set to "Computer," and each template has a set of compatible commands that allow you to interact with virtual objects in the demo window. For example, if you are using the hospitality or healthcare demo, say "Computer, turn on TV" to turn on the virtual TV.
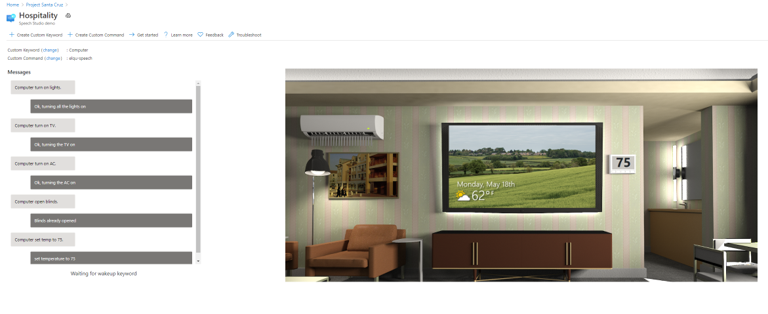
Hospitality and healthcare demo commands
Both the healthcare and hospitality demos have virtual TVs, lights, blinds, and thermostats you can interact with. The following commands (and additional variations) are supported:
- "Turn on/off the lights."
- "Turn on/off the TV."
- "Turn on/off the AC."
- "Open/close the blinds."
- "Set temperature to X degrees." (X is the desired temperature, e.g. 75.)
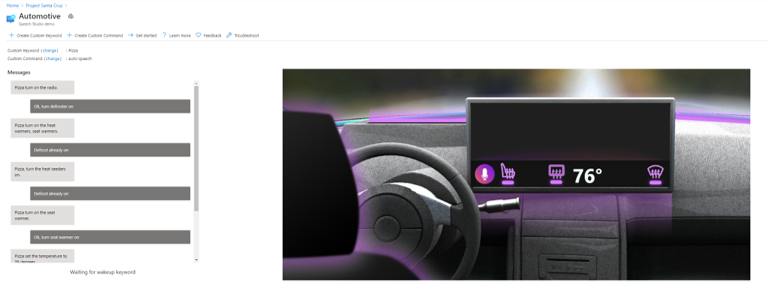
Automotive demo commands
The automotive demo has a virtual seat warmer, defroster, and thermostat you can interact with. The following commands (and additional variations) are supported:
- "Turn on/off the defroster."
- "Turn on/off the seat warmer."
- "Set temperature to X degrees." (X is the desired temperature, e.g. 75.)
- "Increase/decrease the temperature by Y degrees."
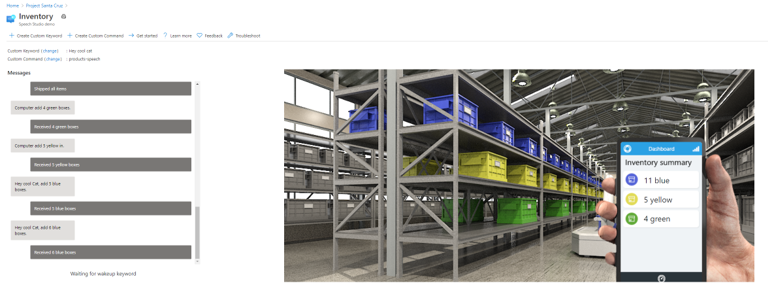
Inventory demo commands
The inventory demo has a selection of virtual blue, yellow, and green boxes to interact with along with a virtual inventory app. The following commands (and additional variations) are supported:
- "Add/remove X boxes." (X is the number of boxes, e.g. 4.)
- "Order/ship X boxes."
- "How many boxes are in stock?"
- "Count Y boxes." (Y is the color of the boxes, e.g. yellow.)
- "Ship everything in stock."
Configure your keyword
You can customize keyword for your voice assistant application.
Click change next to Custom Keyword in the demo window.
Select one of the available keywords. You will be able to choose from a selection of sample keywords and any custom keywords you have created.
Click Save.
Create a custom keyword
You can create your own keyword for your voice application. Training for your custom keyword may complete in just a few minutes.
Click + Create Custom Keyword near the top of the demo window.
Enter your desired keyword, which can be a single word or a short phrase.
Select your Speech resource (this is listed next to Custom Command in the demo window and contains your application prefix).
Click Save.
Create a custom command
The portal also provides functionality for creating custom commands with existing speech resources. "Custom command" refers to the voice assistant application itself, not a specific command within the existing application. By creating a custom command, you are creating a new speech project, which you must further develop in Speech Studio.
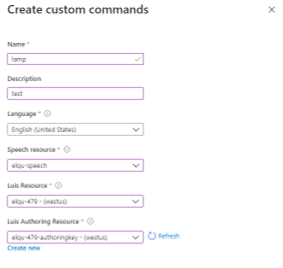
To create a new custom command from within the demo window, click + Create Custom Command at the top of the page and do the following:
Enter a name for your custom command.
Enter a description of your project (optional).
Select your preferred language.
Select your speech resource.
Select your LUIS resource.
Select your LUIS authoring resource or create a new one.
Click Create.
Once you create a custom command, you must go to Speech Studio for further development. If you open Speech Studio and do not see your custom command listed, follow these steps:
On the left-hand menu panel in Azure Percept Studio, click on Speech under AI Projects.
Select the Commands tab.
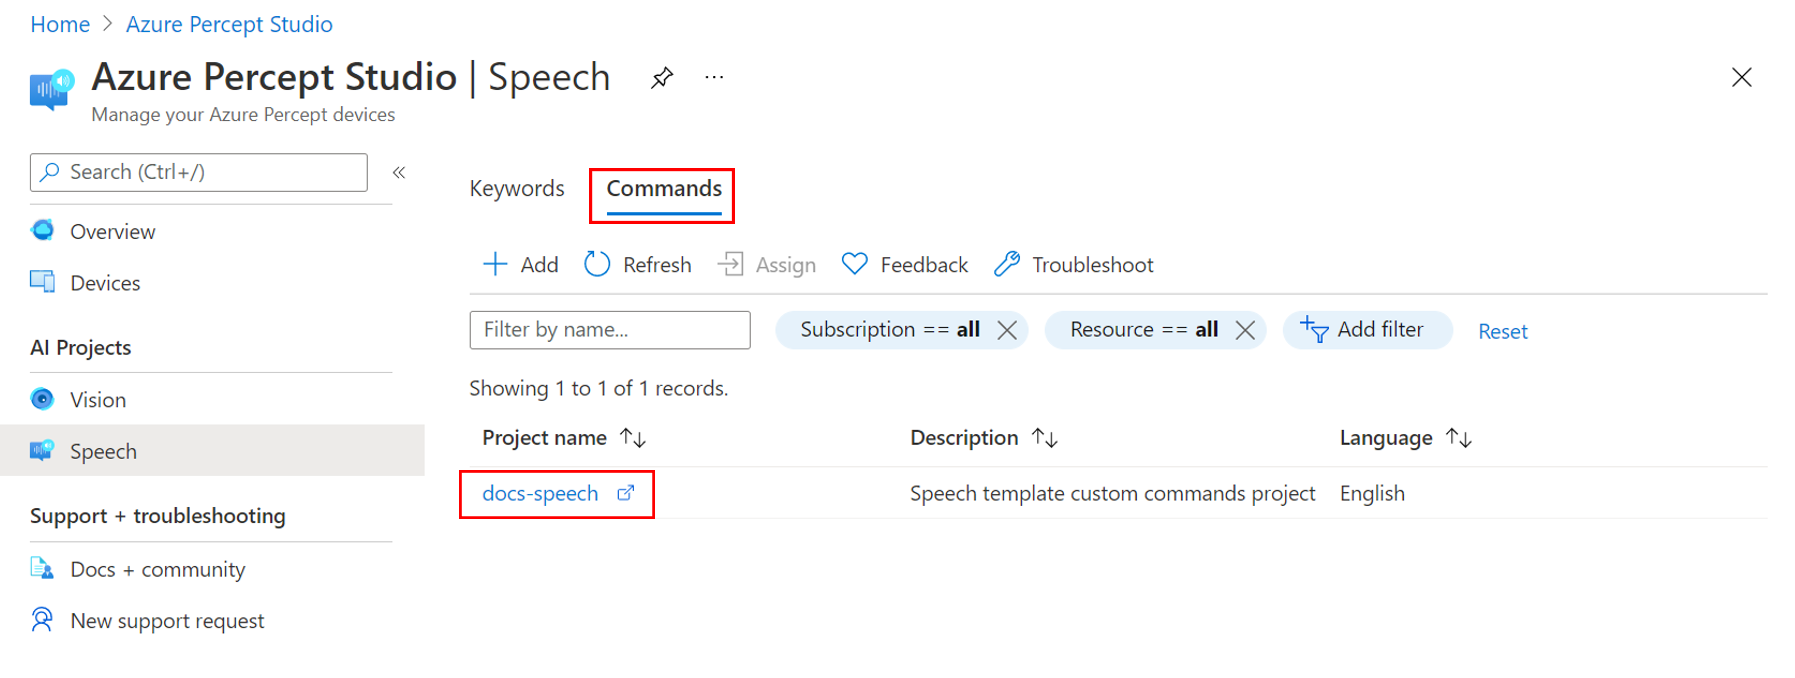
Select the custom command you wish to develop. This opens the project in Speech Studio.
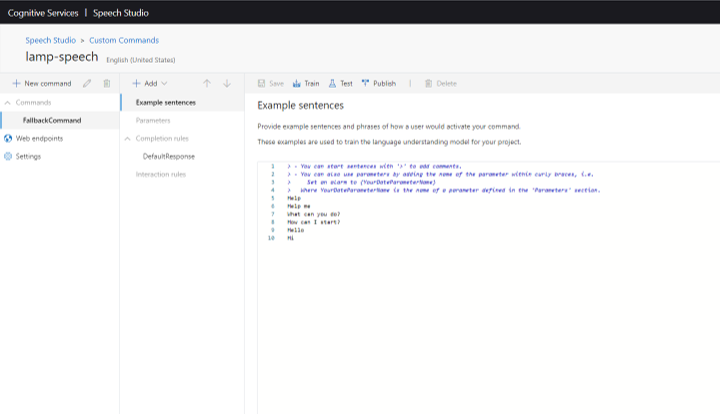
For more information on developing custom commands, please see the Speech Service documentation.
Troubleshooting
Voice assistant was created but does not respond to commands
Check the LED lights on the Interposer Board:
- Three solid blue lights indicate that the voice assistant is ready and waiting for the keyword.
- If the center LED (L02) is white, the devkit completed initialization and needs to be configured with a keyword.
- If the center LED (L02) is flashing white, the Audio SoM has not completed initialization yet. Initialization may take a few minutes to complete.
For more information about the LED indicators, please see the LED article.
Voice assistant does not respond to a custom keyword created in Speech Studio
This may occur if the speech module is out of date. Follow these steps to update the speech module to the latest version:
Click on Devices in the left-hand menu panel of the Azure Percept Studio homepage.
Find and select your device.
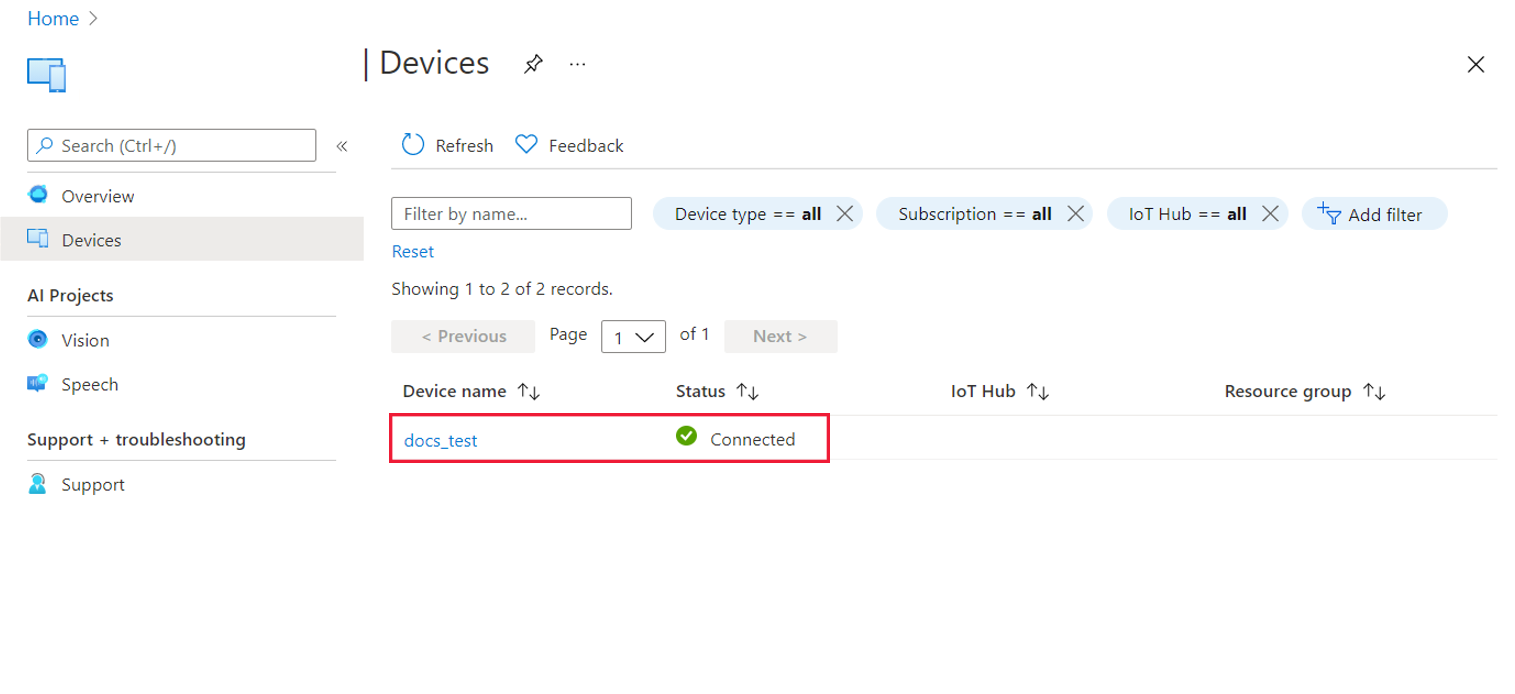
In the device window, select the Speech tab.
Check the speech module version. If an update is available, you will see an Update button next to the version number.
Click Update to deploy the speech module update. The update process generally takes 2-3 minutes to complete.
Clean up resources
Once you are done working with your voice assistant application, follow these steps to clean up the speech resources you deployed during this tutorial:
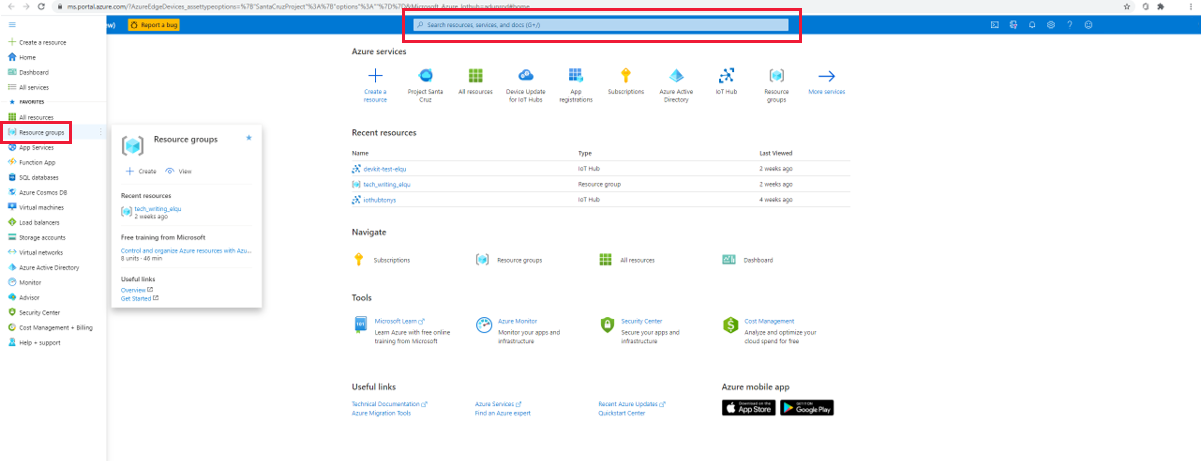
From the Azure portal, select Resource groups from the left menu panel or type it into the search bar.
Select your resource group.
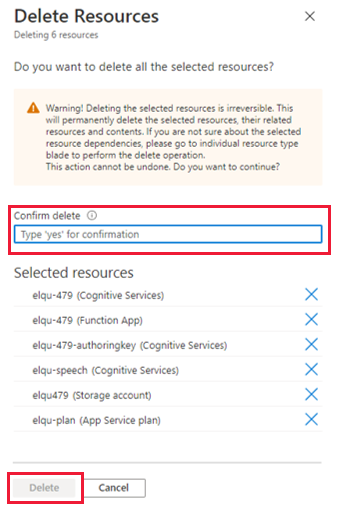
Select all six resources that contain your application prefix and click the Delete icon on the top menu panel.
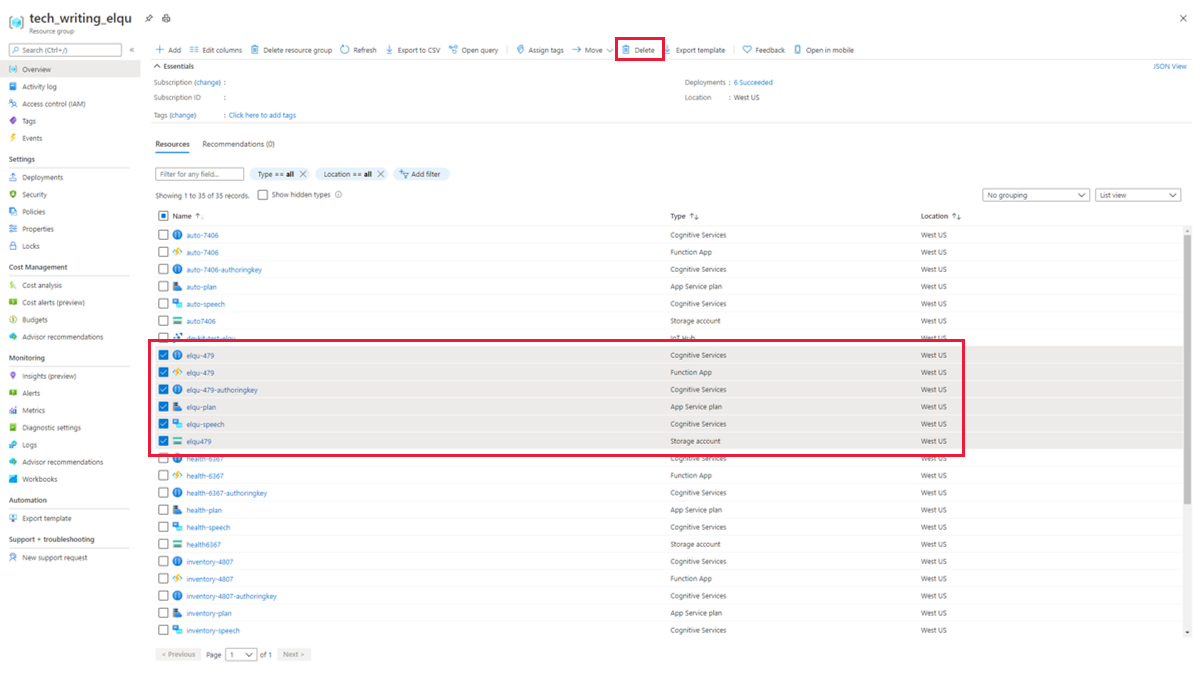
To confirm deletion, type yes in the confirmation box, verify you have selected the correct resources, and click Delete.
Warning
This will remove any custom keywords created with the speech resources you are deleting, and the voice assistant demo will no longer function.
Next Steps
Now that you have created a no-code speech solution, try creating a no-code vision solution for your Azure Percept DK.