Note
Access to this page requires authorization. You can try signing in or changing directories.
Access to this page requires authorization. You can try changing directories.
Azure DevOps Services | Azure DevOps Server 2020 | Azure DevOps Server 2019 | TFS 2018 - TFS 2013
Add area paths to support teams and group work items based on product, feature, or business areas. Once you define area paths at the project level, you assign them to a team under the team configuration. You can also create a hierarchy of area paths to support sub-areas, up to 14 levels deep.
To perform the following tasks, you must define area paths:
- Query and chart work items based on Area Path
- Assign work to more than one team, Add teams
- Work with management and feature teams, Configure a hierarchy of teams
Tip
You can define your area path structure and assign area paths to teams. Or, you can add a team and create the area path with the team name at that time. If teams are fully independent, create a flat set of area paths. However, if you want to create a hierarchy of teams, then you'll want to create a tree-hierarchy of area paths. To learn more, see Configure a hierarchy of teams.
To use the following tools, teams must subscribe to area paths:
To understand how the system uses area paths, see About area and iteration paths.
Prerequisites
If you don't have a project yet, create one now.
Ensure you're a member of the Project Administrators group to add an area path under the root node or edit or delete any child node. To acquire these permissions, see Change project-level permissions.
Have one or more of the following permissions set to Allow, to add, edit, and manage area paths under a node:
- Create child nodes
- Delete this node
- Edit this node
- View permissions in this node
By default, the user who created the project has these permissions already set. For more information, see Set permissions and access for work tracking.
Ensure you're added as a team administrator or are a member of the Project Administrators group to set team area paths.
For naming restrictions on area paths, see About areas and iterations, Naming restrictions.
Get started
Each team has access to a number of Agile tools as described in About teams and Agile tools. Each tool references the team's default area path(s). Most teams choose one area path and several iteration paths to support their work tracking activities. However, to support other scenarios, it's possible for teams to choose several area paths to appear on their backlogs and boards.
New projects contain a single, root area that corresponds to the project name. A team is created with the same project name and the root area path is assigned to that team.
If you're new to managing projects and teams, the most straight forward sequence for configuring your project and teams is as follows:
- Determine the number and names of area paths that you want to support to categorize your work. At a minimum, add one area path for each team you define. For more information, review About areas and iterations.
- Determine the number and names of teams you want to support. For more information, review About teams and Agile tools.
- Open Project settings>Project configuration and define the area paths to support steps 1 and 2 at the project level. Follow the steps provided later in this article: Open Project Settings, Project configuration and Add area paths.
- Define the teams you need to support step 2. For more information, see Add a team, move from one default team to several teams.
- Open the team configuration and assign the default and additional area path(s) to each team. Follow the steps provided later in this article: Open team settings and Set team default area path(s).
- Assign the area path of work items to an area path you defined. Use bulk modify to modify several work items at once.
As needed, you can do the following actions at any time:
- Add additional child nodes
- Rename an area path (except the root area path)
- Move a child node under another node
- Delete a child node
- Rename a team
- Change the area path assignments made to a team
Open Project Settings, list project areas
Define both areas and iterations from the Work pages of the Project Settings context. From the user context, open the admin context by choosing Settings ![]() .
.
From the web portal, choose Project settings
 to open project administration pages. Then choose Areas.
Add an area path
Only one area is defined, by default. Add area paths under the root area path for the project, or as a child to another area path.

Open Areas.
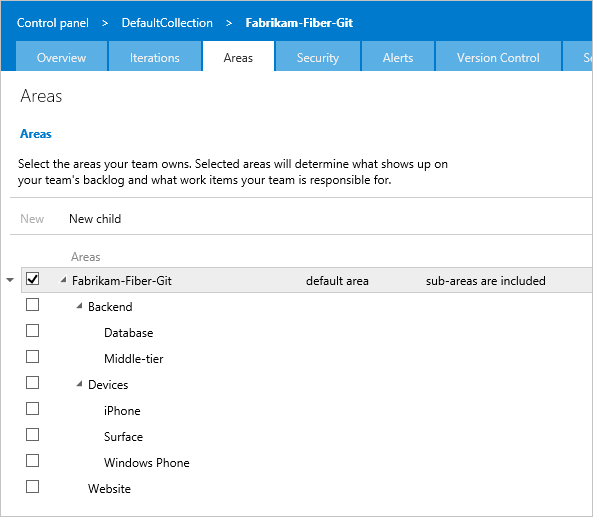
From the areas page, you can set the default area path used to filter the backlog. The default area path is also used when new work items a user creates new work items.
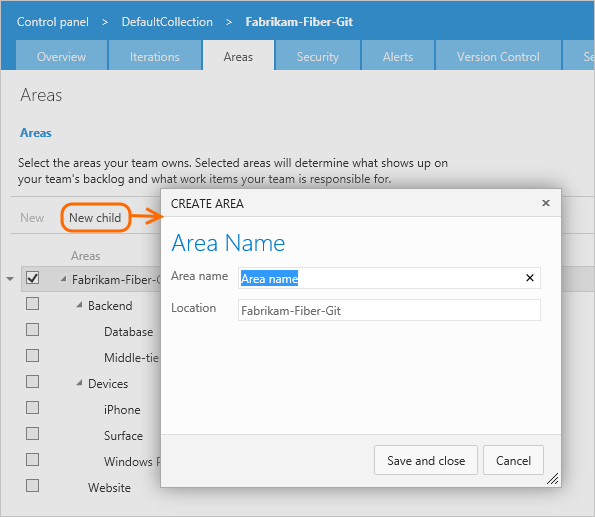
Add a new child node to the area you've selected.
Open team settings, list team area paths
You set team defaults from team settings. If you're not a team administrator, get added as one. Only team or project administrators can change team settings.
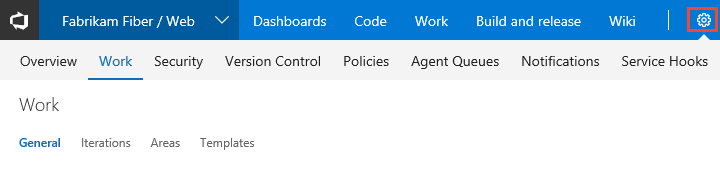
You open team settings from the upper navigation bar. Select the team you want and then choose Team settings ![]() . For more information about switching your team focus, see Switch project, repository, team
. For more information about switching your team focus, see Switch project, repository, team
Set team area path(s)
All work items assigned to the area paths selected for a team appear on the backlogs and boards for that team. You can select a single area path, and optionally include their subarea paths. Choose to include subarea paths when you want to support rollup views of work done across several teams or areas.
Note
Teams can be assigned a maximum of 300 Area Paths. To learn more, see Work tracking, process, and project limits.
The default area path determines the default area path assigned to work items that are created from the team context.
Important
Work items that appear on more than one team's Kanban board can yield query results that don't meet your expectations. Because each team can customize the Kanban board columns and swimlanes, the values assigned to work items which appear on different boards may not be the same. The primary work around for this issue is to maintain single ownership of work items by team area path.
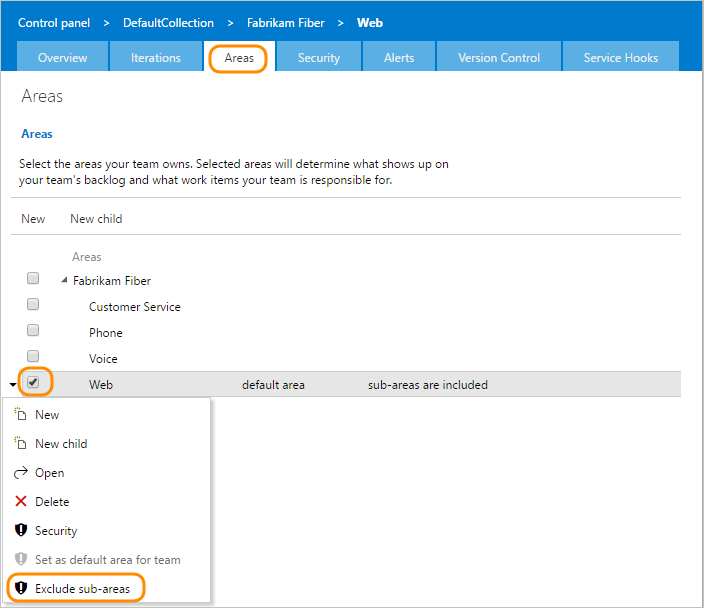
Open the Areas admin page for the team context.
Here, we navigate to the Fabrikam Fiber team. The checked box indicates the area paths selected for the team. To exclude sub-areas, select the option from the area path context menu.
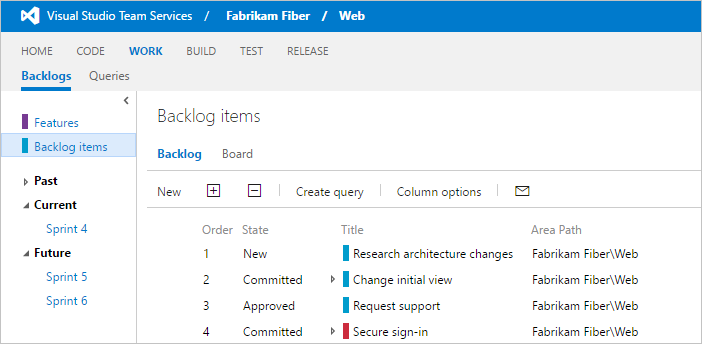
Refresh the product backlog page for the team, and you'll see only those work items assigned to the Fabrikam Fiber area path.
Rename, move, or delete an area path
The system automatically updates work items and queries that reference your updated area path.
To rename an area or iteration path, choose Actions
 for the node, and then select Edit.
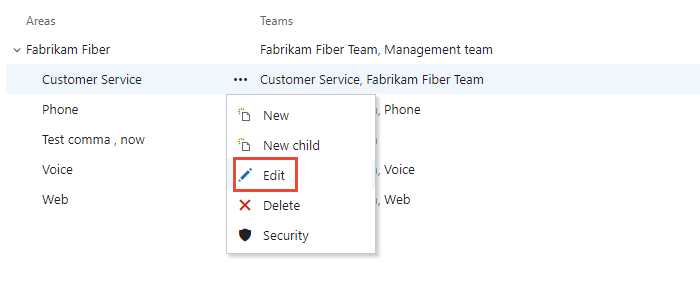
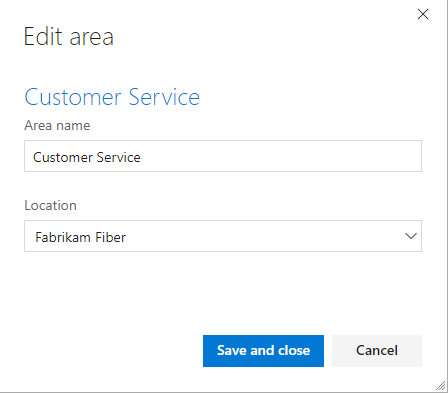
In the dialog that opens, enter the new name.
To move the node within the hierarchy, change the Location field.
To delete a node, choose the Delete option from the actions menu.
Chart progress by area
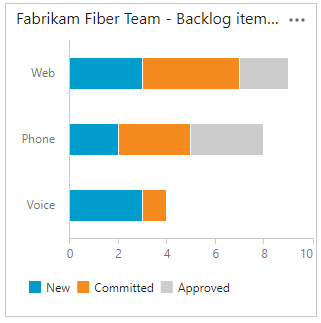
You can quickly generate queries to view the progress based on an area path. For example, visualize progress of work items that are assigned to each team's area path, as shown in the following stacked bar chart. Choose Node Name to get the leaf node of the area path.
Q & A
Q: Do I have to assign an area path to a team?
A: No. You assign area paths to teams so that the work items assigned to that area path appear on the team's backlogs and boards. By default, all work items get assigned to the root area path. These work items appear in the default team that's defined for the project.
Next steps
Related articles
As you can see, area paths play a major role in supporting Agile tools, teams, and managing work items. Learn more about working with these fields from the following articles:
- About areas and iterations
- Add another team
- Configure team settings and add team administrators
- Agile tools that rely on areas or iterations
- Query by area or iteration path
- Set permissions and access for work tracking
Programmatic resources
Area paths and iteration paths are also referred to as Classification Nodes.