Clone an existing Git repo
TFS 2017 | TFS 2015 | TFS 2013
Visual Studio 2019 | Visual Studio 2017 | Visual Studio 2015
You can create a local copy of a remote Git repo by cloning it into a local folder on your computer. Cloning a remote repo downloads all commits on all branches of the repo, unless you use the --single-branch clone option. Cloning links each branch in your new local repo with the corresponding branch in the remote repo. That way, when you push to share your local branch changes with your team, the corresponding remote branch is updated. Similarly, when you pull to update your local branch with changes made by your team, updates from the corresponding remote branch are retrieved. The remote repo can be an Azure Repos Git repo, a GitHub repo, or other hosted Git repo.
This article provides procedures for the following tasks:
- Get the clone URL for an Azure Repos Git repo
- Get the clone URL for a GitHub repo
- Clone an Azure Repos Git repo
- Clone a GitHub repo
- Clone any Git repo
- Open a Visual Studio solution from a cloned repo
For an overview of the Git workflow, see Azure Repos Git tutorial.
Prerequisites for access to Azure Repos
To view code, you must be a member of an Azure DevOps project with Basic access or higher. If you aren't a project member, get added.
To clone or contribute to code, you must be a member of the Contributors security group or have the corresponding permissions.
Get the clone URL of an Azure Repos Git repo
Typically, you need to know the clone URL of the remote repo that you want to clone. The clone URL uniquely identifies the remote repo.
Note
When you're signed into an Azure DevOps project, Visual Studio supports searching for and cloning project repos without needing to know the clone URL.
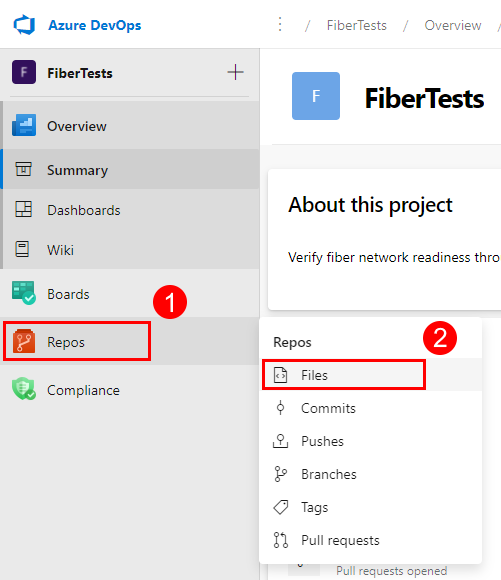
From your web browser, open the team project for your Azure DevOps organization, and then choose Repos > Files to open the Files view.
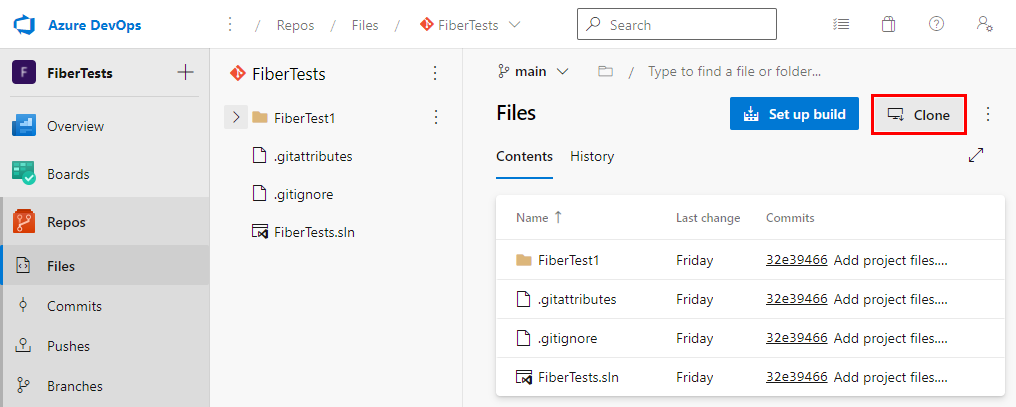
In the Files view, choose Clone to launch the Clone Repository popup.
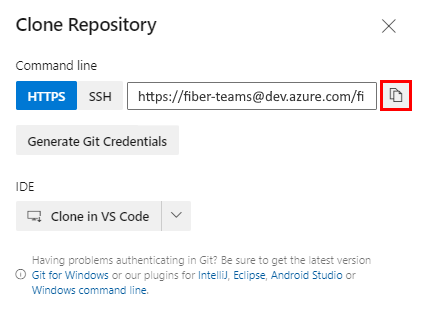
Copy the clone URL from the Clone Repository popup.


Get the clone URL of a GitHub repo
Typically, you need to know the clone URL of the remote repo that you want to clone. The clone URL uniquely identifies the remote repo.
Note
When you're signed into GitHub, Visual Studio supports searching for and cloning GitHub repos without needing to know the clone URL.
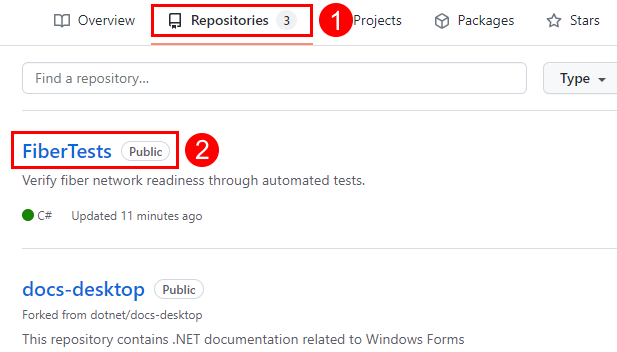
Open a browser and navigate to your GitHub account, select the Repositories tab, and choose the repository to clone.
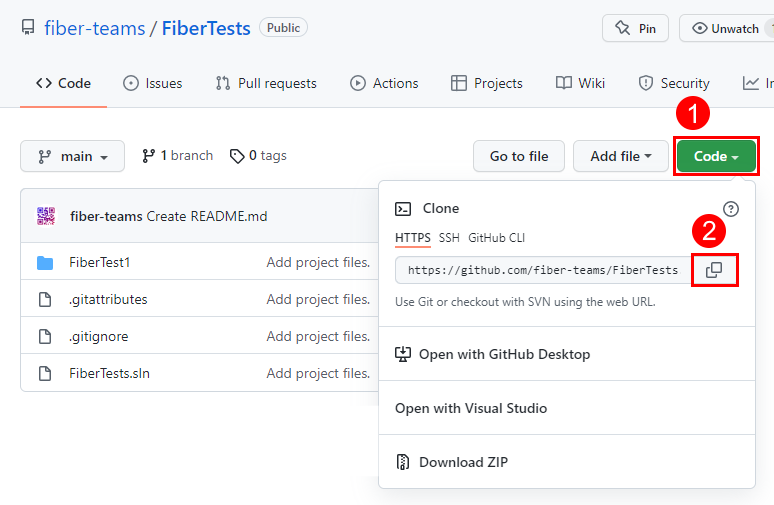
On the GitHub repository page, choose Code to launch the Clone popup. Copy the clone URL from the Clone popup.


Clone an Azure Repos Git repo
By signing in as a member of an Azure DevOps project, you can clone private repos that are accessible to you, and public repos. Visual Studio supports search, clone, and sync operations on repos that are accessible through authentication.
Note
You can clone a public Azure Repos Git repo without signing in as a member of its parent Azure DevOps project. To clone a public Git repo without signing in, see Clone any Git repo and Connect to a project in Azure DevOps.
Visual Studio 2019 version 16.8 and later versions provides a Git version control experience while maintaining the Team Explorer Git user interface. To use Team Explorer, uncheck Tools > Options > Preview Features > New Git user experience from the menu bar. You can use Git features from either interface interchangeably. Below, we provide a side-by-side comparison for cloning an Azure Repos Git repo.
Visual Studio Git
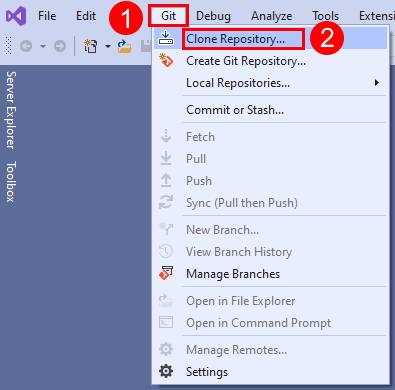
- From the Git menu on the menu bar, choose Clone Repository to open the Clone a repository window.

- In the Clone a repository window, select Azure DevOps under Browse a repository to open the Connect to a Project window.

- In the Connect to a Project window, sign in to Azure DevOps and choose the remote repo you want to clone. You can use the search box to filter the list of remote repos. If you don't see the remote repo, select Add Azure DevOps Server to add the server that hosts the repo. Verify the local folder path where you want the local clone to be created, and then select Clone.

Visual Studio Team Explorer
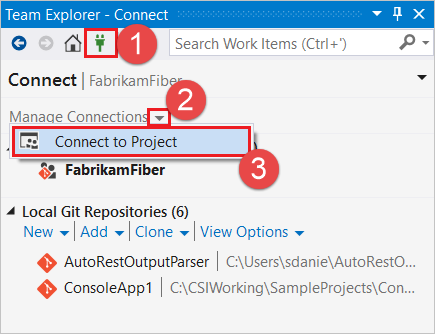
- In Team Explorer, select Connect to open the Connect page, and then choose Manage Connections > Connect to Project.

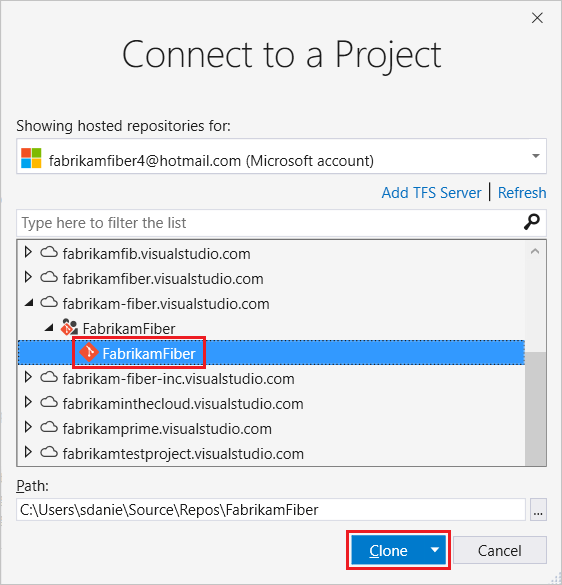
- In the Connect to a Project window, sign in to Azure DevOps and choose the remote repo you want to clone. You can use the search box to filter the list of remote repos. If you don't see the remote repo, select Add Azure DevOps Server to add the server that hosts the repo. Verify the local folder path where you want the local clone to be created, and then select Clone.
After you've cloned a remote Git repo, Visual Studio detects the local clone and adds it to the list of Local Repositories in the Git menu.

Clone a GitHub repo
By signing into GitHub or using SSH authentication, you can clone private repos that are accessible to you, and public repos. Visual Studio supports search, clone, and sync operations on repos that are accessible through authentication.
Note
You can clone a public GitHub repo without signing in to GitHub or otherwise authenticating. To clone a public Git repo without signing in, see Clone any Git repo.
Visual Studio 2019 version 16.8 and later versions provide a Git version control experience that supports search, clone, and sync operations on GitHub repos that are accessible through authentication. To clone a GitHub repo using Team Explorer, see Clone any Git repo. The following steps apply to the Git version control experience.
From the Git menu on the menu bar, choose Clone Repository to open the Clone a repository window.
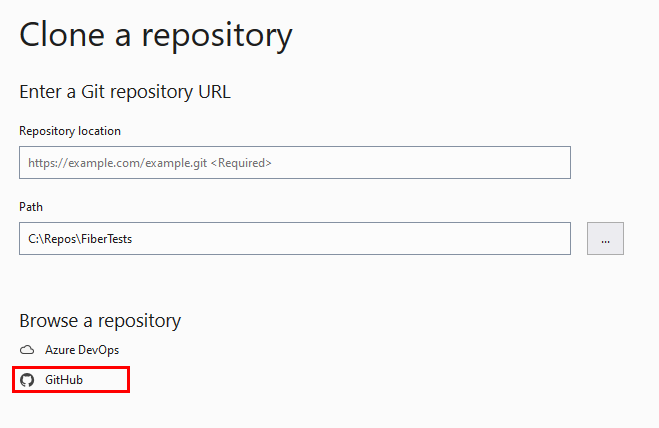
In the Clone a repository window, select GitHub under Browse a repository to open the Open from GitHub window.
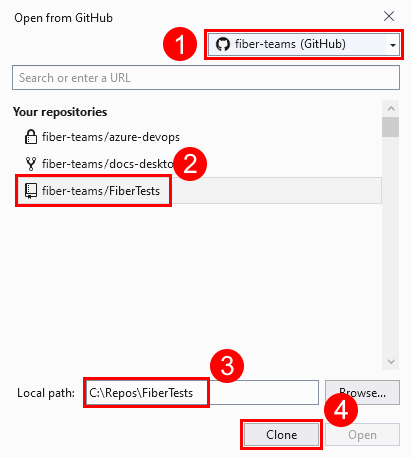
In the Open from GitHub window, sign in to GitHub and choose the remote repo you want to clone. You can use the search box to filter the list of remote repos. Verify the local folder path where you want the local clone to be created, and then choose Clone.


After you've cloned a remote Git repo, Visual Studio detects the local clone and adds it to the list of Local Repositories in the Git menu.
Clone any Git repo
You can clone any Git repo that's accessible to you by using the clone URL of the repo.
Visual Studio 2019 version 16.8 and later versions provides a Git version control experience while maintaining the Team Explorer Git user interface. To use Team Explorer, uncheck Tools > Options > Preview Features > New Git user experience from the menu bar. You can use Git features from either interface interchangeably. Below, we provide a side-by-side comparison for cloning any Git repo.
Visual Studio Git
- From the Git menu on the menu bar, choose Clone Repository to open the Clone a repository window.
- In the Clone a repository window, enter the clone URL of the remote Git repo that you want to clone, verify the local folder path where you want to create the local clone, and then choose Clone.

Visual Studio Team Explorer
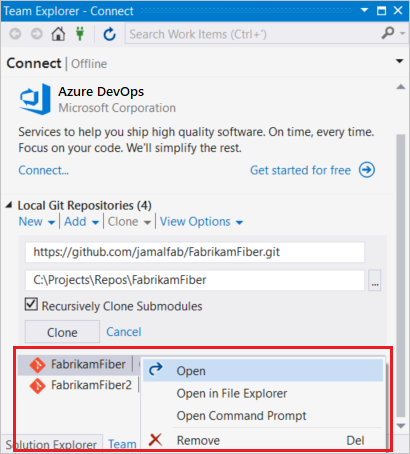
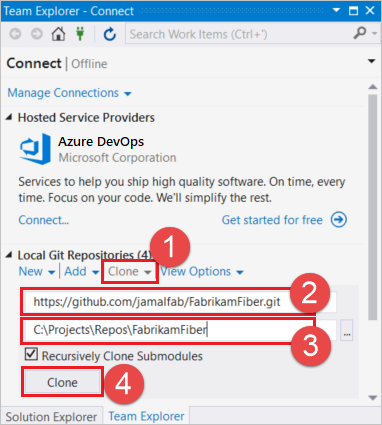
- In Team Explorer, select Connect to open the Connect page, and then choose Clone under Local Git Repositories.

- Enter the clone URL of the remote Git repo that you want to clone, verify the local folder path where you want to create the local clone, and then choose Clone. To clone the remote Git repo and any Git repos that are nested within it, leave Recursively Clone Submodules checked.

After you've cloned a remote Git repo, Visual Studio detects the local clone and adds it to the list of Local Repositories in the Git menu.
Open a Visual Studio solution from a cloned repo
Visual Studio 2019 version 16.8 and later versions provides a Git version control experience while maintaining the Team Explorer Git user interface. To use Team Explorer, uncheck Tools > Options > Preview Features > New Git user experience from the menu bar. You can use Git features from either interface interchangeably. Below, we provide a side-by-side comparison for opening a Visual Studio solution from a cloned repo.
Visual Studio Git
- Choose the File > Open > Project/Solution from the menu bar, and select the solution file to open.

- The Visual Studio solution that you selected is now open in Solution Explorer.

Visual Studio Team Explorer
- Right-click on a repository in the Connect view of Team Explorer and choose Open.

- In the Home view of Team Explorer, double-click your solution file under Solutions.

- The Visual Studio solution that you selected is now open in Solution Explorer.