Share code with push
TFS 2017 | TFS 2015 | TFS 2013
Visual Studio 2019 | Visual Studio 2017 | Visual Studio 2015
You can share your work on a local Git repo branch by uploading your changes to a remote repo that others can access. The Git push command uploads new commits from your local branch to the corresponding branch of a remote repo. Visual Studio uses the Git push command when you choose to sync your work with a remote repo.
For an overview of the Git workflow, see Azure Repos Git tutorial.
Push your code
After you've added one or more commits to a local branch, you can "push" the commits to a remote branch to share or back up your work. When you use the Git push command, Git checks whether your local branch is up to date with the remote branch. If not, Git will prevent you from pushing new commits until you've updated your local branch. To resolve this issue, you can pull to get the remote branch commits that aren't present in your local branch. If the pulled remote commits conflict with your local commits, try resolving those conflicts before pushing your changes.
For the Git push command to work, your local repo must be connected to a remote Git repo. If you cloned your local repo from a remote repo then they're already connected. But if you created your local repo without cloning, you'll need to connect it to a hosted Git repo. For more information, see Connect to an Azure Repos Git repo and Connect to a GitHub repo.
Tip
To support a pull request review of your work, avoid working directly in the main branch of your local repo. Instead, save your commits to a local feature branch or bugfix branch, and push that branch on completion of your work. For an overview of the Git workflow, see Azure Repos Git tutorial.
Visual Studio 2019 version 16.8 and later versions provides a Git version control experience while maintaining the Team Explorer Git user interface. To use Team Explorer, uncheck Tools > Options > Preview Features > New Git user experience from the menu bar. You can use Git features from either interface interchangeably. Below, we provide a side-by-side comparison of how to push your code.
Visual Studio Git
In the Git Changes window, select the up-arrow push button to push your commit.

Or, you can push your changes from the Git Repository window. To open the Git Repository window, select the outgoing / incoming link in the Git Changes window.

Or, you can push your changes from the Git menu on the menu bar.

Visual Studio Team Explorer
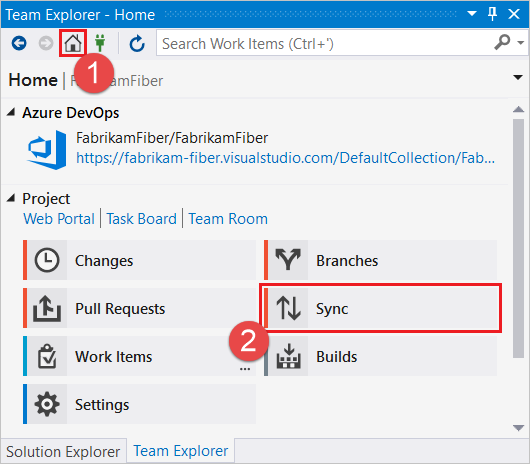
- In Team Explorer, select Home and then choose Sync to open Synchronization.

You can also go to the Synchronization view from Changes by choosing Sync immediately after making a commit.

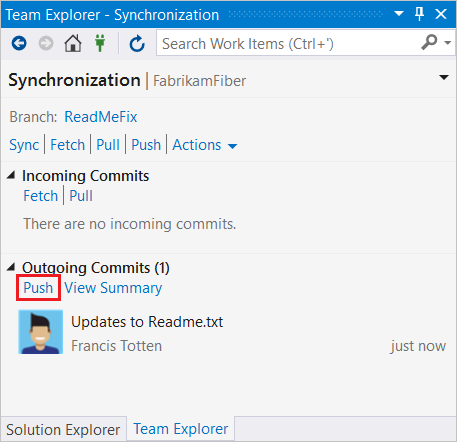
- In the Synchronization view, choose Push to upload your commit to the remote repo. If this is your first push to the repo, you'll see the message:
The current branch does not track a remote branch..., which lets you know that your commit was pushed to a new branch on the remote repo and that future commits pushed from the current branch will be uploaded to that remote branch.


Once you've pushed your commits, you can create a pull request to let others know you'd like to have your changes reviewed. If approved, your changes will be merged into a target branch of the remote repo.