Resolve merge conflicts
TFS 2017 | TFS 2015 | TFS 2013
Visual Studio 2019 | Visual Studio 2017 | Visual Studio 2015
When you merge one branch into another, file changes from commits in one branch can conflict with the changes in the other. Git attempts to resolve these changes by using the history in your repo to determine what the merged files should look like. When it isn't clear how to merge changes, Git halts the merge and tells you which files conflict.
In this tutorial you learn how to:
- Understand merge conflicts
- Resolve merge conflicts
Understand merge conflicts
The following image shows a very basic example of how changes conflict in Git. Both the main and bugfix branch make updates to the same lines of source code.
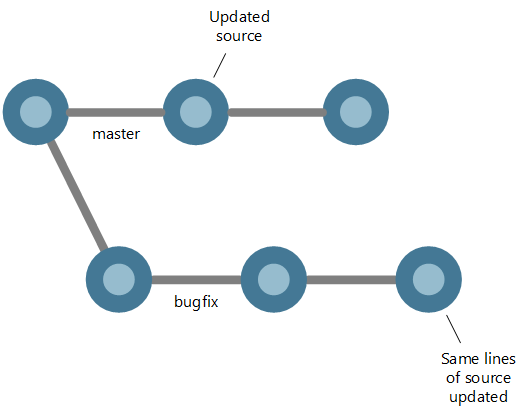
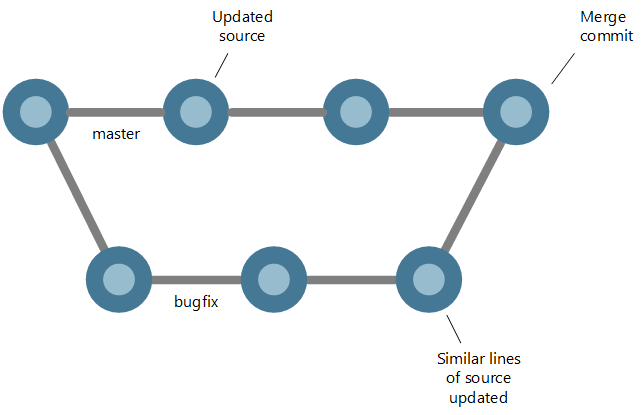
If you try to merge the bugfix branch into main, Git can't determine which changes to use in the merged version. You may want to keep the changes in the main branch, the bugfix branch, or some combination of the two. Resolve this conflict with a merge commit on the main branch that reconciles the conflicting changes between the two branches.
The most common merge conflict situation is when you pull updates from a remote branch to your local branch, for example from origin/bugfix into your local bugfix branch.
Resolve these conflicts in the same way - create a merge commit on your local branch reconciling the changes and complete the merge.
What does Git do to prevent merge conflicts?
Git keeps an entire history of all changes made in your repo. Git uses this history as well as the relationships between commits to see if it can order the changes and resolve the merge automatically. Conflicts only occur when it's not clear from your history how changes to the same lines in the same files should merge.
Preventing merge conflicts
Git is very good at automatically merging file changes in most circumstances, provided that the file contents don't change dramatically between commits. Consider rebasing branches before you open up a pull request if your branch is far behind your main branch. Rebased branches will merge into your main branch without conflicts.
Resolve merge conflicts
Note
Visual Studio 2019 version 16.8 and later versions provide a new Git menu for managing the Git workflow with less context switching than Team Explorer. Procedures provided in this article under the Visual Studio 2019 tab provide information for using the Git experience as well as Team Explorer. To learn more, see Side-by-side comparison of Git and Team Explorer.
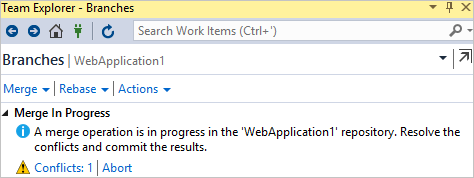
You'll be informed of the merge conflict(s) when you pull changes or attempt to merge two branches.
The conflict notification appears. Click the Conflicts link to start resolve file conflicts.
This will bring up a list of files with conflicts. Selecting a file lets you accept the changes in the source branch you are merging from with the Take Source button or accept the changes in the branch you are merging into using Keep Target. You can manually merge changes by selecting Merge, then entering the changes directly into the merge tool specified in your Git settings.
Use the checkboxes next to the lines modified to select between remote and local changes entirely, or edit the results directly in the Result editor under the Source and Target editor in the diff view.
When done making changes, click Accept Merge . Repeat this for all conflicting files.
Open the Changes view in Team Explorer and commit the changes to create the merge commit and resolve the conflict.
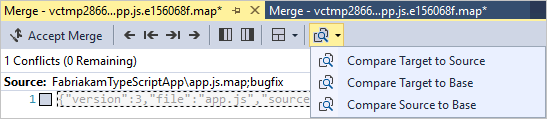
Compare the conflicting commits as well as the differences between the common history with the options in Visual Studio's merge tool.