Run automated tests from test plans
TFS 2017
Automate test cases in your test plans and run them directly from Azure Test Plans . Automated tests provide you with the following benefits:
- A user-friendly process for testers who may not be well versed with running tests in Build or Release workflows.
- The flexibility to run selected tests on demand, rather than scheduled testing in Build or Release workflows where all tests meeting the filter criteria are run.
- The ability to rerun a few tests that failed due to test infrastructure issues, or you have a new build that includes fixes for failed tests.
Prerequisites
- You must connect to a project. If you don't have a project yet, create one.
- You must be added to a project. To get added, Add users to a project or team.
- To view or run manual or automated tests, you must have Basic access or higher.
To learn more, see Manual test access and permissions.
In addition, you'll need:
- A test plan containing your automated tests, which you have associated with automated test methods using Visual Studio 2017, or Visual Studio 2015 or earlier.
- A build pipeline that generates builds containing the test binaries.
- An app to test. You can deploy the app as part of the build and release workflow and also use it for on-demand testing.
- Permissions to create and manage releases, edit a release environment, and manage deployment. For more information, see Set permissions for release pipelines and Release permissions.
Set up your environment
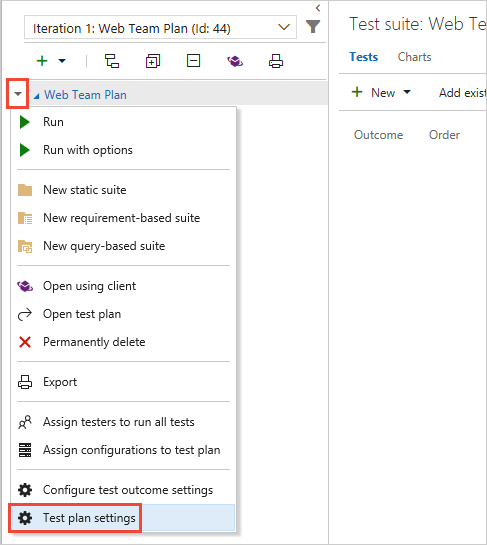
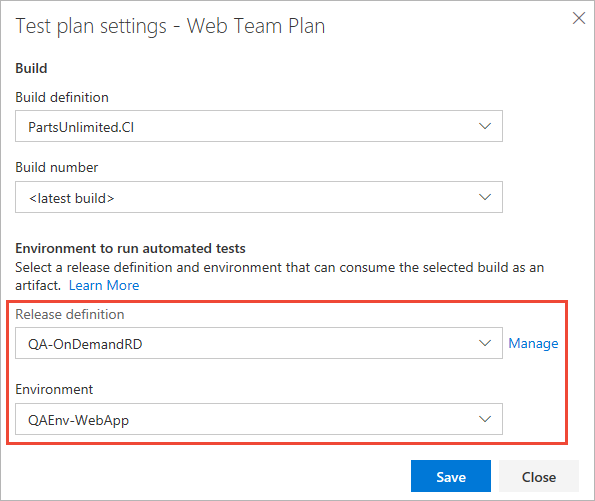
In the Test Plans page, choose your test plan, open the shortcut menu, and choose Test plan settings.
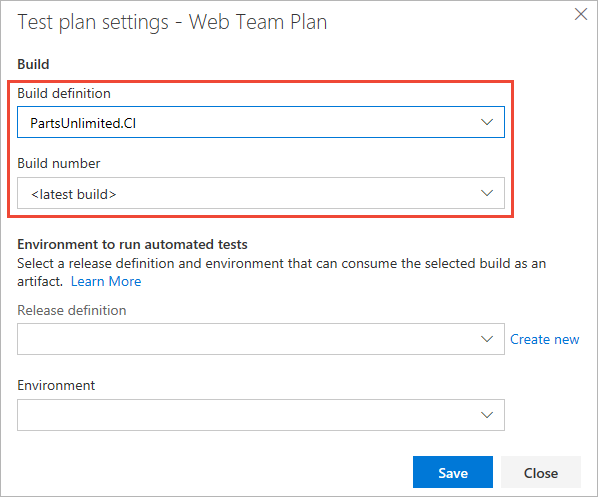
In the Test plan settings dialog, select the build pipeline that generates builds which contain the test binaries. You can then select a specific build number to test, or let the system automatically use the latest build when tests are run.
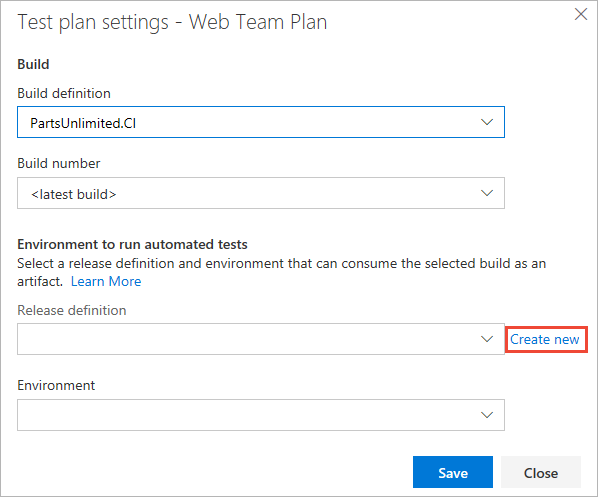
You will need a release pipeline that was created from the Run automated tests from Test Manager template to run tests from test plans in Azure Test Plans . If you have an existing release pipeline that was created using this template, select it and then select the existing stage in the release pipeline where the tests will be executed. Otherwise, choose the Create new link in the dialog to create a new release pipeline containing a single stage with the Visual Studio Test task already added.
How do I pass parameters to my test code from a build or release pipeline?
Assign meaningful names to the release pipeline and stage as required.
You need the Visual Studio Test Platform to be installed on the agent computer. If Visual Studio is already installed on the agent computer, you can skip this step. If not, you must add the Visual Studio Test Platform Installer task to the pipeline definition.
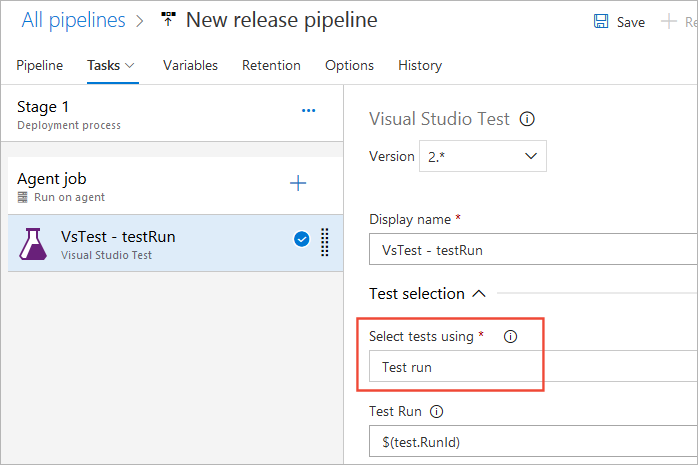
Add the Visual Studio Test task to the release pipeline and configure it as follows:
Verify that version 2 of the Visual Studio Test task is selected. The version number is shown in the drop-down list at the top left of the task settings panel.

Verify that Select tests using is set to Test run. What does this setting mean?
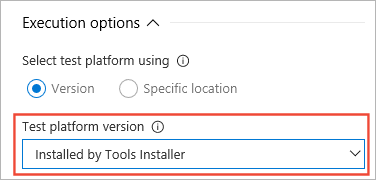
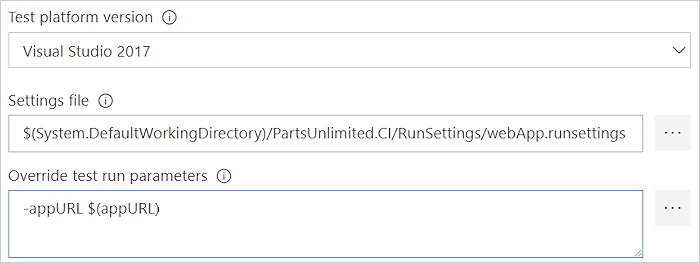
For the Test platform version setting, select Installed by Tools Installer.
If you have UI tests that run on physical browsers or thick clients, ensure that the agent is set to run as an interactive process with auto-logon enabled. Setting up an agent to run interactively must be done before queueing the build or release (setting the Test mix contains UI tests checkbox does not configure the agent in interactive mode automatically - it is used only as a reminder to configure the agent appropriately to avoid failures).
If you are running UI tests on a headless browser, the interactive process configuration is not required.
Select how is the test platform is provisioned, and the version of Visual Studio or the location of the test platform that is installed on the test machines
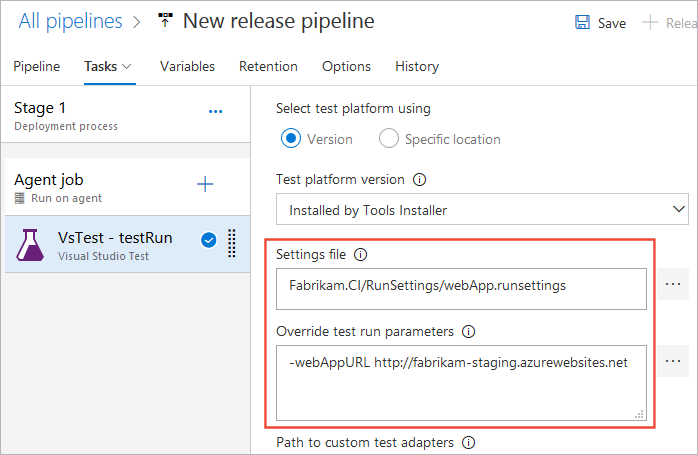
If your tests need input parameters such as app URLs or database connection strings, select the relevant settings file from the build artifacts. You can use the Publish build artifacts tasks in your build pipeline to publish the settings file in a drop location if this file is not included in the artifacts. In the example shown below, the application URL is exposed in the run settings file, and is overridden to set it to a staging URL using the Override test run parameters setting.
For information about the option settings of the Visual Studio Test task, see Visual Studio Test task.
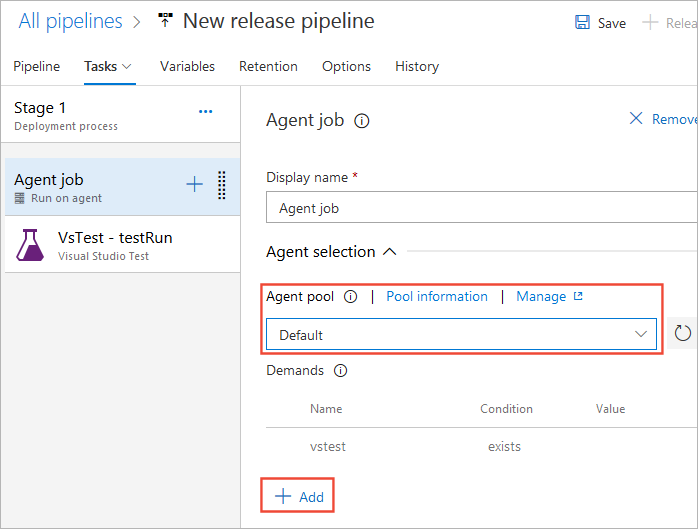
Choose the Agent job item and verify that the deployment queue is set to the one containing the machines where you want to run the tests. If your tests require special machines from the agent pool, you can add demands that will select these at runtime.
You may be able to minimize test times by distributing tests across multiple agents by setting Parallelism to Multiple executions and specifying the number of agents.
Note
If you are running UI tests such as CodeUI or Selenium on physical browsers such as IE, Firefox, or Chrome, the agent on the machines must be running in interactive mode and not as a service. More details.
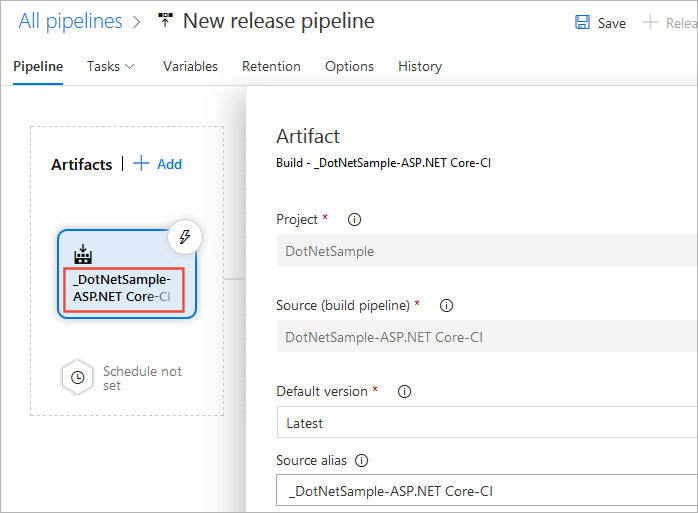
In the Pipeline page of the release pipeline, verify that the build pipeline containing the test binaries is linked to this release pipeline as an artifact source.
Save the release pipeline.
If you chose Create new in the Test plan settings dialog in step 2 of this example, return to the browser page containing your test plan settings. In the Test plan settings dialog, select the release pipeline and stage you just saved.
Run the automated tests
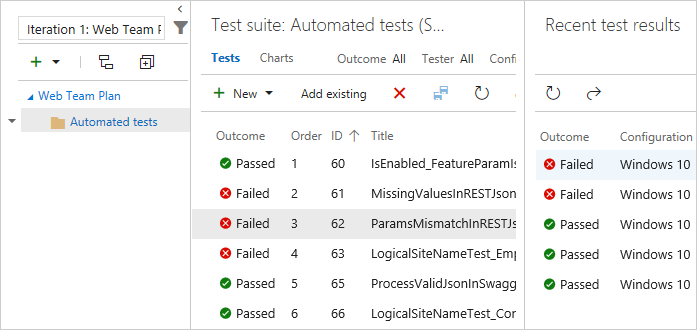
In the Test Plans web portal, open the test plan and select a test suite that contains the automated tests.
Select the test(s) you want to run, open the Run menu, and choose Run test.
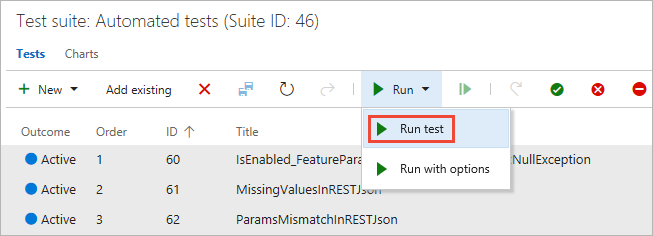
The test binaries for these tests must be available in the build artifacts generated by your build pipeline.
Choose OK to start the testing process. The system checks that only automated tests are selected (any manual tests are ignored), validates the stage to ensure the Visual Studio Test task is present and has valid settings, checks the user's permission to create a release for the selected release pipeline, creates a test run, and then triggers the creation of a release to the selected stage.
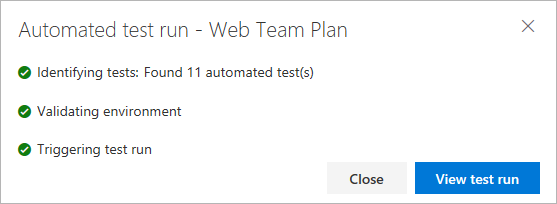
Choose View test run to view the test progress and analyze the failed tests. Test results have the relevant information for debugging failed tests such as the error message, stack trace, console logs, and attachments.
After test execution is complete, the Runs page of the Azure Test Plans shows the test results. The Run summary page shows an overview of the run.
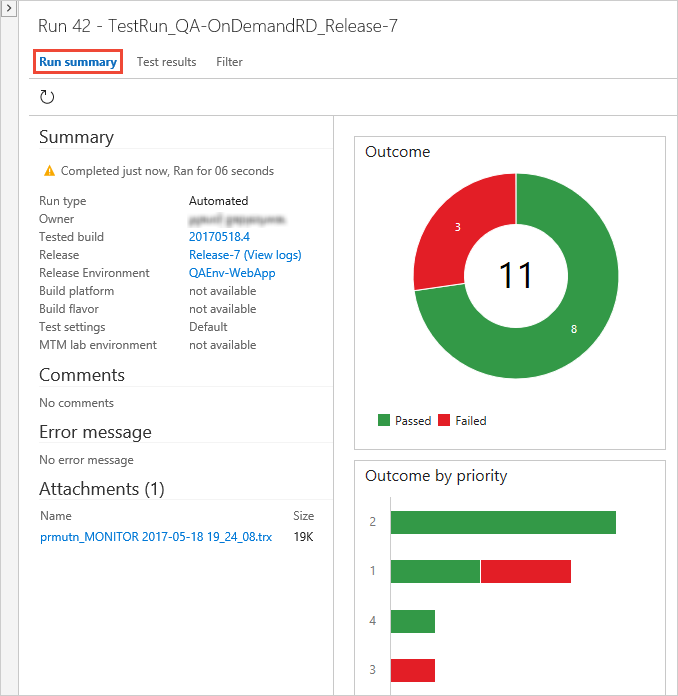
There is a link to the Release used to run the tests, which makes it easy to find the release that ran the tests if you need to come back later and analyze the results. Also use this link if you want to open the release to view the release logs.
Note : Manually attaching of files is not supported for automated test results.
What are the typical error scenarios or issues I should look out for if my tests don't run?
The Test results page lists the results for each test in the test run. Select a test to see debugging information for failed tests such as the error message, stack trace, console logs, and attachments.

Open the Test Plans page and select the test plan to see the status of your tests if tests are updated after test execution is complete. Select a test to see the recent test results.
FAQ
Q: What permissions do I need to run automated tests from Azure Test Plans?
You must be a Project Contributor, or have the following permissions:
- Create releases
- Manage releases
- Edit release stage
- Manage deployment
For more information, see Set permissions for release pipelines and Release permissions.
Q: Can I override the build or stage set at the test plan level for a specific instance of test run?
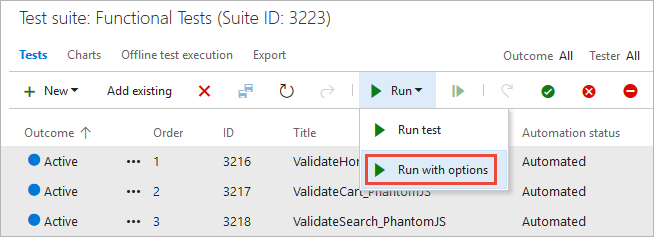
A: Yes, you can do this using the Run with options command. Open the shortcut menu for the test suite in the left column and choose Run with options.
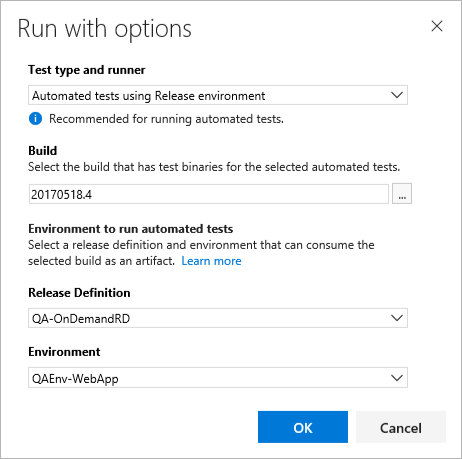
Enter the following values in the Run with options dialog and then choose OK:
Test type and runner: Select Automated tests using Release Stage.
Build: Select the build that has the test binaries. The test results will be associated this build.
Release Pipeline: Select a pipeline from the list of release pipelines that can consume the selected build artifact.
Release Stage: Select the name of the stage configured in your release pipeline.
Q: Why use release stages to run tests?
A: Azure Pipelines offers a compelling orchestration workflow to obtain test binaries as artifacts and run tests. This workflow shares the same concepts used in the scheduled testing workflow, meaning users running tests in scheduled workflow will find it easy to adapt; for example, by cloning an existing scheduled testing release pipeline.
Another major benefit is the availability of a rich set of tasks in the task catalog that enable a range of activities to be performed before and after running tests. Examples include preparing and cleaning test data, creating and cleaning configuration files, and more.
Q: How does selecting "Test run" in the Visual Studio Test task version 2 work?
A: The Test management sub-system uses the test run object to pass the list of tests selected for execution. The test task looks up the test run identifier, extracts the test execution information such as the container and test method names, runs the tests, updates the test run results, and sets the test points associated with the test results in the test run. From an auditing perspective, the Visual Studio task provides a trace from the historical releases and the test run identifiers to the tests that were submitted for on-demand test execution.
Q: Should the agent run in interactive mode or as a service?
A: If you are running UI tests such as coded UI or Selenium tests, the agent on the test machines must be running in interactive mode with auto-logon enabled, not as a service, to allow the agent to launch a web browser. If you are using a headless browser such as PhantomJS, the agent can be run as a service or in interactive mode. See Build and release agents, Deploy an agent on Windows, and Agent pools.
Q: Where can I find detailed documentation on how to run Selenium tests?
A: See Get started with Selenium testing.
Q: What happens if I select multiple configurations for the same test?
A: Currently, the on-demand workflow is not configuration-aware.
Q: What if I need to download product binaries and test binaries from different builds? Or if I need to obtain artifacts from a source such as Jenkins?
A: The current capability is optimized for a single team build to be tested on-demand using an Azure Pipelines workflow. We will evaluate support for multi-artifact releases, including non-Azure Pipelines artifacts such as Jenkins, based on user feedback.
Q: I already have a scheduled testing release pipeline. Can I reuse the same pipeline to run test on-demand, or should I create a new pipeline as shown above?
A: We recommend you use a separate release pipeline and stage for on-demand automated testing from Azure Test Plans because:
You may not want to deploy the app every time you want to run a few on-demand tests. Scheduled testing stages are typically set up to deploy the product and then run tests.
New releases are triggered for every on-demand run. If you have many testers executing a few on-demand test runs every day, your scheduled testing release pipeline could be overloaded with releases for these runs, making it difficult to find releases that were triggered for the pipeline that contains scheduled testing and deployment to production.
You may want to configure the Visual Studio Test task with a Test run identifier as an input so that you can trace what triggered the release. See How does selecting "Test run (for on-demand runs)" in the Visual Studio Test task work?.
Q: Can I trigger these runs and view the results in Microsoft Test Manager?
A: No. Microsoft Test Manager will not support running automated tests against Team Foundation builds. It only works in the web-based interface for Azure Pipelines and TFS. All new manual and automated testing product development investments will be in the web-based interface. No further development is planned for Microsoft Test Manager. See Guidance on Microsoft Test Manager usage.
Q: I have multiple testers in my team. Can they run tests from different test suites or test plans in parallel using the same release pipeline?
A: They can use the same release pipeline to trigger multiple test runs in parallel if:
The agent pool associated with the stage has sufficient agents to cater for parallel requests. If sufficient agents are not available, runs can still be triggered but releases will be queued for processing until agents are available.
You have sufficient jobs to enable parallel jobs. See Parallel jobs in Azure Pipelines or Parallel jobs in TFS for more information.
Testers do not run the same tests in parallel. Doing so may cause results to be overwritten depending on the order of execution.
To enable multiple different test runs to execute in parallel, set the Azure Pipelines stage trigger option for behavior when multiple releases are waiting to be deployed as follows:
If your application supports tests running in parallel from different sources, set this option to Allow multiple releases to be deployed at the same time.
If your application does not support tests running in parallel from different sources, set this option to Allow only one active deployment at a time.
Q: How do I pass parameters to my test code from a build or release pipeline?
A: Use a runsettings file to pass values as parameters to your test code. For example, in a release that contains several stages, you can pass the appropriate app URL to each the test tasks in each one. The runsettings file and matching parameters must be specified in the Visual Studio Test task.
Q: What are the typical error scenarios or issues I should look out for if my tests don't run?
A: Check and resolve issues as follows:
The release pipeline and stage in which I want to run tests are not shown after I select the build.
- Make sure the build pipeline that is generating the build is linked as the primary artifact in the Artifacts tab of the release pipeline.
I get an error that I don't have sufficient permission to trigger a release.
- Configure Create releases and Manage deployments permissions for the user in the Security menu of the release pipeline. See Release permissions.
I get an error that no automated tests were found.
- Check the automation status of the selected tests. Do this in the work item for the test case, or use the Column options link in Azure Test Plans to add the Automation status column to the list of tests. See the pre-requisites section for information about automating manual tests.
My tests didn't execute, and I suspect the release pipeline is incorrect.
- Use the link in the Run summary page to access the release instance used to run the tests, and view the release logs.
My tests go into the error state, or remain "in-progress" even after release to the stage is triggered.
- Check if the release stage that you selected has the correct task and version selected. You must use version 2 or higher of the Visual Studio Test task. Version 1 of the task, and the Run Functional Tests task, are not supported.