How to configure Postman for Azure Digital Twins
Important
A new version of the Azure Digital Twins service has been released. In light of the new service's expanded capabilities, the original Azure Digital Twins service (described in this documentation set) has been retired.
To view the documentation for the new service, visit the active Azure Digital Twins Documentation.
This article describes how to configure the Postman REST client to interact with and test the Azure Digital Twins Management APIs. Specifically, it describes:
- How to configure an Azure Active Directory application to use the OAuth 2.0 implicit grant flow.
- How to use the Postman REST client to make token-bearing HTTP requests to your Management APIs.
- How to use Postman to make multipart POST requests to your Management APIs.
Postman summary
Get started on Azure Digital Twins by using a REST client tool such as Postman to prepare your local testing environment. The Postman client helps to quickly create complex HTTP requests. Download the desktop version of the Postman client by going to www.getpostman.com/apps.
Postman is a REST testing tool that locates key HTTP request functionalities into a useful desktop and plugin-based GUI.
Through the Postman client, solutions developers can specify the kind of HTTP request (POST, GET, UPDATE, PATCH, and DELETE), API endpoint to call, and use of TLS. Postman also supports adding HTTP request headers, parameters, form-data, and bodies.
Configure Azure Active Directory to use the OAuth 2.0 implicit grant flow
Follow the steps in the Quickstart to create and configure an Azure Active Directory application. Alternatively, you can reuse an existing app registration.
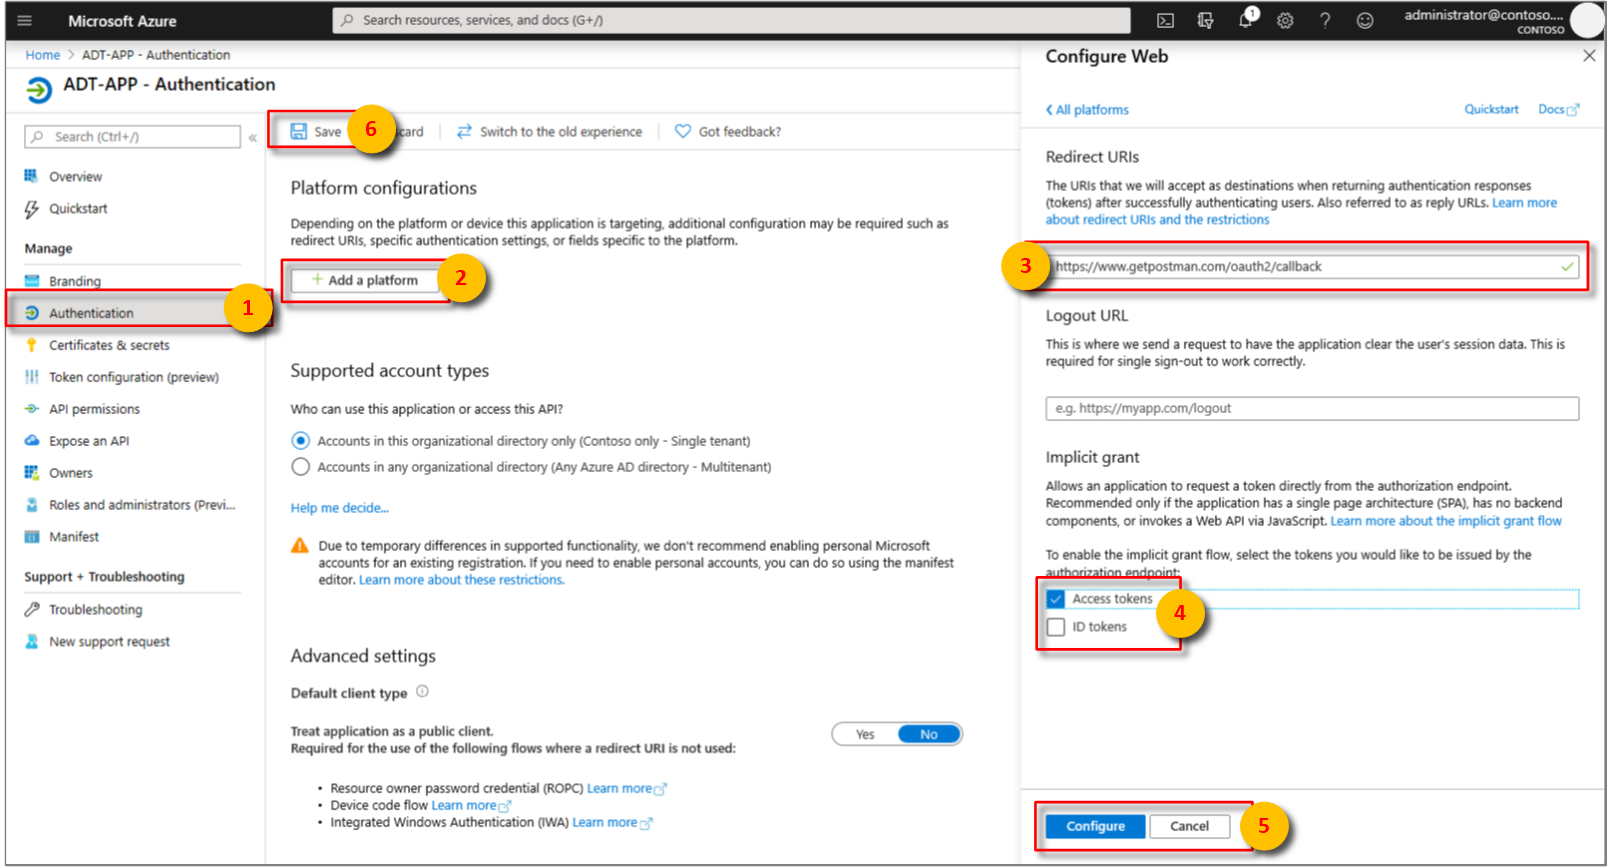
Now, add a Redirect URI to
https://www.getpostman.com/oauth2/callback.Select the Implicit grant > Access tokens check box to allow the OAuth 2.0 implicit grant flow to be used. Select Configure, then Save.
Copy the Client ID of your Azure Active Directory app.

Obtain an OAuth 2.0 token
In the examples below, YOUR_MANAGEMENT_API_URL refers to the URI of the Digital Twins APIs:
https://YOUR_INSTANCE_NAME.YOUR_LOCATION.azuresmartspaces.net/management/api/v1.0
| Name | Replace with |
|---|---|
| YOUR_INSTANCE_NAME | The name of your Azure Digital Twins instance |
| YOUR_LOCATION | The region your instance is hosted on |
Set up and configure Postman to obtain an Azure Active Directory token. Afterwards, make an authenticated HTTP request to Azure Digital Twins using the acquired token:
Verify that your Authorization URL is correct. It should take the format:
https://login.microsoftonline.com/YOUR_AZURE_TENANT.onmicrosoft.com/oauth2/authorize?resource=0b07f429-9f4b-4714-9392-cc5e8e80c8b0Name Replace with Example YOUR_AZURE_TENANT The name of your tenant or organization. Use the human-friendly name instead of the alphanumeric Tenant ID of your Azure Active Directory app registration. microsoftGo to www.getpostman.com to download the app.
We want to make GET request. Select the Authorization tab, select OAuth 2.0, and then select Get New Access Token.
Field Value Grant Type ImplicitCallback URL https://www.getpostman.com/oauth2/callbackAuth URL Use the Authorization URL from step 1 Client ID Use the Application ID for the Azure Active Directory app that was created or reused from the previous section Scope Leave blank State Leave blank Client Authentication Send as Basic Auth headerThe client should now appear as:
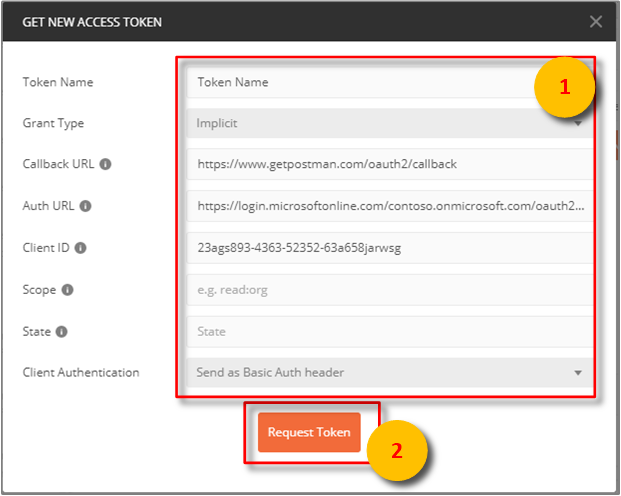
Select Request Token.
Scroll down, and select Use Token.

Make a multipart POST request
After completing the previous steps, configure Postman to make an authenticated HTTP multipart POST request:
Under the Headers tab, add an HTTP request header key Content-Type with value
multipart/mixed.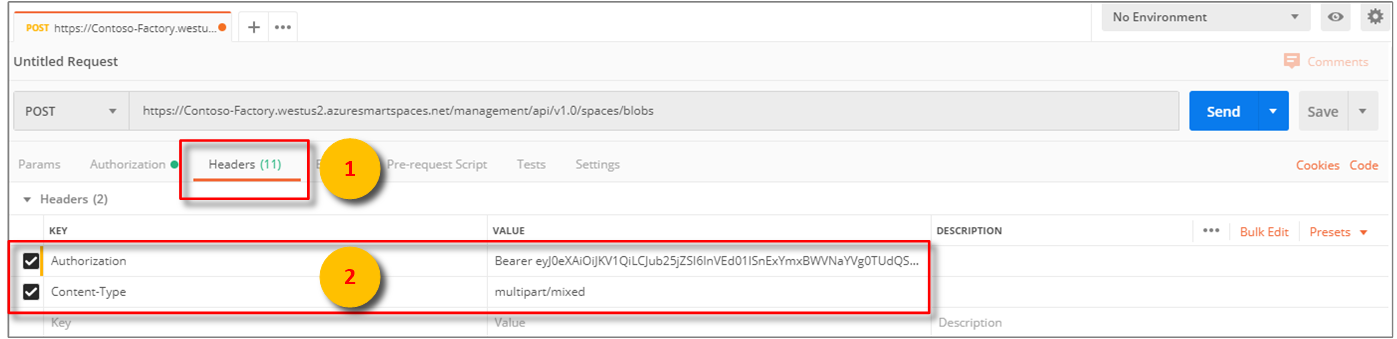
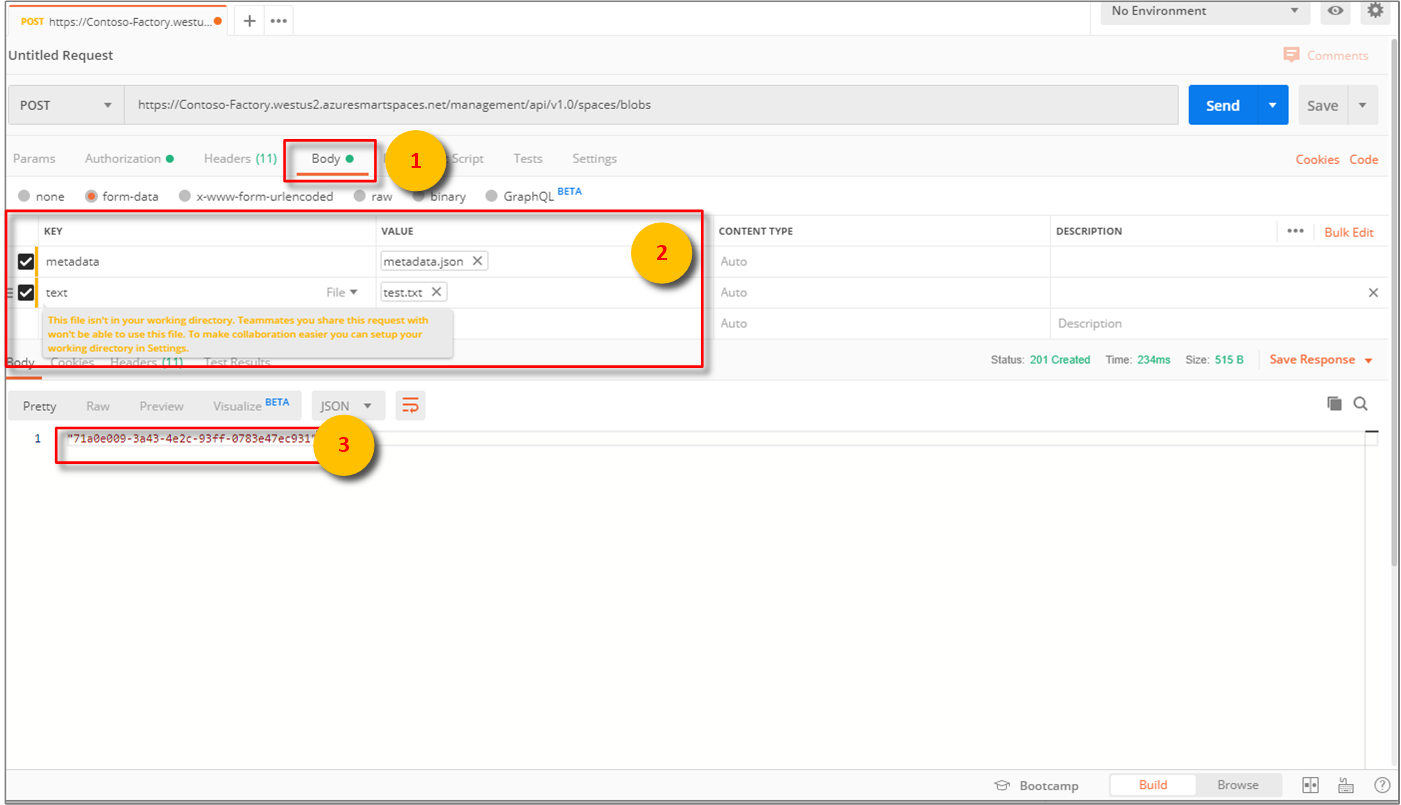
Serialize non-text data into files. JSON data would be saved as a JSON file.
Under the Body tab, select
form-data.Add each file by assigning a key name, selecting
File.Then, select each file through the Choose File button.
Note
- The Postman client does not require that multipart chunks have a manually assigned Content-Type or Content-Disposition.
- You do not need to specify those headers for each part.
- You must select
multipart/mixedor another appropriate Content-Type for the entire request.
Lastly, select Send to submit your multipart HTTP POST request. A status code of
200or201indicates a successful request. The appropriate response message will appear in the client interface.Validate your HTTP POST request data by calling the API endpoint:
YOUR_MANAGEMENT_API_URL/spaces/blobs?includes=description


Next steps
To learn about the Digital Twins management APIs, and how to use them, read How to use Azure Digital Twins management APIs.
Use multipart requests to add blobs to Azure Digital Twins' entities.
To learn about authenticating with the Management APIs, read Authenticate with APIs.