Note
Access to this page requires authorization. You can try signing in or changing directories.
Access to this page requires authorization. You can try changing directories.
Scenario overview
In this scenario, you create a device that sends the following telemetry to the remote monitoring preconfigured solution:
- External temperature
- Internal temperature
- Humidity
For simplicity, the code on the device generates sample values, but we encourage you to extend the sample by connecting real sensors to your device and sending real telemetry.
The device is also able to respond to methods invoked from the solution dashboard and desired property values set in the solution dashboard.
To complete this tutorial, you need an active Azure account. If you don't have an account, you can create a free trial account in just a couple of minutes. For details, see Azure Free Trial.
Before you start
Before you write any code for your device, you must provision your remote monitoring preconfigured solution and provision a new custom device in that solution.
Provision your remote monitoring preconfigured solution
The device you create in this tutorial sends data to an instance of the remote monitoring preconfigured solution. If you haven't already provisioned the remote monitoring preconfigured solution in your Azure account, use the following steps:
- On the https://www.azureiotsolutions.com/ page, click + to create a solution.
- Click Select on the Remote monitoring panel to create your solution.
- On the Create Remote monitoring solution page, enter a Solution name of your choice, select the Region you want to deploy to, and select the Azure subscription to want to use. Then click Create solution.
- Wait until the provisioning process completes.
Warning
The preconfigured solutions use billable Azure services. Be sure to remove the preconfigured solution from your subscription when you are done with it to avoid any unnecessary charges. You can completely remove a preconfigured solution from your subscription by visiting the https://www.azureiotsolutions.com/ page.
When the provisioning process for the remote monitoring solution finishes, click Launch to open the solution dashboard in your browser.
Provision your device in the remote monitoring solution
Note
If you have already provisioned a device in your solution, you can skip this step. You need to know the device credentials when you create the client application.
For a device to connect to the preconfigured solution, it must identify itself to IoT Hub using valid credentials. You can retrieve the device credentials from the solution dashboard. You include the device credentials in your client application later in this tutorial.
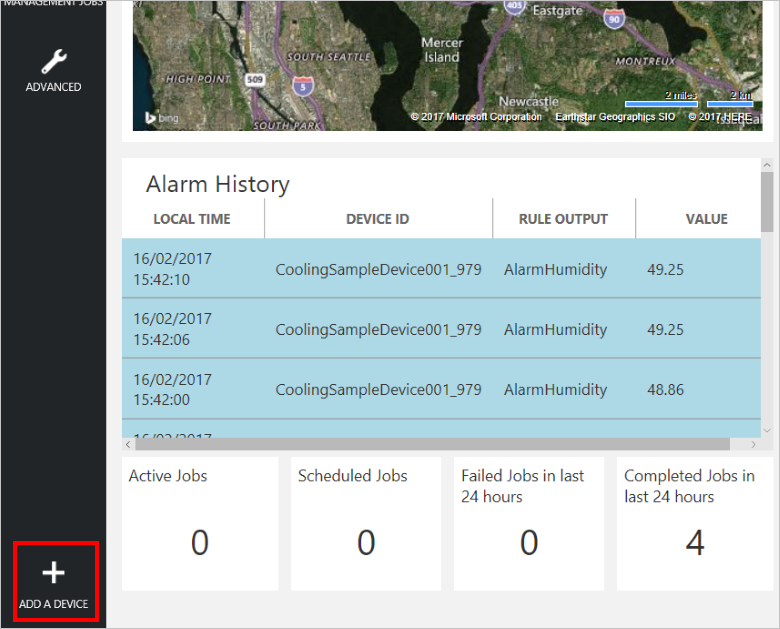
To add a device to your remote monitoring solution, complete the following steps in the solution dashboard:
In the lower left-hand corner of the dashboard, click Add a device.
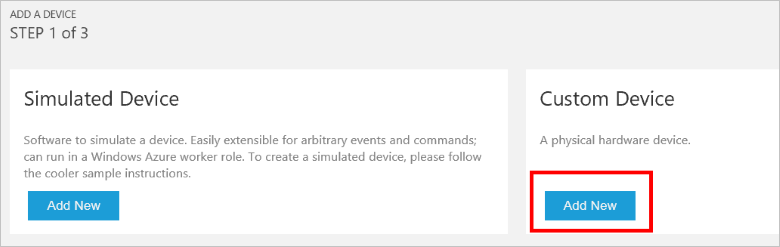
In the Custom Device panel, click Add new.
Choose Let me define my own Device ID. Enter a Device ID such as mydevice, click Check ID to verify that name isn't already in use, and then click Create to provision the device.
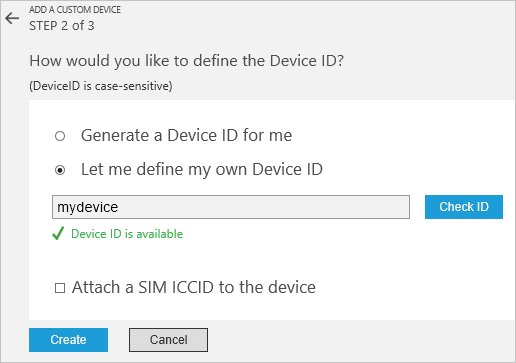
Make a note the device credentials (Device ID, IoT Hub Hostname, and Device Key). Your client application needs these values to connect to the remote monitoring solution. Then click Done.

Select your device in the device list in the solution dashboard. Then, in the Device Details panel, click Enable Device. The status of your device is now Running. The remote monitoring solution can now receive telemetry from your device and invoke methods on the device.
Create a node.js sample solution
Ensure that Node.js version 0.11.5 or later is installed on your development machine. You can run node --version at the command line to check the version.
Create a folder called RemoteMonitoring on your development machine. Navigate to this folder in your command-line environment.
Run the following commands to download and install the packages you need to complete the sample app:
npm init
npm install azure-iot-device azure-iot-device-mqtt --save
In the RemoteMonitoring folder, create a file called remote_monitoring.js. Open this file in a text editor.
In the remote_monitoring.js file, add the following
requirestatements:'use strict'; var Protocol = require('azure-iot-device-mqtt').Mqtt; var Client = require('azure-iot-device').Client; var ConnectionString = require('azure-iot-device').ConnectionString; var Message = require('azure-iot-device').Message;Add the following variable declarations after the
requirestatements. Replace the placeholder values [Device Id] and [Device Key] with values you noted for your device in the remote monitoring solution dashboard. Use the IoT Hub Hostname from the solution dashboard to replace [IoTHub Name]. For example, if your IoT Hub Hostname is contoso.azure-devices.net, replace [IoTHub Name] with contoso:var connectionString = 'HostName=[IoTHub Name].azure-devices.net;DeviceId=[Device Id];SharedAccessKey=[Device Key]'; var deviceId = ConnectionString.parse(connectionString).DeviceId;Add the following variables to define some base telemetry data:
var temperature = 50;
var humidity = 50;
var externalTemperature = 55;
Add the following helper function to print operation results:
function printErrorFor(op) {
    return function printError(err) {
        if (err) console.log(op + ' error: ' + err.toString());
    };
}
Add the following helper function to use to randomize the telemetry values:
function generateRandomIncrement() {
    return ((Math.random() * 2) - 1);
}
Add the following definition for the DeviceInfo object the device sends on startup:
var deviceMetaData = {
    'ObjectType': 'DeviceInfo',
    'IsSimulatedDevice': 0,
    'Version': '1.0',
    'DeviceProperties': {
        'DeviceID': deviceId,
        'HubEnabledState': 1
    }
};
Add the following definition for the device twin reported values. This definition includes descriptions of the direct methods the device supports:
var reportedProperties = {
    "Device": {
        "DeviceState": "normal",
        "Location": {
            "Latitude": 47.642877,
            "Longitude": -122.125497
        }
    },
    "Config": {
        "TemperatureMeanValue": 56.7,
        "TelemetryInterval": 45
    },
    "System": {
        "Manufacturer": "Contoso Inc.",
        "FirmwareVersion": "2.22",
        "InstalledRAM": "8 MB",
        "ModelNumber": "DB-14",
        "Platform": "Plat 9.75",
        "Processor": "i3-9",
        "SerialNumber": "SER99"
    },
    "Location": {
        "Latitude": 47.642877,
        "Longitude": -122.125497
    },
    "SupportedMethods": {
        "Reboot": "Reboot the device",
        "InitiateFirmwareUpdate--FwPackageURI-string": "Updates device Firmware. Use parameter FwPackageURI to specifiy the URI of the firmware file"
    },
}
Add the following function to handle the Reboot direct method call:
function onReboot(request, response) {
    // Implement actual logic here.
    console.log('Simulated reboot...');

    // Complete the response
    response.send(200, "Rebooting device", function(err) {
        if(!!err) {
            console.error('An error occurred when sending a method response:\n' + err.toString());
        } else {
            console.log('Response to method \'' + request.methodName + '\' sent successfully.' );
        }
    });
}
Add the following function to handle the InitiateFirmwareUpdate direct method call. This direct method uses a parameter to specify the location of the firmware image to download, and initiates the firmware update on the device asynchronously:
function onInitiateFirmwareUpdate(request, response) {
    console.log('Simulated firmware update initiated, using: ' + request.payload.FwPackageURI);

    // Complete the response
    response.send(200, "Firmware update initiated", function(err) {
        if(!!err) {
            console.error('An error occurred when sending a method response:\n' + err.toString());
        } else {
            console.log('Response to method \'' + request.methodName + '\' sent successfully.' );
        }
    });

    // Add logic here to perform the firmware update asynchronously
}
Add the following code to create a client instance:
var client = Client.fromConnectionString(connectionString, Protocol);Add the following code to:
- Open the connection.
- Send the DeviceInfo object.
- Set up a handler for desired properties.
- Send reported properties.
- Register handlers for the direct methods.
- Start sending telemetry.
client.open(function (err) {
    if (err) {
        printErrorFor('open')(err);
    } else {
        console.log('Sending device metadata:\n' + JSON.stringify(deviceMetaData));
        client.sendEvent(new Message(JSON.stringify(deviceMetaData)), printErrorFor('send metadata'));

        // Create device twin
        client.getTwin(function(err, twin) {
            if (err) {
                console.error('Could not get device twin');
            } else {
                console.log('Device twin created');

                twin.on('properties.desired', function(delta) {
                    console.log('Received new desired properties:');
                    console.log(JSON.stringify(delta));
                });

                // Send reported properties
                twin.properties.reported.update(reportedProperties, function(err) {
                    if (err) throw err;
                    console.log('twin state reported');
                });

                // Register handlers for direct methods
                client.onDeviceMethod('Reboot', onReboot);
                client.onDeviceMethod('InitiateFirmwareUpdate', onInitiateFirmwareUpdate);
            }
        });

        // Start sending telemetry
        var sendInterval = setInterval(function () {
            temperature += generateRandomIncrement();
            externalTemperature += generateRandomIncrement();
            humidity += generateRandomIncrement();

            var data = JSON.stringify({
                'DeviceID': deviceId,
                'Temperature': temperature,
                'Humidity': humidity,
                'ExternalTemperature': externalTemperature
            });

            console.log('Sending device event data:\n' + data);
            client.sendEvent(new Message(data), printErrorFor('send event'));
        }, 5000);

        client.on('error', function (err) {
            printErrorFor('client')(err);
            if (sendInterval) clearInterval(sendInterval);
            client.close(printErrorFor('client.close'));
        });
    }
});
Save the changes to the remote_monitoring.js file.
Run the following command at a command prompt to launch the sample application:
node remote_monitoring.js
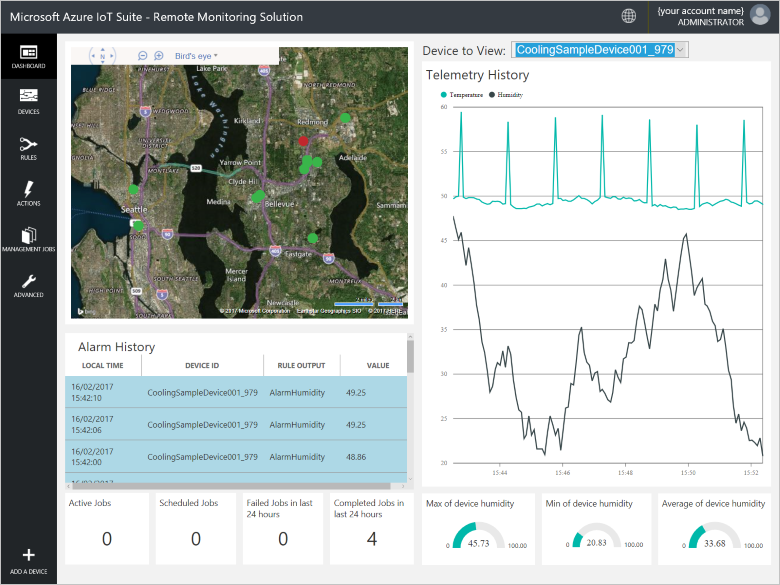
View device telemetry in the dashboard
The dashboard in the remote monitoring solution enables you to view the telemetry your devices send to IoT Hub.
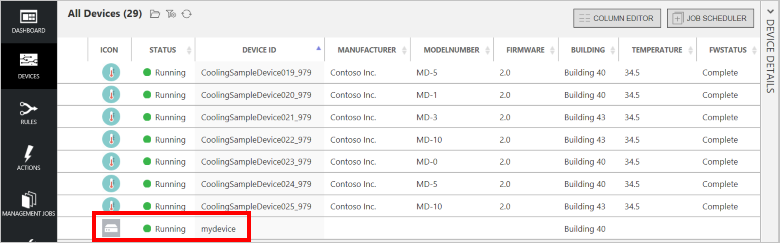
In your browser, return to the remote monitoring solution dashboard, click Devices in the left-hand panel to navigate to the Devices list.
In the Devices list, you should see that the status of your device is Running. If not, click Enable Device in the Device Details panel.
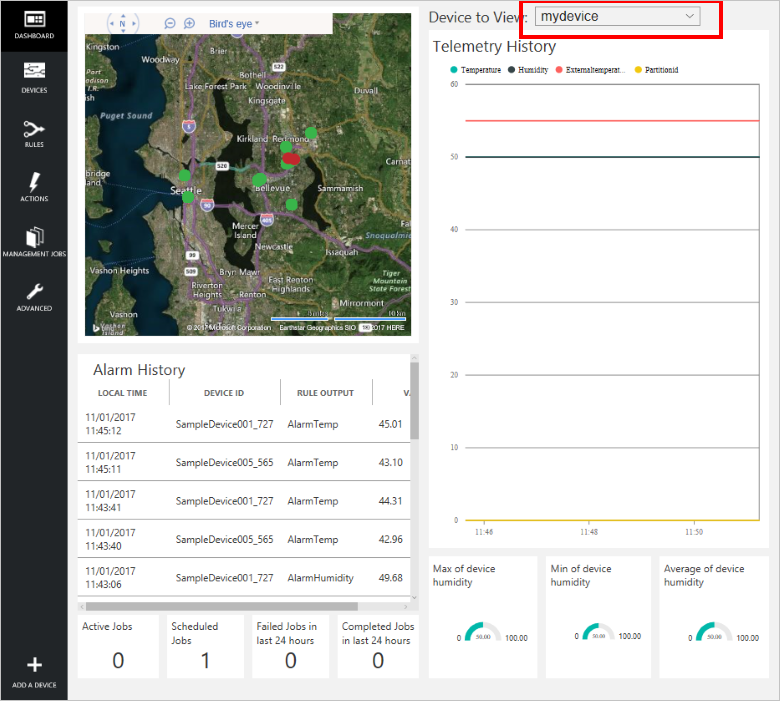
Click Dashboard to return to the dashboard, select your device in the Device to View drop-down to view its telemetry. The telemetry from the sample application is 50 units for internal temperature, 55 units for external temperature, and 50 units for humidity.
Invoke a method on your device
The dashboard in the remote monitoring solution enables you to invoke methods on your devices through IoT Hub. For example, in the remote monitoring solution you can invoke a method to simulate rebooting a device.
In the remote monitoring solution dashboard, click Devices in the left-hand panel to navigate to the Devices list.
Click Device ID for your device in the Devices list.
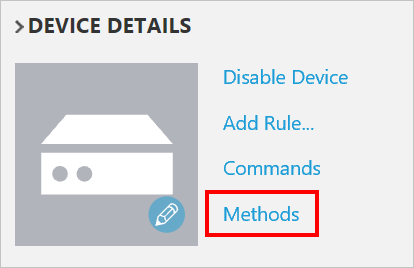
In the Device details panel, click Methods.
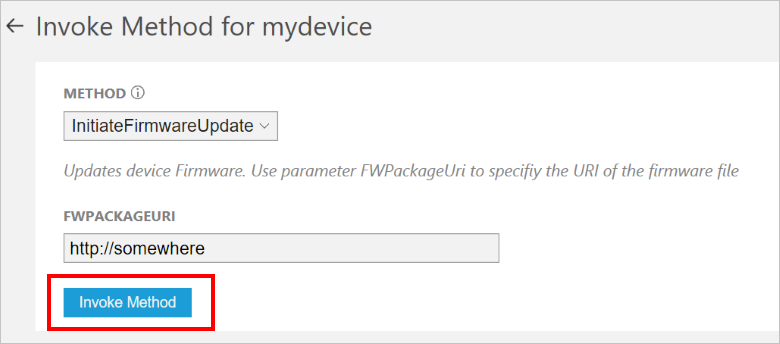
In the Method drop-down, select InitiateFirmwareUpdate, and then in FWPACKAGEURI enter a dummy URL. Click Invoke Method to call the method on the device.
You see a message in the console running your device code when the device handles the method. The results of the method are added to the history in the solution portal:

Next steps
The article Customizing preconfigured solutions describes some ways you can extend this sample. Possible extensions include using real sensors and implementing additional commands.
You can learn more about the permissions on the azureiotsuite.com site.