Configure DNS for name resolution for Private Cloud vCenter access from on-premises workstations
To access the vCenter server on a CloudSimple Private Cloud from on-premises workstations, you must configure DNS address resolution so the vCenter server can be addressed by hostname as well as by IP address.
Obtain the IP address of the DNS server for your Private Cloud
Sign in to the CloudSimple portal.
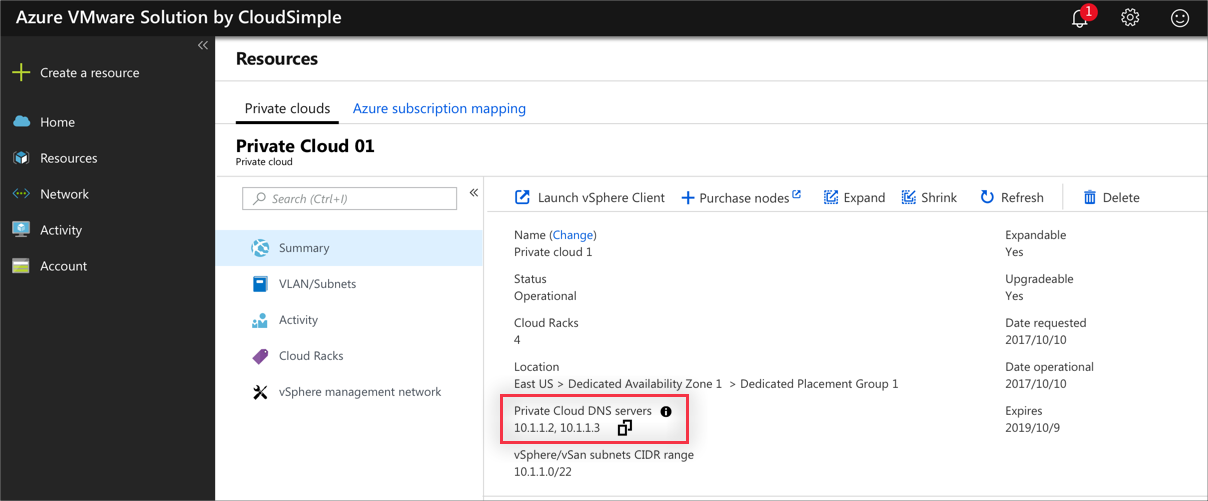
Navigate to Resources > Private Clouds and select the Private Cloud you want to connect to.
On the Summary page of the Private Cloud under Basic Info, copy the Private Cloud DNS server IP address.
Use either of these options for the DNS configuration.
- Create a zone on the DNS server for *.cloudsimple.io
- Create a conditional forwarder on your on-premises DNS server to resolve *.cloudsimple.io
Create a zone on the DNS server for *.cloudsimple.io
You can set up a zone up as a stub zone and point to the DNS servers on the Private Cloud for name resolution. This section provides information on using a BIND DNS server or a Microsoft Windows DNS server.
Create a zone on a BIND DNS server
The specific file and parameters to configure can vary based on your individual DNS setup.
For example, for the default BIND server configuration, edit the
/etc/named.conf file on your DNS server and add the following zone information.
Note
This article contains references to the term slave, a term that Microsoft no longer uses. When the term is removed from the software, we’ll remove it from this article.
zone "az.cloudsimple.io"
{
    type stub;
    masters { IP address of DNS servers; };
    file "slaves/cloudsimple.io.db";
};
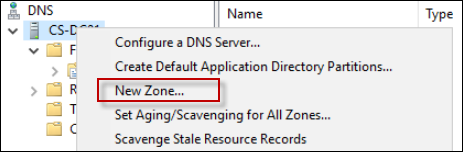
Create a zone on a Microsoft Windows DNS server
Right-click the DNS server and select New Zone.
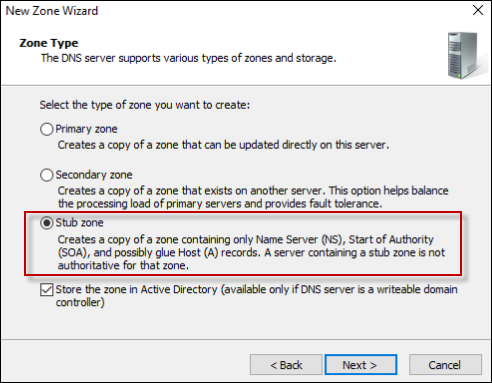
Select Stub Zone and click Next.
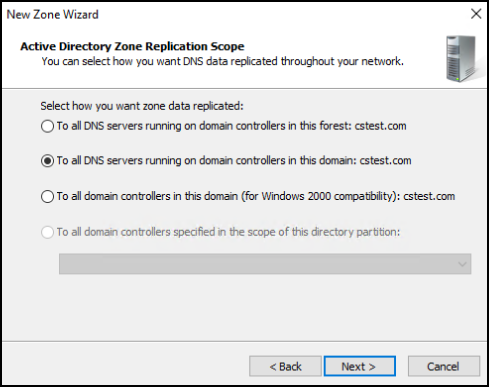
Select the appropriate option depending on your environment and click Next.
Select Forward lookup zone and click Next.
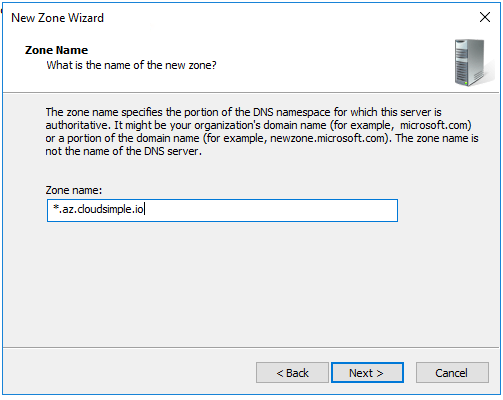
Enter the zone name and click Next.
Enter the IP addresses of the DNS servers for your Private Cloud that you obtained from the CloudSimple portal.
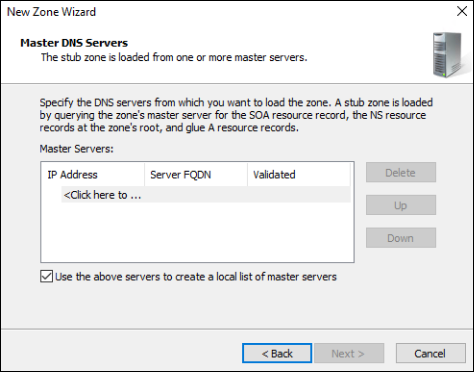
Click Next as needed to complete the wizard setup.
Create a conditional forwarder
A conditional forwarder forwards all DNS name resolution requests to the designated server. With this setup, any request to *.cloudsimple.io is forwarded to the DNS servers located on the Private Cloud. The following examples show how to set up forwarders on different types of DNS servers.
Create a conditional forwarder on a BIND DNS server
The specific file and parameters to configure can vary based on your individual DNS setup.
For example, for the default BIND server configuration, edit /etc/named.conf file on your DNS server and add the following conditional forwarding information.
zone "az.cloudsimple.io" {
    type forward;
    forwarders { IP address of DNS servers; };
};
Create a conditional forwarder on a Microsoft Windows DNS server
Open the DNS Manager on the DNS server.
Right-click Conditional Forwarders and select the option to add a new conditional forwarder.
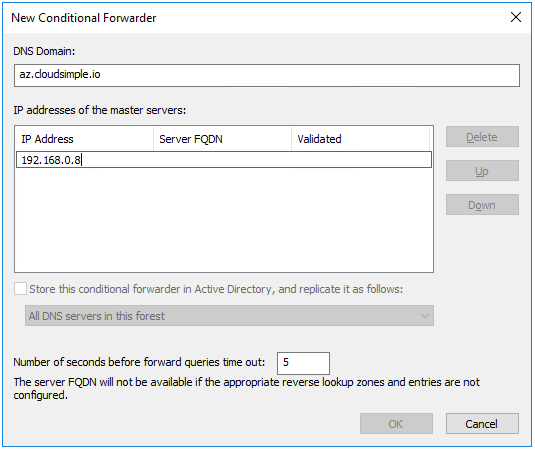
Enter the DNS domain and the IP address of the DNS servers in the Private Cloud, and click OK.