Note
Access to this page requires authorization. You can try signing in or changing directories.
Access to this page requires authorization. You can try changing directories.
In this article, learn how to create a CloudSimple Private Cloud and set up your Private Cloud environment.
Before you begin
Review Networking Prerequisites.
Sign in to Azure
Sign in to the Azure portal at https://portal.azure.com.
Create a Private Cloud
A Private Cloud is an isolated VMware stack that supports ESXi hosts, vCenter, vSAN, and NSX.
Private Clouds are managed through the CloudSimple portal. They have their own vCenter server in its own management domain. The stack runs on dedicated nodes and isolated bare metal hardware nodes.
Select All services.
Search for CloudSimple Services.
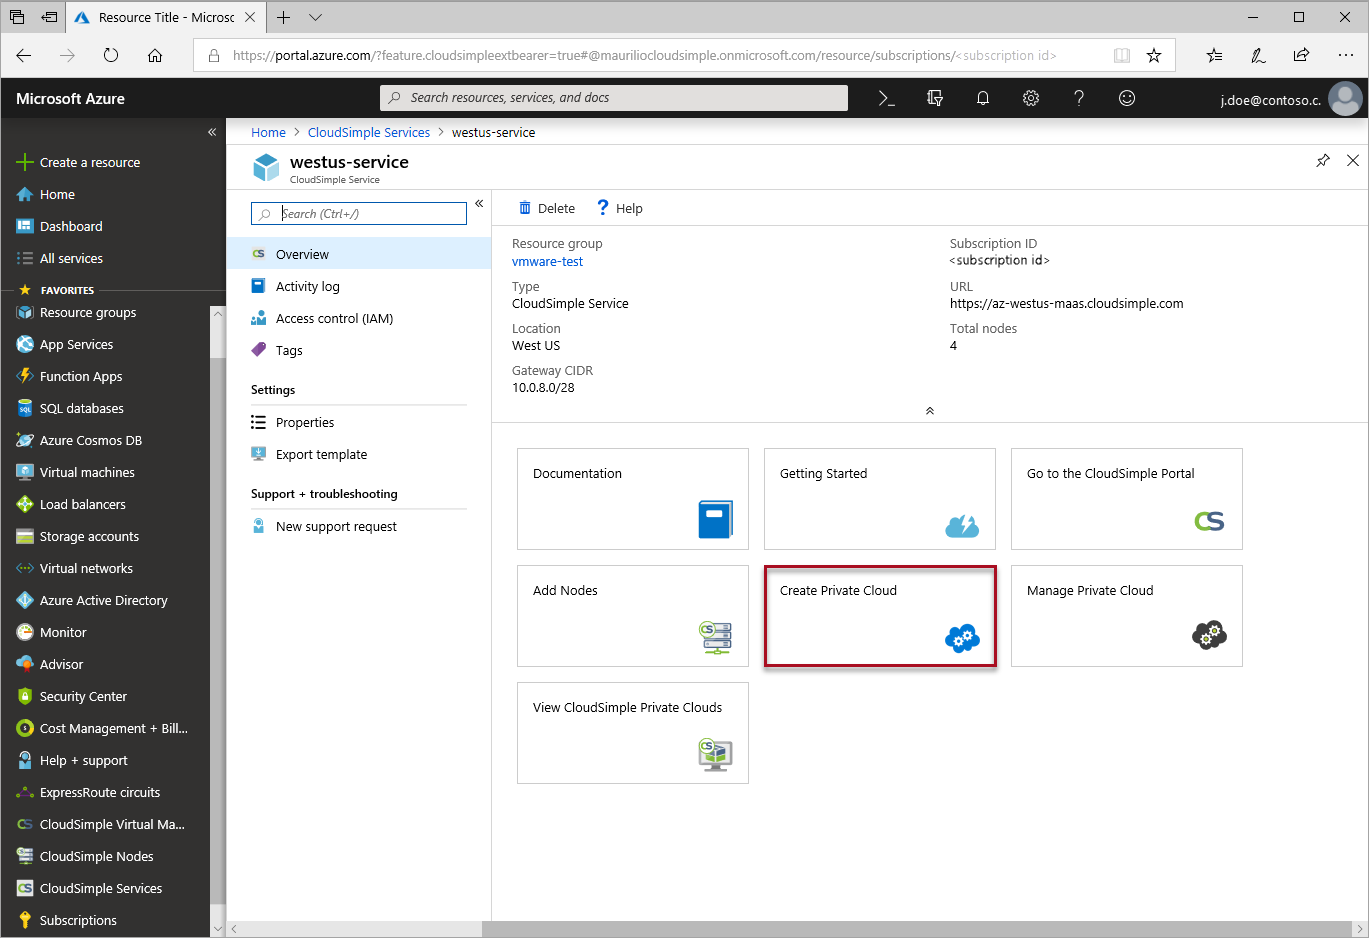
Select the CloudSimple service on which you want to create your Private Cloud.
From Overview, click Create Private Cloud to open a new browser tab for CloudSimple portal. If prompted, sign in with your Azure sign in credentials.
In the CloudSimple portal, provide a name for your Private Cloud.
Select the Location of your Private Cloud.
Select Node type, consistent with what you provisioned on Azure.
Specify Node count. At least three nodes are required to create a Private Cloud.
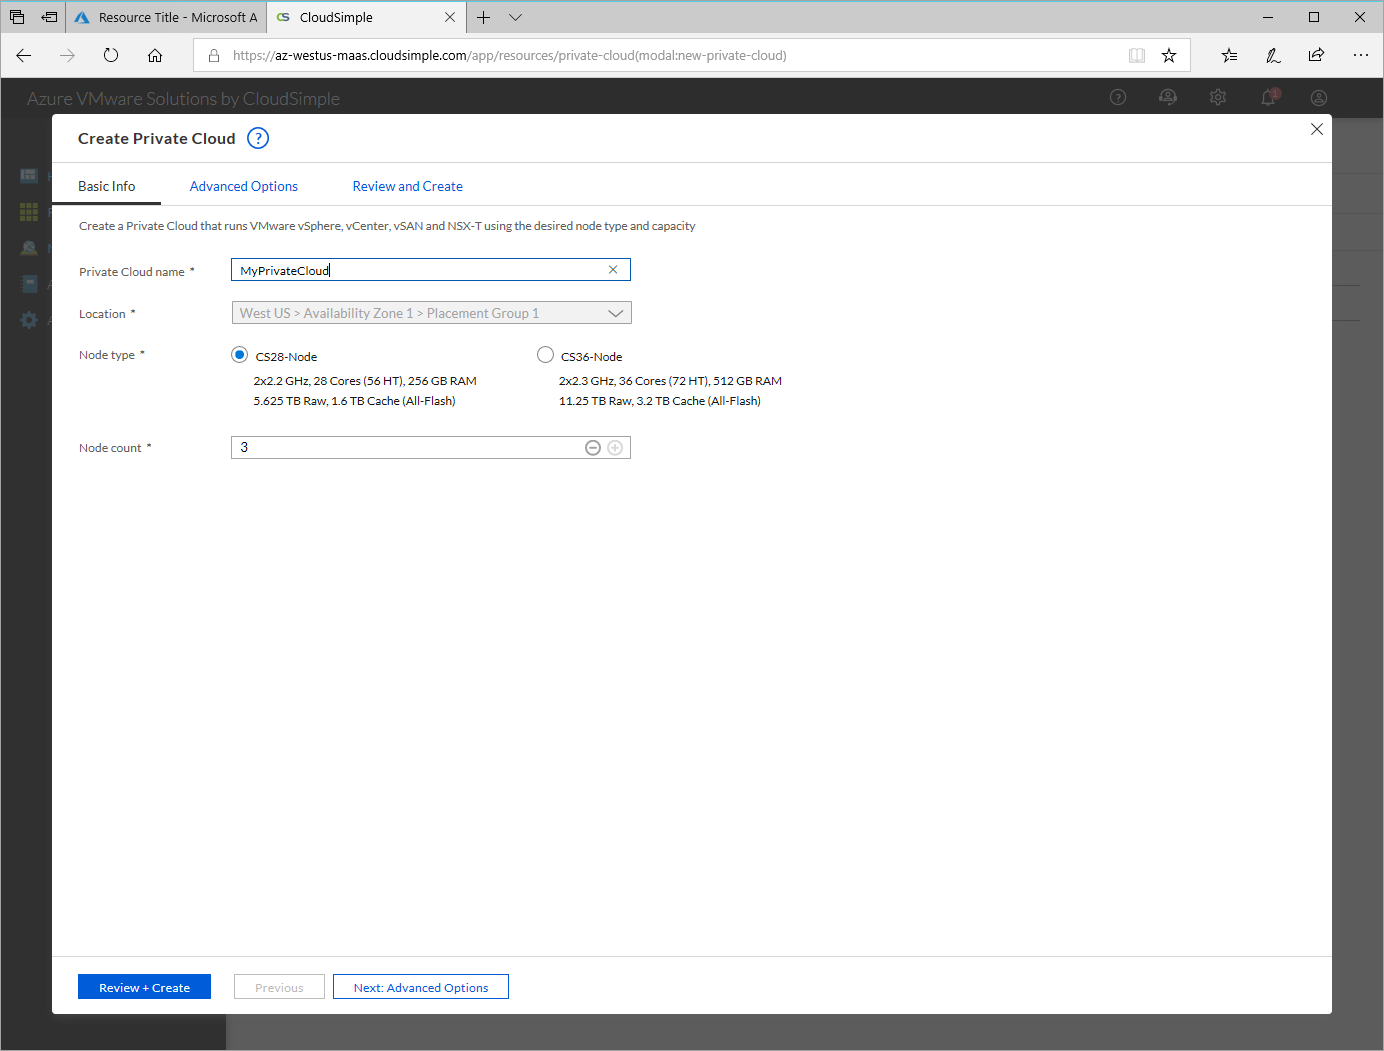
Click Next: Advanced options.
Enter the CIDR range for vSphere/vSAN subnets. Make sure that the CIDR range doesn't overlap with any of your on-premises or other Azure subnets (virtual networks) or with the gateway subnet.
CIDR range options: /24, /23, /22, or /21. A /24 CIDR range supports up to 26 nodes, a /23 CIDR range supports up to 58 nodes, and a /22 and /21 CIDR range supports 64 nodes (the maximum number of nodes in a Private Cloud). To learn more and VLANs and subnets, see VLANs and subnets overview.
Important
IP addresses in the vSphere/vSAN CIDR range are reserved for use by the Private Cloud infrastructure. Don't use the IP address in this range on any virtual machine.
Click Next: Review and create.
Review the settings. If you need to change any settings, click Previous.
Click Create.
Private Cloud provisioning process starts. It can take up to two hours for the Private Cloud to be provisioned.
Launch CloudSimple portal
You can access the CloudSimple portal from Azure portal. The CloudSimple portal will be launched with your Azure sign in credentials using Single Sign-On (SSO). Accessing the CloudSimple portal requires you to authorize the CloudSimple Service Authorization application. For more information on granting permissions, see Consent to CloudSimple Service Authorization application.
Select All services.
Search for CloudSimple Services.
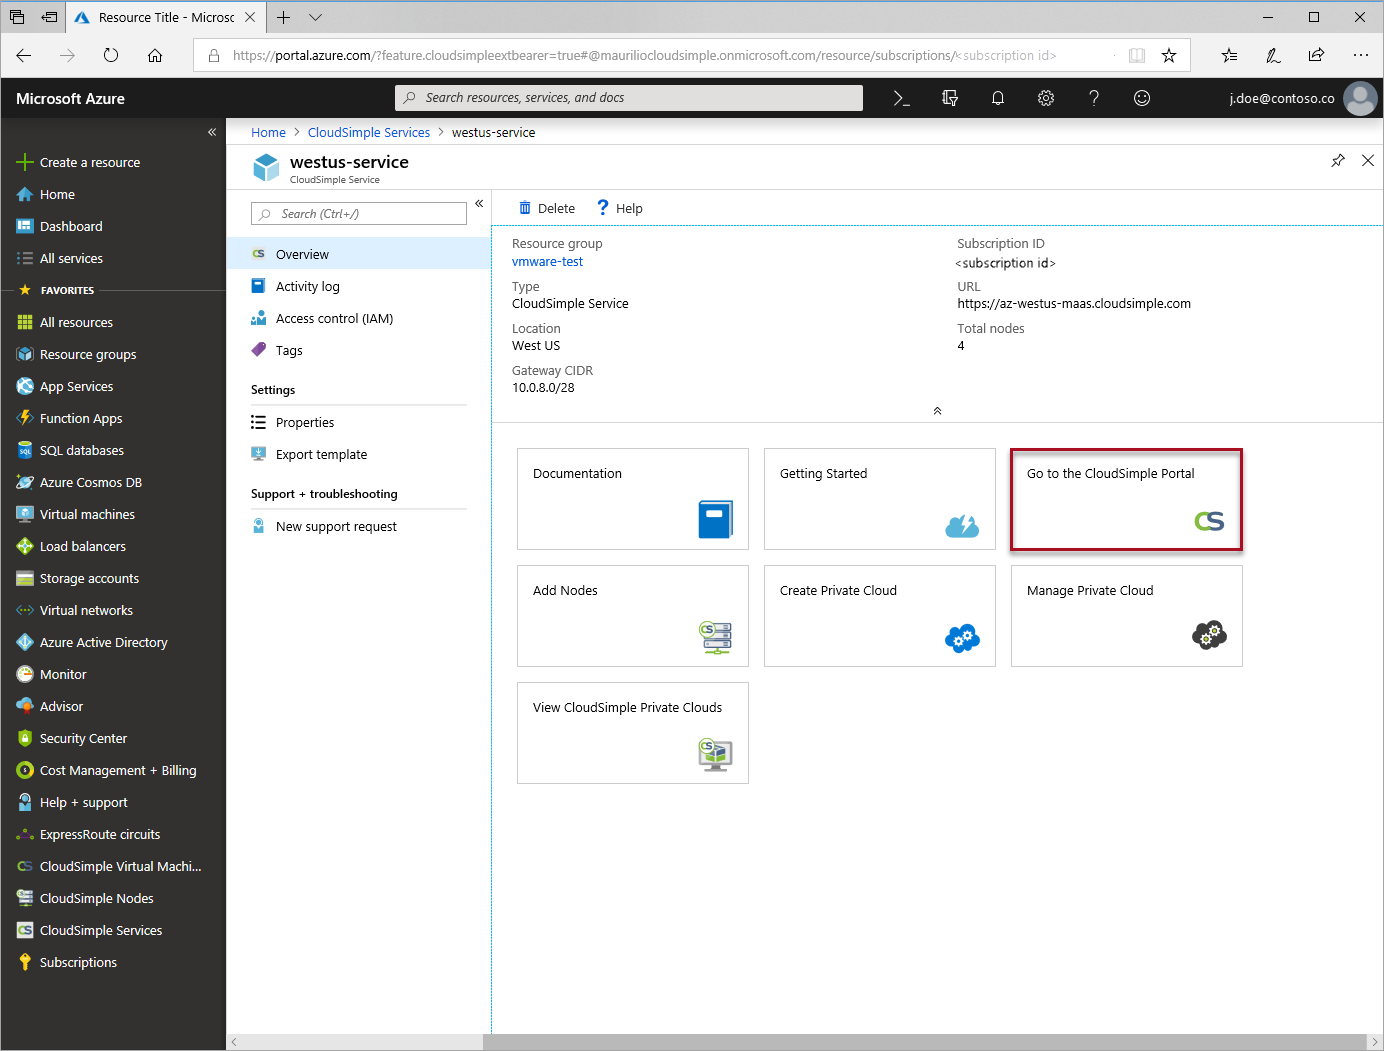
Select the CloudSimple service on which you want to create your Private Cloud.
From overview, click Go to the CloudSimple portal to open a new browser tab for CloudSimple portal. If prompted, sign in with your Azure sign in credentials.
Create Point-to-Site VPN
A Point-to-Site VPN connection is the simplest way to connect to your Private Cloud from your computer. Use Point-to-Site VPN connection if you're connecting to the Private Cloud remotely. For quick access to your Private Cloud, follow the steps below. Access to the CloudSimple region from your on-premises network can be done using Site-to-Site VPN or Azure ExpressRoute.
Create gateway
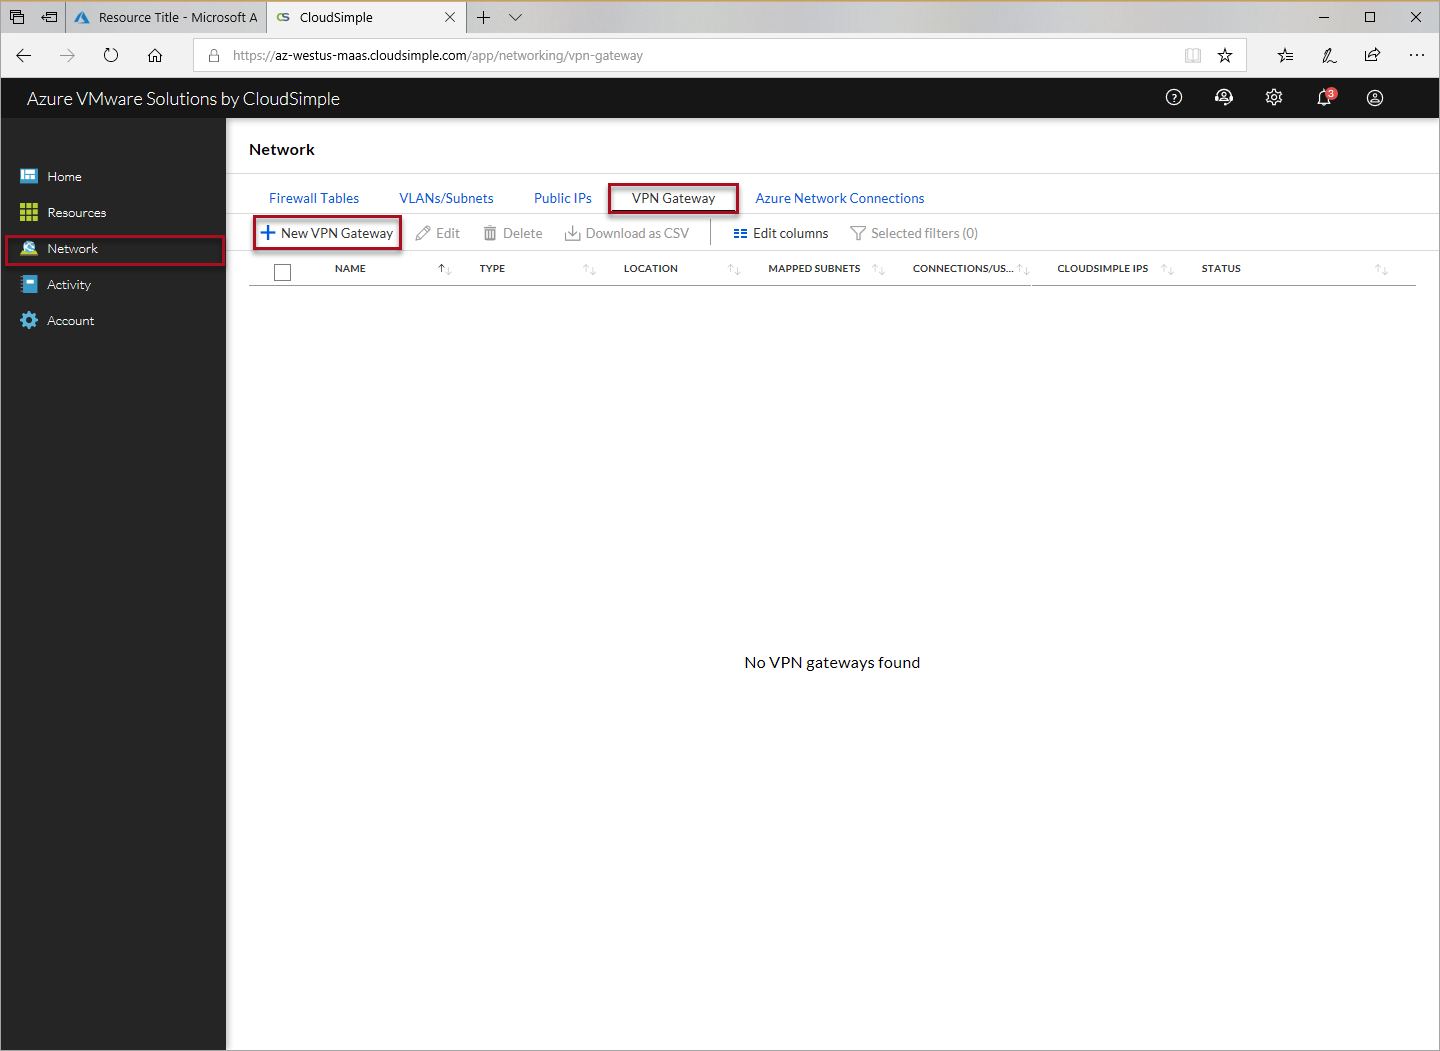
Launch CloudSimple portal and select Network.
Select VPN Gateway.
Click New VPN Gateway.
For Gateway configuration, specify the following settings and click Next.
- Select Point-to-Site VPN as the gateway type.
- Enter a name to identify the gateway.
- Select the Azure location where your CloudSimple service is deployed.
- Specify the client subnet for the Point-to-Site gateway. DHCP addresses will be given from this subnet when you connect.
For Connection/User, specify the following settings and click Next.
- To automatically allow all current and future users to access the Private Cloud through this Point-to-Site gateway, select Automatically add all users. When you select this option, all users in the User list are automatically selected. You can override the automatic option by deselecting individual users in the list.
- To select only individual users, click the check boxes in the User list.
The VLANs/Subnets section allows you to specify management and user VLANs/subnets for the gateway and connections.
- The Automatically add options set the global policy for this gateway. The settings apply to the current gateway. The settings can be overridden in the Select area.
- Select Add management VLANs/Subnets of Private Clouds.
- To add all user-defined VLANs/subnets, click Add user-defined VLANs/Subnets.
- The Select settings override the global settings under Automatically add.
Click Next to review the settings. Click the Edit icons to make any changes.
Click Create to create the VPN gateway.
Connect to CloudSimple using Point-to-Site VPN
VPN client is needed for connecting to CloudSimple from your computer. Download OpenVPN client for Windows or Viscosity for macOS and OS X.
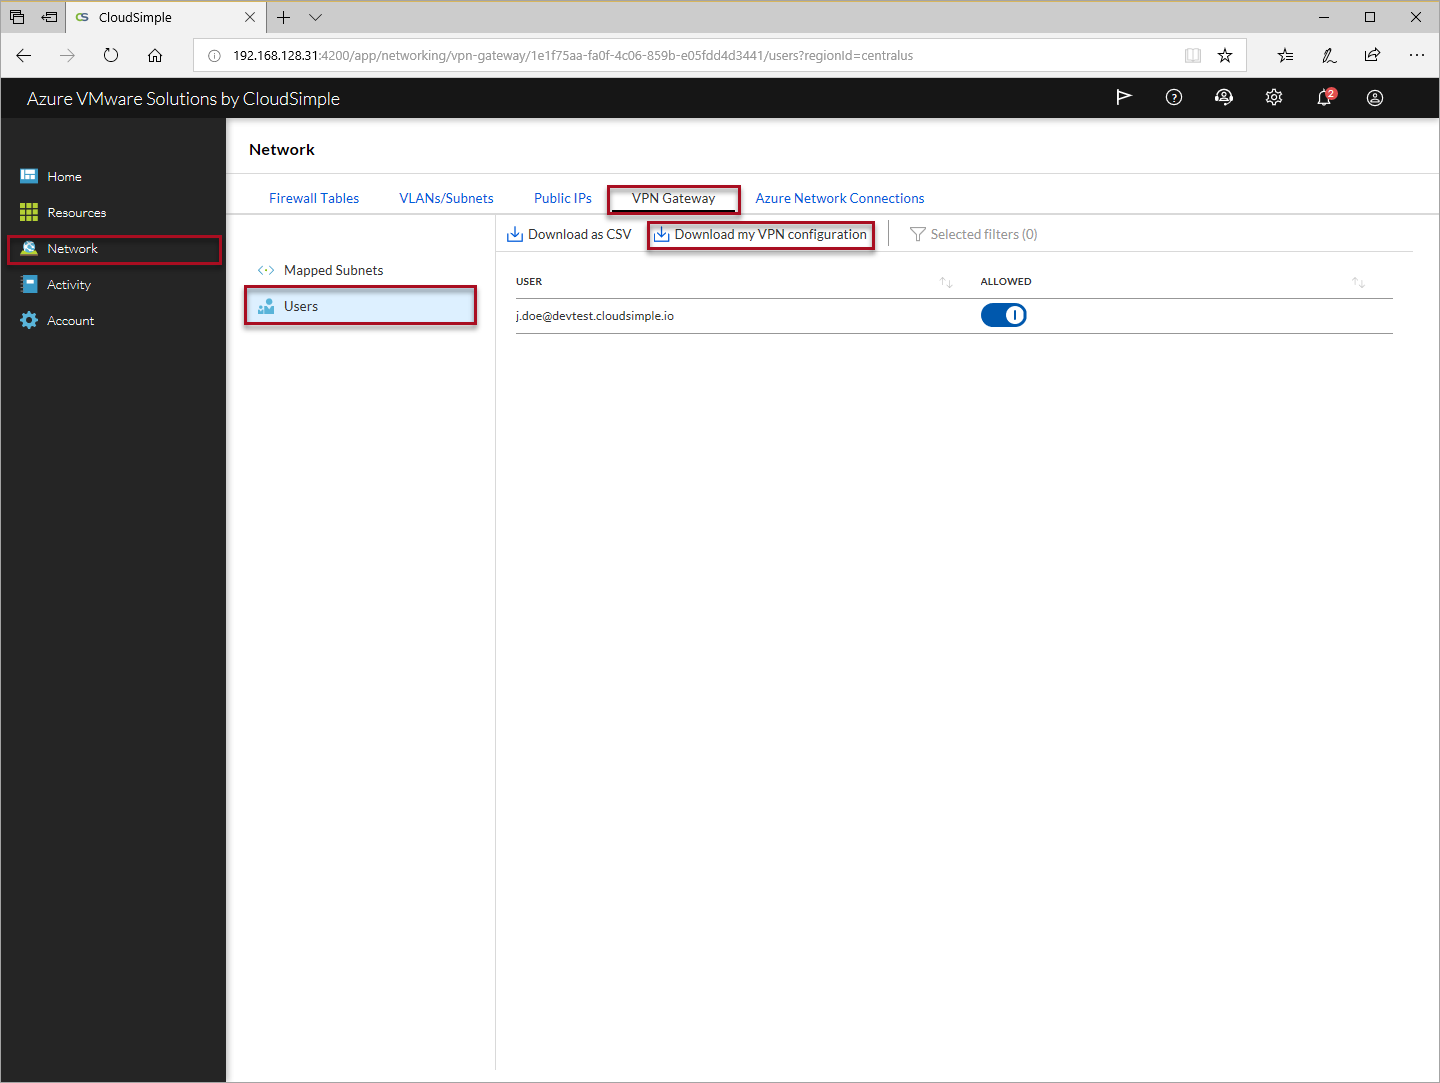
Launch CloudSimple portal and select Network.
Select VPN Gateway.
From the list of VPN gateways, click the Point-to-Site VPN gateway.
Select Users.
Click Download my VPN configuration.
Import the configuration on your VPN client.
- Instructions for importing configuration on Windows client
- Instructions for importing configuration on macOS or OS X
Connect to CloudSimple.
Create a VLAN for your workload VMs
After creating a Private Cloud, create a VLAN where you'll deploy your workload/application VMs.
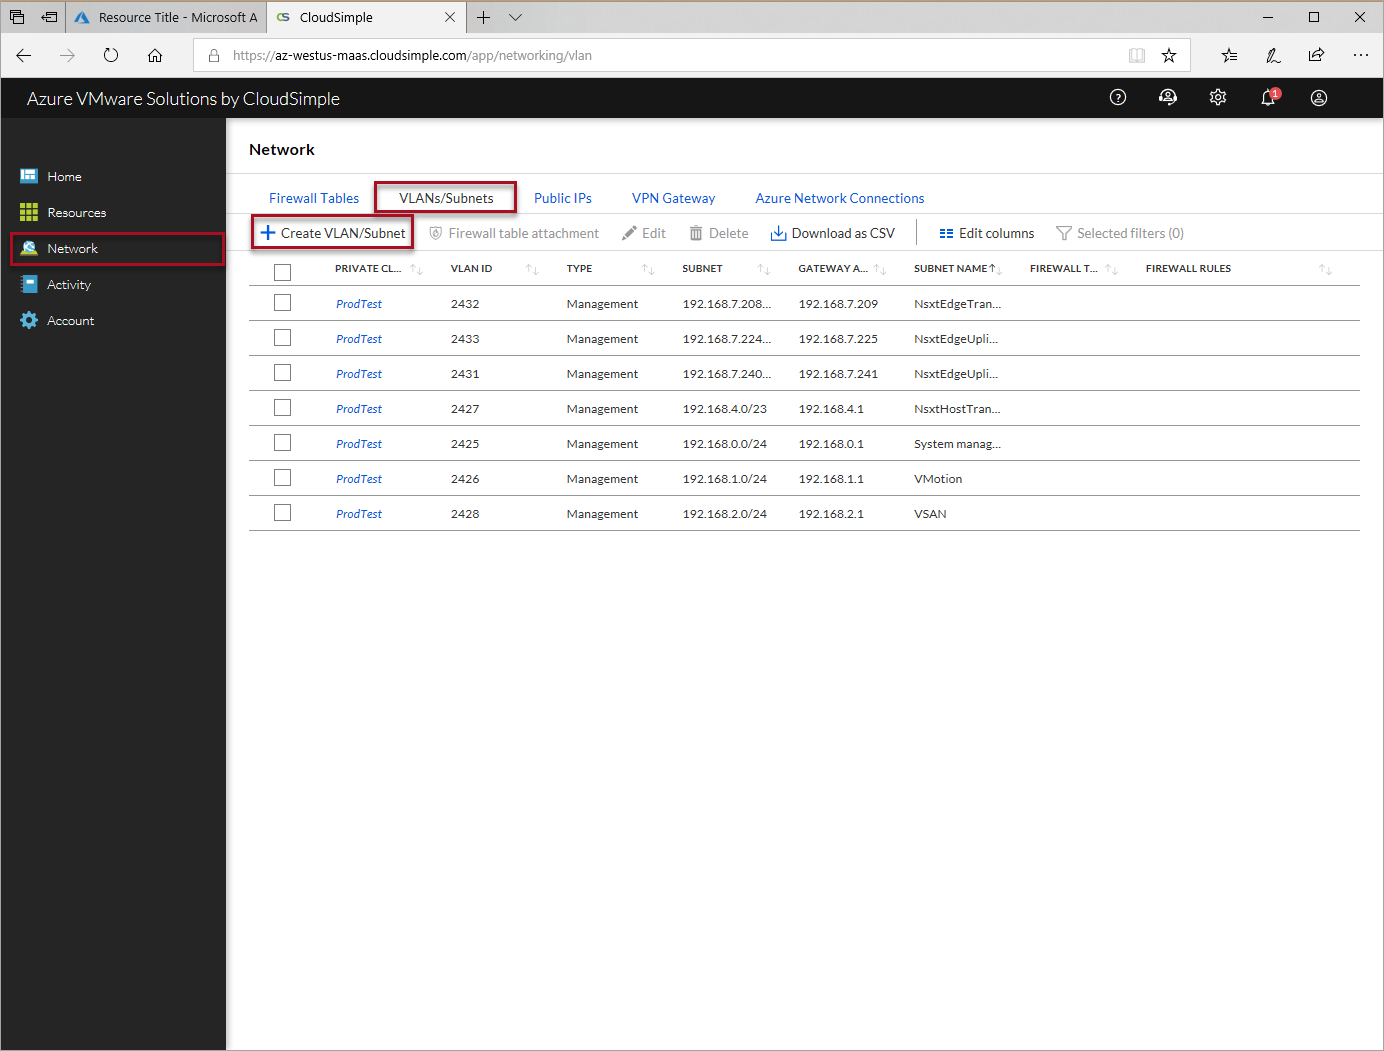
In the CloudSimple portal, select Network.
Click VLAN/Subnets.
Click Create VLAN/Subnet.
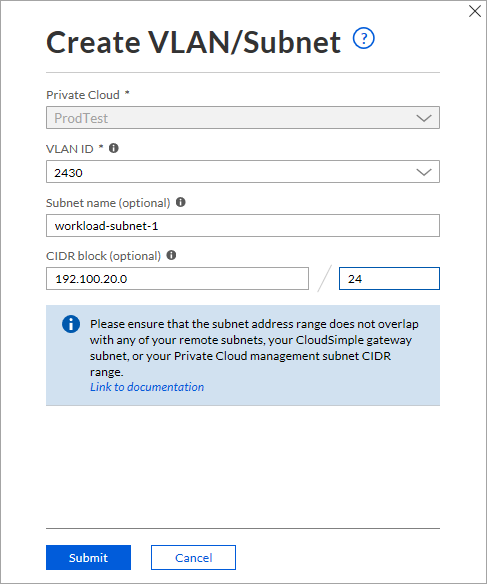
Select the Private Cloud for the new VLAN/subnet.
Select a VLAN ID from the list.
Enter a subnet name to identify the subnet.
Specify the subnet CIDR range and mask. This range must not overlap with any existing subnets.
Click Submit.
The VLAN/subnet will be created. You can now use this VLAN ID to create a distributed port group on your Private Cloud vCenter.
Connect your environment to an Azure virtual network
CloudSimple provides you with an ExpressRoute circuit for your Private Cloud. You can connect your virtual network on Azure to the ExpressRoute circuit. For full details on setting up the connection, follow the steps in Azure Virtual Network Connection using ExpressRoute.
Sign in to vCenter
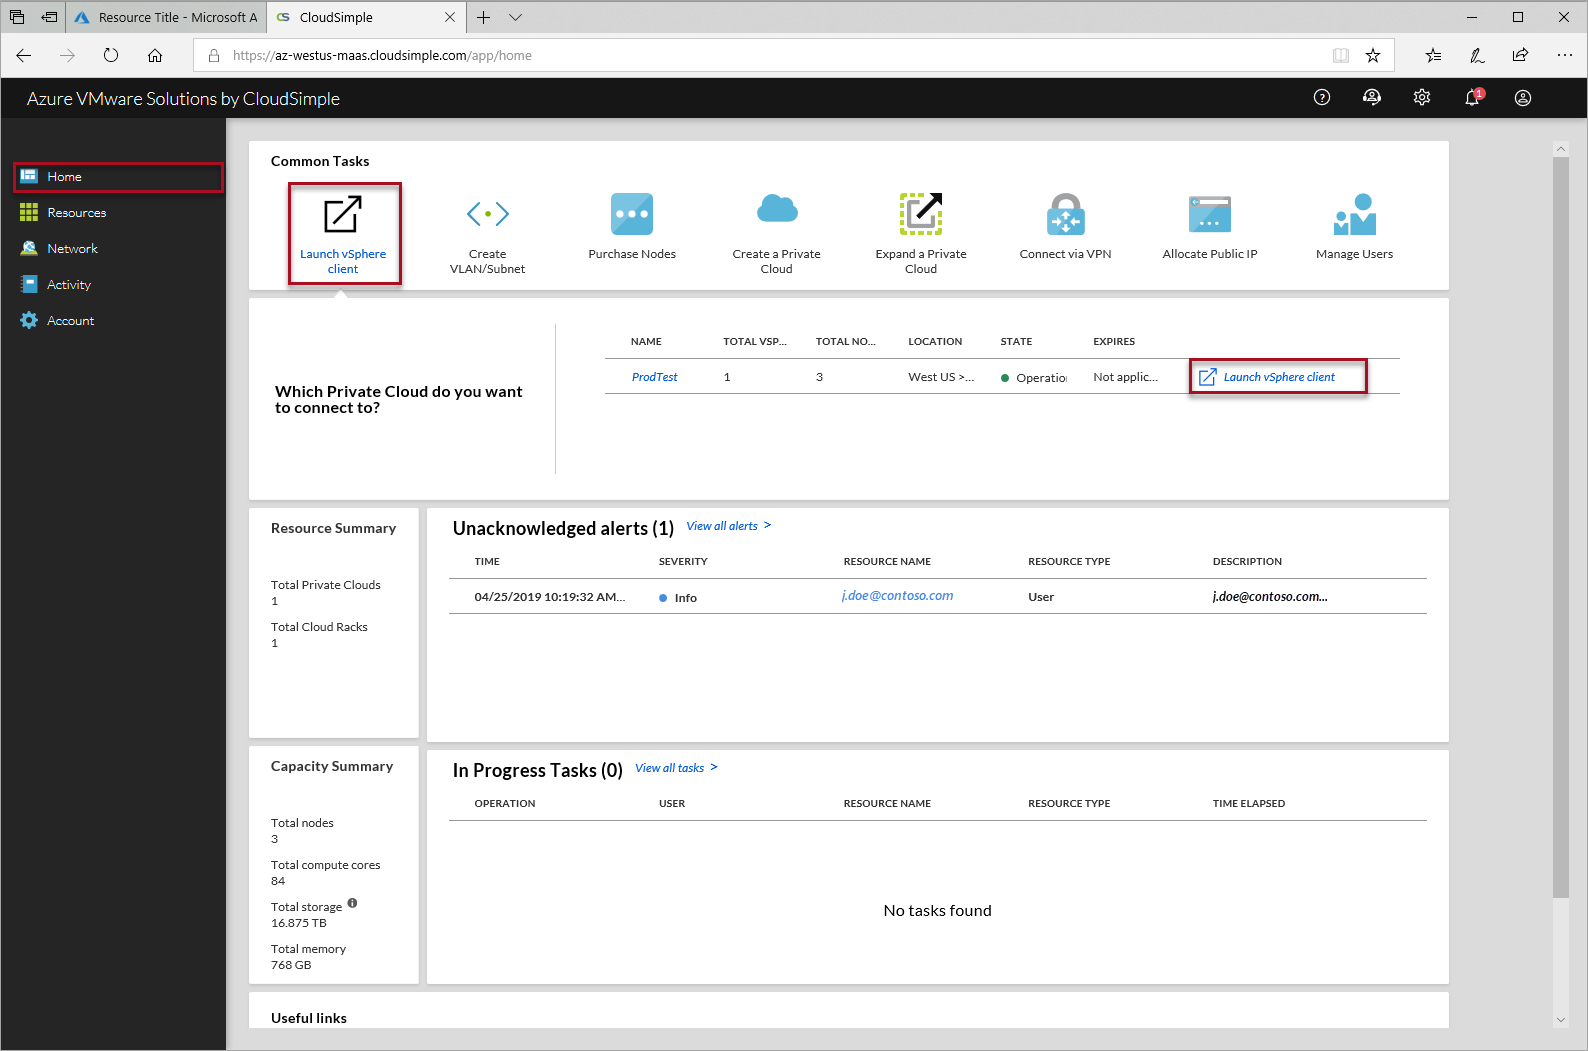
You can now sign in to vCenter to set up virtual machines and policies.
To access vCenter, start from the CloudSimple portal. On the Home page, under Common Tasks, click Launch vSphere Client. Select the Private Cloud and then click Launch vSphere Client on the Private Cloud.
Select your preferred vSphere client to access vCenter and sign in with your username and password. The defaults are:
- User name:
CloudOwner@cloudsimple.local - Password:
CloudSimple123!
- User name:
The vCenter screens in the next procedures are from the vSphere (HTML5) client.
Change your vCenter password
CloudSimple recommends that you change your password the first time you sign in to vCenter.
The password you set must meet the following requirements:
Maximum lifetime: Password must be changed every 365 days
Restrict reuse: Users can't reuse any of the previous five passwords
Length: 8 - 20 characters
Special character: At least one special character
Alphabetic characters: At least one uppercase character, A-Z, and at least one lowercase character, a-z
Numbers: At least one numeric character, 0-9
Maximum identical adjacent characters: Three
Example: CC or CCC is acceptable as a part of the password, but CCCC isn't.
If you set a password that doesn't meet the requirements:
- if you use the vSphere Flash Client, it reports an error
- If you use the HTML5 client, it doesn't report an error. The client doesn't accept the change and the old password continues to work.
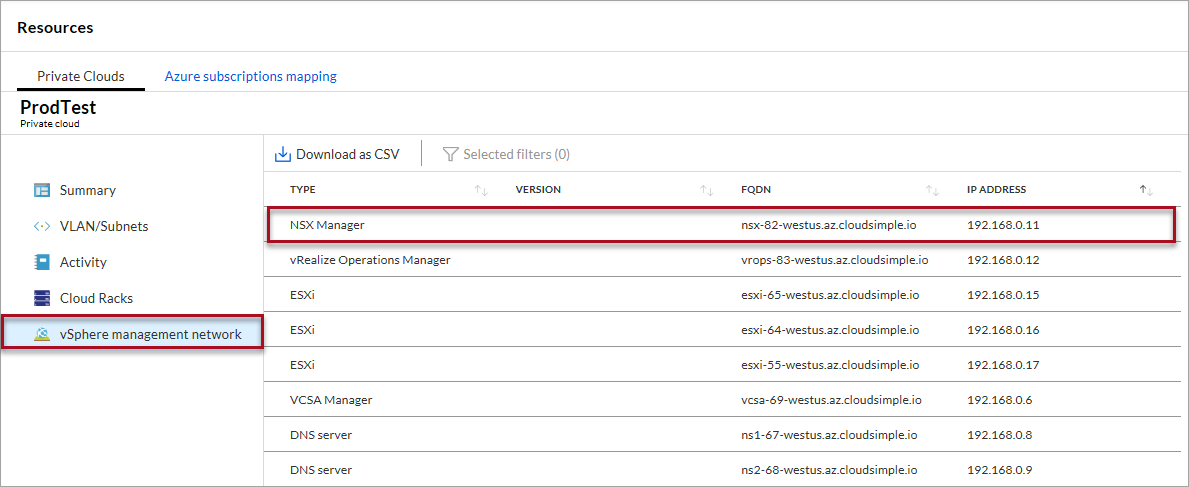
Access NSX manager
NSX manager is deployed with a default password.
- User name: admin
- Password: CloudSimple123!
You can find the fully qualified domain name (FQDN) and IP address of NSX manager on CloudSimple portal.
Launch CloudSimple portal and select Resources.
Click on the Private Cloud, which you want to use.
Select vSphere management network
Use the FQDN or IP address of NSX Manager and connect using a web browser.
Create a port group
To create a distributed port group in vSphere:
- Follow the instructions in "Add a distributed port group" in vSphere Networking Guide.
- When setting up the distributed port group, provide the VLAN ID created in Create a VLAN for your Workload VMs.