Note
Access to this page requires authorization. You can try signing in or changing directories.
Access to this page requires authorization. You can try changing directories.
Users are granted permissions to perform operations on the DeployR Web services API by the role(s) assigned to them. Having clearly defined roles in this console simplifies the process of granting permissions to new or existing users.
DeployR is delivered with predefined system roles you can assign to users. These predefined system roles determine user permissions within DeployR by granting individual users access to the console or programmatic access on the API.
You can also create custom roles to constrain access to certain scripts. Once you have created a custom role for that purpose, a script author can set a script’s access rights to Restricted and specify one or more new custom roles. Then, only those users assigned to at least one of the roles specified for that script are permitted to execute the script. You can manage the access rights to a file in the DeployR Repository Manager.
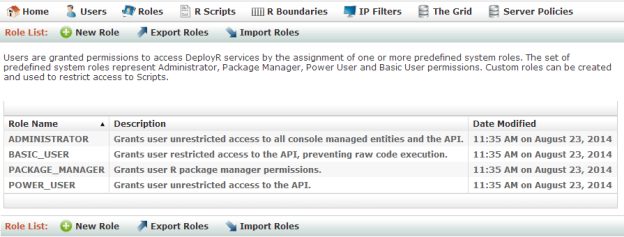
You can view the available roles by clicking Roles in the main menu. Clicking a role in the list reveals the list of users assigned to this role.
Figure: Role List page
Predefined System Roles
The following DeployR system roles are shipped with DeployR and can be assigned to user accounts.
| Role Name | Role Description |
|---|---|
ADMINISTRATOR |
The ADMINISTRATOR role identifies the user as an administrator. There is only one administrator for the console, and that is the user admin. |
POWER_USER |
Users with this role are granted permissions to access the full API and to install R packages. Full access includes the ability to execute scripts and arbitrary blocks of R code. |
BASIC_USER |
Users with this role are granted permissions to access the full API with the exception of being able to execute arbitrary blocks of R code on the API. However, they can execute R scripts. |
PACKAGE_MANAGER |
Users with this role are granted permissions to install R packages using the install.packages() command. By default, ADMINISTRATOR and POWER_USER have implicit PACKAGE_MANAGER rights, while BASIC_USER does not. |
Viewing, Editing, and Assigning Roles
You can review, edit, and assign custom roles. System roles cannot be edited.
To view and edit a role:
From the main menu, click Roles. The Role List page appears.
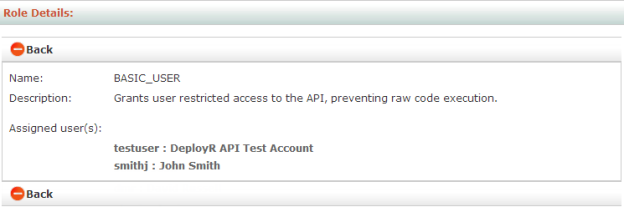
In the Role List table, click the role you want to review or edit. The Role Details page displays the role’s name and description as well as the names of any users to which the role is assigned.
The list of scripts to which a role may be assigned does not appear on this page.
Figure: Role Details page
To edit a custom role, do the following:
Click Edit.
Change the name or description as needed. If you change the name of role, it is updated throughout the console.
You cannot edit a system role delivered with the product.
Click Update to save the changes.
To assign a role to a user:
From the main menu, click Users. The User List page appears.
Click the account name you want to edit. The User Details page appears.
Click Edit. The Edit User page appears.
Select all applicable roles.
Click Update to save the changes.
Creating Custom Roles
While the system roles will suffice in many cases, there are times when it might be beneficial to create custom roles to constrain access to certain scripts according to a specific organizational, departmental, or functional need.
Any script author can set the access rights to his or her script to Restricted and specify one or more roles. Then, only the users assigned to one of the specified roles are permitted to execute that script. For more details on defining access rights for scripts, refer the DeployR Repository Manager documentation.
To create a custom role:
From the main menu, click Roles. The Role List page appears.
From the Role List page, click New Role in the menu. The New Role page appears.
Figure: New Role page
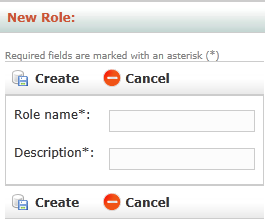
Enter a Role name and Description for the new role.
Click Create to save the new role. You can now assign this role to users or scripts in the console. To assign a role, edit the user or script and select the role(s).
Deleting Custom Roles
While you cannot delete any of the system roles, you can delete a custom role. If you delete a custom role that is assigned to users, then that association between user and role is automatically removed upon deletion. To delete a custom role:
From the main menu, click Roles. The Role List page appears.
Click name of the custom role you want to delete. The Role Details page appears.
Click Delete.
Click OK to confirm that you want to delete.
Exporting Roles
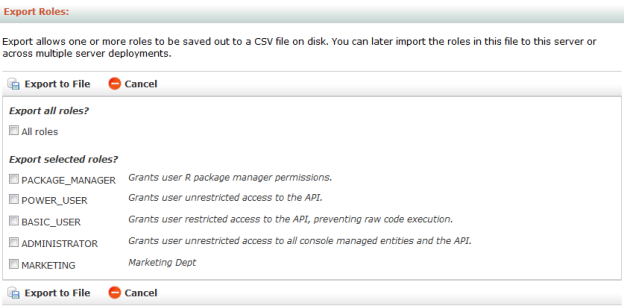
You can export roles in a CSV file. Exporting can be useful when you want to copy the roles to another machine or to preserve them as a backup, for example. You can later import the contents of this file to this server or across multiple server deployments.
Figure: Export Roles page
To export:
From the main menu, click Roles.
From the Role List, click Export Roles.
Select the role(s) to be exported.
Click Export to File and save the file.
Importing Roles
Importing into the server database allows you to retrieve all of the roles from a previously exported CSV file. Alternately, you can also import a CSV file you have created yourself using the proper format.
Figure: Import Roles page
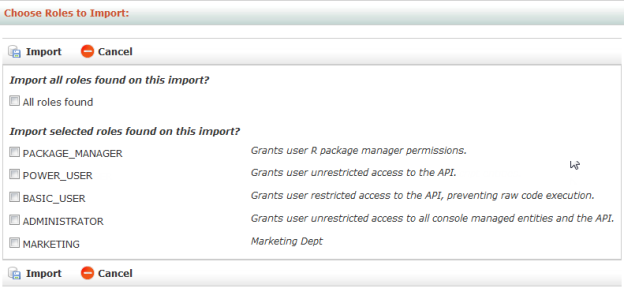
To import:
From the main menu, click Roles.
From the Role List, click Import Roles.
Click Browse and select the file to be imported. By default, the file has the CSV extension.
Click Load.
Choose which role(s) to import.
Click Import. If a role by the same name already exists, a message appears to inform you that the incoming role was rejected.