Note
Access to this page requires authorization. You can try signing in or changing directories.
Access to this page requires authorization. You can try changing directories.
After you deploy the PMO Accelerator, consider creating a custom managed solution to add any extra functionality you want. The Power BI template is a great example: it adds significant reporting features to the PMO Accelerator, but merely deploying the template won't integrate the reports—you need to change some components to enable it, and a managed solution that you deploy on top of the Accelerator is the best way to make such changes.
Prerequisites
- Admin rights in a development environment with the Project Management Office Accelerator deployed
- Rights to use the Common Data Service connector
- An understanding of managed solution layers
- (Optional, but recommended) A Developer plan so you can export your solution to easily deploy in other environments
Create a managed solution to layer over the PMO Accelerator
This process has three main steps:
- Select (or create) a development environment where you're an admin, and where Project for the web and the Accelerator solution are deployed—or deploy them, if they aren't there yet.
- In that environment, create a managed solution that contains your customizations.
- Export the solution, and then import it into your production Project+Accelerator environment.
Example customization: add an action to send email when a Project Request is approved
The cloud flow included with the Project Requests scenario is very simple; it creates a project from a request when Request State is set to Approved. By adding an action to the cloud flow, you can make it also send an email notification.
Open the Power Apps Portal and select your development environment.
In the list of solutions, select Project Management Office Accelerator.
In the navigation pane, select Cloud Flows.
Select When the request state is updated to Approved to open it.
On the command bar, select Edit.
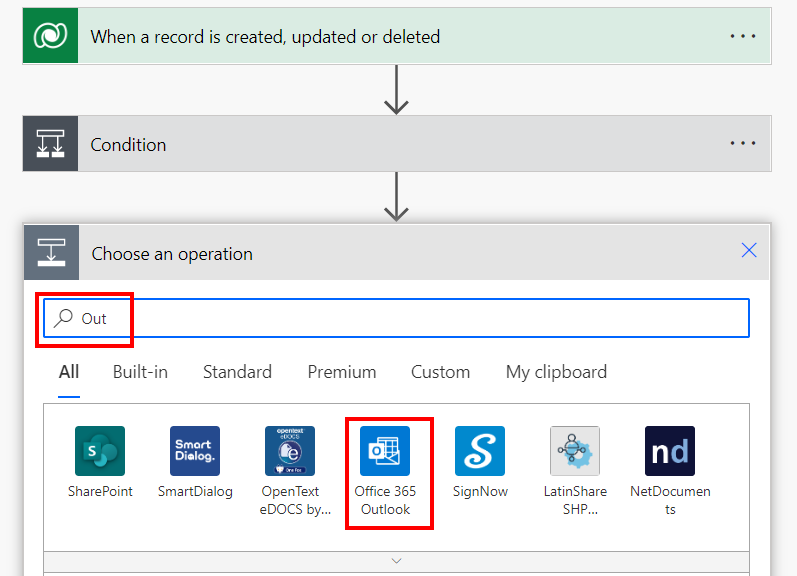
Select + New step.
Under Choose an operation, enter Out and then select Office 365 Outlook.
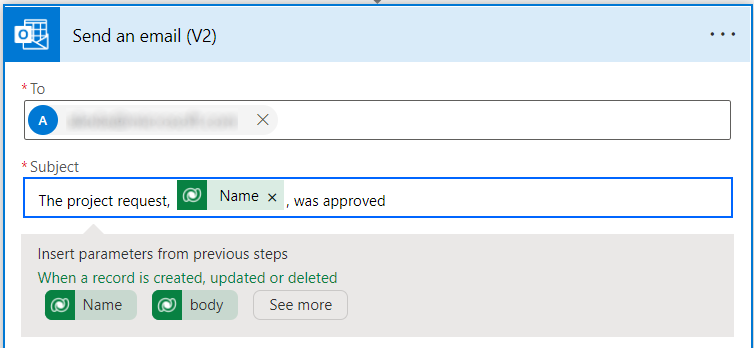
Select fields inside the connector to add content. Power Apps offers suggestions depending on the field you select. For example, when you select the Subject field you see attributes you can add. When the flow runs, the value of the attribute appears in the generated email.
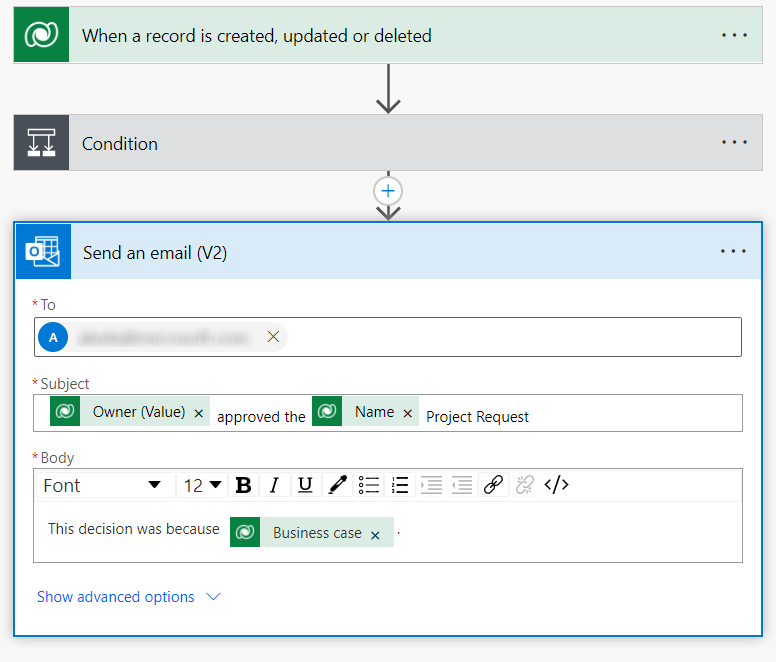
Your Outlook step should look something like this example:
Save and close the flow.
On the command bar, select Publish all customizations.
Disable the flow
Open the Power Apps Portal.
In the navigation pane, select Solutions, and then select Project Management Office Accelerator.
In the navigation pane, select Cloud Flows.
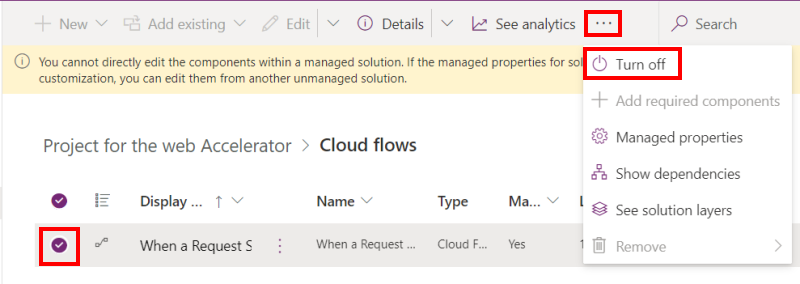
Select the When the request state is updated to Approved flow. Then, on the command bar select the ellipses (...) and then select Turn Off.
On the command bar, select Publish all customizations.
Next Steps
- Learn more about Solution layers.
- Understand application lifecycle management (ALM) with Microsoft Power Platform