Note
Access to this page requires authorization. You can try signing in or changing directories.
Access to this page requires authorization. You can try changing directories.
 Microsoft Project for the web will soon become Microsoft Planner, which is currently rolling out to customers. To learn more about setting up the new Planner for your organization, see Microsoft Planner for admins.
To delete user data from Project for the web, you need the user's Microsoft Entra Object ID or the name of Microsoft 365 group that owns the records.
To find and delete a user's roadmaps or projects
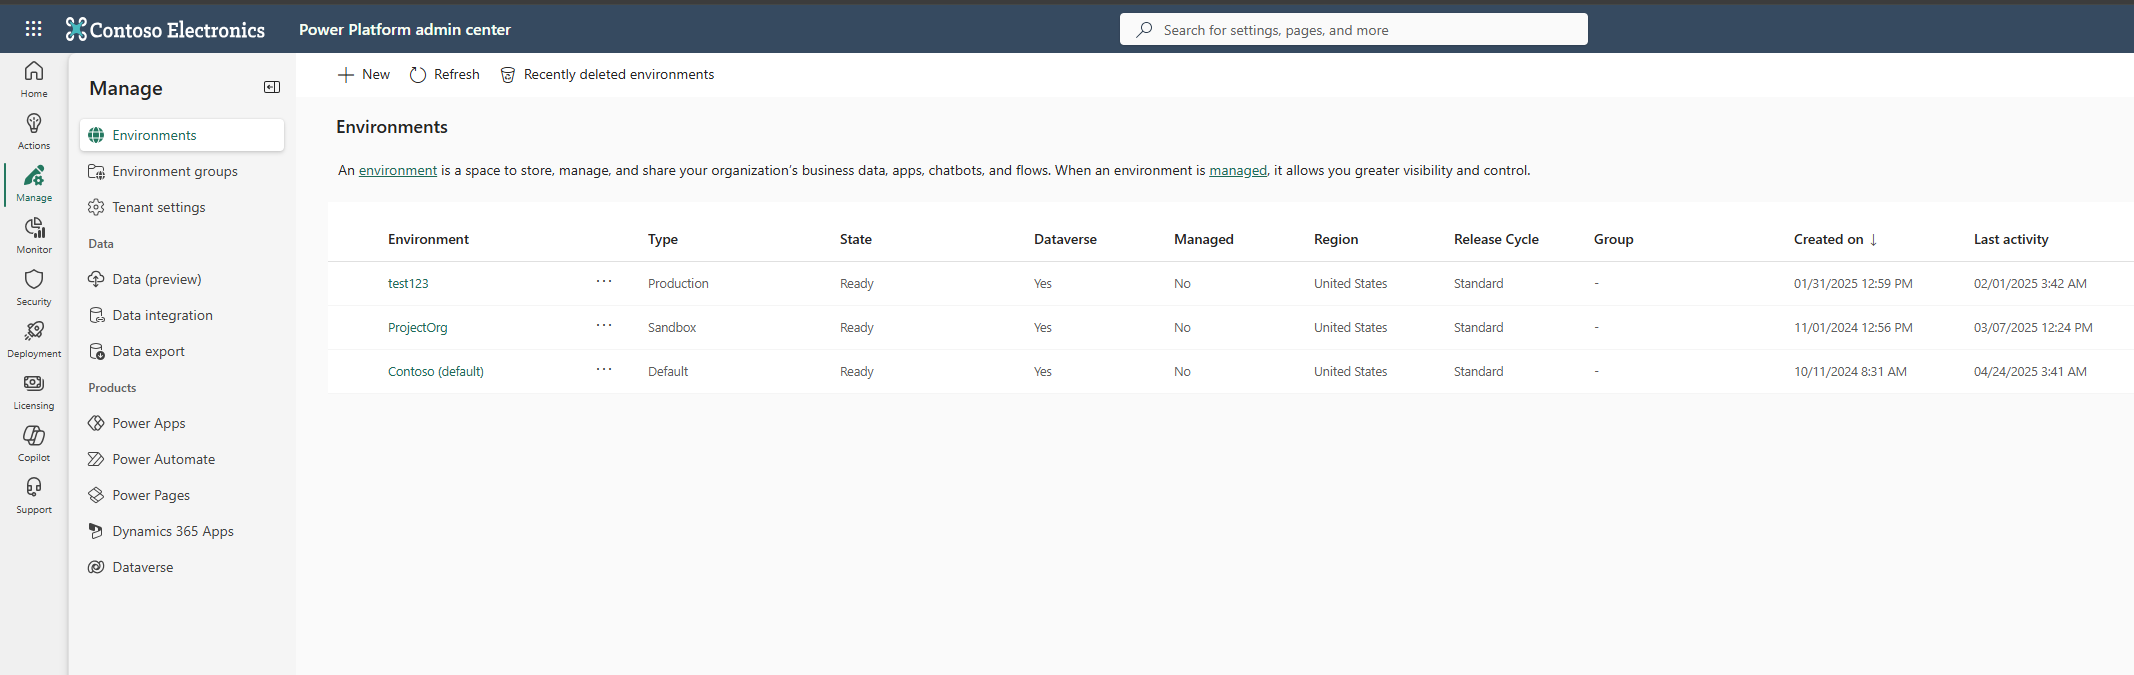
In the Microsoft 365 admin center, under Admin centers, select Power Platform.
In the Power Platform Administration Center, select the Manage.
Select Environments.
Find the Default Environment. The name of the Environment contains "(default)".
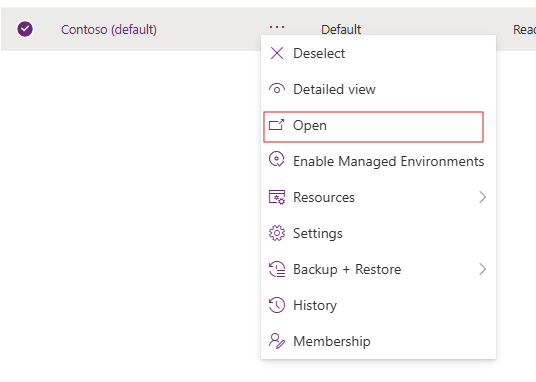
Select "..." to the right of the Default environment.
Select Open.
Select on the name at the top and choose "Power Platform Environment Settings"
Select the Advance Find button.

From the Look for menu, choose Roadmaps for Roadmaps or Plans for Projects followed by Edit Columns and Add Columns.
Choose the columns that you want to search on. Be sure to include Owner and Created By.
Select OK, and then select OK again.
Filter on Owner or Created By and select the user or group.
Select Results.
Select the name of the roadmap you want to delete.
Select Delete.
Note
You can change the ownership of the record to another user or Dynamics Team and edit Project or Roadmap. If you choose a Dynamics Team, it is recommended to use choose a Dynamics Team that is links to a Microsoft 365 group to use the native Project for the web experience.
To delete or edit Task History for a project
Users can delete all history records for a project by deleting the project.
To selectively remove history records, perform the following steps:
- Sign in to Power Apps and select the appropriate Dataverse environment. Typically the environment will be the default environment.
- Navigate to solutions > Project. The Name property for this table is msdyn_ProjectServiceCore_Patch.
- Locate and select the Project History table.
- Select the Edit option for the table.
- Select the records you want to delete and select Delete n records
To delete or edit Status Report for a project
- Find the status report using the instructions from Export user data from Project for the web.
- Edit or delete the status report.
Impact of deleting a project on data copied to Planner and To Do
Deleting a Project or the user's data would lead to deletion of the Project/User data from Assigned to me view of Planner and To Do as well.
See Also
Create, edit, or save an Advanced Find search