Note
Access to this page requires authorization. You can try signing in or changing directories.
Access to this page requires authorization. You can try changing directories.
In this article, you learn how to register new data sources, manage domains and collections of data sources, view sources, and move sources between collections in the Microsoft Purview Data Map.
Register a new source
Note
To register and manage a source in Data Map, you need to be a Data Source Admin and have one of the other Data Map roles, such as Data Reader. For more information, see assigning data governance roles and permissions.
Use the following steps to register a new source:
In the Microsoft Purview portal, navigate to Data Map, Data sources, and select Register.

If you're using the classic experience, open the classic Microsoft Purview governance portal, go to Data Map, Sources, and select Register.
Select a source type. This example uses Azure Blob Storage. Select Continue.
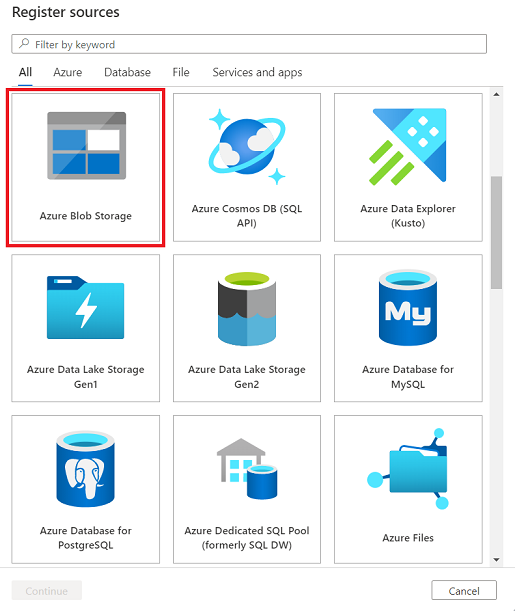
Fill out the form on the Register sources page. Select a name for your source and enter the relevant information. If you choose From Azure subscription as your account selection method, the sources in your subscription appear in a dropdown list.
Select Register.
Important
Most data sources have prerequisites to register and scan them in Microsoft Purview. For a list of all available sources, and links to source-specific instructions to register and scan, see Data sources that connect to Data Map.
View sources
You can view all registered sources by going to the Microsoft Purview portal > Data Map > Data sources.
There are two view types:
Map view
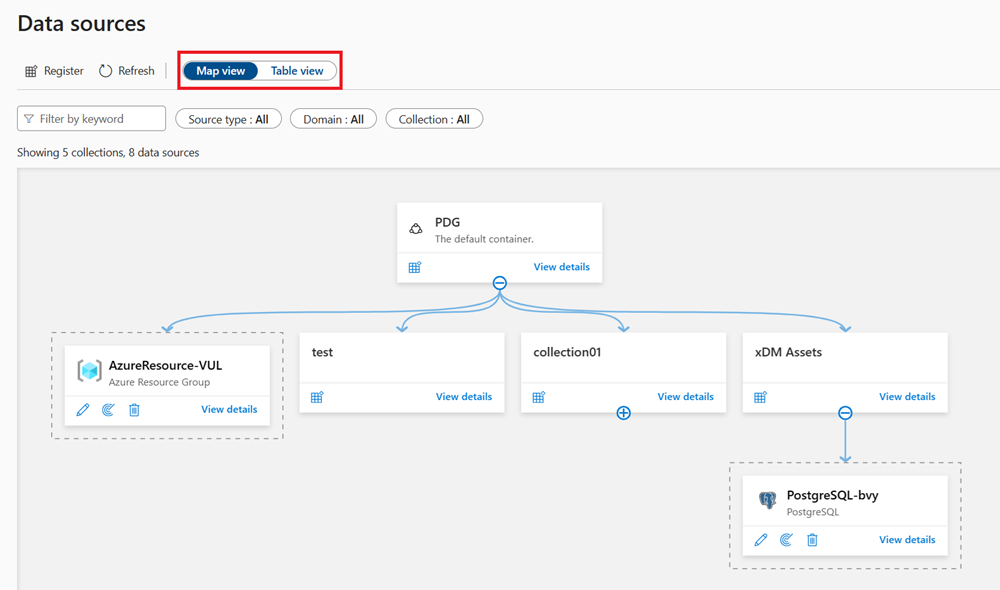
To find the map view, open Data Map and select Data sources. Make sure the toggle at the top of the page is set to Map view.
In Map view, you see all of your sources and collections, and you can filter by sources, domains, and collections. In the following screenshot, you see the default domain at the top called PDG. It has three collections: test, collection01, and xDM Assets. The collection xDM Assets has a PostgreSQL source registered to it. An Azure resource group source is also housed under the root domain.
You can open and manage each of the subcollections from the map view by selecting the + button. You can also register a new source by selecting the register source button, or view details by selecting View details.
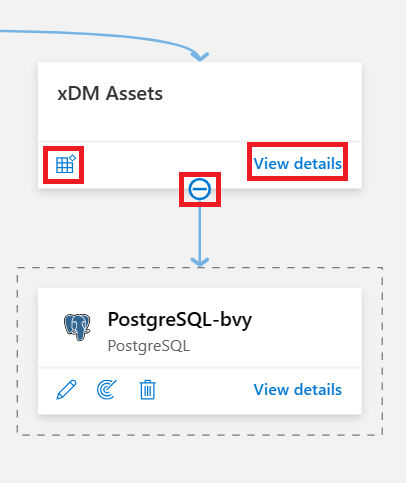
Table view
In the table view, you see a sortable list of sources. Hover over the source for options to edit, begin a new scan, or delete.
Manage collections and domains
To manage collections and domains, and assign permissions based on your collections and domains, see Create and manage collections and domains.
Move sources between collections
After you register your source, you can move it to another collection that you have access to within the same domain.
Important
Data source connections that register multiple sources can't be moved between collections:
- Azure (Multiple)
- AWS account (Multiple)
- Azure Synapse Analytics (Multiple)
Find your source in Data Map and select it.
Beside the Collection Path list, select the ellipsis (...) button and select Move.
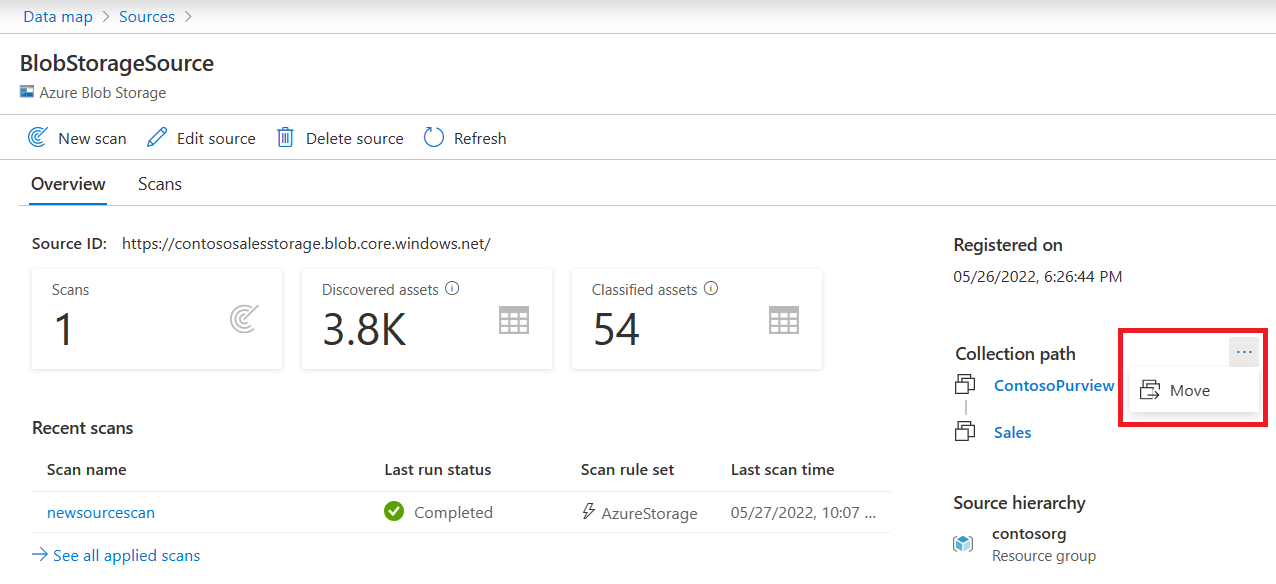
In the Move collection menu that appears, select your collection from the drop-down and then select Ok.
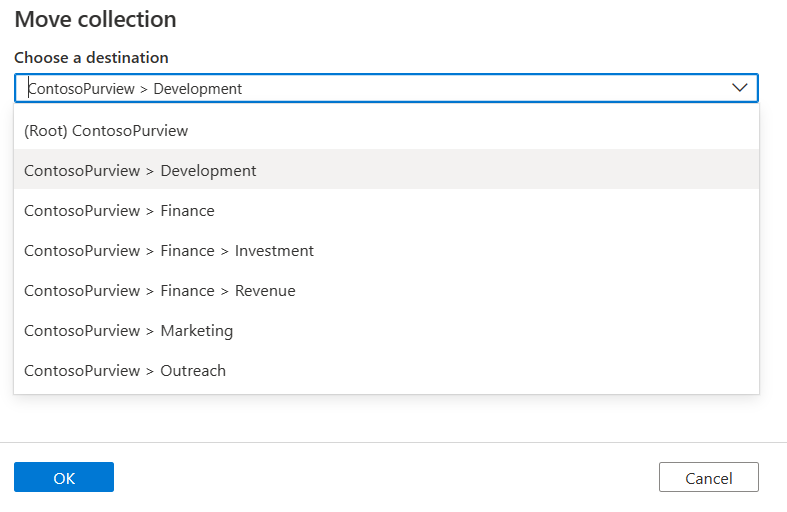
Your data source has been moved. It can take up to an hour for results to be fully seen across your Microsoft Purview environment. Your scans will move with your resource, but assets will remain in their original collection until your next scan, then they'll move to the new collection.
Note
- When a source moves to a new collection, its scans move with it, but assets don't appear in the new collection until your next scan.
- If you manually moved any assets from your source to a different collection before migrating the source, the scan doesn't take them to the new collection. They remain in the collection you moved them to.
Next steps
Learn how to discover and govern various data sources:
