Note
Access to this page requires authorization. You can try signing in or changing directories.
Access to this page requires authorization. You can try changing directories.
This article outlines how to register Azure Databricks, and how to authenticate and interact with Azure Databricks Unity Catalog in Microsoft Purview. For more information about Microsoft Purview, see the introductory article.
Supported capabilities
Scanning capabilities
| Metadata Extraction | Full Scan | Incremental Scan | Scoped Scan |
|---|---|---|---|
| Yes | Yes | Yes | No |
When scanning Azure Databricks Unity Catalog, Microsoft Purview supports:
Extracting technical metadata, including:
- Metastore
- Catalogs
- Schemas
- Tables, including the columns. External tables or dynamic tables aren't supported.
- Views including the columns
- Tags from Unity Catalog (tags that represent labels, classification equivalent in Unity Catalog are scanned in Microsoft Purview in properties)
Fetching lineage on assets relationships between tables, views, and columns during notebook runs.
When setting up a scan, you can choose to scan the entire Unity Catalog, or scope the scan to a subset of catalogs.
Other capabilities
For classifications, sensitivity labels, policies, data lineage, and live view, see the list of supported capabilities.
Note
This connector brings metadata from Azure Databricks Unity Catalog. To scan Azure Databricks workspace-scoped metadata, see Azure Databricks Hive Metastore connector.
Known limitations
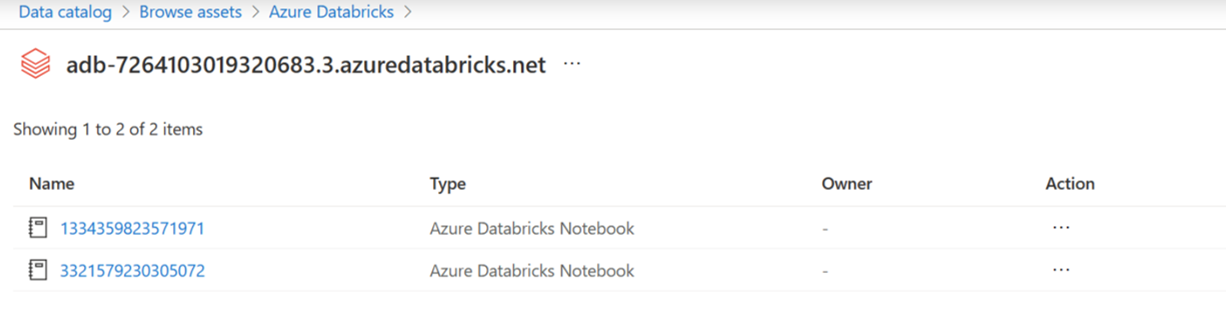
In Microsoft Purview, Databricks notebook names appear as numeric IDs instead of readable names. This limitation exists because Databricks doesn't expose notebook names in the Unity Catalog system table.
You might encounter errors if scan results from Azure Databricks exceed 1 MB and Azure Databricks-managed blob storage denies public network access. To prevent this problem, ensure that Microsoft Purview has access to the internal DBFS storage location of the Azure Databricks workspace being scanned. To learn more, see Cloud fetch in JDBC.
Incremental scan is available only for the Azure Databricks Unity Catalog data source.
Scoped scan is available only for the Unity Catalog option under Azure Databricks data source.
You can add managed private endpoints only for the Unity Catalog option under Azure Databricks data source.
When you delete an object from the data source, the subsequent scan doesn't automatically remove the corresponding asset in Microsoft Purview.
Lineage information isn't available in Azure Databricks workspaces in the China region. This limitation exists because Azure Databricks system tables aren't supported in this region. Microsoft Purview uses these tables to extract lineage, so it can't retrieve lineage in this region.
Set the Databricks table column comment to an empty string if you don't want the column description displayed in Microsoft Purview.
Scan of external tables or dynamic tables isn't supported.
For more information about other limitations related to native Azure Databricks lineage, see Azure Databricks documentation.
Prerequisites
You must have an Azure account with an active subscription. Create an account for free.
You must have an active Microsoft Purview account.
You need an Azure Key Vault, and to grant Microsoft Purview permissions to access secrets.
You need Data Source Administrator and Data Reader permissions to register a source and manage it in the classic Microsoft Purview governance portal. For more information about permissions, see Access control in Microsoft Purview.
To scan Azure Databricks Unity Catalog, Microsoft Purview connects to a SQL Warehouse in your workspace, and uses a Personal Access Token for authentication. You need to have an Azure Databricks workspace that is Unity Catalog enabled and attached to the metastore you want to scan. In your Azure Databricks workspace:
Create a SQL Warehouse. You can use the autocreated Starter warehouse as well if applicable.
Note down the HTTP path. You can find it in Azure Databricks workspace > SQL Warehouses > your warehouse > Connection details > HTTP path.
Make sure the user has the Can Use permission so they can connect to the Azure Databricks SQL warehouse. Learn more at SQL warehouse access control.
The SQL warehouse in Azure Databricks must be running to establish a connection with Microsoft Purview before setting up the scan in Microsoft Purview.
To fetch lineage from Azure Databricks using Microsoft Purview, the following prerequisites must be in place:
Enable the system schema: The system schema system.access must be enabled in your Unity Catalog. This requirement exists because lineage information is stored in system tables, and enabling this schema allows access to those tables. Learn more about monitoring usage with system tables.
User privileges:
The user account you use for scanning needs to have SELECT privileges on the following system tables:
- system.access.table_lineage
- system.access.column_lineage
These permissions are required because lineage data is read directly from the system tables, and without the necessary access, Microsoft Purview can't retrieve the lineage information.
The user account you use for scanning also needs to have these permissions:
- USE CATALOG on system
- USE SCHEMA on system.access
If your Azure Databricks workspace doesn’t allow access from public network or if your Microsoft Purview account doesn’t enable access from all networks, you can use the Managed Virtual Network Integration Runtime or a kubernetes supported self-hosted integration runtime to scan. You can set up a managed private endpoint for Azure Databricks as needed to establish private connectivity.
Data source setup (Azure Databricks vs. Azure Databricks Unity Catalog)
You can set up an Azure Databricks Unity Catalog connection to Microsoft Purview through two sources:
- Azure Databricks (old source)
- Azure Databricks Unity Catalog
Differences in capabilities between data sources
The capabilities of the Azure Databricks Unity Catalog connector differ based on the source used for the connection, as outlined in the following table:
| Capability | Old source | New source |
|---|---|---|
| Source name | Azure Databricks | Azure Databricks Unity Catalog |
| Source support | Hive & Unity Catalog | Unity Catalog |
| Authentication: Personal Access Token | Supported | Supported |
| Authentication: Service Principal | No | Supported |
| Authentication: Managed Identity | No | Supported (system managed identity) |
| Integration Runtime: Azure IR | Supported | Supported |
| Integration Runtime: Managed Virtual Network IR | Supported | Yes** |
| Integration Runtime: Kubernetes Self-Hosted IR | Supported | Supported |
| Scoped scan | Yes - catalog level | No |
| Incremental scan | No | Yes |
| Lineage | Supported | Supported |
**Scanning Azure Databricks Unity Catalog is supported through Managed Virtual Network Integration Runtime. However, Managed Private Endpoint isn't supported in this case.
Which source should I use?
Choose either source based on your organization’s needs, or use both in parallel. Switching between sources or using both simultaneously doesn't cause asset duplication in Microsoft Purview. This flexibility allows you to start with the option that best fits your current setup and adjust over time as needed.
Authentication for a scan
To scan Azure Databricks Unity Catalog, use personal access tokens, managed identities, or service principal authentication methods.
If you use a system assigned managed identity
In Azure Databricks
Go to Settings > Workspace admin > Identity and access.
Select Add service principal.
Select Add new.
Select Microsoft Entra ID managed. Enter the Application ID for Microsoft Purview. You can find the Application ID under Microsoft Purview account resource details in the Azure portal.

In Microsoft Purview
- Select the system-assigned managed identity under Credential.
For all the objects that you want to bring into Microsoft Purview, the user or service principal needs to have at least SELECT privilege on tables/views, USE CATALOG on the object’s catalog, and USE SCHEMA on the object’s schema.
To scan all the objects in a Unity Catalog metastore, use a user or service principal with metastore admin role. For more information, see Manage privileges in Unity Catalog and Unity Catalog privileges and securable objects.
- For classification, the user also needs to have SELECT privilege on the tables/views to retrieve sample data.
Register
This section describes how to register an Azure Databricks workspace in Microsoft Purview by using the classic Microsoft Purview governance portal.
Go to your Microsoft Purview account.
Select Data Map on the left pane.
Select Register.
In Register sources, select Azure Databricks Unity Catalog > Continue.
On the Register sources (Azure Databricks Unity Catalog) screen, complete the following steps:
For Name, enter a name that Microsoft Purview will list as the data source.
For Metastore ID, enter the metastore ID for the Azure Databricks Unity Catalog metastore that you want to scan.
Select a collection from the list.
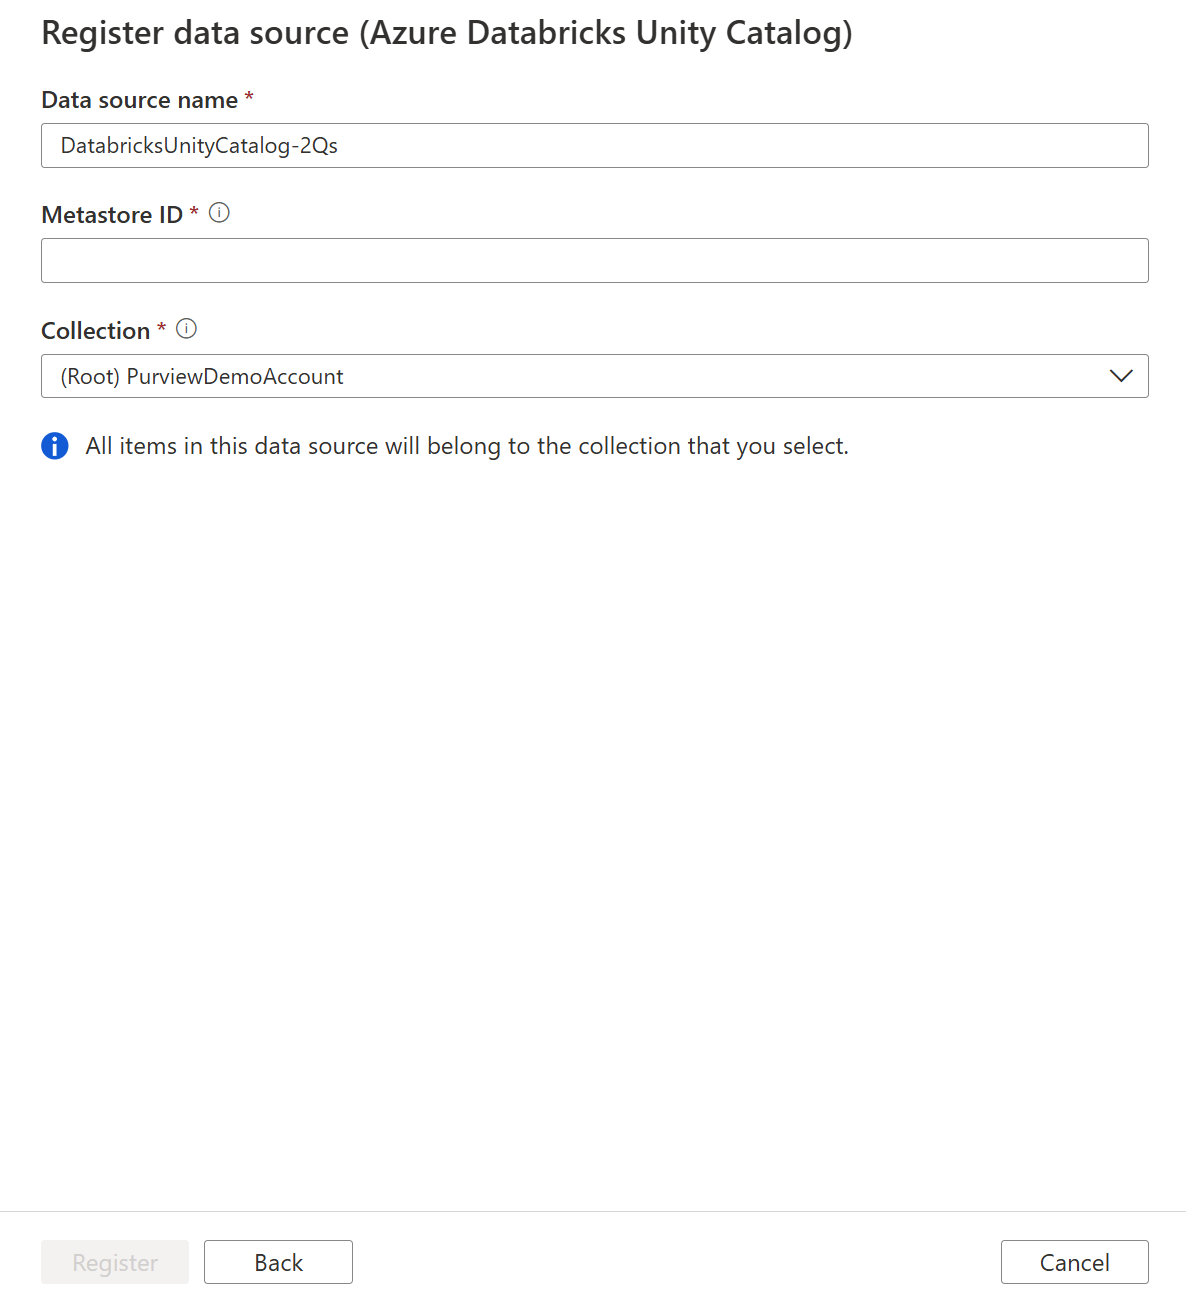
- Select Finish.
Scan
Tip
To troubleshoot any problems with scanning:
- Confirm you meet all prerequisites.
- Review the scan troubleshooting documentation.
Use the following steps to scan Azure Databricks and automatically identify assets. For more information about scanning, see Scans and ingestion in Microsoft Purview.
Go to Sources.
Select the registered Azure Databricks.
Select + New scan.
Provide the following details:
Name: Enter a name for the scan.
Connect via integration runtime: Choose the default Azure integration runtime, Managed Virtual Network IR, or a Kubernetes supported self-hosted integration runtime you created.
Credential: Select the credential to connect to your data source. Make sure to:
- Select Access Token, Managed Identity, or Service Principal.
- You can create a new Access Token or Service Principal credential while registering a scan. For more information, see Credentials for source authentication in Microsoft Purview.
Workspace URL: Provide the URL for the workspace that you want to scan.
- HTTP path: Specify the Databricks SQL Warehouse’s HTTP path that Microsoft Purview connects to and performs the scan; for example,
/sql/1.0/endpoints/xxxxxxxxxxxxxxxx. You can find it in Azure Databricks workspace -> SQL Warehouses -> your warehouse -> Connection details -> HTTP path.
- HTTP path: Specify the Databricks SQL Warehouse’s HTTP path that Microsoft Purview connects to and performs the scan; for example,
Lineage extraction: Toggle lineage extraction to On to fetch lineage of the scanned assets.
Select Test connection to validate the settings.
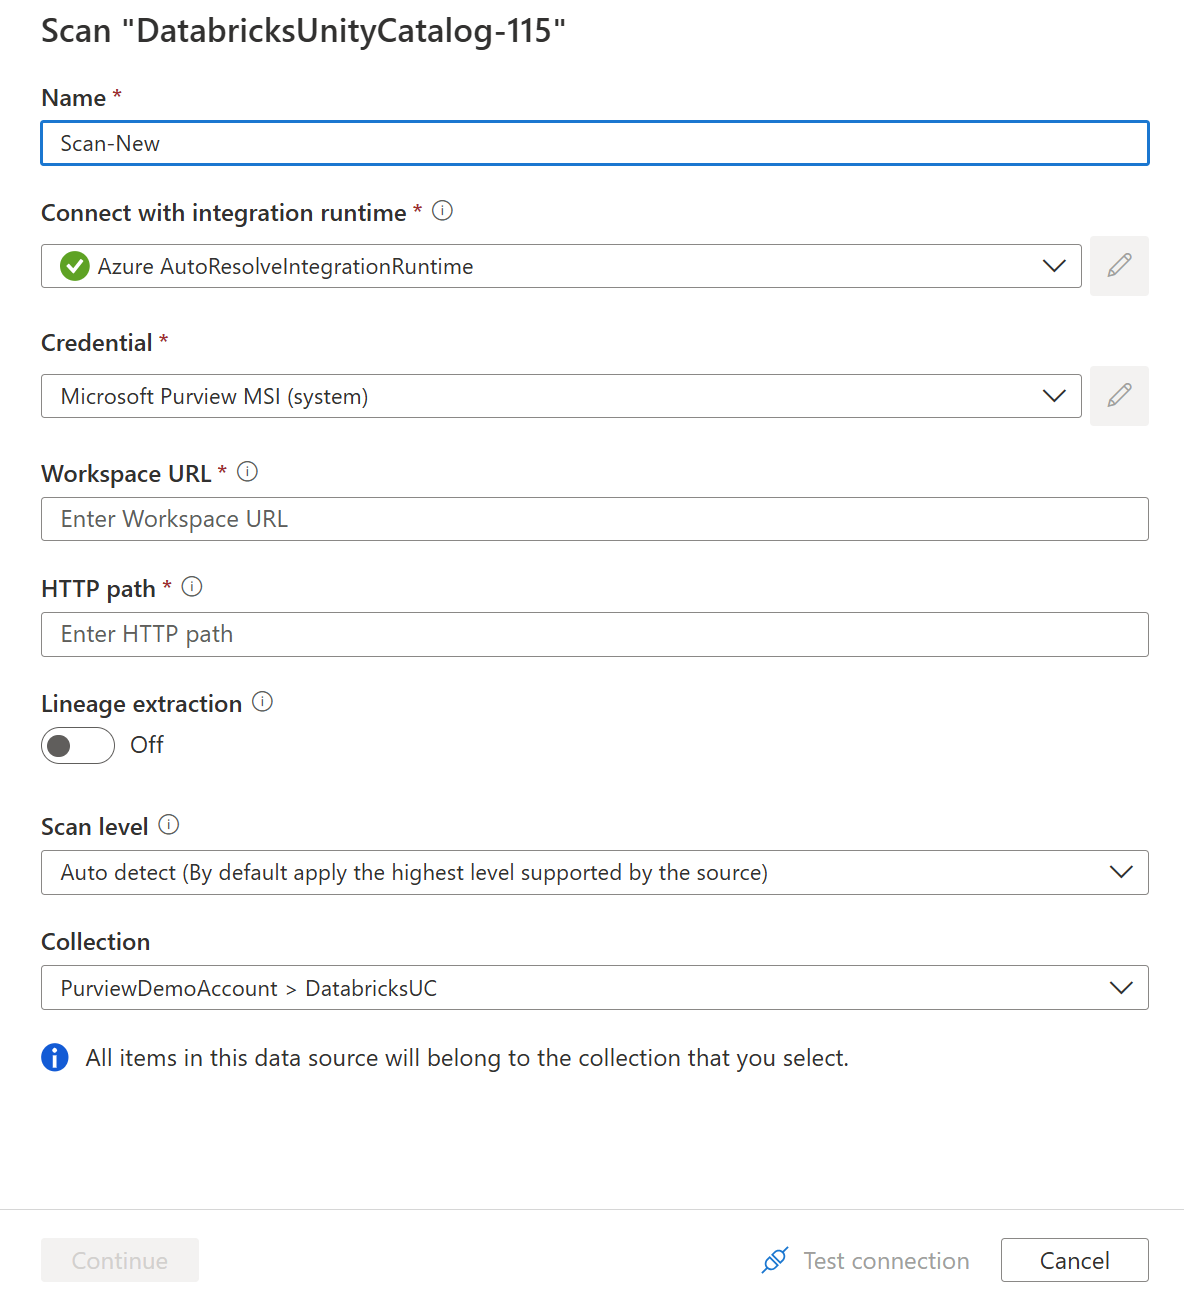
Select Continue.
For Scan trigger, choose whether to set up a schedule or run the scan once.
Review your scan and select Save and Run.
After the scan finishes successfully, see how to browse and search assets.
View your scans and scan runs
To view existing scans:
- Go to the Microsoft Purview portal. On the left pane, select Data map.
- Select the data source. You can view a list of existing scans on that data source under Recent scans, or you can view all scans on the Scans tab.
- Select the scan that has results you want to view. The pane shows you all the previous scan runs, along with the status and metrics for each scan run.
- Select the run ID to check the scan run details.
Manage your scans
To edit, cancel, or delete a scan:
Go to the Microsoft Purview portal. On the left pane, select Data Map.
Select the data source. You can view a list of existing scans on that data source under Recent scans, or you can view all scans on the Scans tab.
Select the scan that you want to manage. You can then:
- Edit the scan by selecting Edit scan.
- Cancel an in-progress scan by selecting Cancel scan run.
- Delete your scan by selecting Delete scan.
Note
- Deleting your scan does not delete catalog assets created from previous scans.
Browse and search assets
After scanning your Azure Databricks, you can browse Unified Catalog or search Unified Catalog to view the asset details and lineage.
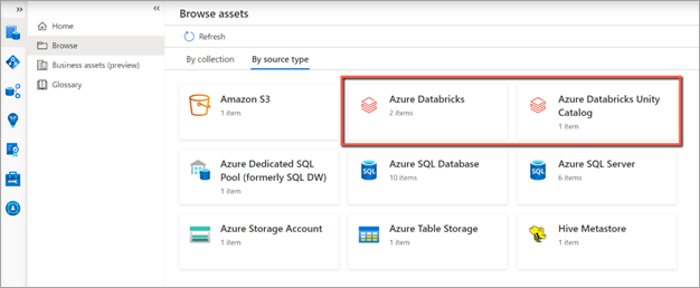
When you browse by source types, you see two entries for Azure Databricks Unity Catalog and Azure Databricks. The Azure Databricks Unity Catalog entry contains the Unity Catalog artifacts, including the metastore and its catalogs, schemas, tables, and views. The Azure Databricks entry contains the workspace artifacts.
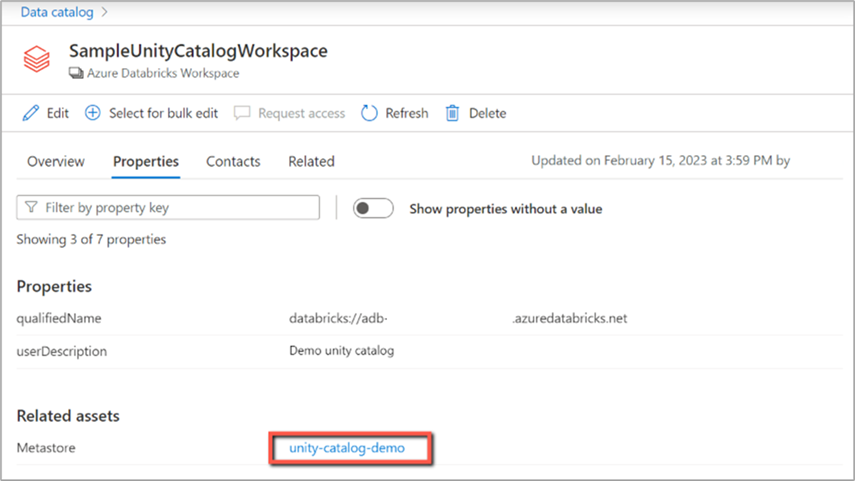
From the Azure Databricks workspace asset, you can find the associated Unity Catalog under the Properties tab. The association also works in reverse.
Lineage
When you browse a particular Azure Databricks asset, you can see the notebooks that have captured lineage.
Go to the asset and select the lineage tab. You can see the lineage on the Azure Databricks Notebook asset or table/view asset when applicable.

Supported lineage scenarios
Lineage is supported for tables and views when they're connected via Databricks notebooks within the Unity Catalog.
Lineage appears only for objects scanned through Microsoft Purview. All related assets must be scanned to form a complete lineage graph. Ensure all Databricks workspaces with relevant notebooks are included in Microsoft Purview scans.
Lineage limitations
- When you execute notebooks through Databricks jobs, column-level lineage might not be captured.
- Microsoft Purview shows only partial lineage if you don't scan all objects involved in a data flow. For example, if a notebook in Workspace A writes data to a table in Workspace B, but you only scan Workspace A by using Microsoft Purview, the lineage shows the notebook but not the destination table, resulting in incomplete lineage.
- If an external service triggers a notebook (for example, Azure Data Factory [ADF] pipeline calling a Databricks job), the lineage in Microsoft Purview doesn't reflect that dependency.
- In this case, lineage between ADF datasets and Databricks assets isn't shown.
- Only lineage built within Databricks notebooks is captured.
Lineage is missing scenario
Lineage extraction is passive; Microsoft Purview only ingests what Unity Catalog system table logs and makes accessible.
- Refer to the preceding sections to ensure that your lineage scenario is supported.
- Validate that Unity Catalog lineage system tables (
system.access.table_lineage,system.access.column_lineage) are populated correctly. - Raise a support ticket if you still encounter problems.
Refer to the supported capabilities section for supported Databricks Unity Catalog lineage scenarios. For more information about lineage in general, see data lineage and lineage user guide.
Frequently asked questions (FAQ)
Does Microsoft Purview capture column-level lineage from Unity Catalog?
Microsoft Purview captures lineage at both the Unity Catalog table and view level, as well as at the column level.
Why don't I see column-level lineage?
Column-level lineage appears when you run your notebook from a cluster. SQL warehouses don't generate column-level lineage.
How do I fix a timeout error?
Your scan might not finish if your workspace contains a large number of assets. To fix this problem, scope your scan to a few catalogs at a time. This approach reduces the number of assets in each scan and helps your scans complete.
Why didn't Microsoft Purview fetch the lineage after I ran my notebook?
After you run your notebook, Databricks might take a few minutes to update the lineage information in its system tables. Microsoft Purview can fetch the lineage after the system tables are updated.
Next steps
After you register your source, use the following guides to learn more about Microsoft Purview and your data: