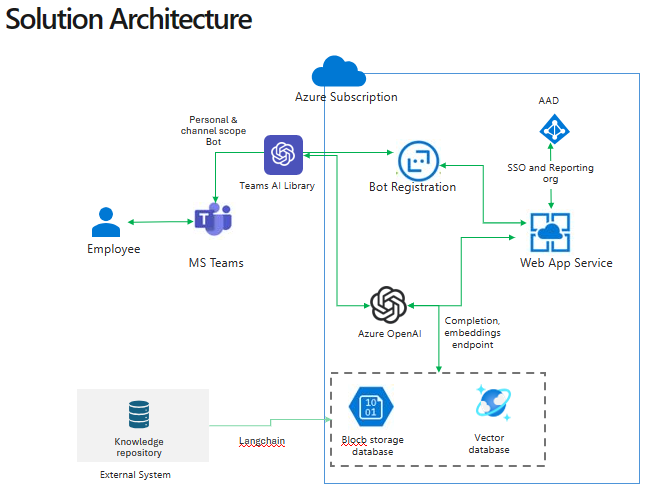
Teams Azure Open AI Embeddings And Redis Search On Uploaded File Using Bot
This bot has been created using Bot Builder and Teams Toolkit, this Azure Open AI sample app demonstrates the user search functionality based on Azure Open AI embeddings, Redis DB search and completion APIs for user queries, and it is based on files uploaded by an admin using a bot.
Included Features
- Bots
- Adaptive Cards
- Azure Open AI
- Redis Search
- Blob Storage
Interaction with bot - Admin
Interaction with bot - User
Prerequisites
Microsoft Teams is installed and you have an account
dev tunnel or ngrok latest version or equivalent tunnelling solution
Node.js, supported versions: 16, 18
An M365 account. If you do not have M365 account, apply one from M365 developer program
Teams Toolkit Visual Studio Code Extension version 5.0.0 and higher or TeamsFx CLI
Run the app (Using Teams Toolkit for Visual Studio Code)
The simplest way to run this sample in Teams is to use Teams Toolkit for Visual Studio Code.
- Ensure you have downloaded and installed Visual Studio Code
- Install the Teams Toolkit extension
- Select File > Open Folder in VS Code and choose this samples directory from the repo
- Using the extension, sign in with your Microsoft 365 account where you have permissions to upload custom apps
- In the
env/.env.localorenv/.env.local.userfile, fill all the required values for below and other values will be generated automatically once you debug/start the app.
SECRET_AZURE_OPENAPI_KEY=<Azure OpenAI Service Key>
REDIS_CONNECTION=redis://default:<REDIS_PASSWORD>=@<REDIS_HOST>:<REDIS_PORT>
EMBEDDING_MODEL_URL=https://<Azure OpenAI Service Name>.openai.azure.com/openai/deployments/<Your Deployed Embedding Model Name>/embeddings?api-version=2023-03-15-preview
COMPLETION_MODEL_URL=https://<Azure OpenAI Service Name>.openai.azure.com/openai/deployments/<Your Deployed Completion Model Name>
AZURE_STORAGE_CONNECTION_STRING='DefaultEndpointsProtocol=https;AccountName=<Storage Account Name>;AccountKey=<Your Account Key>;EndpointSuffix=core.windows.net'
Note: Update the Azure Open API version from 2023-03-15-preview to any specific or public version in all the files wherever applicable.
Note: If you are deploying the code, make sure that above mentioned values are properly updated at
env/.env.devorenv/.env.dev.userwherever required.
- Select Debug > Start Debugging or F5 to run the app in a Teams web client.
- Alternatively use the
Run and Debug Activity Panelin Visual Studio Code and click theRun and Debuggreen arrow button. - In the browser that launches, select the Add button to install the app to Teams.
If you do not have permission to upload custom apps (sideloading), Teams Toolkit will recommend creating and using a Microsoft 365 Developer Program account - a free program to get your own dev environment sandbox that includes Teams
Setup
Note these instructions are for running the sample on your local machine, the tunnelling solution is required because the Teams service needs to call into the bot.
Run ngrok - point to port 3978
ngrok http 3978 --host-header="localhost:3978"Alternatively, you can also use the
dev tunnels. Please follow Create and host a dev tunnel and host the tunnel with anonymous user access command as shown below:devtunnel host -p 3978 --allow-anonymousSetup for Bot
In Azure portal, create a Azure Bot resource.
- For bot handle, make up a name.
- Select "Use existing app registration" (Create the app registration in Microsoft Entra ID beforehand.)
- Choose "Accounts in any organizational directory (Any Azure AD directory - Multitenant)" in Authentication section in your App Registration to run this sample smoothly.
- If you don't have an Azure account create an Azure free account here
In the new Azure Bot resource in the Portal,
- Ensure that you've enabled the Teams Channel
- In Settings/Configuration/Messaging endpoint, enter the current
httpsURL you were given by running the tunneling application. Append with the path/api/messages
Clone the repository
git clone https://github.com/OfficeDev/Microsoft-Teams-Samples.gitIn a terminal, navigate to
samples/bot-ai-enterprise-search/nodejsInstall modules
npm install
- Update the
env/.env.localorenv/.env.local.userfile, fill all the required values for below and other values will be generated automatically once you debug/start the app.
SECRET_AZURE_OPENAPI_KEY=<Azure OpenAI Service Key>
REDIS_CONNECTION=redis://default:<REDIS_PASSWORD>=@<REDIS_HOST>:<REDIS_PORT>
EMBEDDING_MODEL_URL=https://<Azure OpenAI Service Name>.openai.azure.com/openai/deployments/<Your Deployed Embedding Model Name>/embeddings?api-version=2023-03-15-preview
COMPLETION_MODEL_URL=https://<Azure OpenAI Service Name>.openai.azure.com/openai/deployments/<Your Deployed Completion Model Name>
AZURE_STORAGE_CONNECTION_STRING='DefaultEndpointsProtocol=https;AccountName=<Storage Account Name>;AccountKey=<Your Account Key>;EndpointSuffix=core.windows.net'
Note: Update the Azure Open API version from 2023-03-15-preview to any specific or public version in all the files whereever applicable.
Run your bot at the command line:
npm startThis step is specific to Teams.
Edit the
manifest.jsoncontained in theappManifestfolder (appManifest.adminandappManifest.userfolders) to replace your Microsoft App Id (that was created when you registered your bot earlier) everywhere you see the place holder string<BOT_ID>(depending on the scenario the Microsoft App Id may occur multiple times in themanifest.json)Also, update the <TEAMS_APP_ID> with unique Guid for both the
manifest.jsonstored in (appManifest.adminandappManifest.user) as this app has 2 roles: Admin and User.Edit the
manifest.jsonforvalidDomainswith base Url domain. E.g. if you are using ngrok it would behttps://1234.ngrok-free.appthen your domain-name will be1234.ngrok-free.appand if you are using dev tunnels then your domain will be like:12345.devtunnels.ms.Zip up the contents of the
appManifestfolder (appManifest.admin and appManifest.user folders separately) to create amanifest.zip(Make sure that zip file does not contains any subfolder otherwise you will get error while uploading your .zip package)Upload the
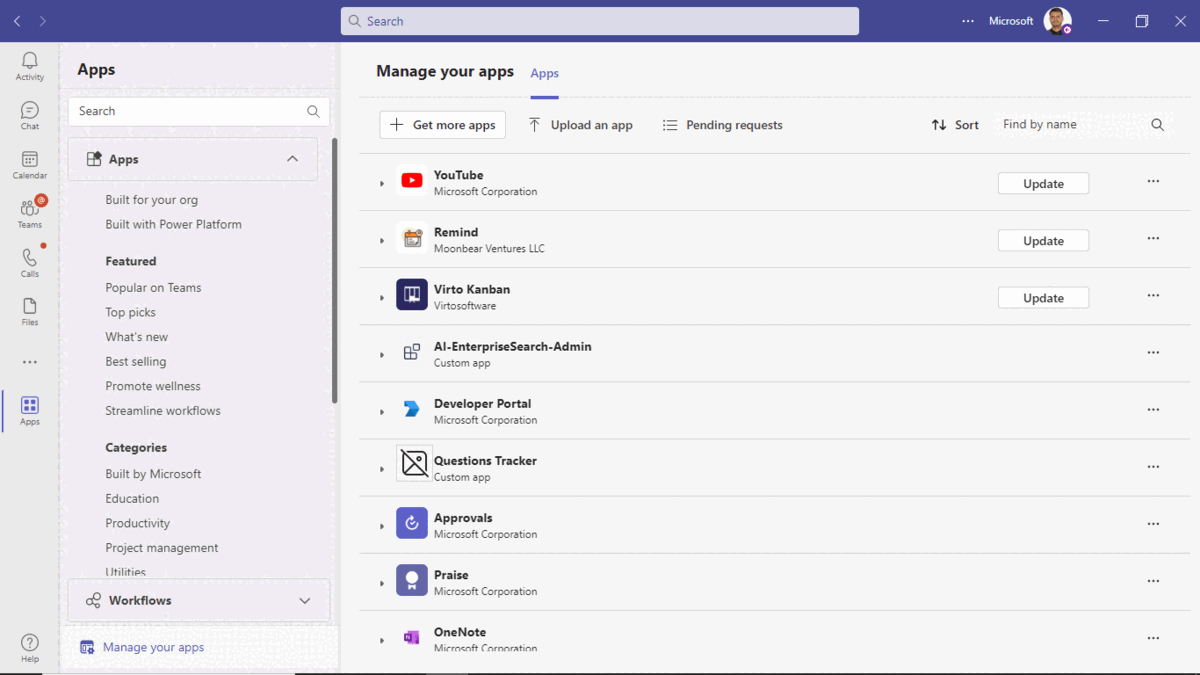
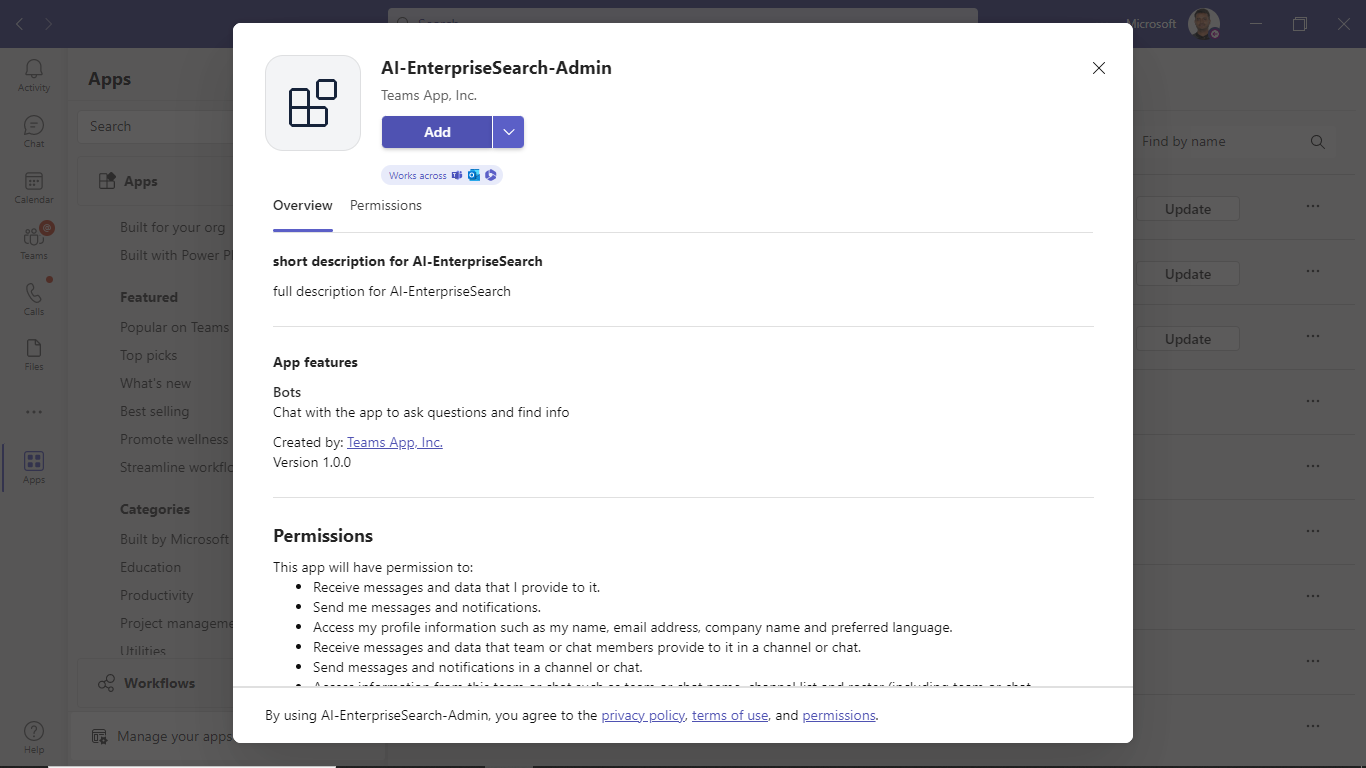
manifest.zipto Teams (In Teams Apps/Manage your apps click "Upload an app". Browse to and Open the .zip file. At the next dialog, click the Add button.)Add the app to personal scope (Supported app scope)
Running the sample
Admin Functionalities
Adding the bot:
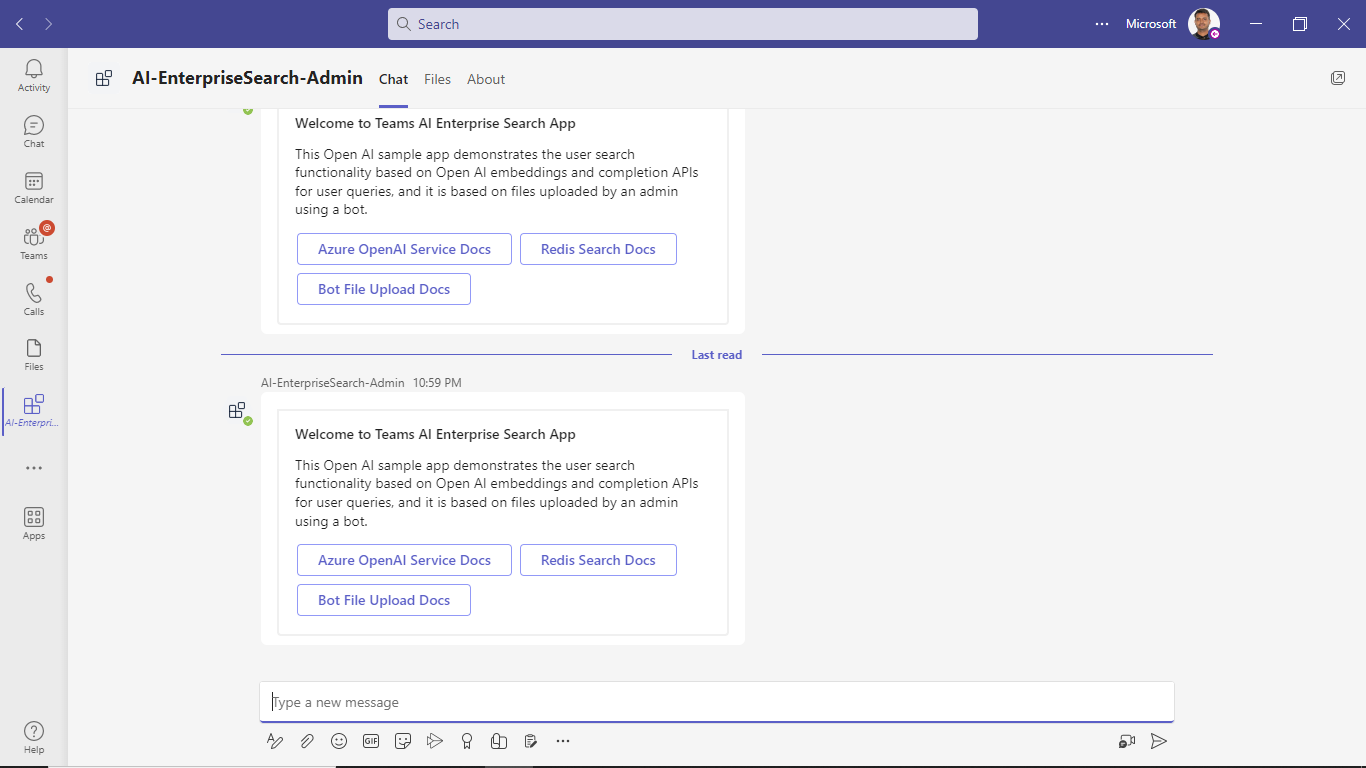
Welcome Card:
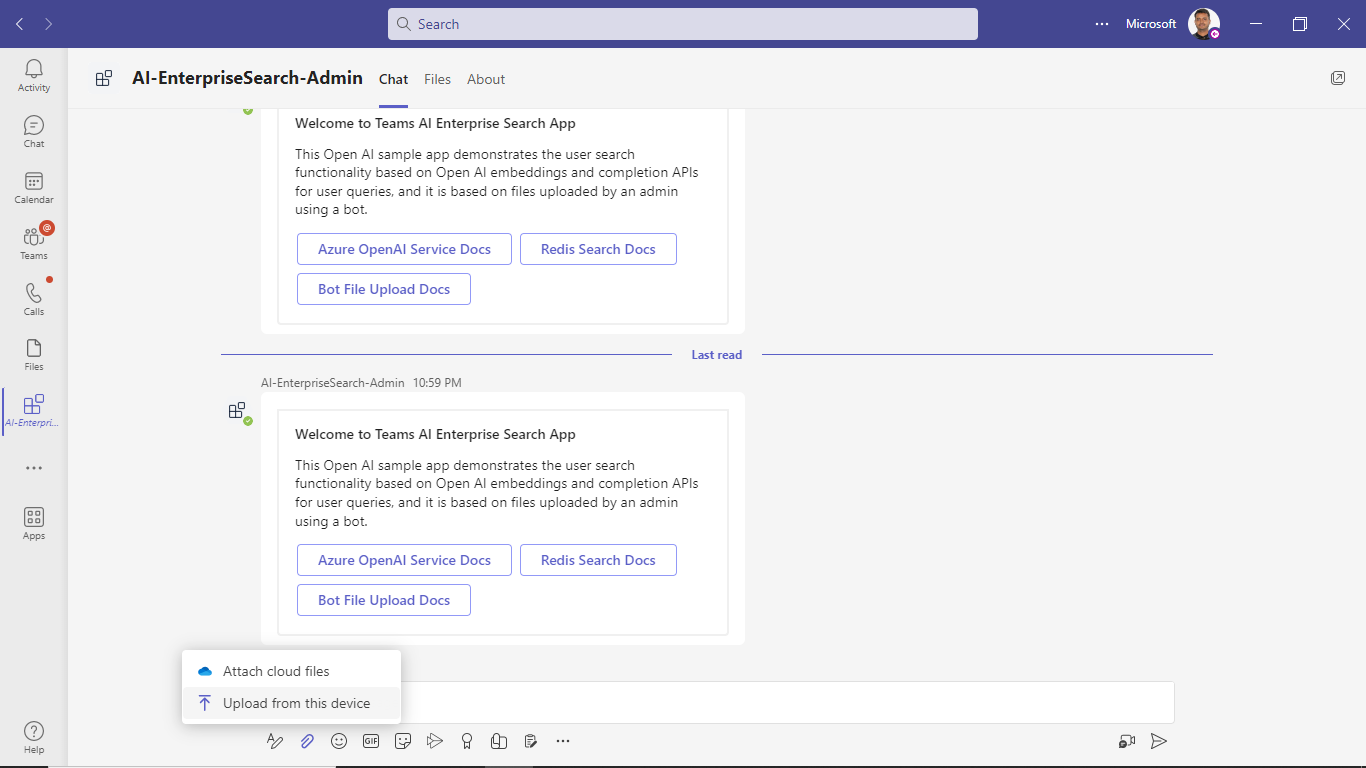
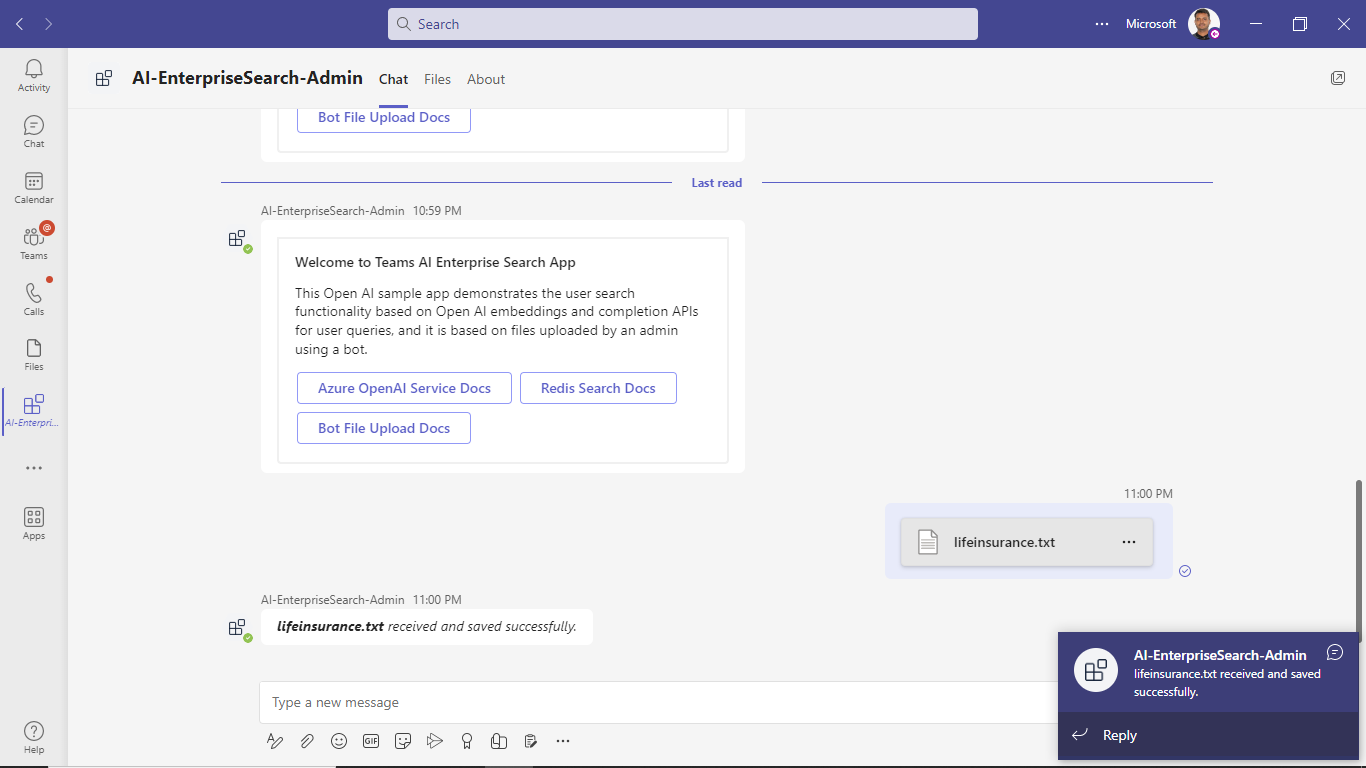
Admin can send a file to the bot as an attachment in the message compose section in Teams. This will be delivered to the bot as a Message Activity and the code in this sample fetches and saves the file in Azure blob and creates the embedding for uploaded file and save it in Redis Cache Database.
File Uploaded Successfully:
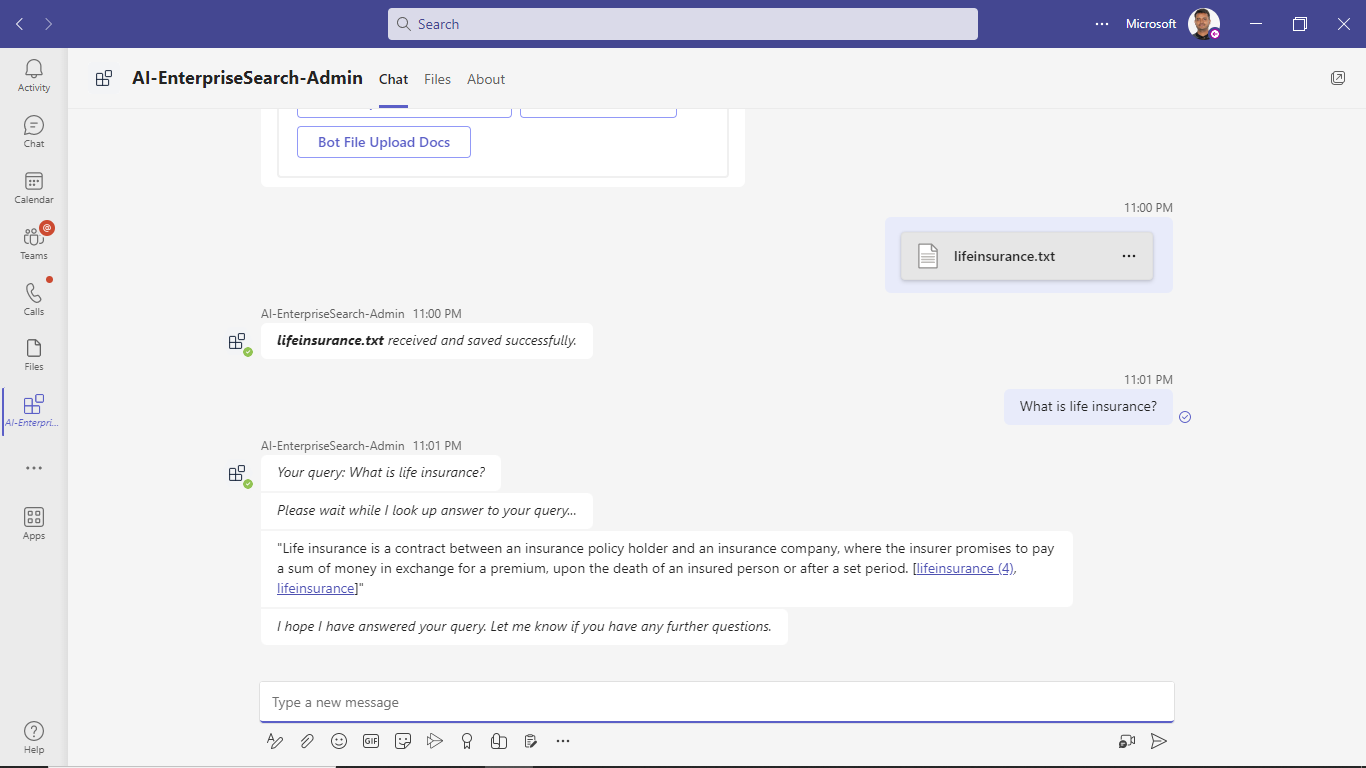
Now, admin can ask query based on the uploaded docs and Azure Open AI will generate the embedding for query and search the most relevant vectors for user query in the Redis search database based on the embeddings generated for uploaded file contents.
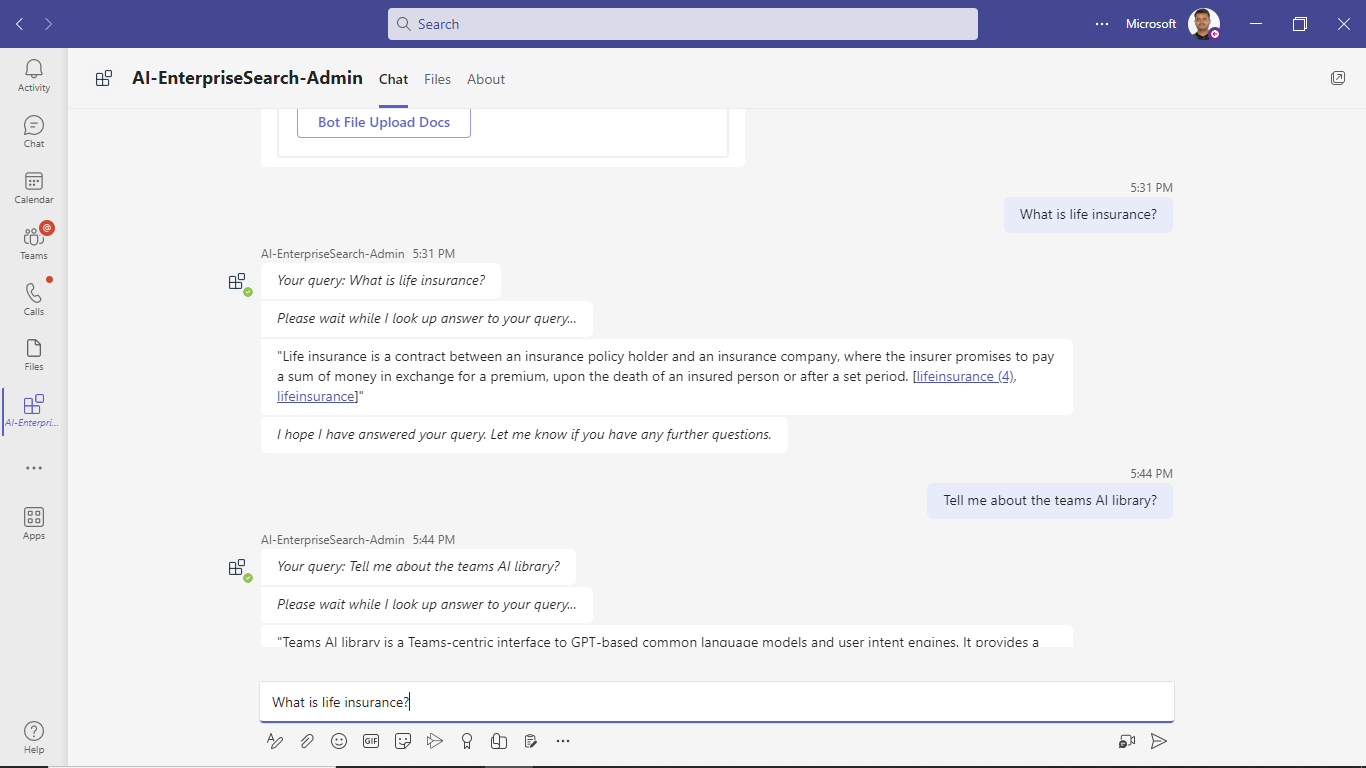
Admin will get the final answer based on the uploaded docs using Azure Open AI completion model:
User Functionalities
Adding the bot:

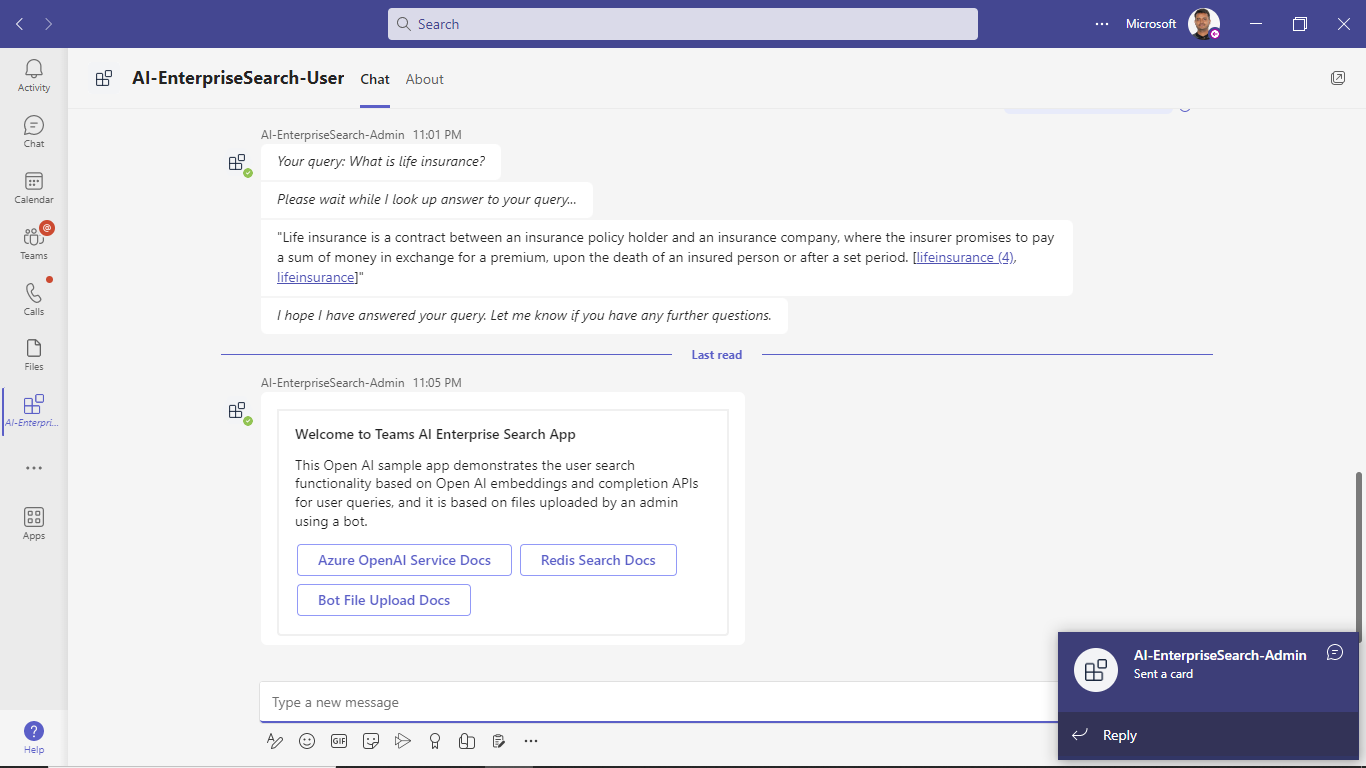
Welcome Card:
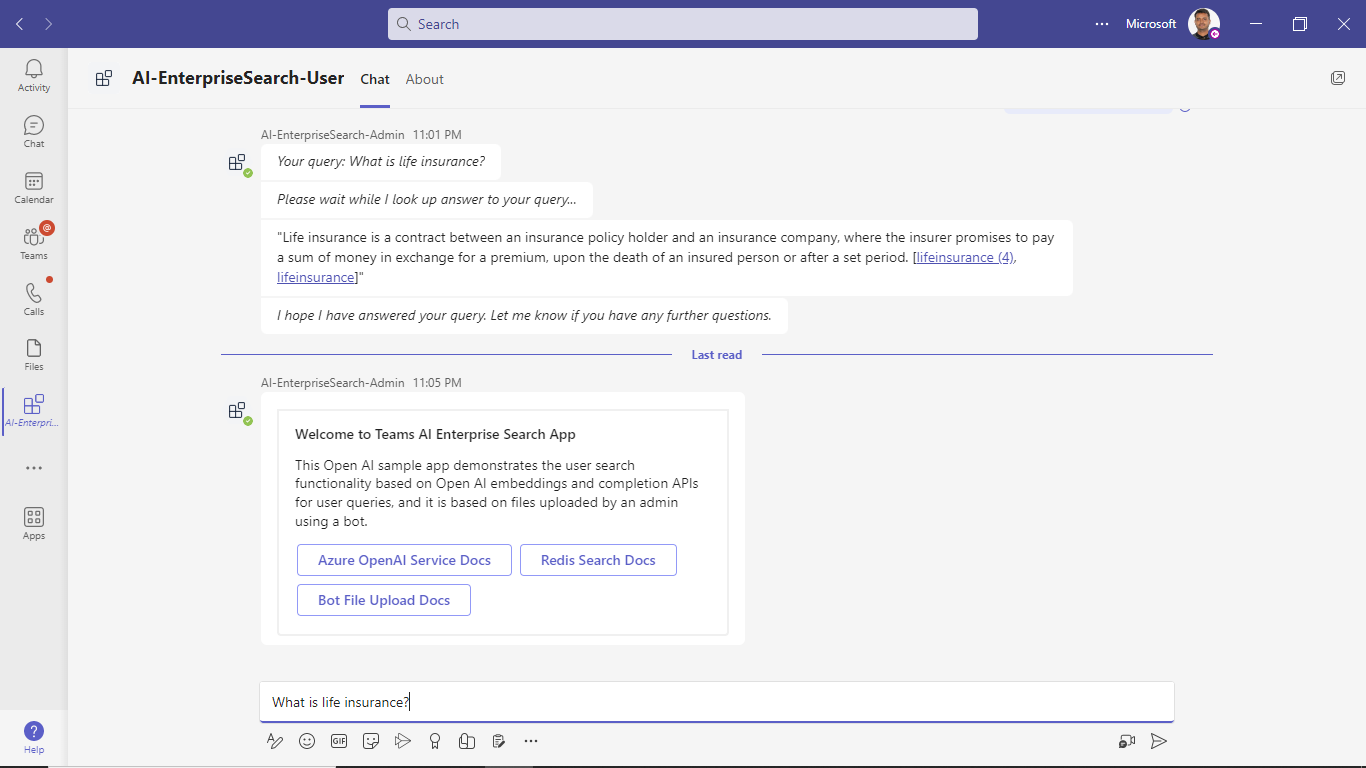
User can ask query based on the uploaded docs by admin and Azure Open AI will generate the embedding for query and search the most relevant vectors for user query in the Redis search database based on the embeddings generated for uploaded file contents.
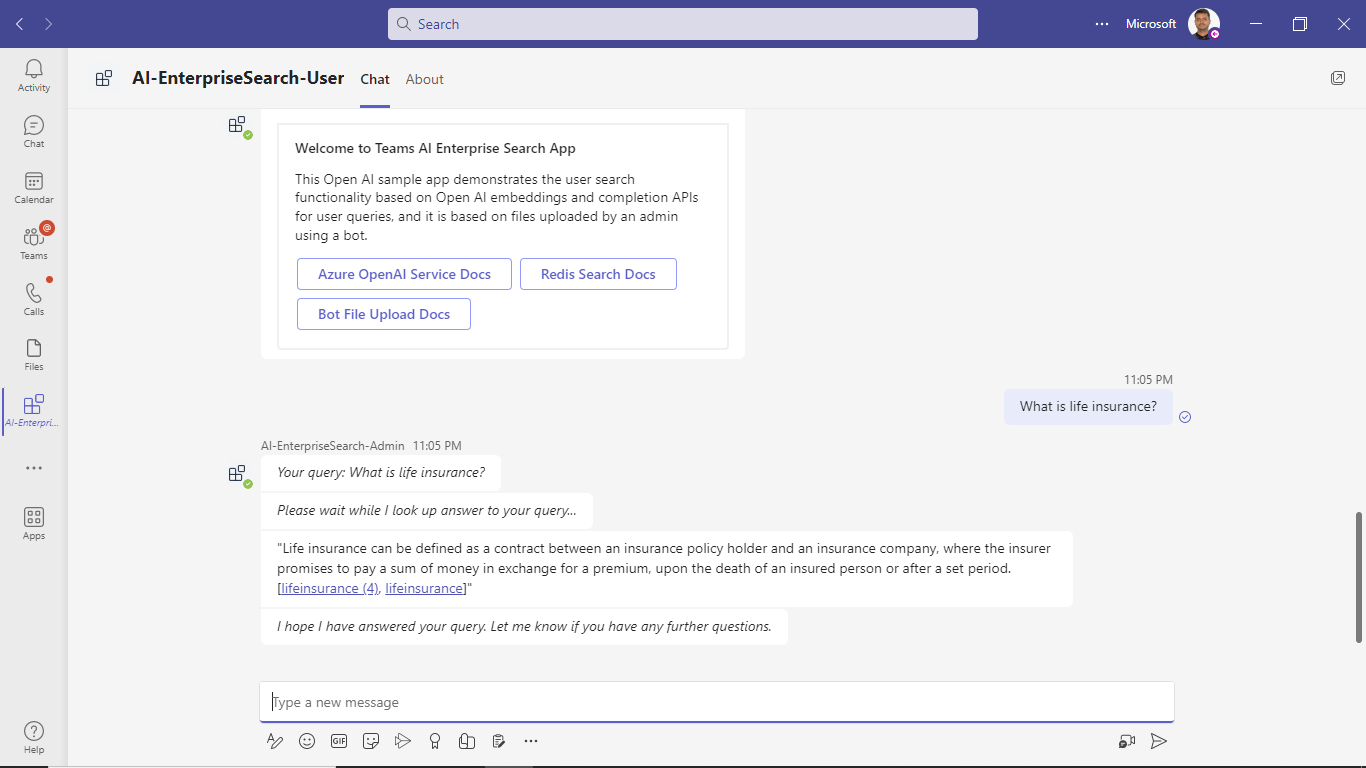
User will get the final answer based on the uploaded docs using Azure Open AI completion model:
Deploy to Azure
Deploy your project to Azure by following these steps:
| From Visual Studio Code | From TeamsFx CLI |
|---|---|
|
|
Note: Provisioning and deployment may incur charges to your Azure Subscription.
Note: Once the provisioning and deployment steps are finished please update the manifest.json contained in the appManifest folders (appManifest.admin and appManifest.user folders) for validDomains with base Url domain. E.g. if your deployed web app service URL is: https://botaxxxxx.azurewebsites.net/ then your domain-name will be botaxxxxx.azurewebsites.net.
Also, make sure that below key/values are properly added to the configuration section of web app after code deployement.
"name": "AZURE_STORAGE_CONNECTION_STRING", "value": 'DefaultEndpointsProtocol=https;AccountName=<Storage Account Name>;AccountKey=<Your Account Key>;EndpointSuffix=core.windows.net'
"name": "BOT_ID", "value": "<BOT_ID>"
"name": "BOT_PASSWORD", "value": "<BOT_PASSWORD>"
"name": "COMPLETION_MODEL_URL", "value": "https://<Azure OpenAI Service Name>.openai.azure.com/openai/deployments/<Your Deployed Completion Model Name>"
"name": "EMBEDDING_MODEL_URL", "value": "https://<Azure OpenAI Service Name>.openai.azure.com/openai/deployments/<Your Deployed Embedding Model Name>/embeddings?api-version=2023-03-15-preview"
"name": "REDIS_CONNECTION", "value": redis://default:<REDIS_PASSWORD>=@<REDIS_HOST>:<REDIS_PORT>
"name": "RUNNING_ON_AZURE", "value": "1"
"name": "SECRET_AZURE_OPENAPI_KEY", "value": "<Your Azure Open API Key>"
"name": "WEBSITE_NODE_DEFAULT_VERSION", "value": "~18"
"name": "WEBSITE_RUN_FROM_PACKAGE", "value": "1"
Preview
Once the provisioning and deployment steps are finished, you can sideload your app.
Note: Please refer above Setup section for manifest configurations and sideload your packages (Admin/User) in Teams.
Further reading
Bot
- Upload Files Using Bots
- Bot Framework Documentation
- Bot Basics
- Azure Bot Service Introduction
- Azure Bot Service Documentation
AI, Redis And Blob Storage
- Azure OpenAI Service
- Learn how to generate embeddings with Azure OpenAI
- Quickstart: Azure Blob Storage
- RediSearch