Connect data to School Data Sync
Important
By connecting and making institution data available with School Data Sync (SDS), you acknowledge that you are authorized to share this data with Microsoft and commit to adhere to your organization’s data governance standards.
Set up SDS for Microsoft 365 Education Tenant
- Microsoft 365 Education tenant
- Need Global Administrator Permissions
- Global Administrator accessing SDS needs SDS Plan 1 (A1) or SDS Plan 2 (A3 / A5) License
SDS Access and First Time sign-in
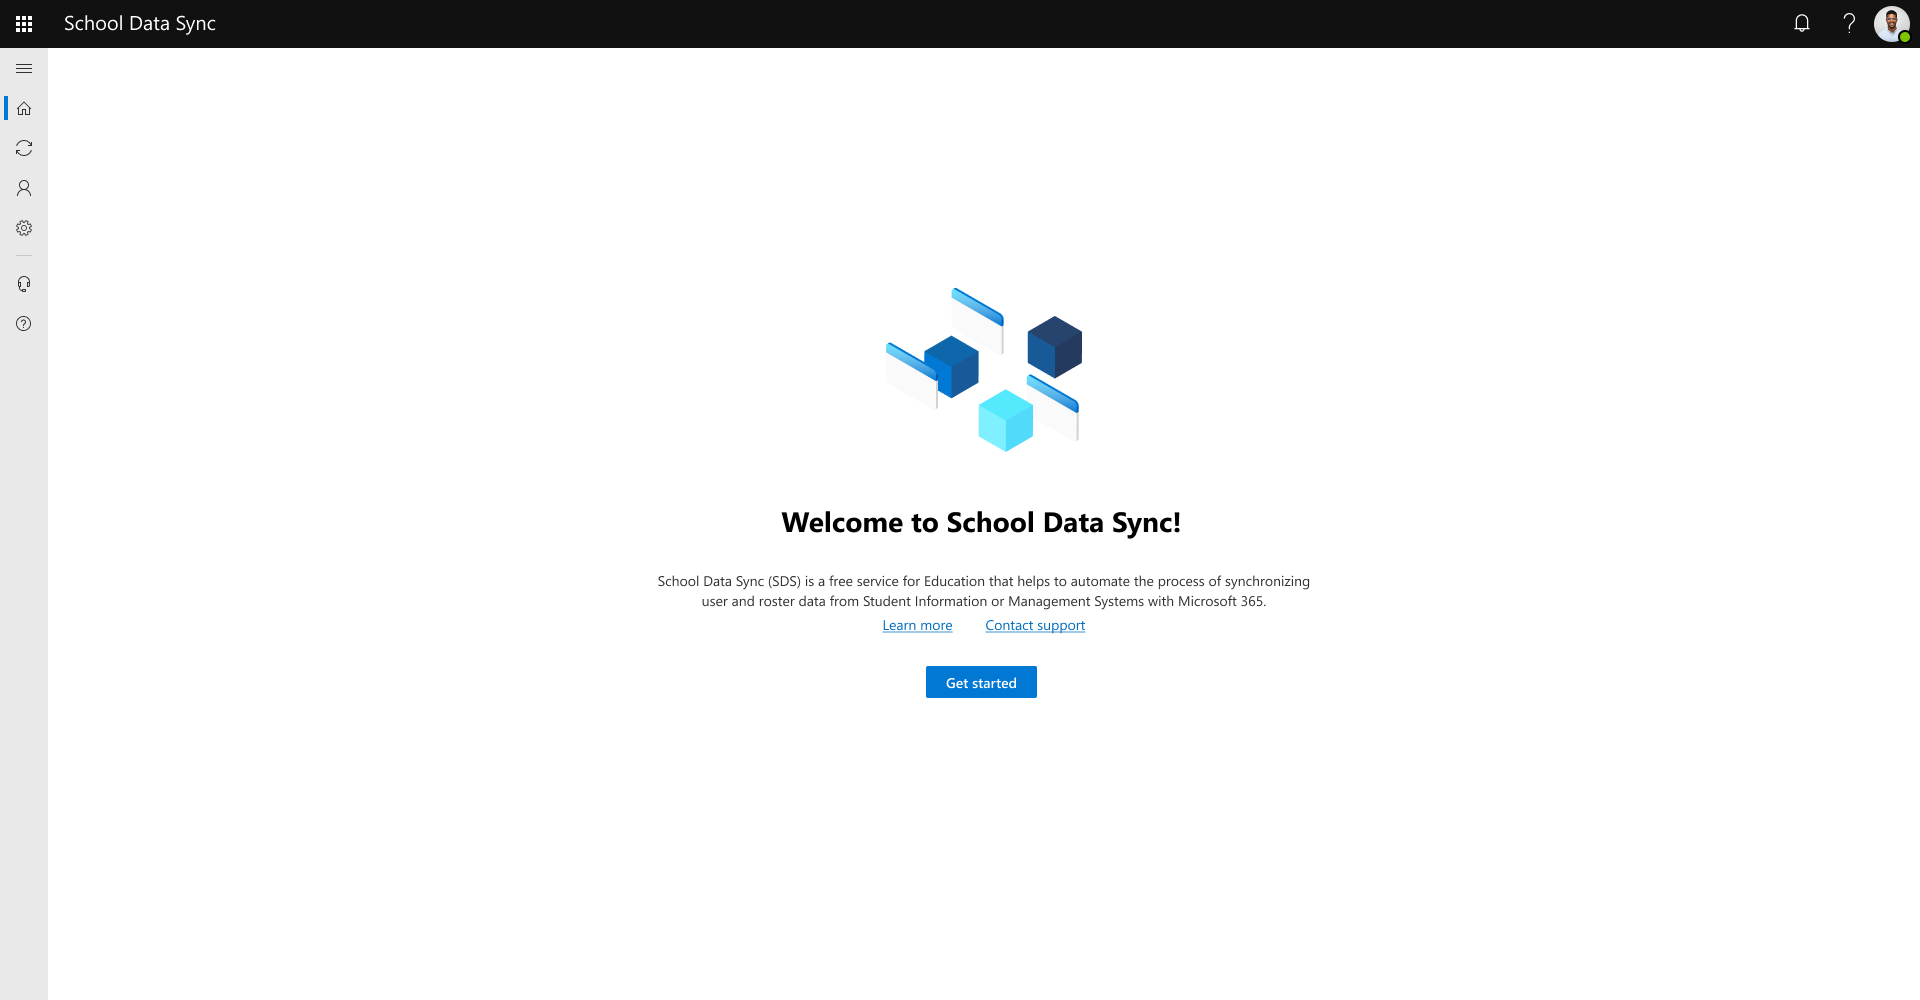
To access the SDS Admin Portal launch your web browser, navigate to sds.microsoft.com, and then sign in using your Microsoft 365 Global Administrator account.
Select Get started.
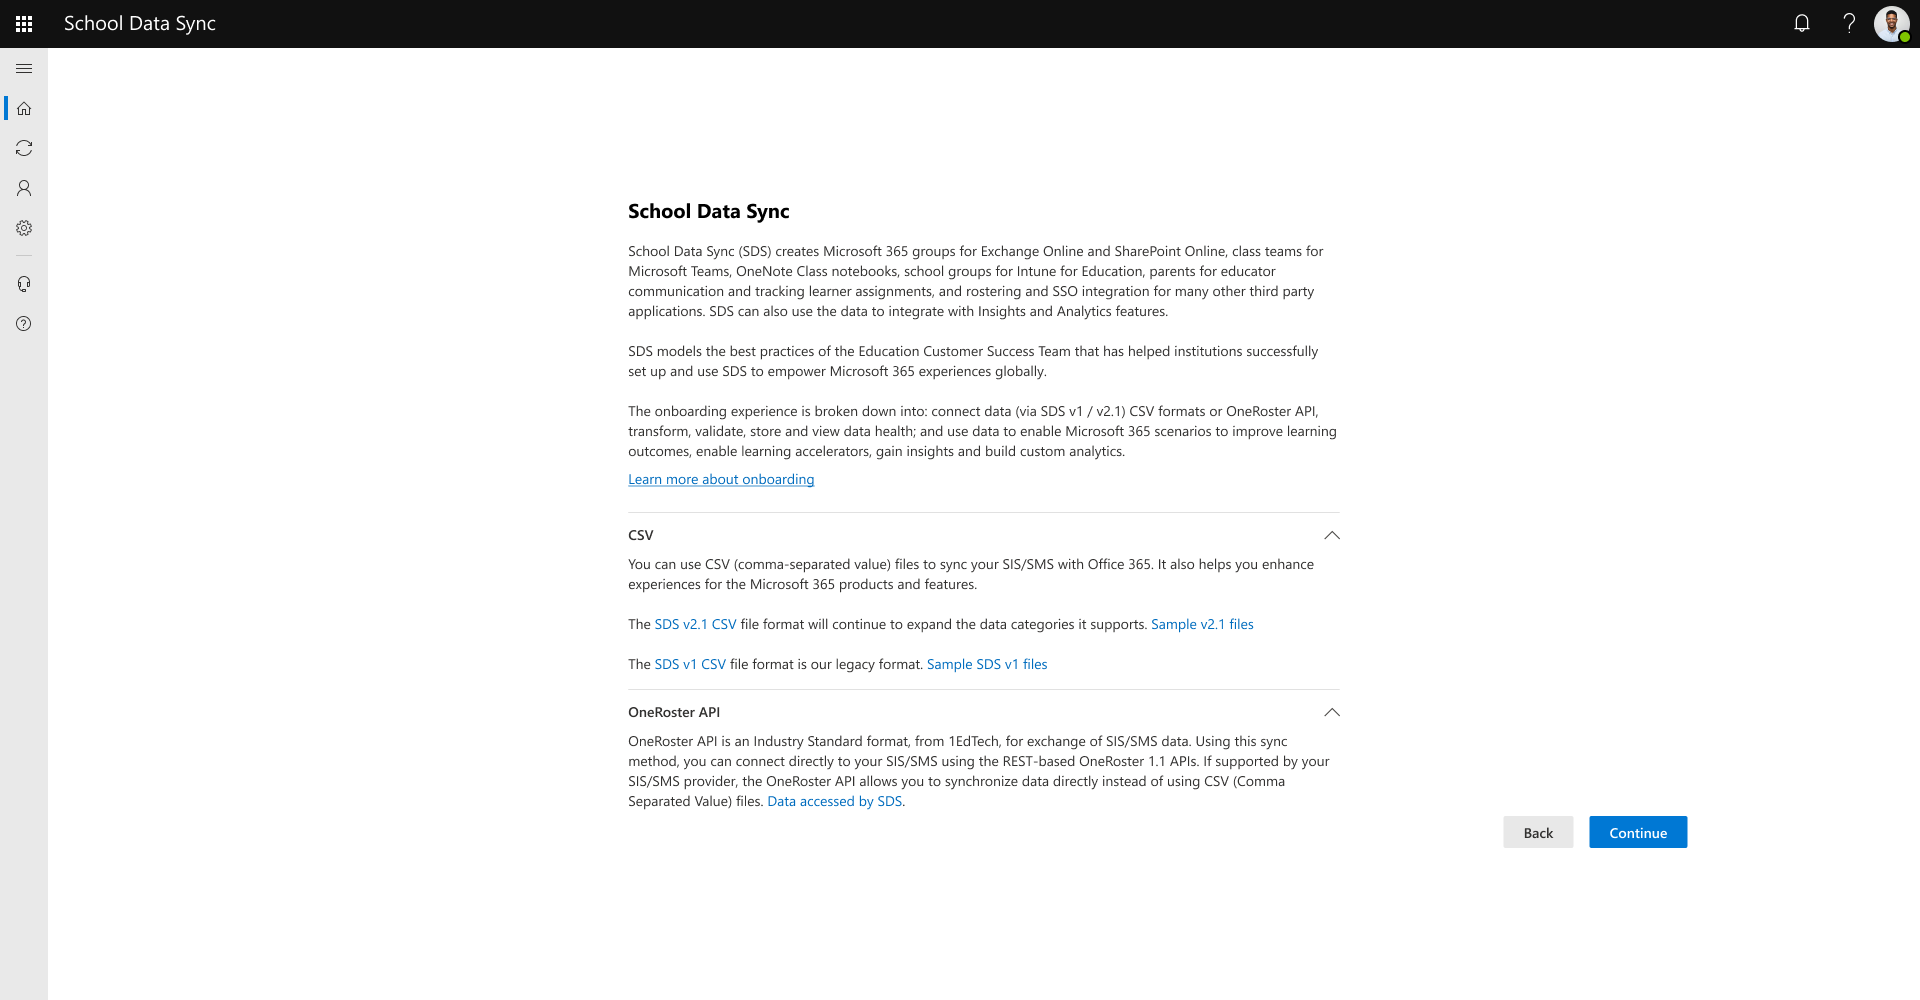
Select Continue.
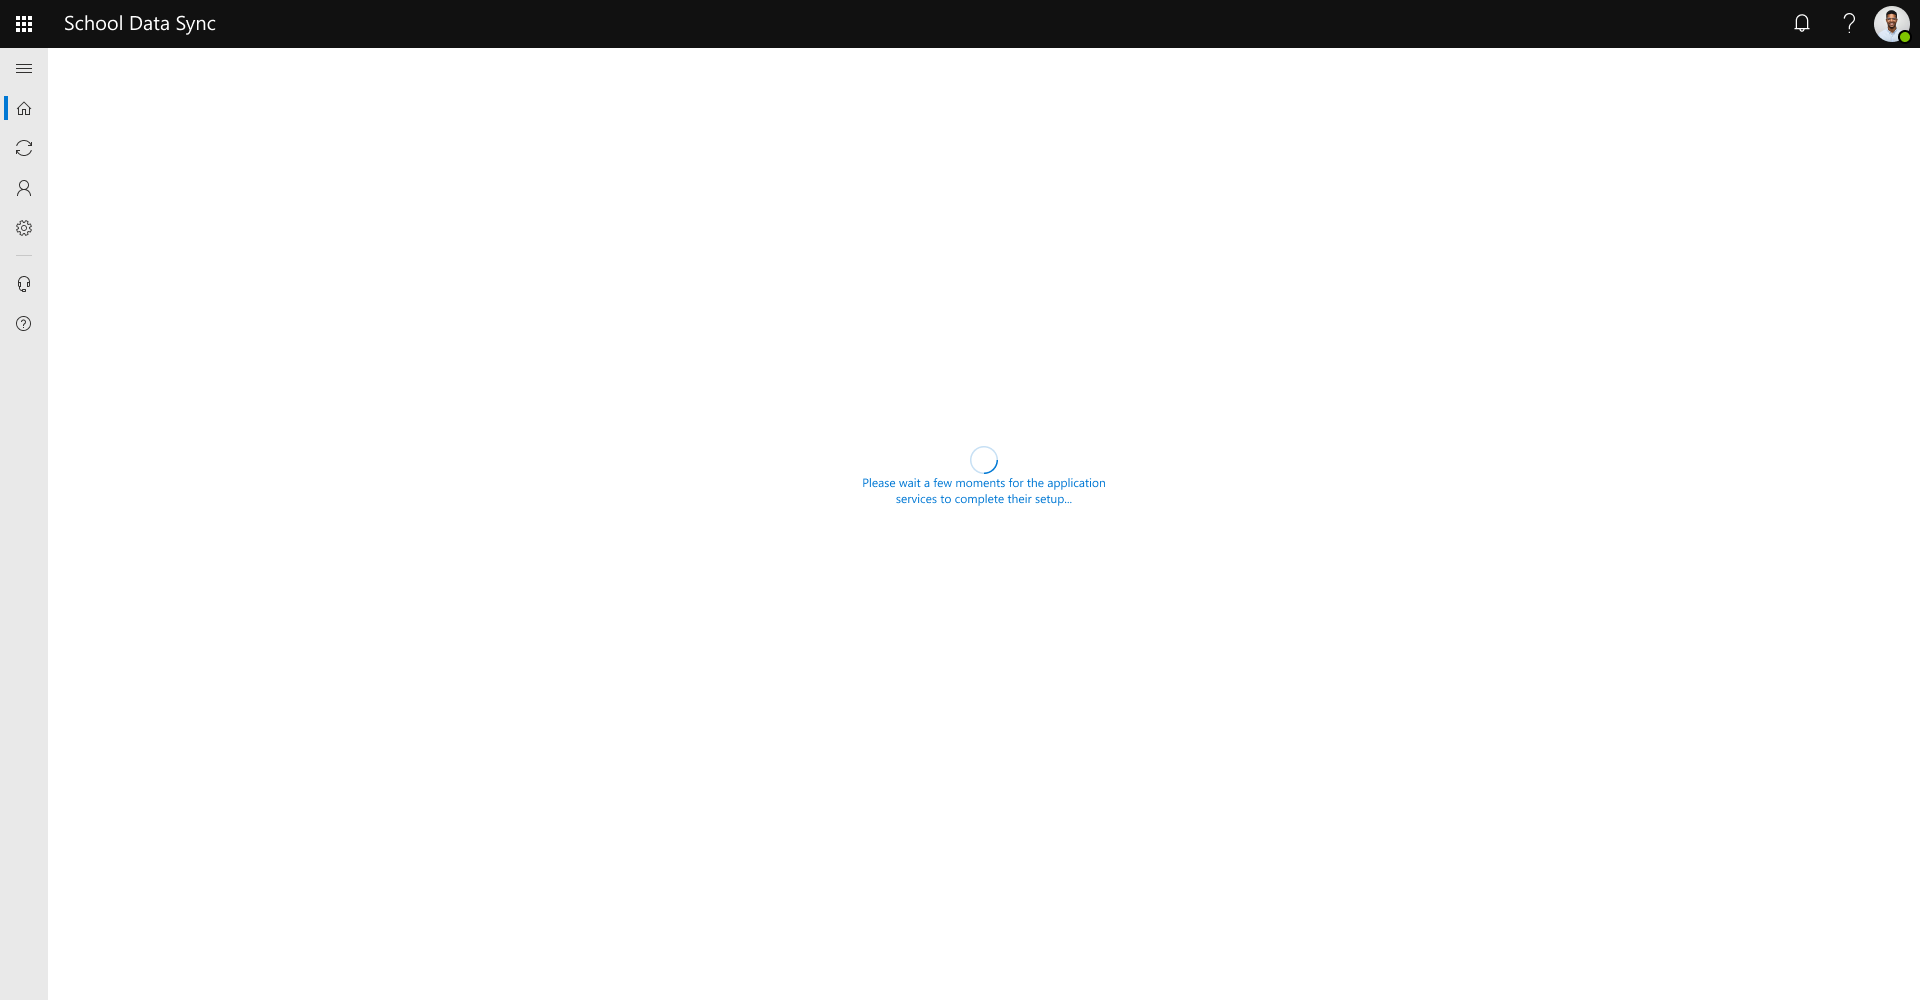
Allow a few moments for services to provision to tenant before next step.
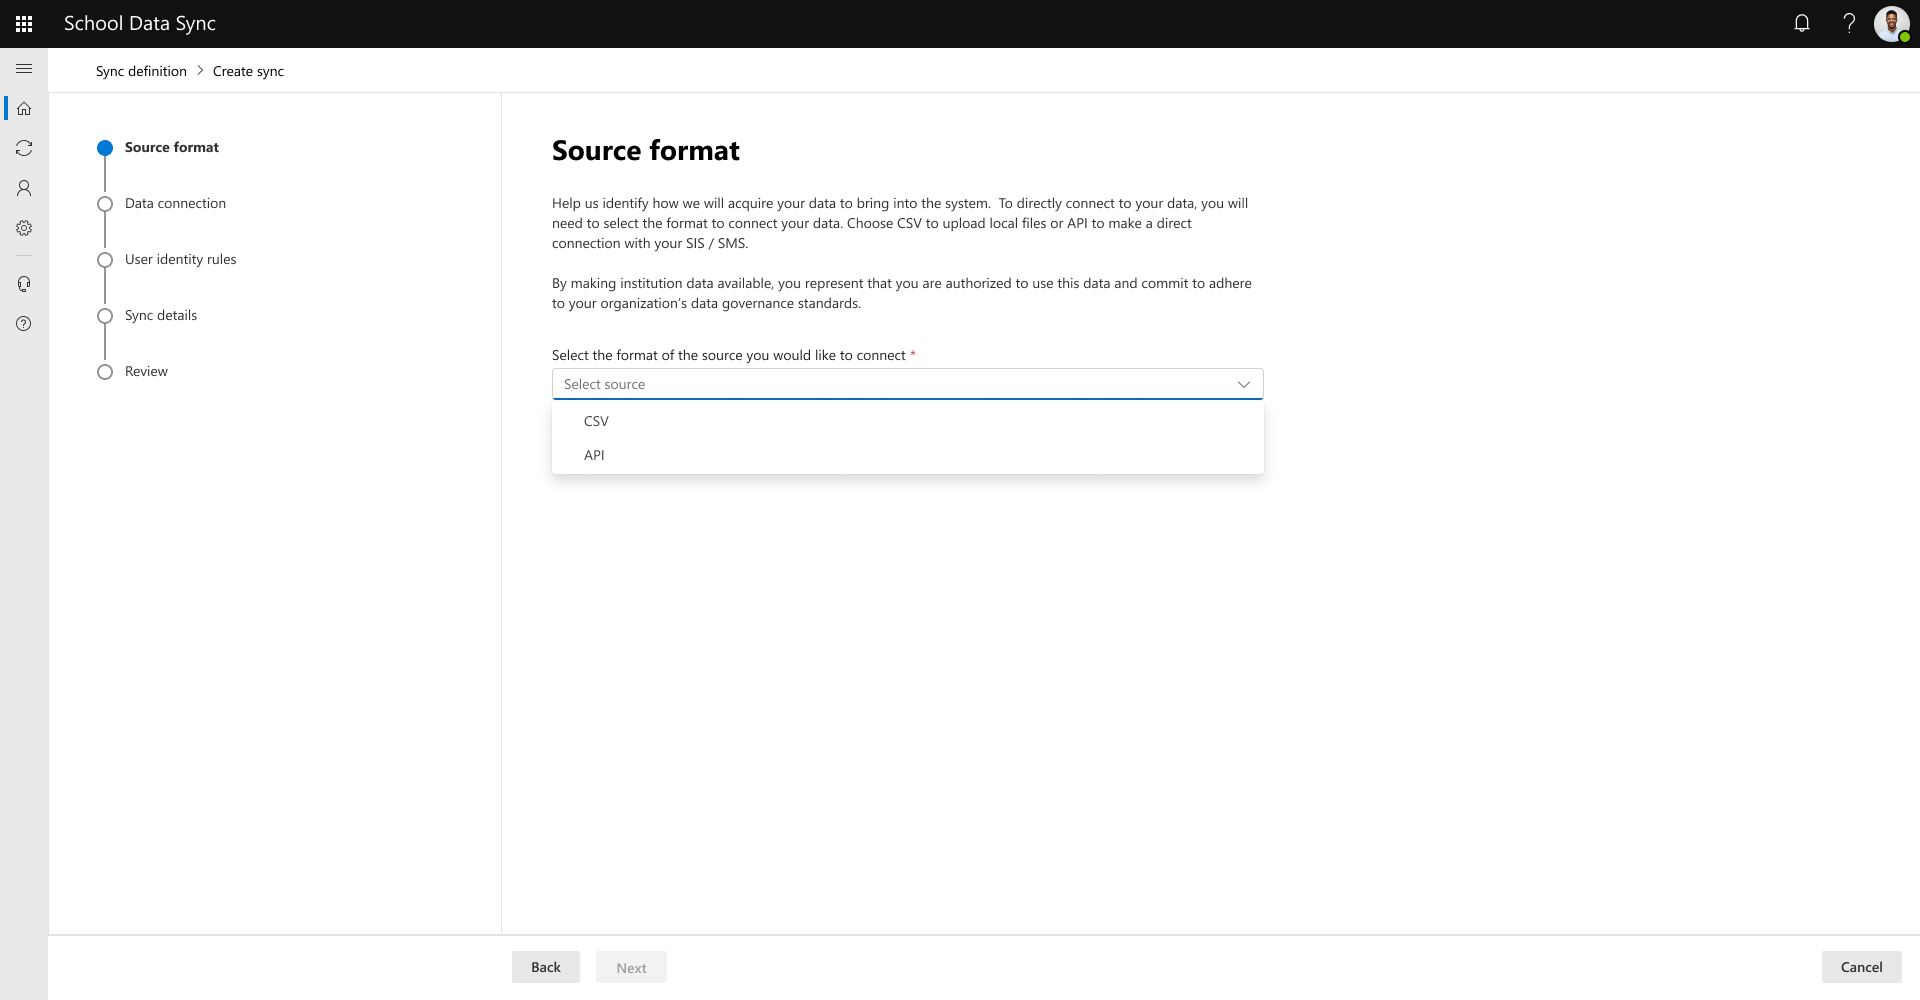
Select the Source format. For data supplied through SDS v2.1 CSV or SDS v1 CSV, select CSV. For data supplied through OneRoster API, select API. After you make your choice, select Next.


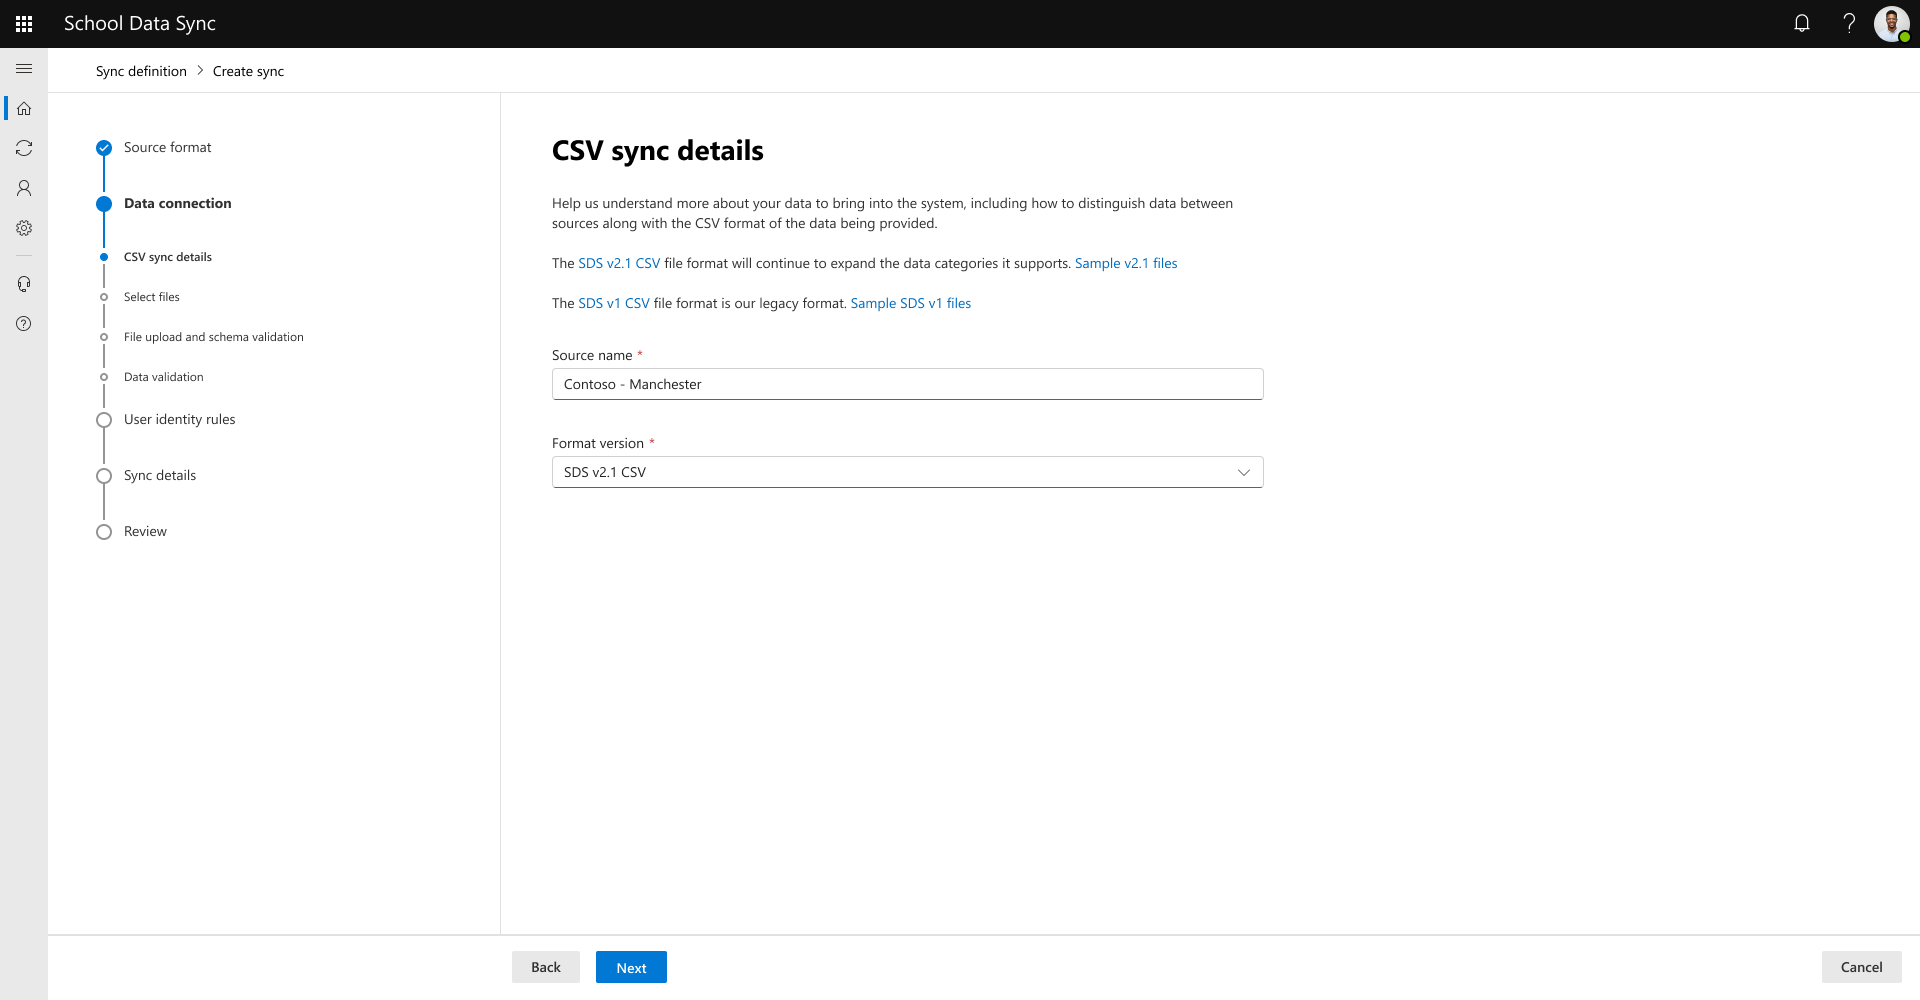
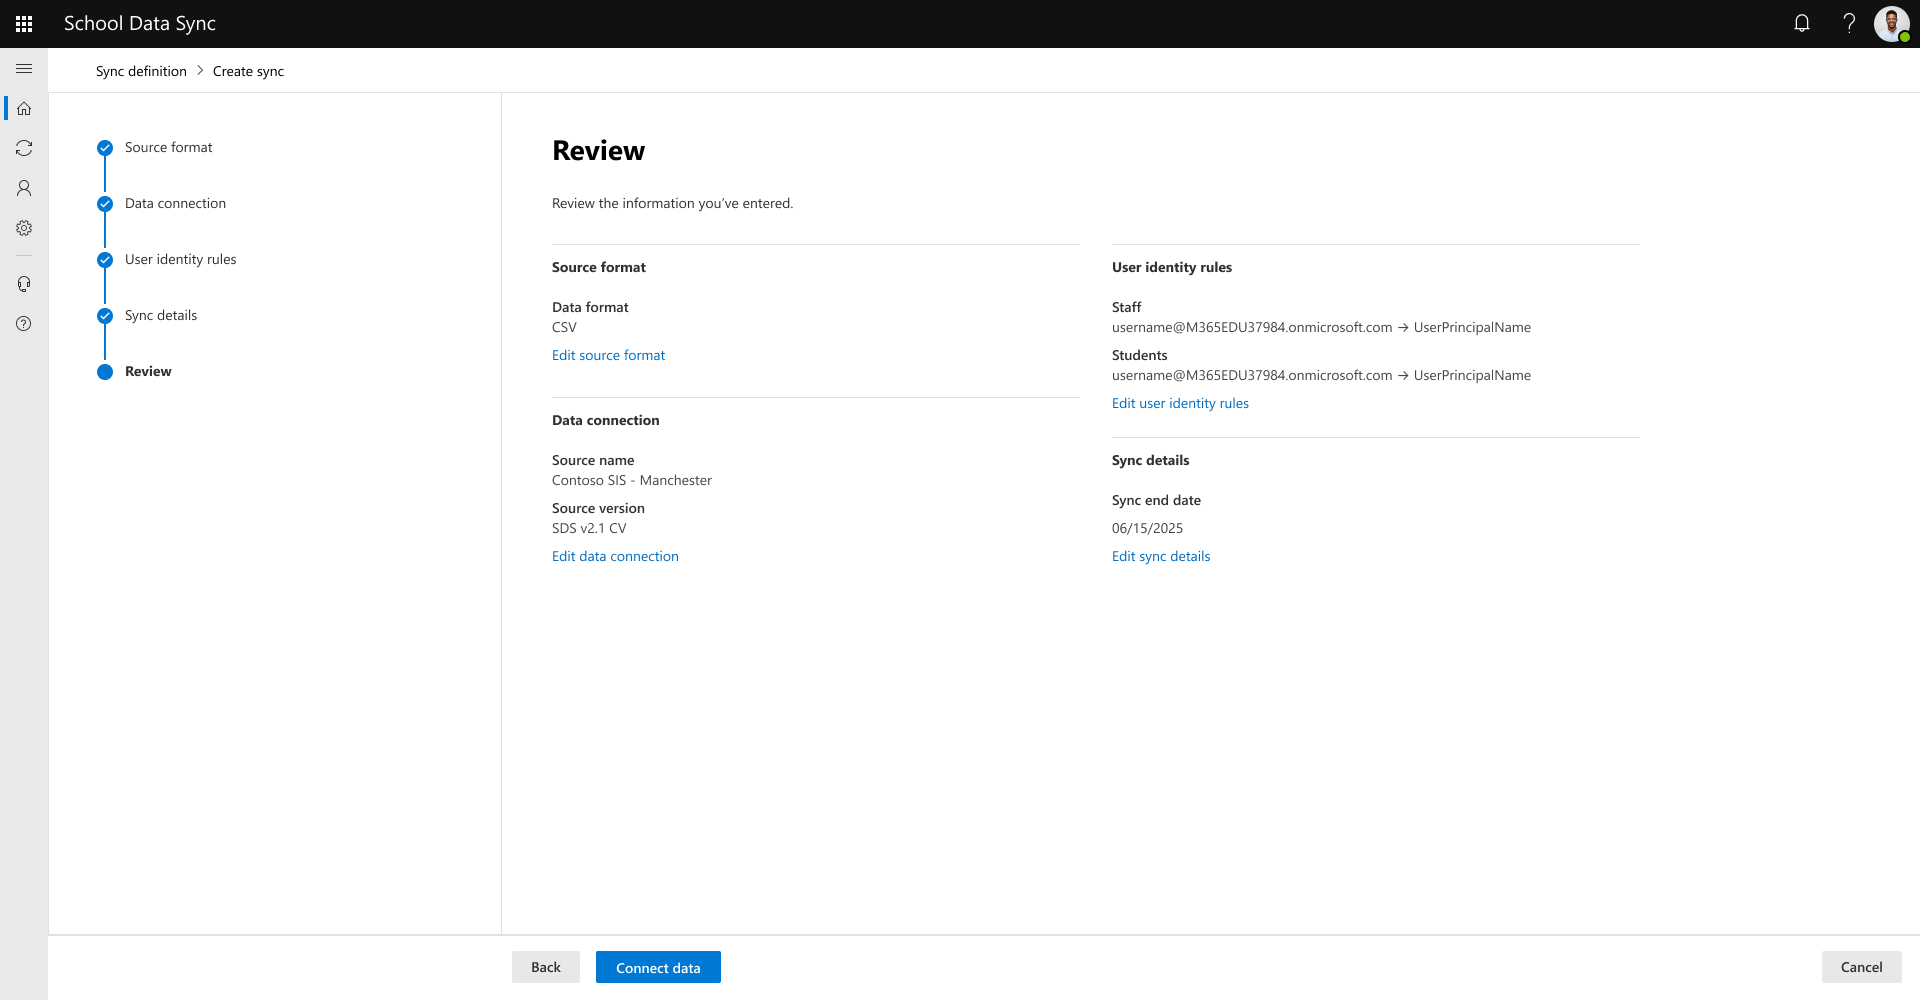
Provide the name of the connected data Student Information System (SIS) or Student Management System (SMS). Include information to help distinguish the connected data between different sources for managing and troubleshooting purposes. For format version, select SDS v2.1 CSV. Select Next to continue.
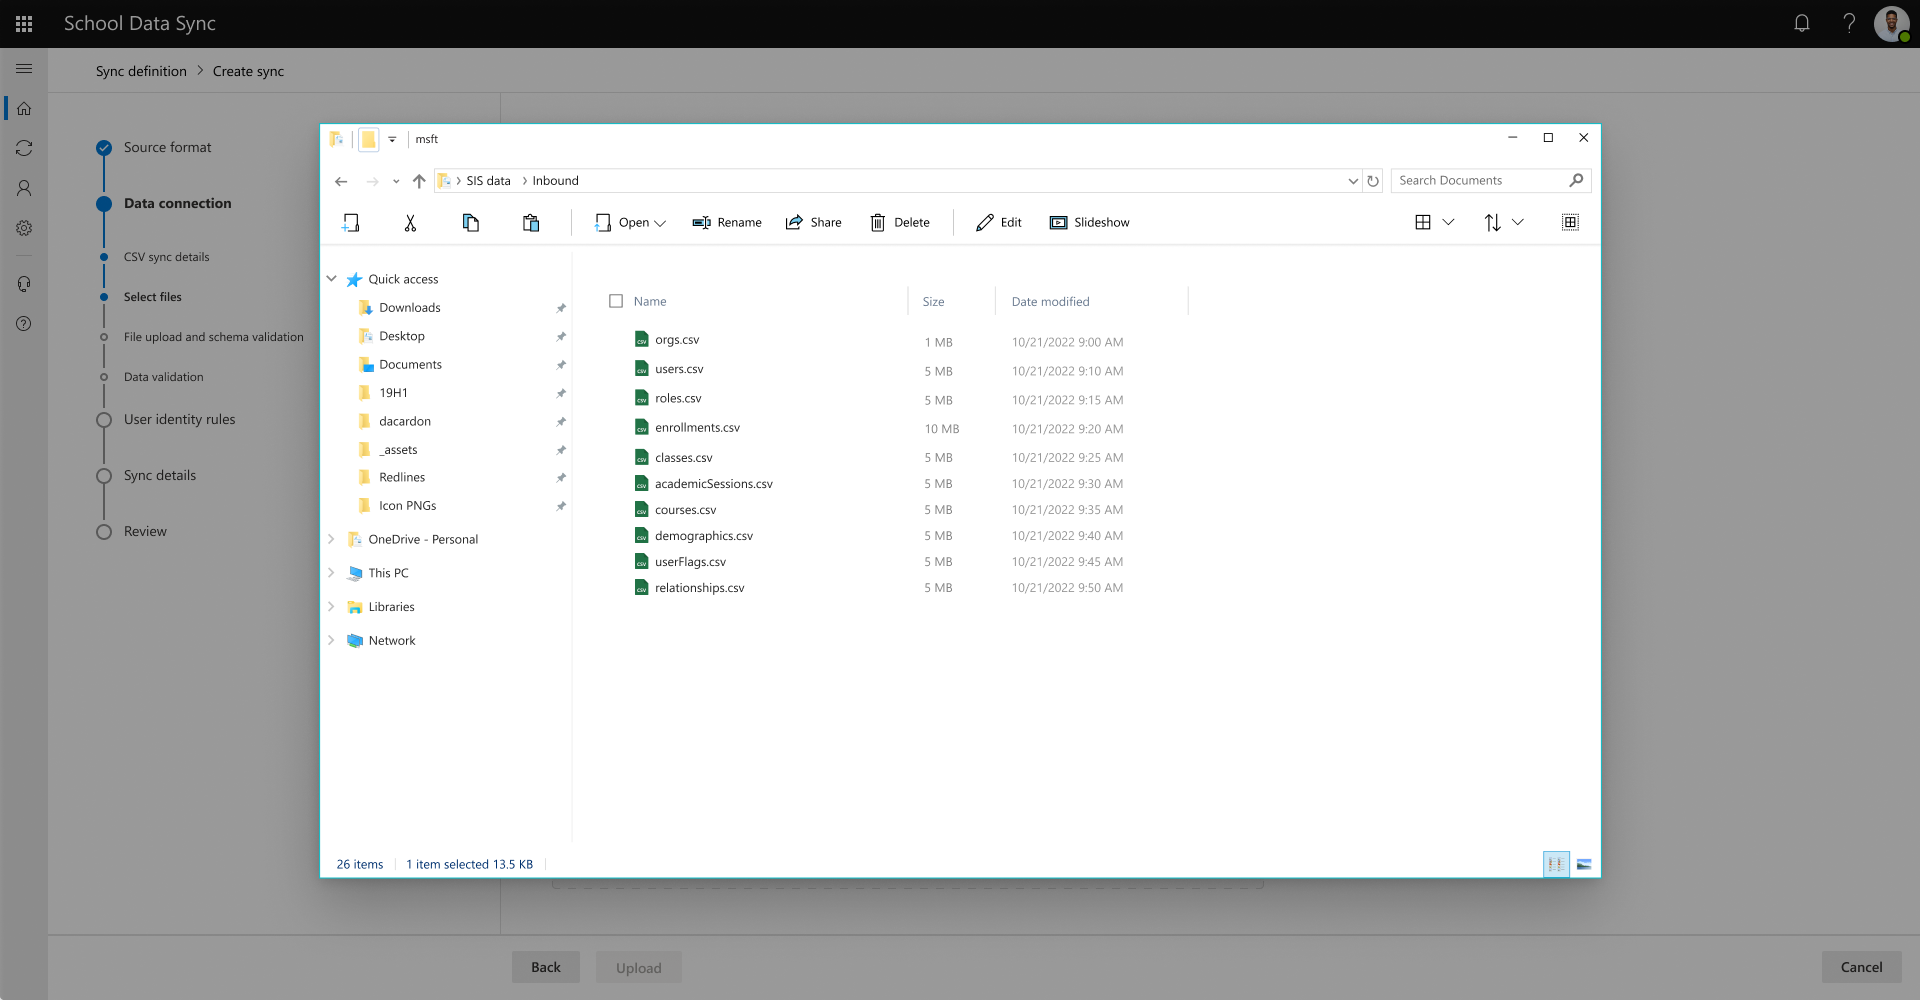
Select Browse device to present the browse and selection dialog.
Note
After your initial upload during the creation of your connect data configuraiton, you'll need to always supply the same set of files for subsequent uploads, regardless of data changes made in the optional files or not. If you do not the system will determine that the records are no longer active and will mark them as such.

Navigate to the file location and select the files.
Refer to SDS V2.1 CSV file format.
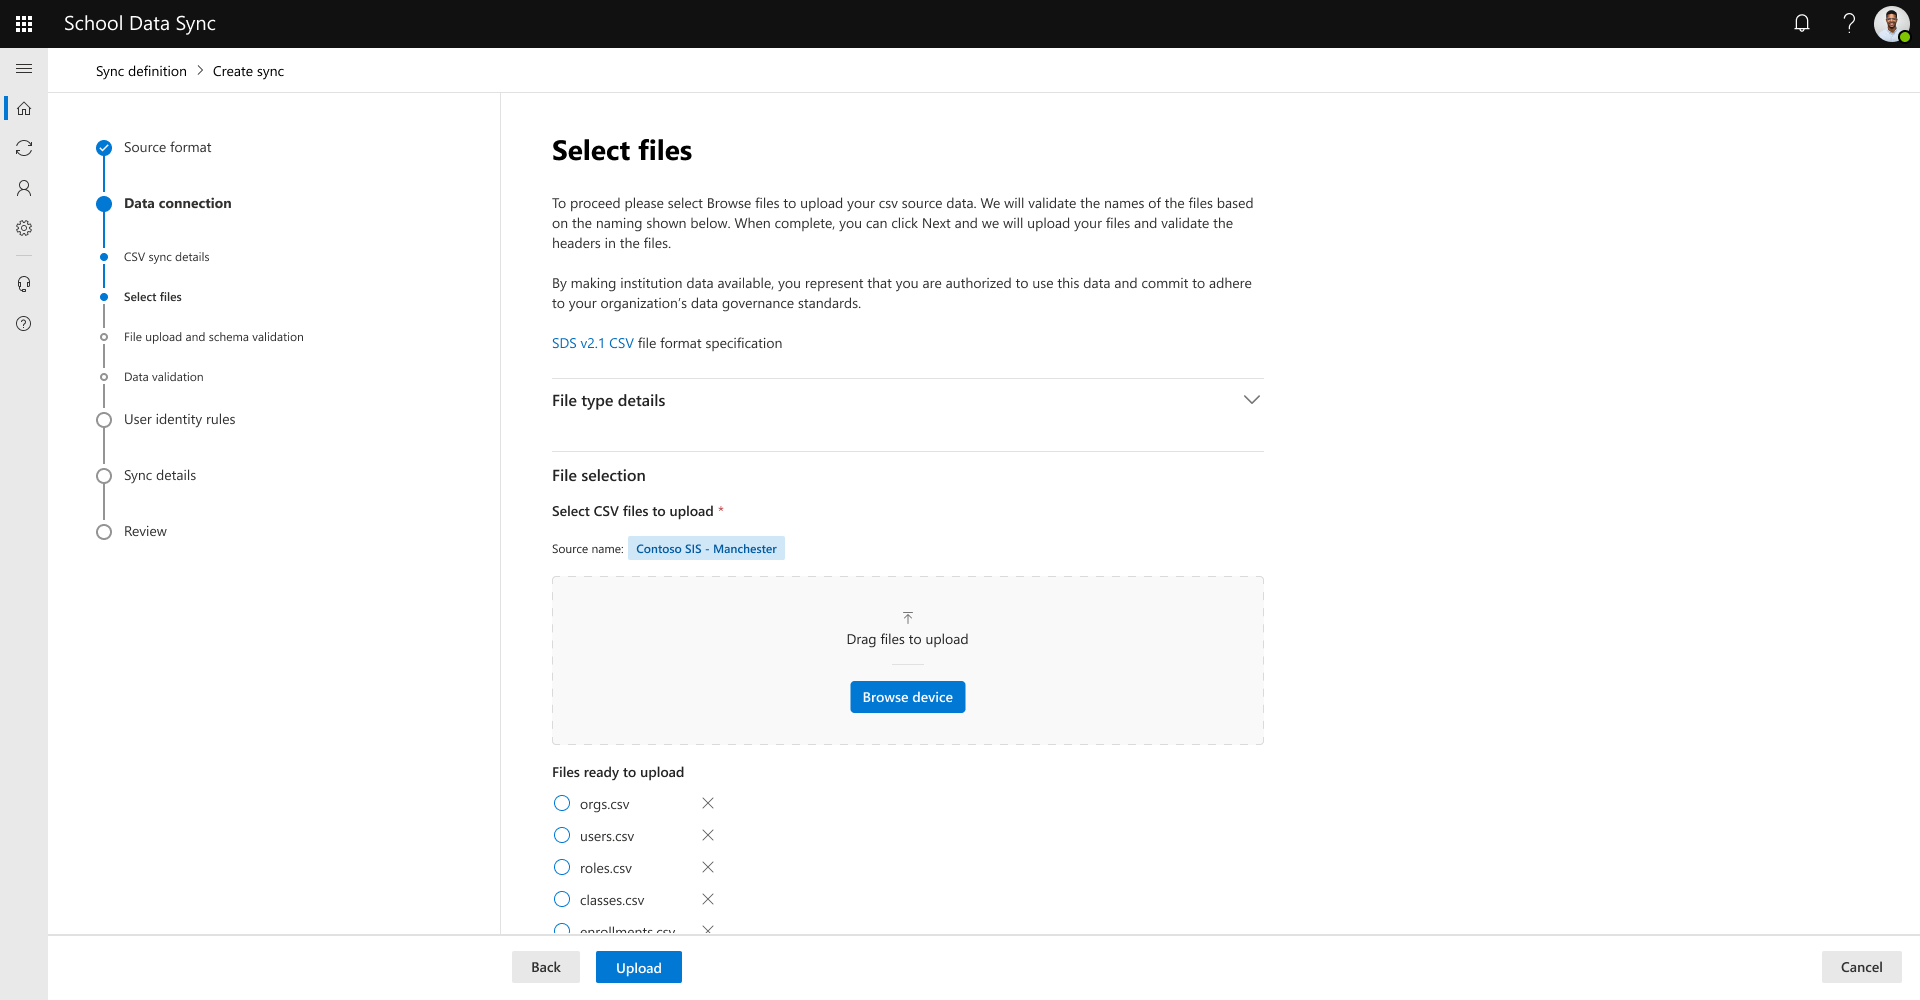
Required: The three files listed must be selected before you can progress. If you're only managing users and not classes, you only need to supply these files.
- orgs.csv
- users.csv
- roles.csv
Optional / Required: Not required if you're only managing users. If you're also managing classes and class enrollments, you need to provide the two files listed, along with the three files prior. If you're not, don't select any files with these names. If one is selected and the other isn't, when you select Next, a message appears stating that one of these files is missing. You need to correct before continuing.
- classes.csv
- enrollments.csv
Optional: The following are optional files and are used to enhance experiences. Not required, unless the files prior have data references based on the notes provided.
- academicSessions.csv (If your roles.csv, classes.csv, or courses.csv contains academic session data, provided to avoid error messages when processing data.)
- courses.csv (If your classes.csv data contains links to courses, provided to avoid error messages when processing data.)
- demographics.csv
- userFlags.csv
- relationships.csv
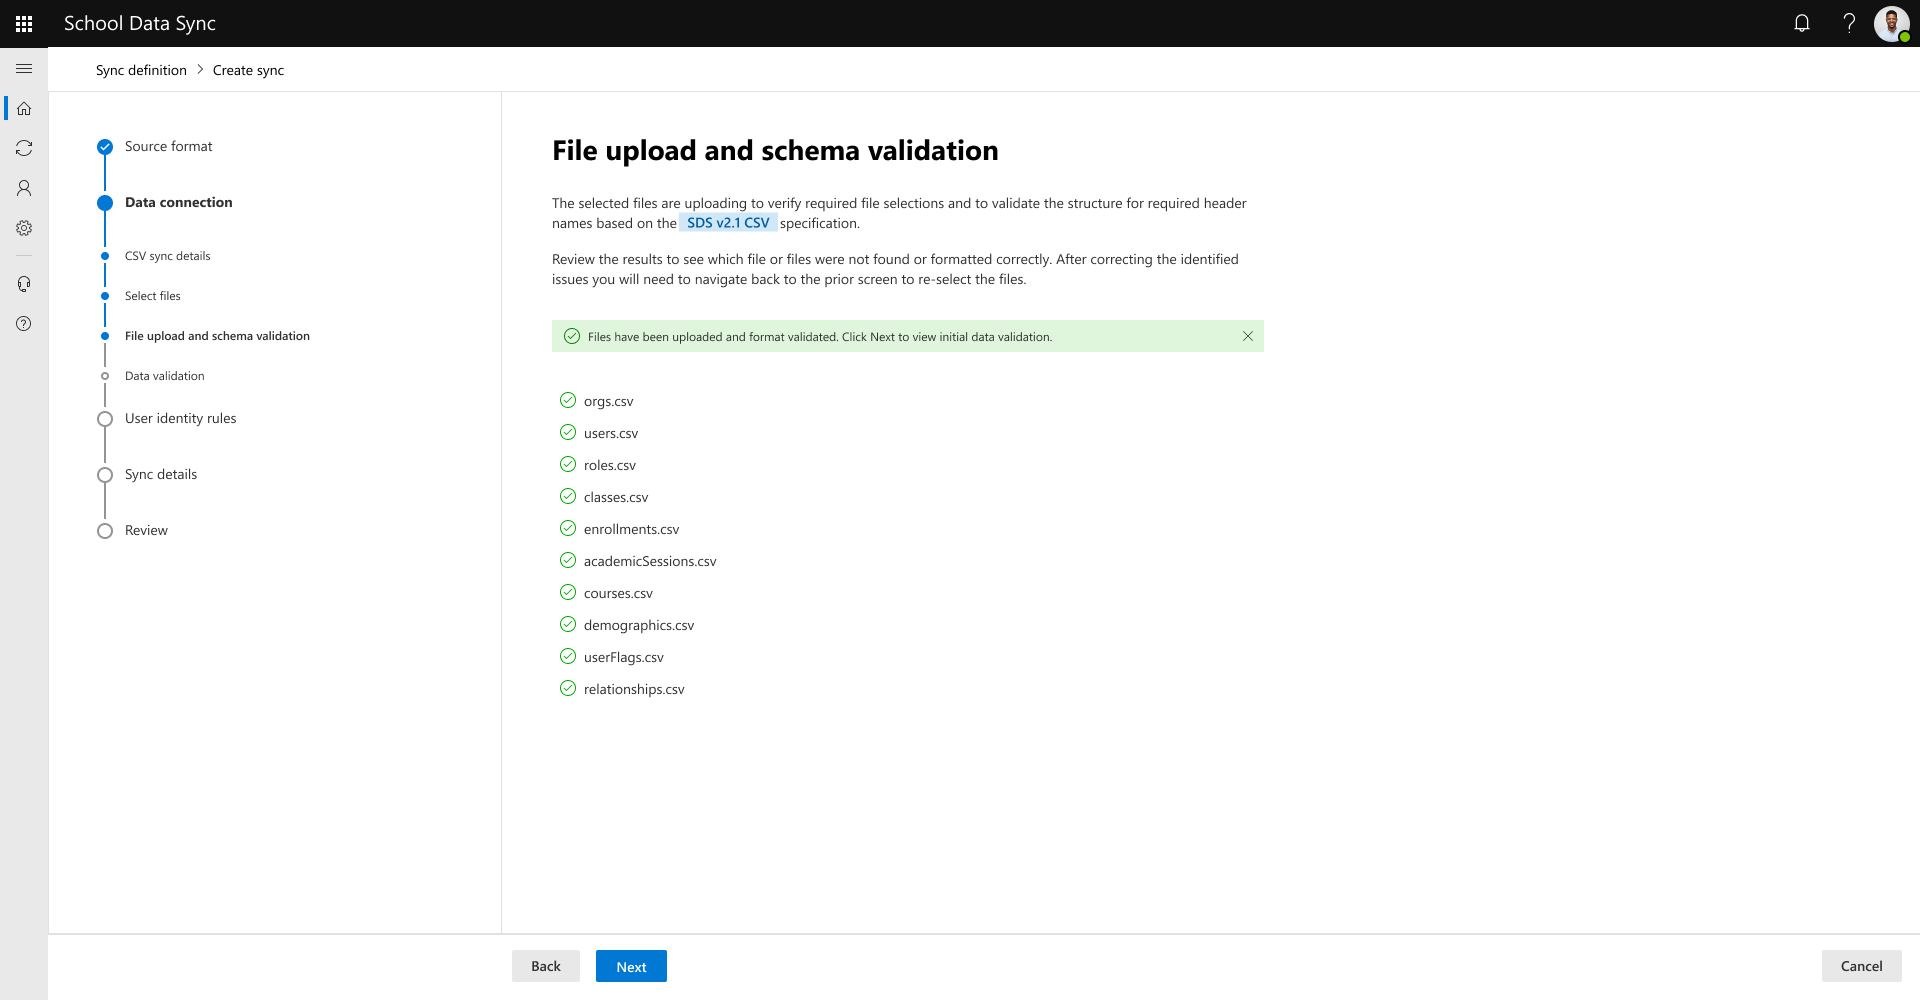
When you complete selecting your files, select Next to continue. The system will validate the names of the selected files before continuing to the next screen. If a required file isn't found a message appears, and you need to address and reselect the file or files.
After the files names are validated, the files will be uploaded to validate the structure of the selected files and are formatted correctly with the header names based on the SDS CSV v2.1 specification.
If you receive the message: One or more of the files found don't match the expected format. Review the screen to see if any files aren't formatted correctly. You'll need to navigate back to the prior screen to reselect the files after correcting the issues.
If you receive the message: We aren't able to find one or more of the optional files. Review the screen to see which file or files aren't found. If you aren't expecting this message, you need to navigate back to the prior screen to reselect the files. Otherwise, select Next to continue.
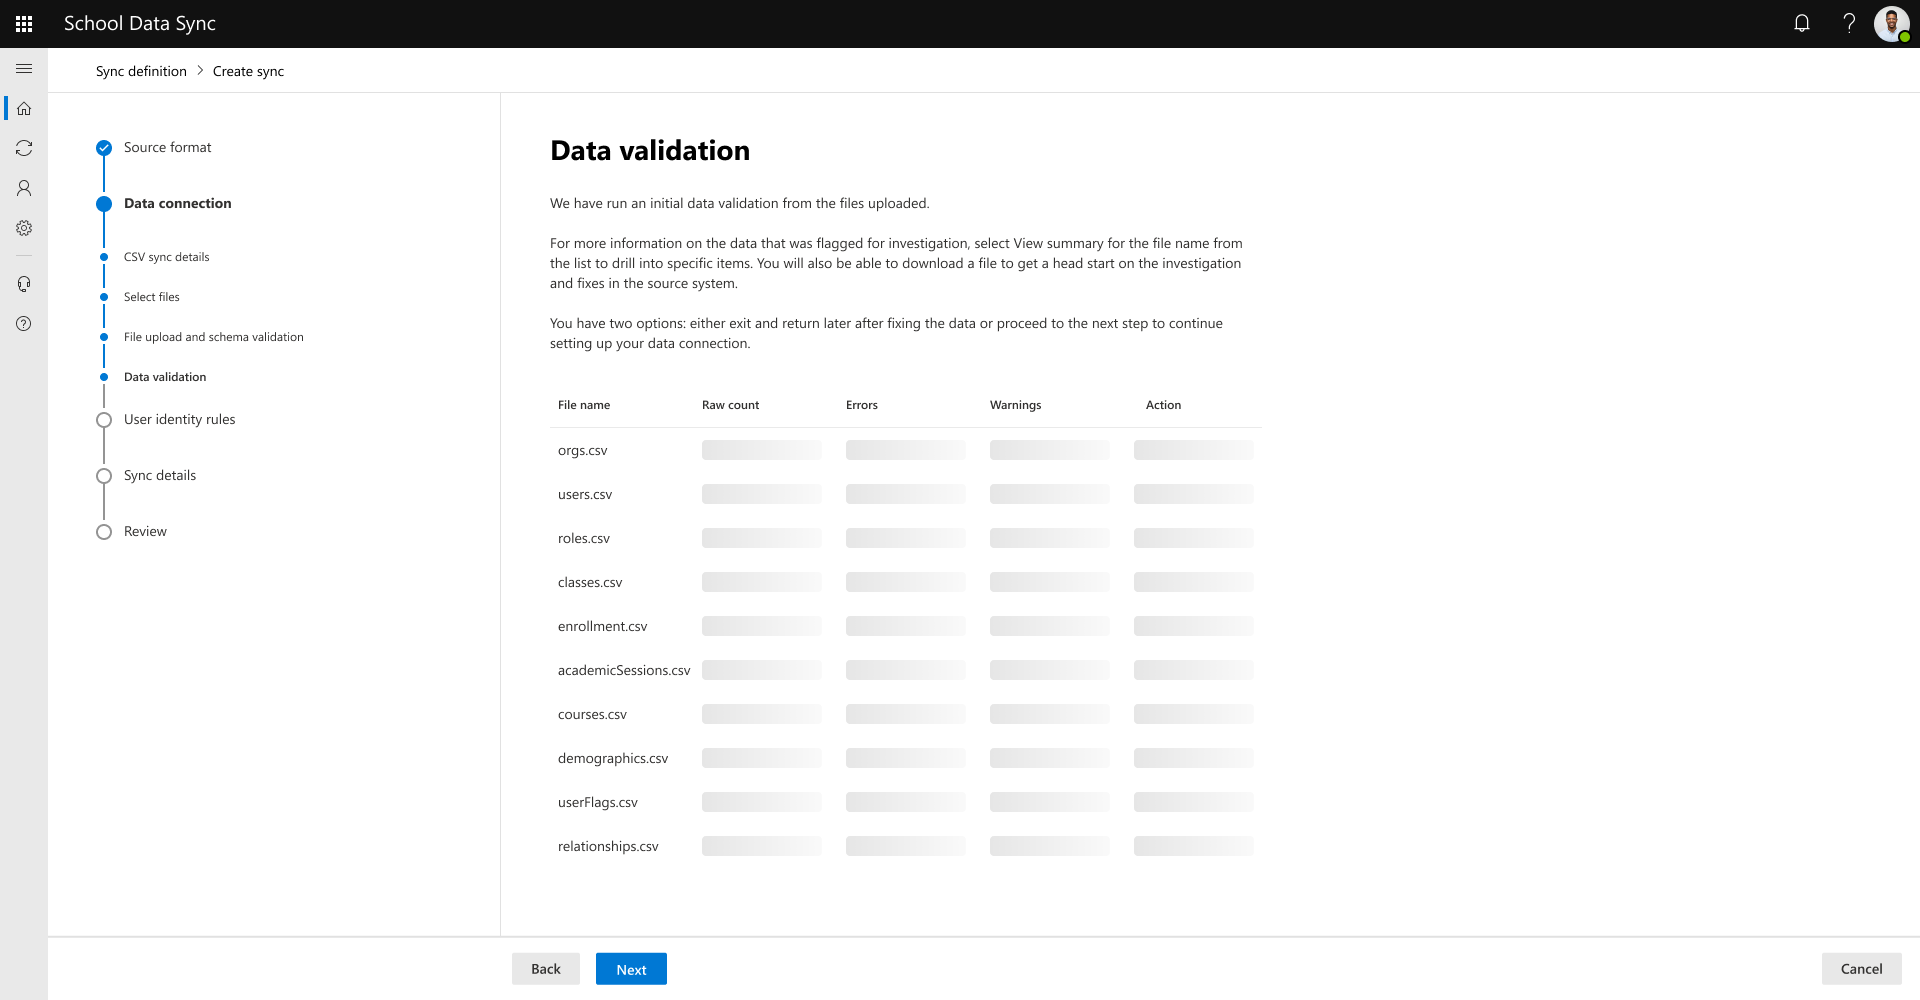
After the file schema is validated, SDS will perform a quick data validation from the files uploaded. The uploaded data passes through some of the SDS data matching and validation rules to help identify the good required and provided optional data. It isn't all the validation rules but the ones most encountered.
Tip
Data validation results are non-blocking during the onboarding or csv upload experiences, you have two options: either exit and return later after fixing the data or proceed to the next step to continue setting up your data connection and later supplying the corrected data with subsequent uploads.
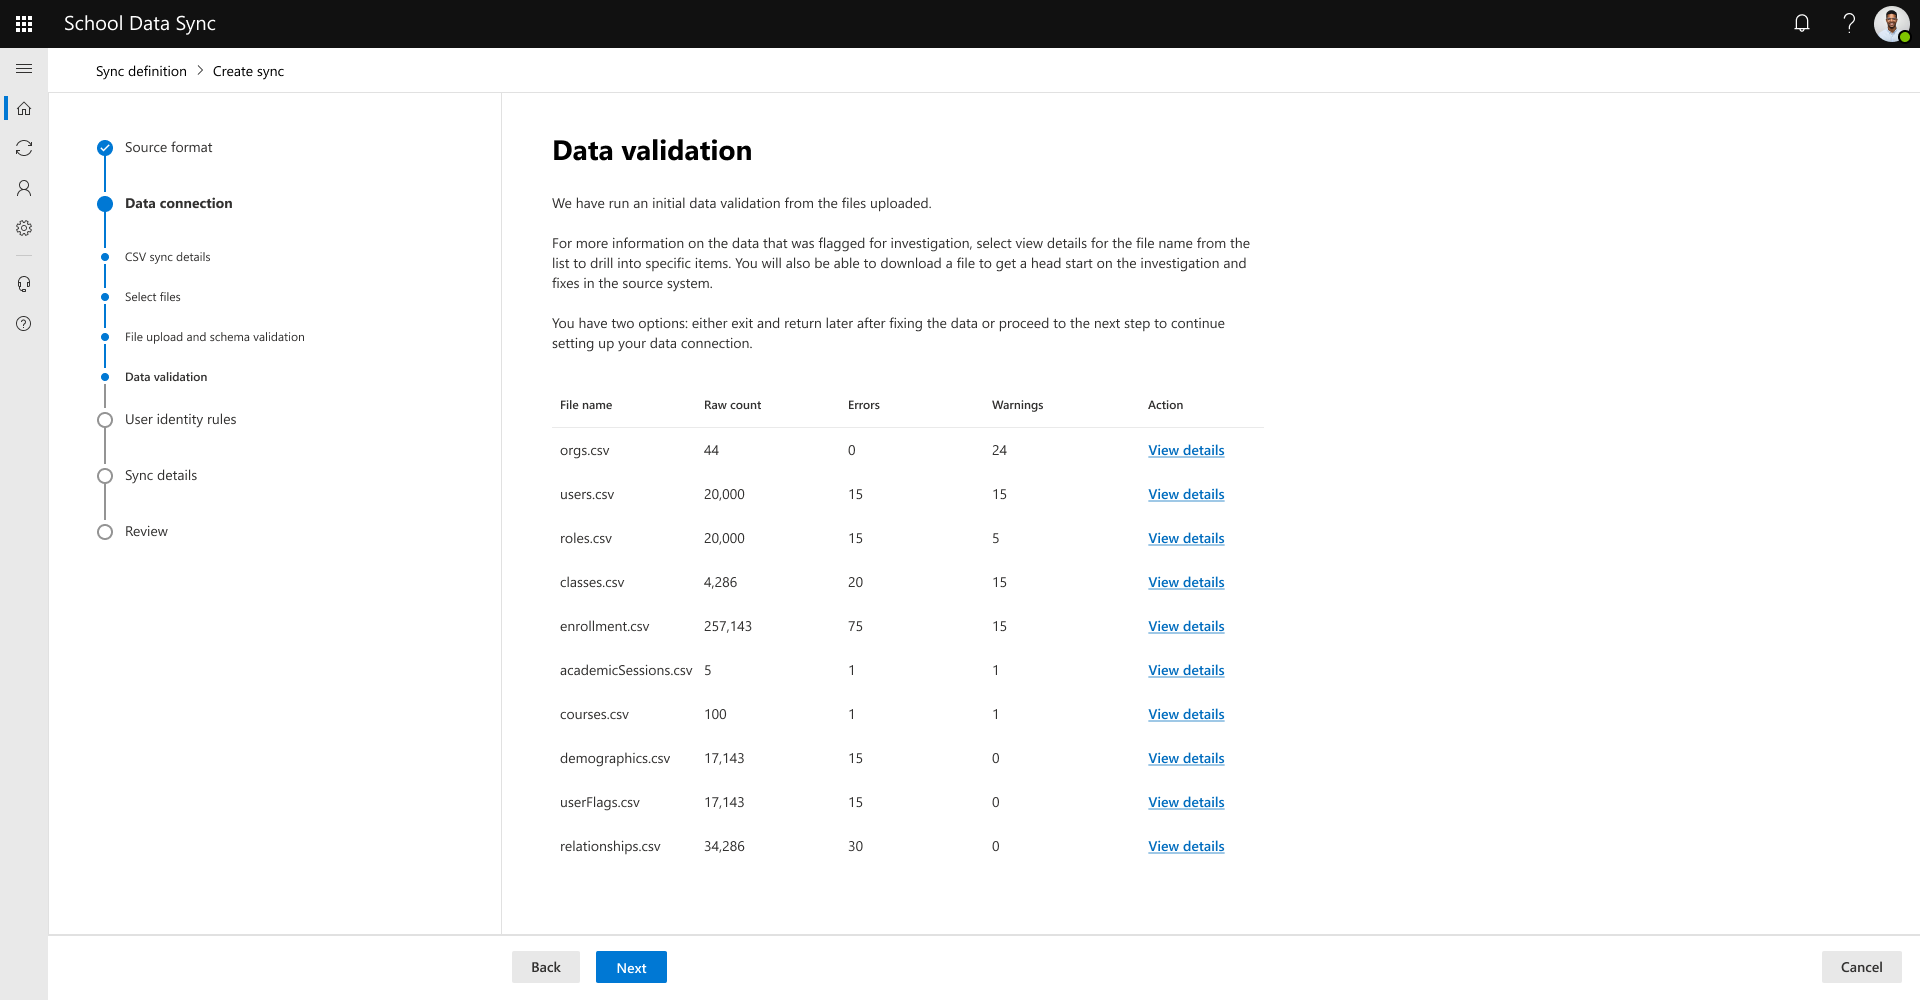
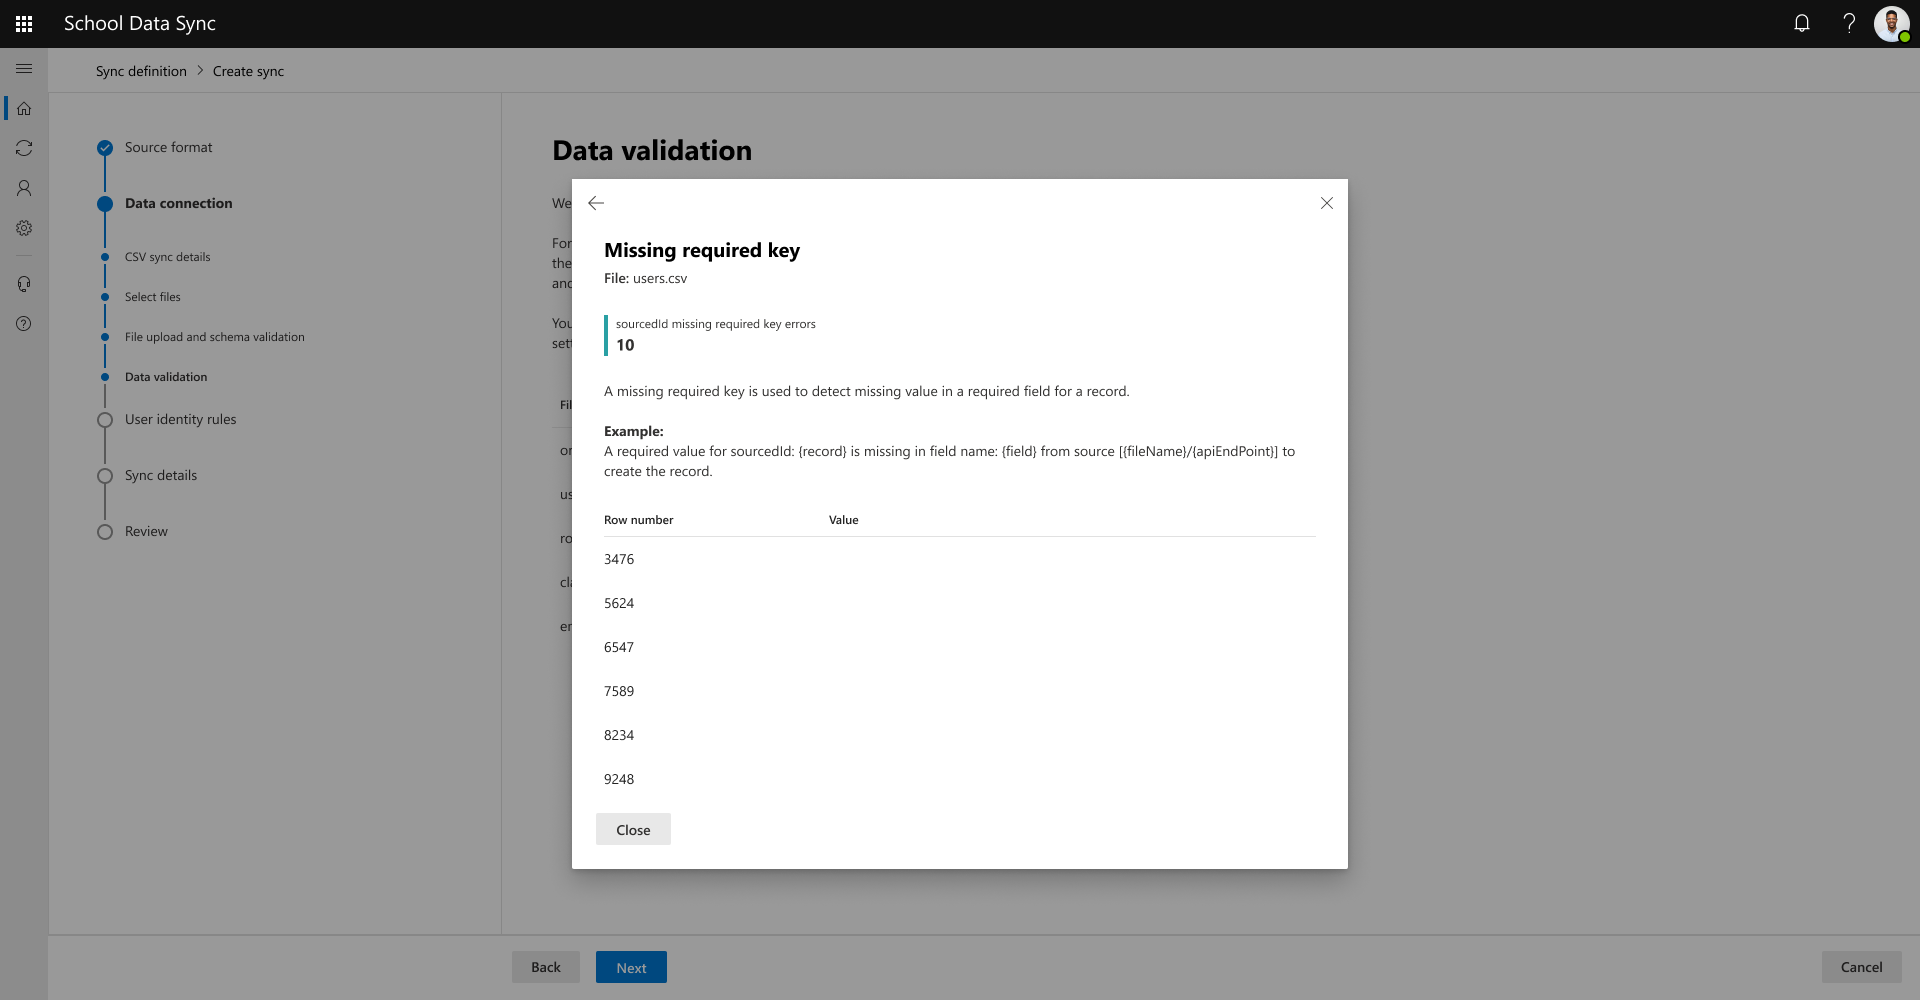
For more information on the data that was flagged for investigation, select view details for the file name from the list to drill into specific items.
You're able to download a report by file to get a head start on the investigation and fixes in the source system.
Flagged file columns are displayed with ability to expand and investigate what rule or rules flagged them.
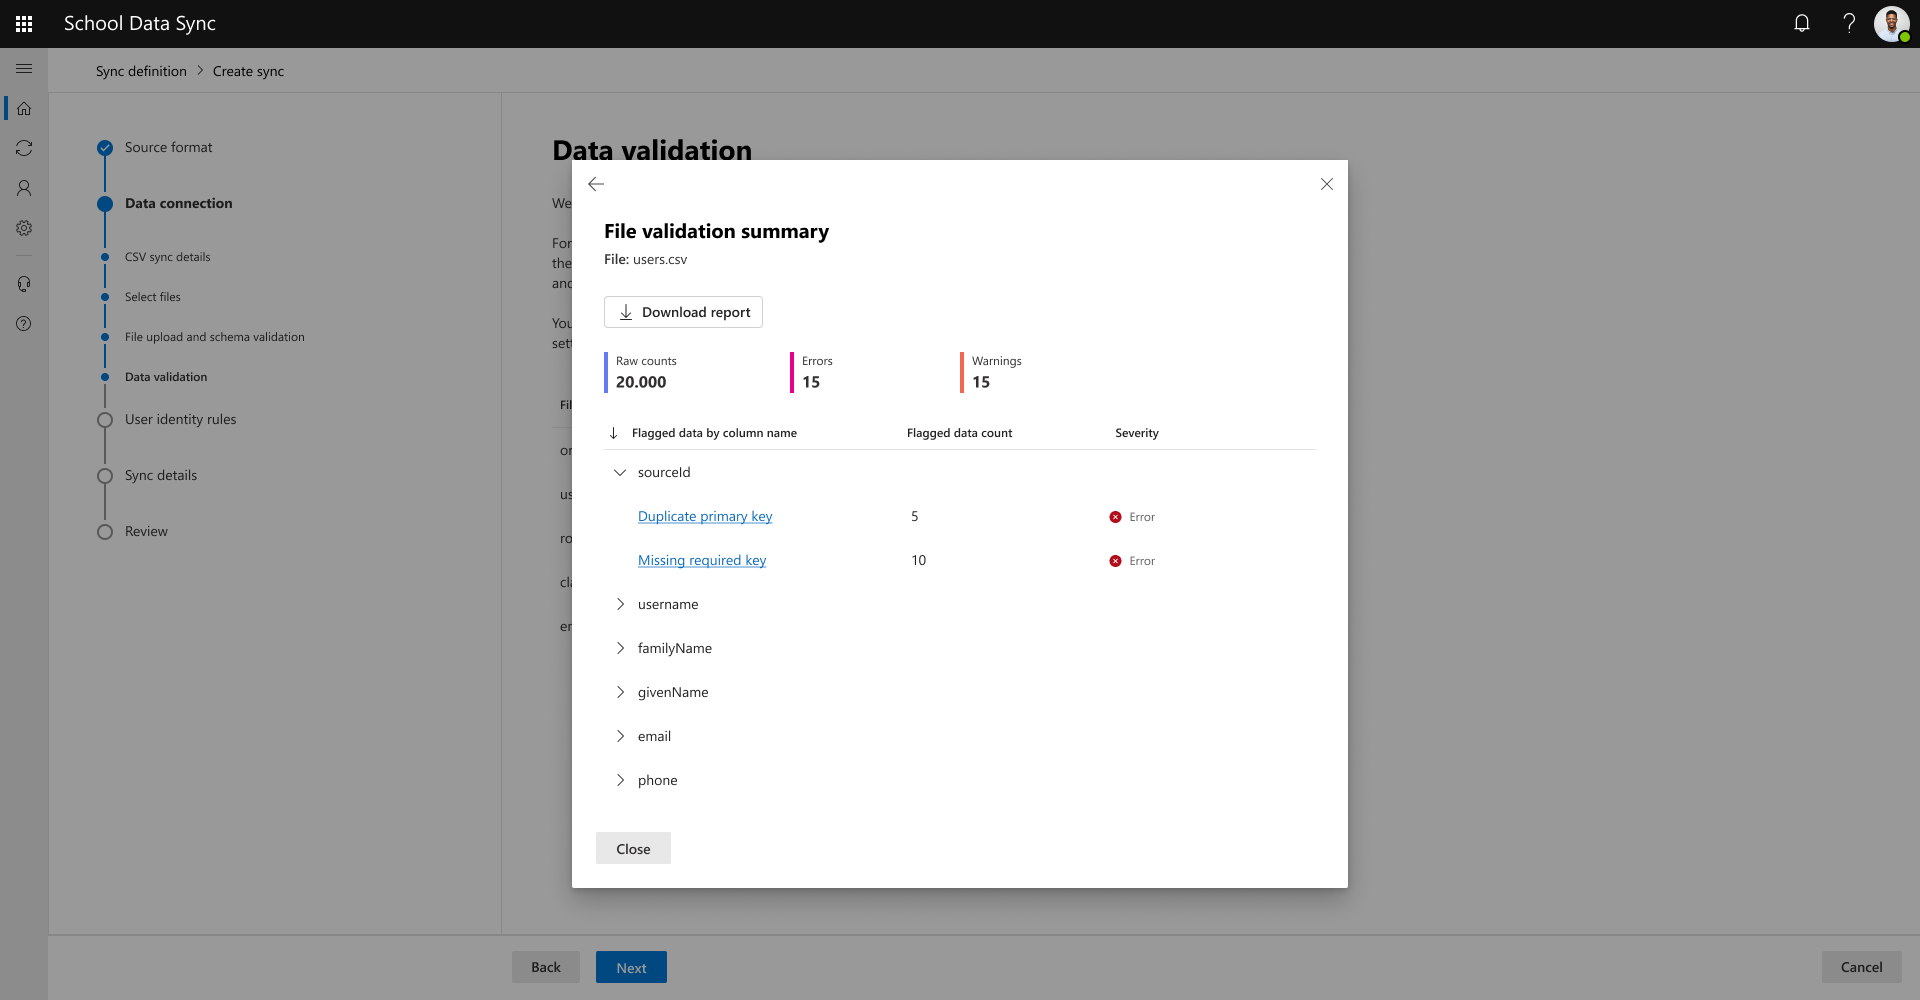
By clicking on the rule, you're able to see another summary of the top 10 records, for example purposes.
When your investigation is complete, close the dialogs then select Next.


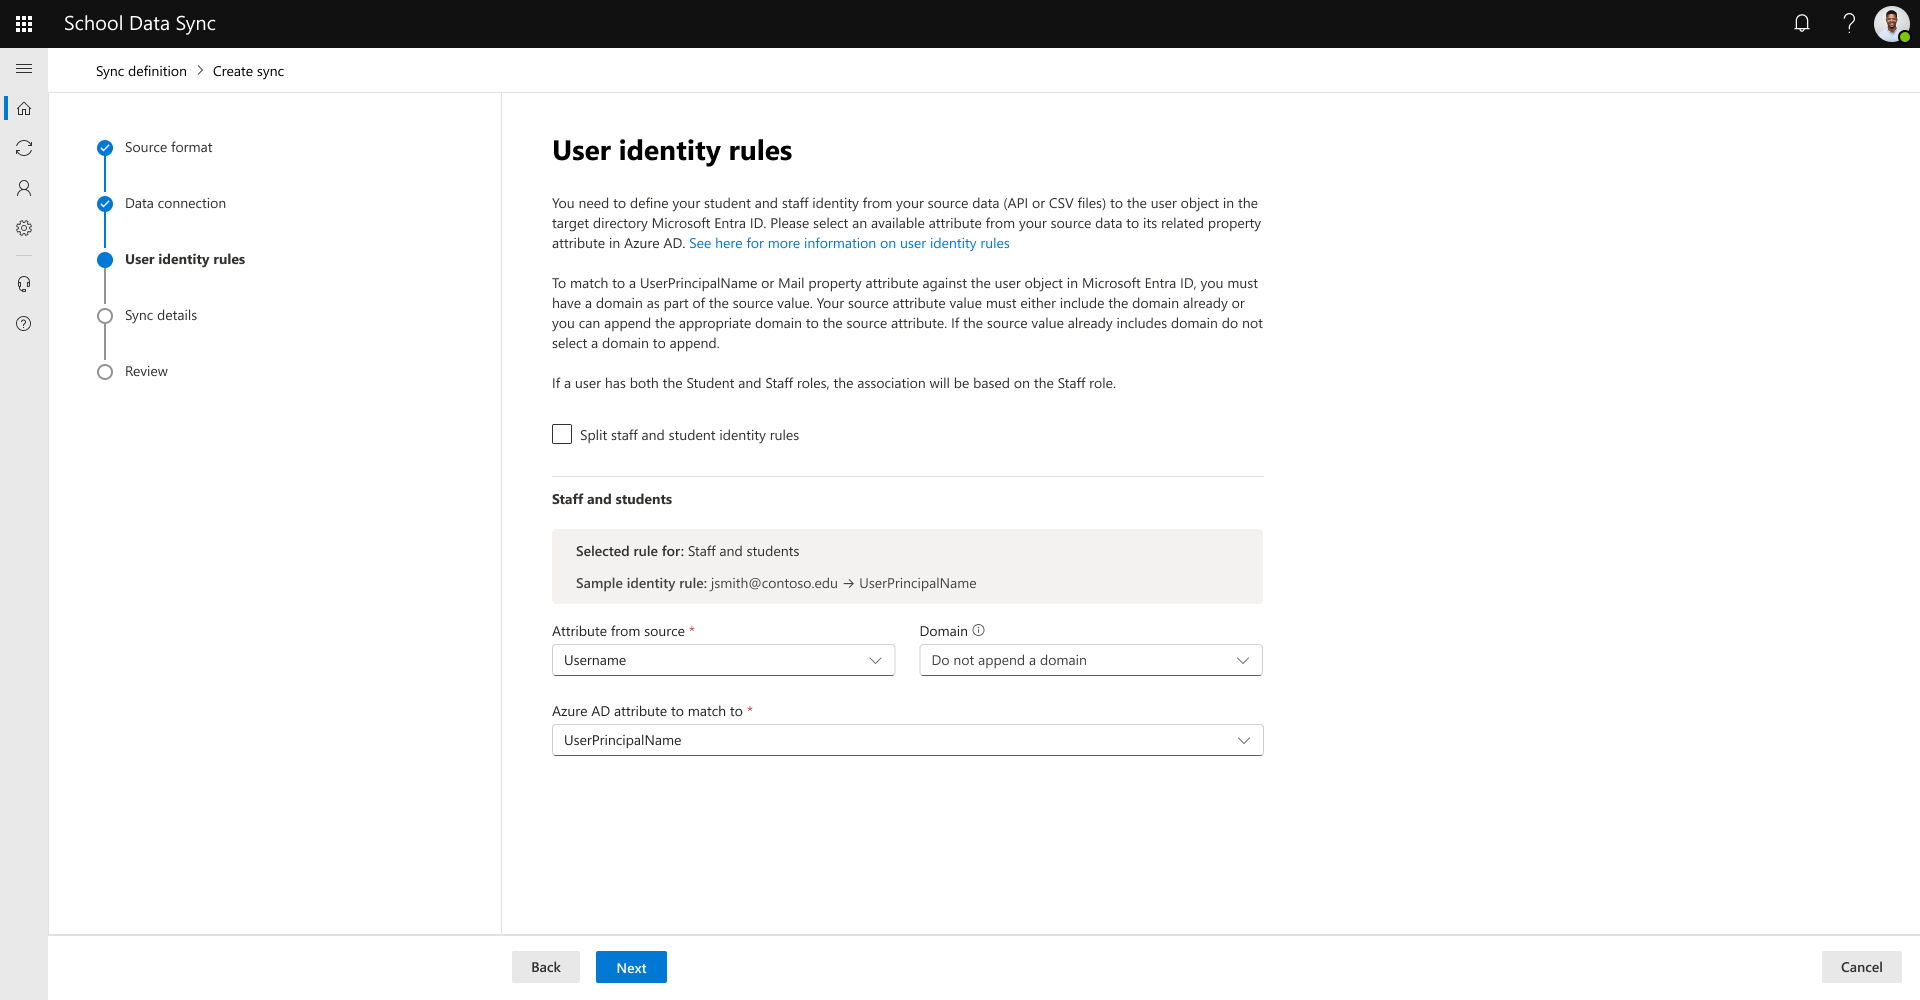
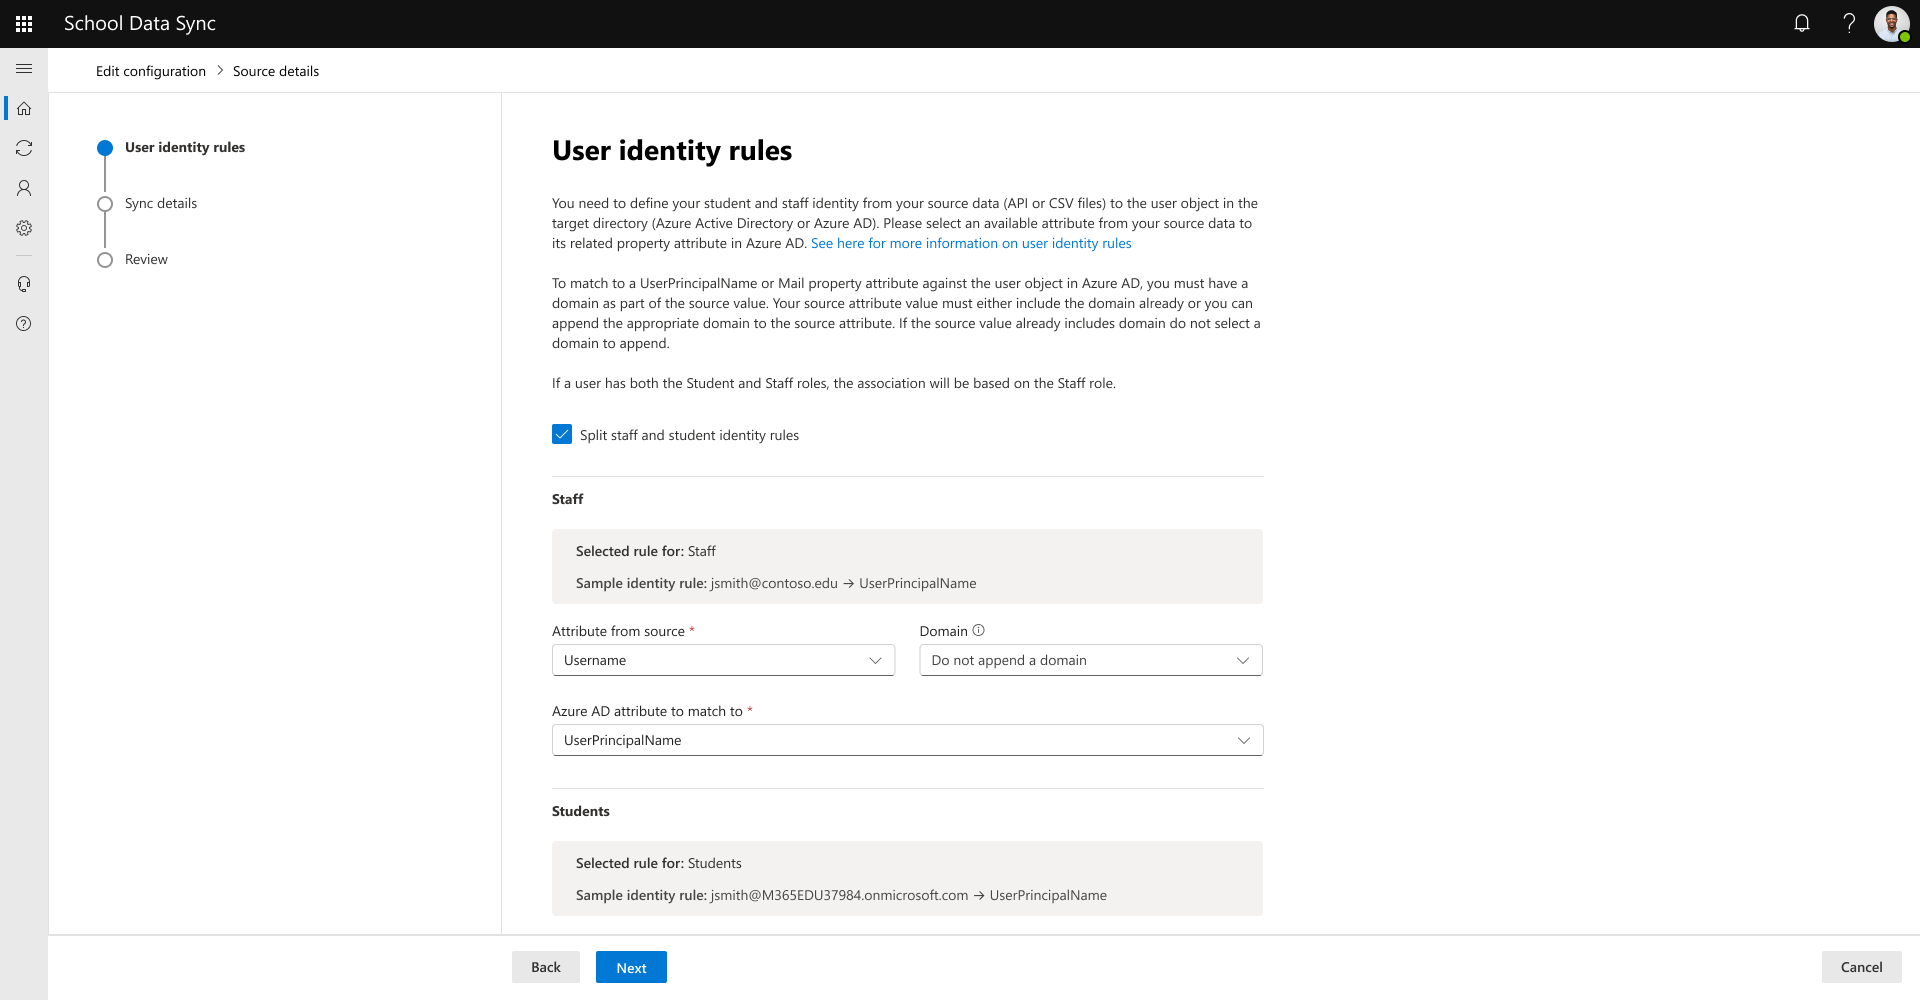
Select the user identity rule options. Make your selections for both staff and student roles. If your rules are different for staff and students, select the split option to define unique rules. After you're satisfied with your selections, select Next to continue.
Note
User matching is performed during data ingesiton and does not write or update the user objects in Microsoft Entra ID. The matching is performed and stored in the SDS data lake. For more information, see Manage data to Microsoft 365 user provisioning type on the writing of the match link forward when managing data to Microsoft 365.
- Attribute from source: user attribute based on data that is coming from your SIS / SMS.
- Available source options are Username, Email, and ActiveDirectory MatchId.
- Attribute to match to: user property in Microsoft Entra ID to match to.
- Available Microsoft Entra ID match options are UserPrincipalName and Mail.
- (OPTIONAL) If your user data doesn't include the @domain value, select a domain from the list.
Warning
Selecting a domain is optional and should only be used if the incoming data based on the selected Attribute from source does not include the @domain value. SDS doesn't check and append if the value is missing on a record. SDS will append the domain selection to all records which could result in @domain@domain and not find matches in those instances for existing user mapping with users in Microsoft Entra ID.
Caution
If the SIS / SMS users, for example users in the staff role group, could be associated to @domain1 or @domain2 or @domain3 you must have a @domain included in the source data, based on the selected Attribute from source selection (example: prefix@domain). This is needed for your Attribute to match to: UserPrincipalName or Mail to find the correct Microsoft Entra user to match with.
In the instance that a user has multiple roles, the following rules are used to determine what staff or student match rules should be used between the user record and the Microsoft Entra user object.
If isPrimary is set for all student roles, even if association to a staff role exists, the match is made based on the student role.
If isPrimary is set for any staff role, even if association to a student role exists, the match is made based on the staff role.
If isPrimary is set for both staff and student role, the match is made based on the staff role.
If isPrimary isn't set for any roles, especially with a mix for both staff and student roles, the match is based on the staff role.
Important
When configuring Manage data to Microsoft 365 user provisioning type, these rules are used if the option is activated to Create unmatched users, to define the construct for the Microsoft Entra UserPrincipalName property.
- Attribute from source: user attribute based on data that is coming from your SIS / SMS.
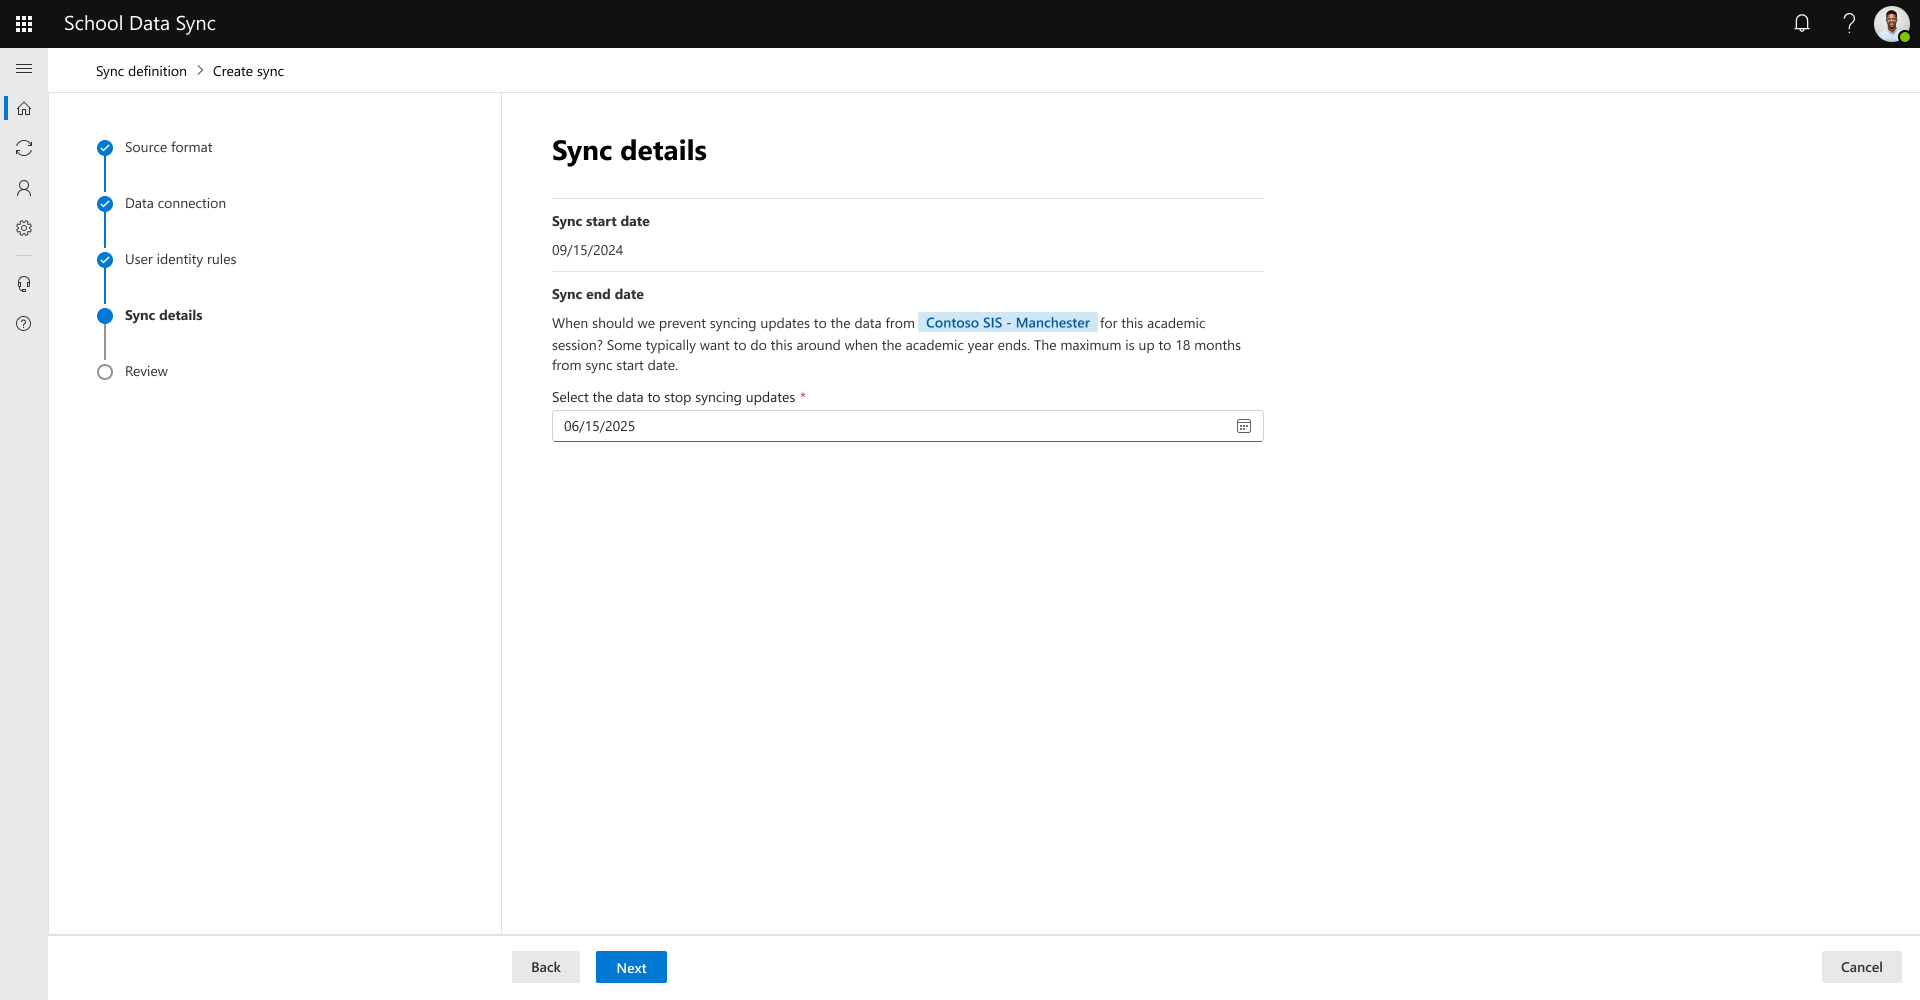
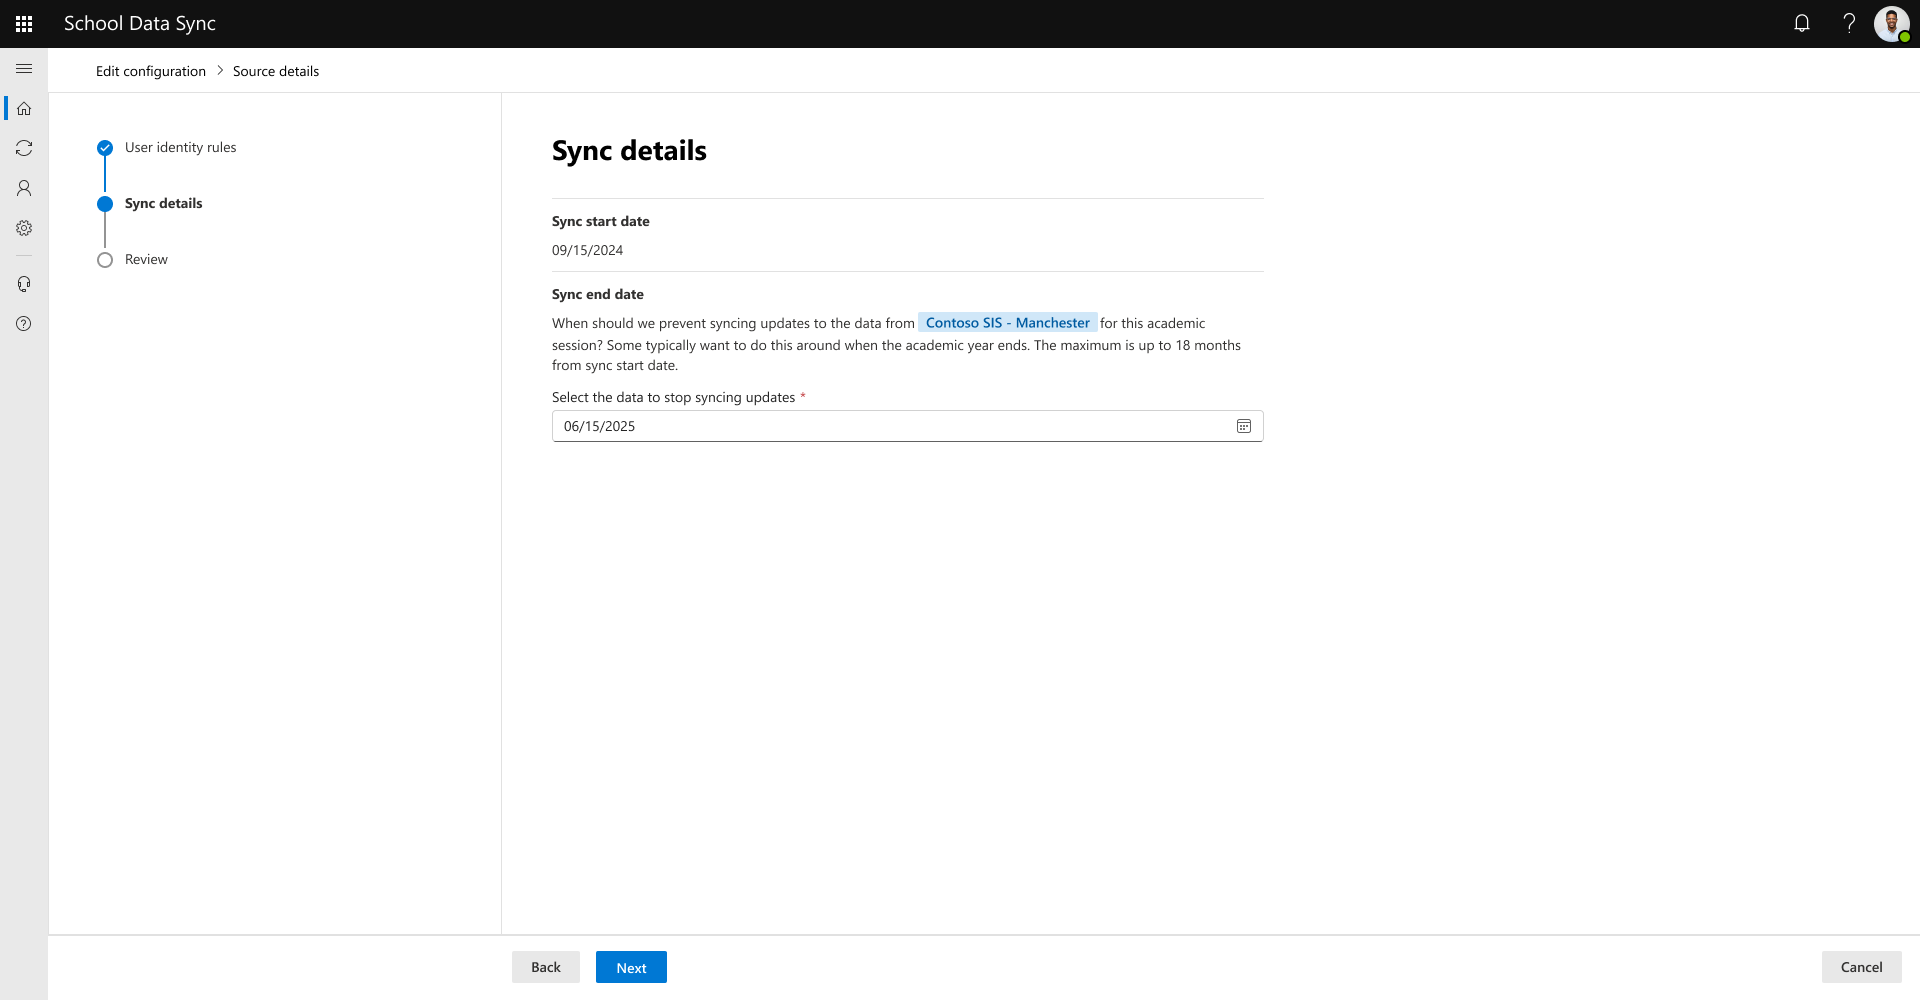
Enter the date when SDS should prevent synching updates to the data from the connected data source. Most typically stop syncing data around when the academic year ends. The maximum is 18 months from sync start date.
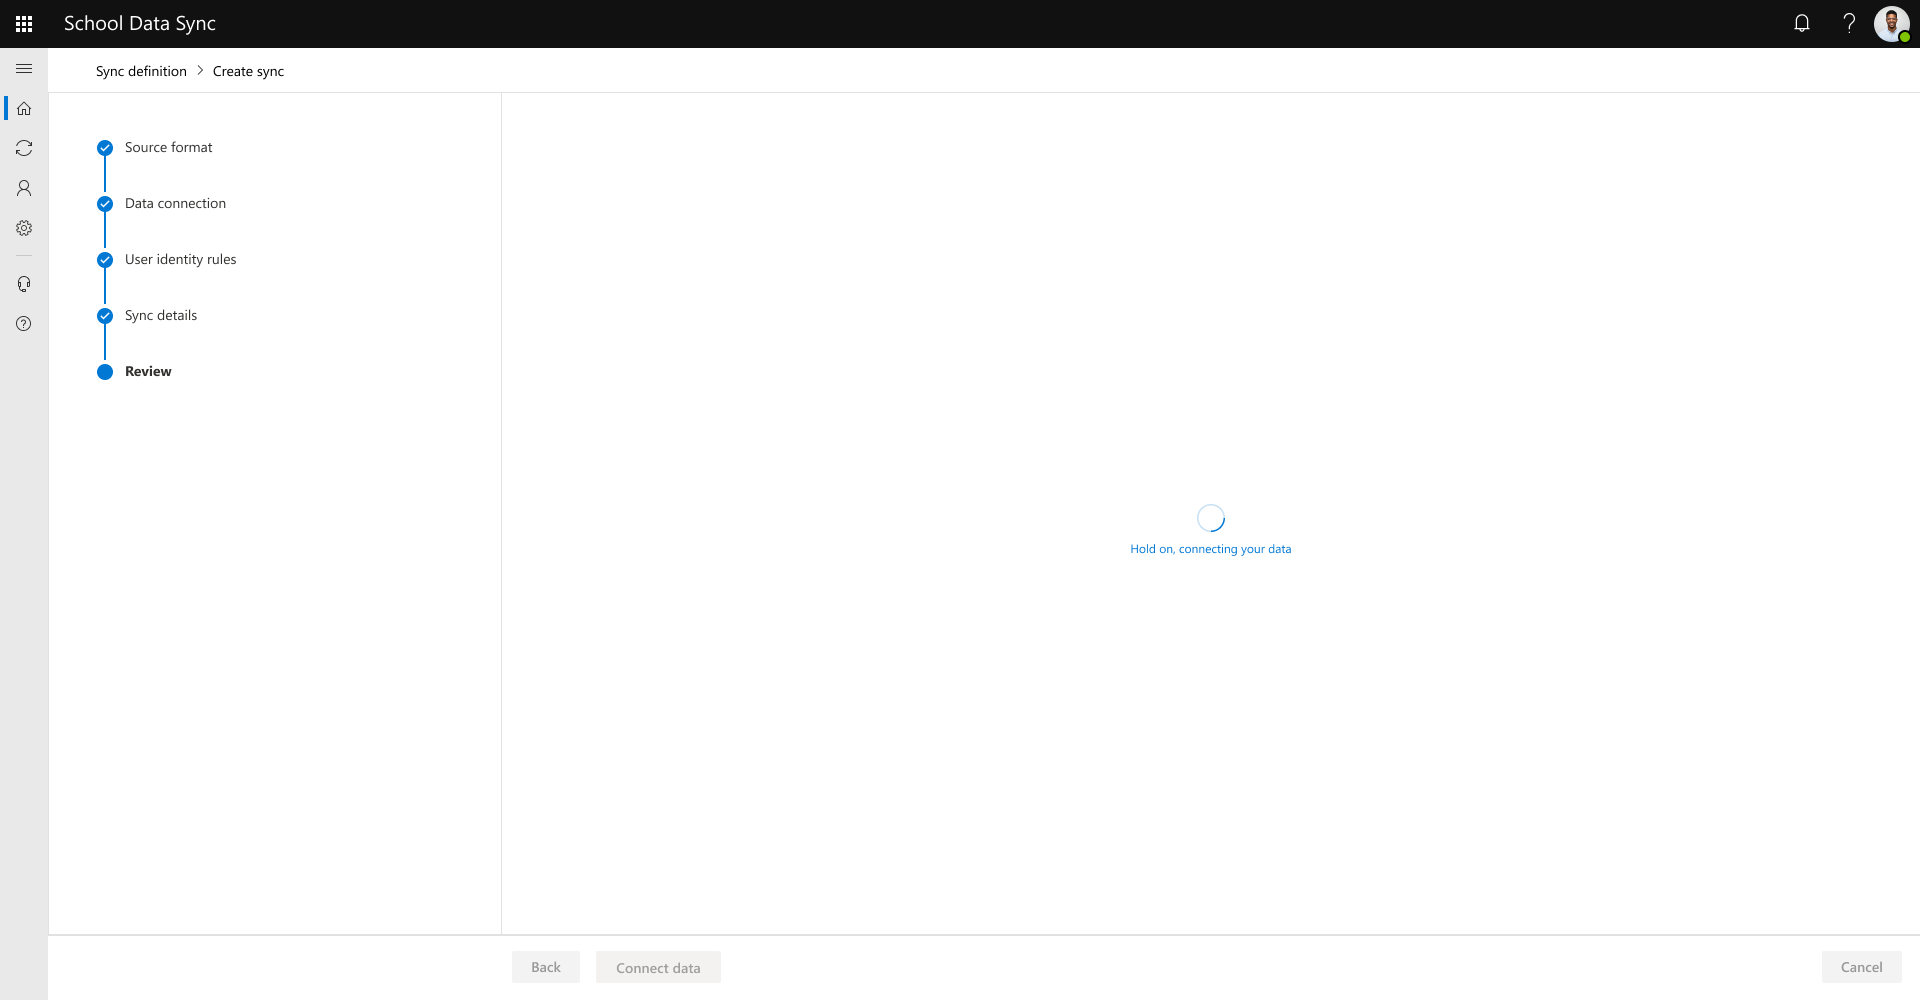
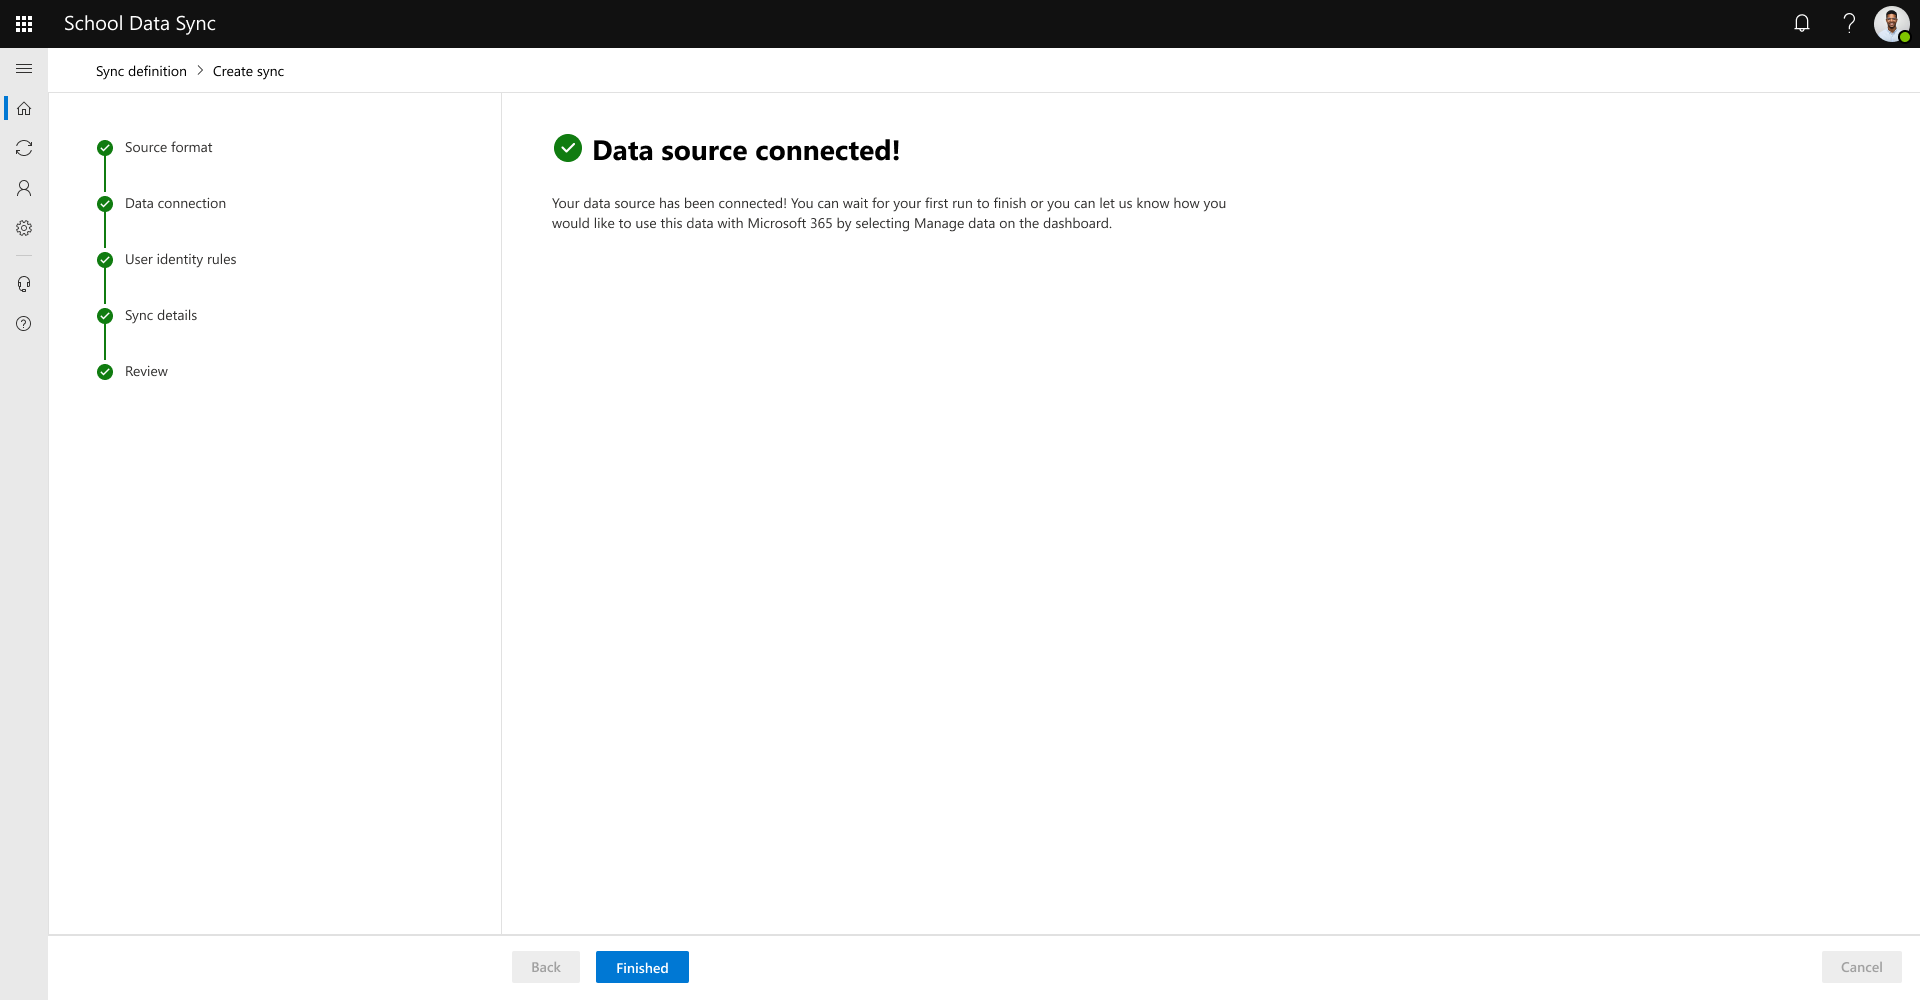
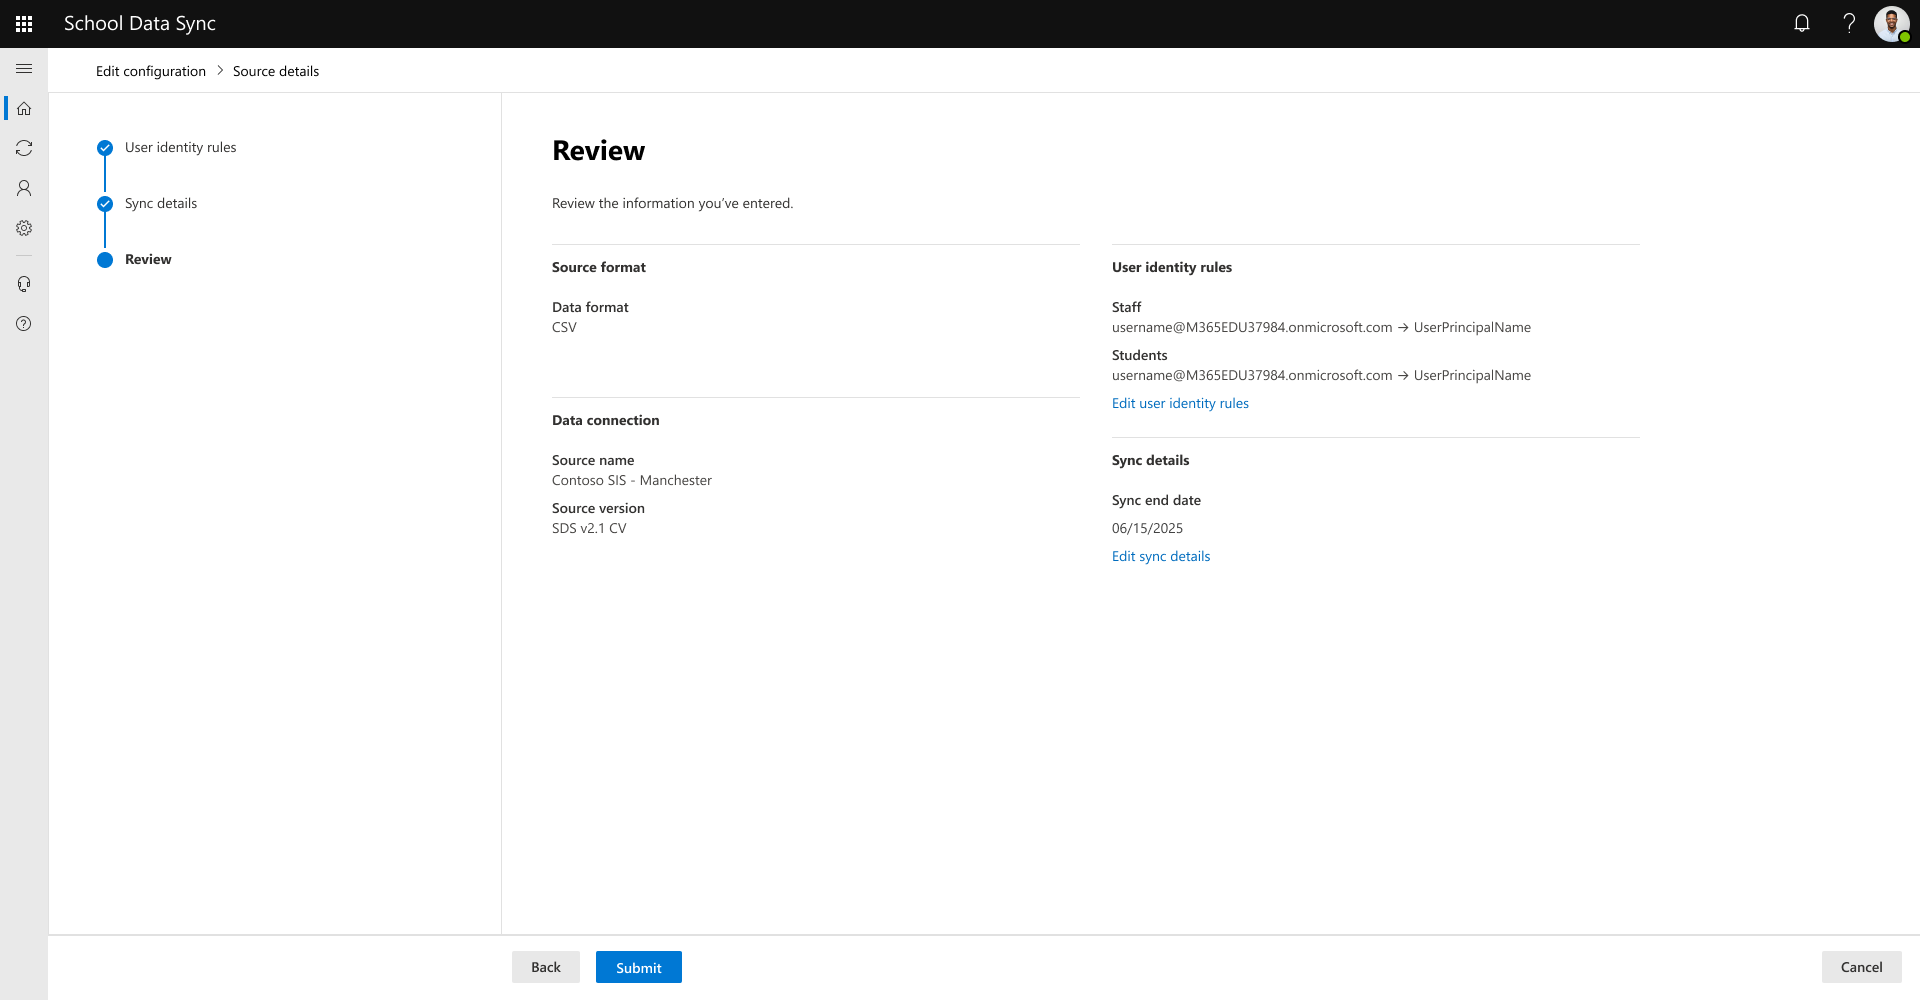
Review the information presented. If everything looks correct, select the Connect data button. If not, you can navigate back to correct.
Your connect data configuration is created, and the first run is pending, select Finished button.
Tip
You can set up your Manage data configuration immediately after defining your Connect data configuration, during the active first run, or later after the first run has finished.
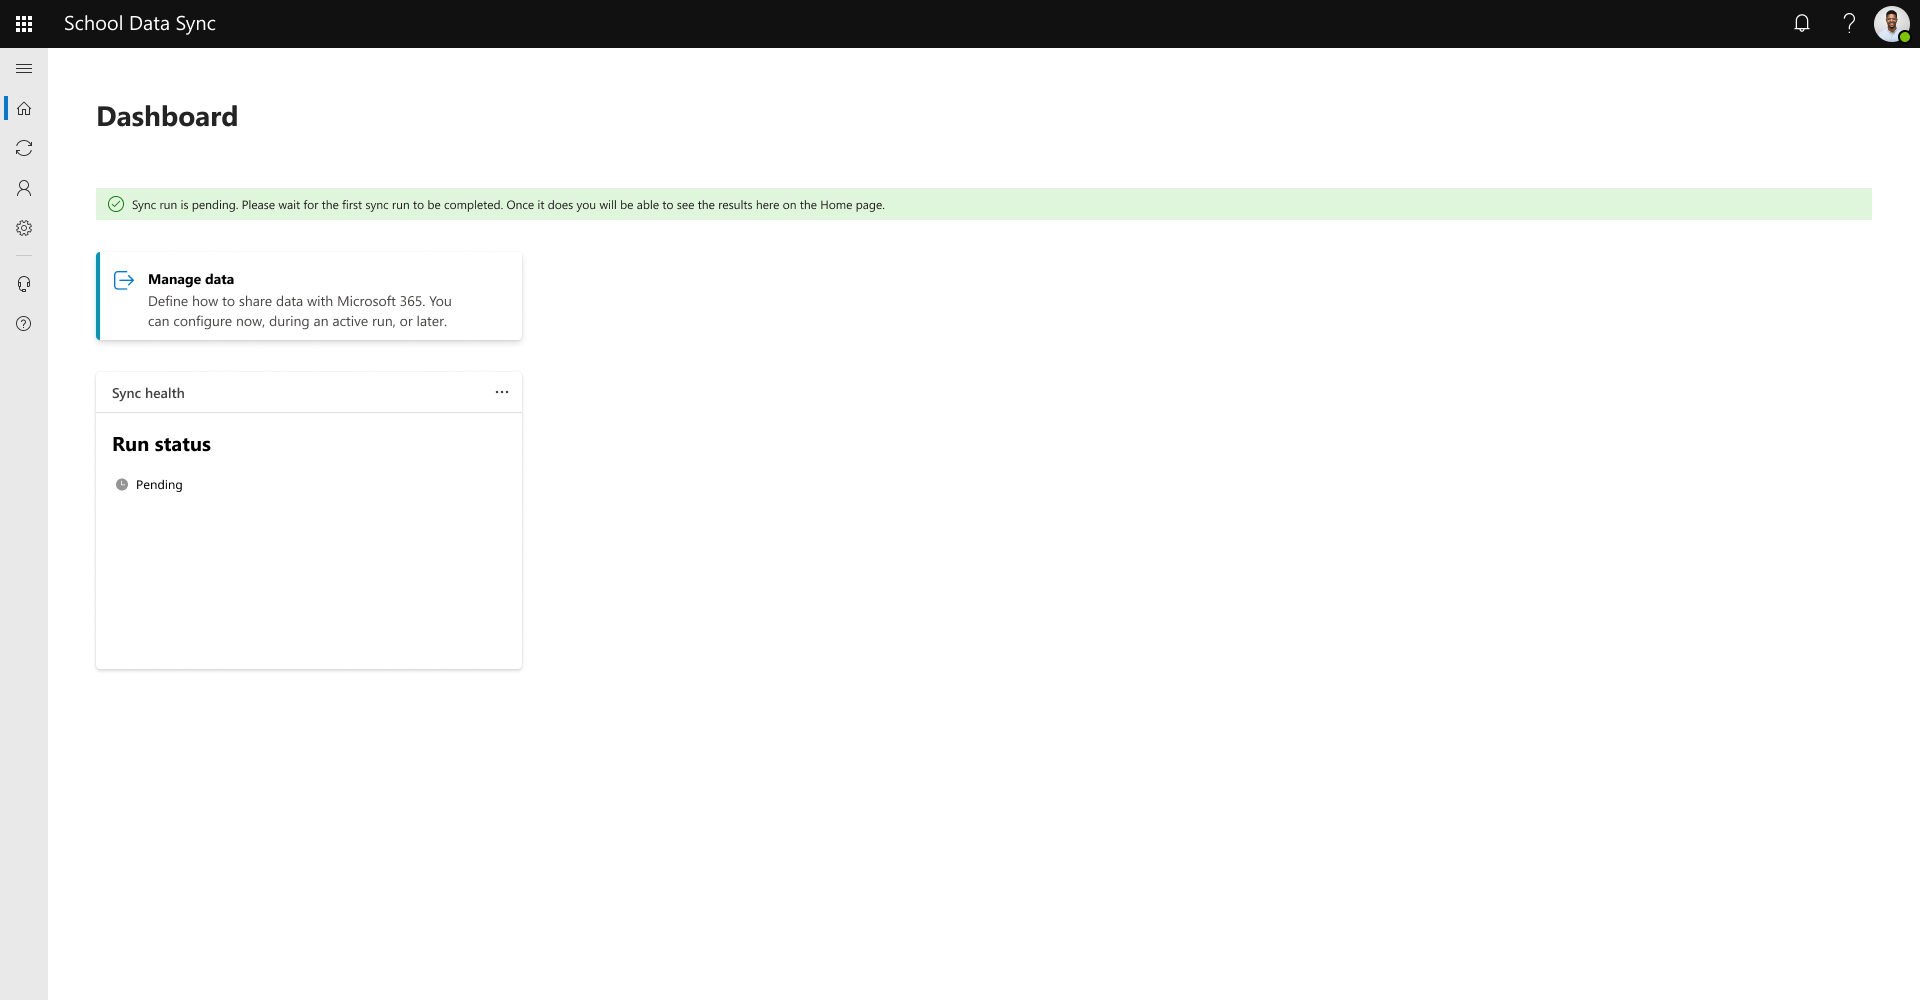
To check on the status of the sync run, navigate back to the Home dashboard page.
If there are no issues with your data, the Home dashboard will state, No Data Errors or Warnings Found. and We didn't encounter any data errors or warnings during your last run. Keep up the great work!
If there are issues found with your data, the Home dashboard informs that We found some issues with your data. and encourage you to Investigate sync health.
Tip
To provide updates to your data after the initial CSV upload refer to Manual SDS CSV Upload.
Tip
You can automate your CSV upload using Power Automate. For more information, see Automate SDS CSV Uploads.


Edit Connect data configuration
- From the Home Dashboard, use left navigation to go Sync | Configuration.
Important
The following steps are the same regardless of SDS v1 CSV or v2.1 CSV format.

On the Connected data tab, select Edit source details for your configured source.
Tip
To provide updates to your data after the initial CSV upload refer to Manual CSV Upload.


Review the user identity rule options.
Note
User matching is performed during data ingesiton and does not write or update the user objects in Microsoft Entra ID. The matching is performed and stored in the SDS data lake. For more information, see Manage data to Microsoft 365 user provisioning type on the writing of the match link forward when managing data to Microsoft 365.
- Attribute from source: user attribute based on data that is coming from your SIS / SMS.
- Available source options are Username, Email, and ActiveDirectory MatchId.
- Attribute to match to: user property in Microsoft Entra ID to match to.
- Available Microsoft Entra ID match options are UserPrincipalName and Mail.
For your Attribute to match to: UserPrincipalName or Mail, example - prefix@domain, you must have a @domain included in the source data.
In the instance that a user has multiple roles, the following rules are used to determine what staff or student match rules should be used between the user record and the Microsoft Entra user object.
If isPrimary is set for all student roles, even if association to a staff role exists, the match is made based on the student role.
If isPrimary is set for any staff role, even if association to a student role exists, the match is made based on the staff role.
If isPrimary is set for both staff and student role, the match is made based on the staff role.
If isPrimary isn't set for any roles, especially with a mix for both staff and student roles, the match is based on the staff role.
Important
When configuring Manage data to Microsoft 365 user provisingin type, these rules are used if the option is activated to Create unmatched users, to define the construct for the Microsoft Entra UserPrincipalName property.
Select Next to continue.
- Attribute from source: user attribute based on data that is coming from your SIS / SMS.
Review the date when SDS should prevent synching updates to the data from the connected data source. Most typically stop syncing data around when the academic year ends. The maximum is 18 months from sync start date.
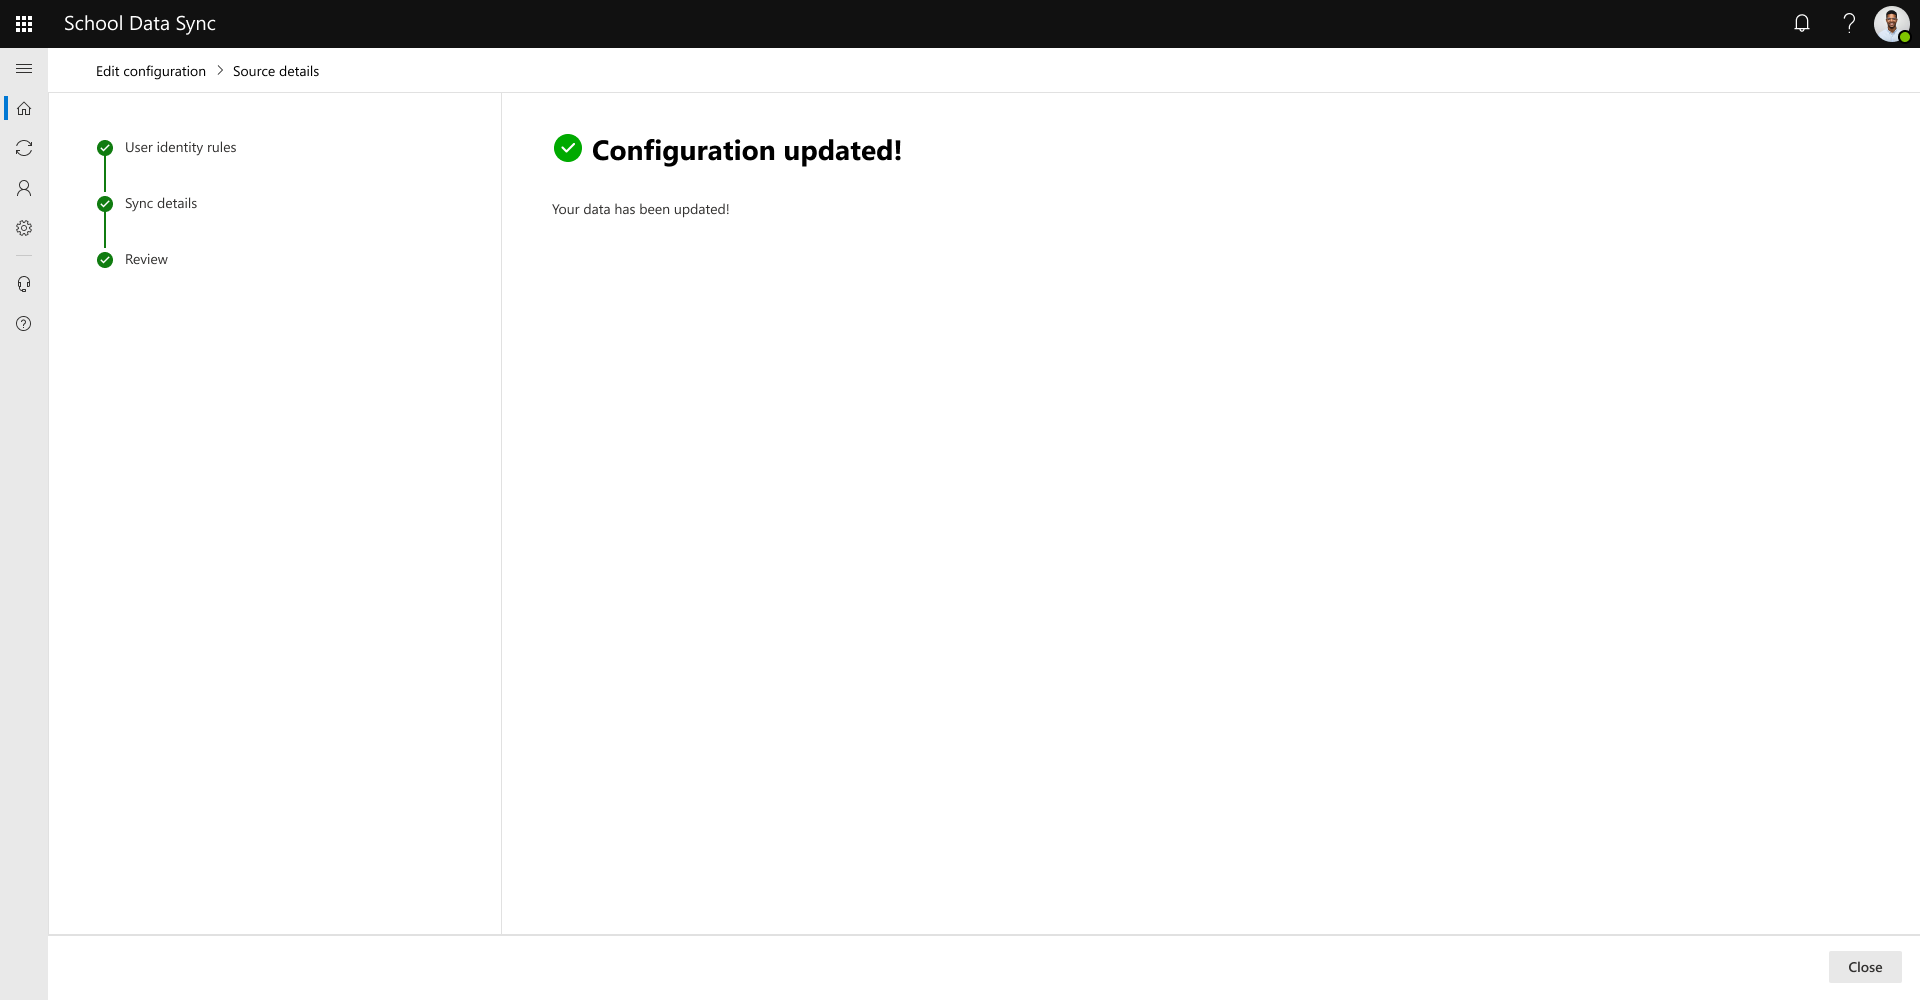
Review information presented. If everything looks correct, select Submit button. If not, you're able to navigate back to correct.
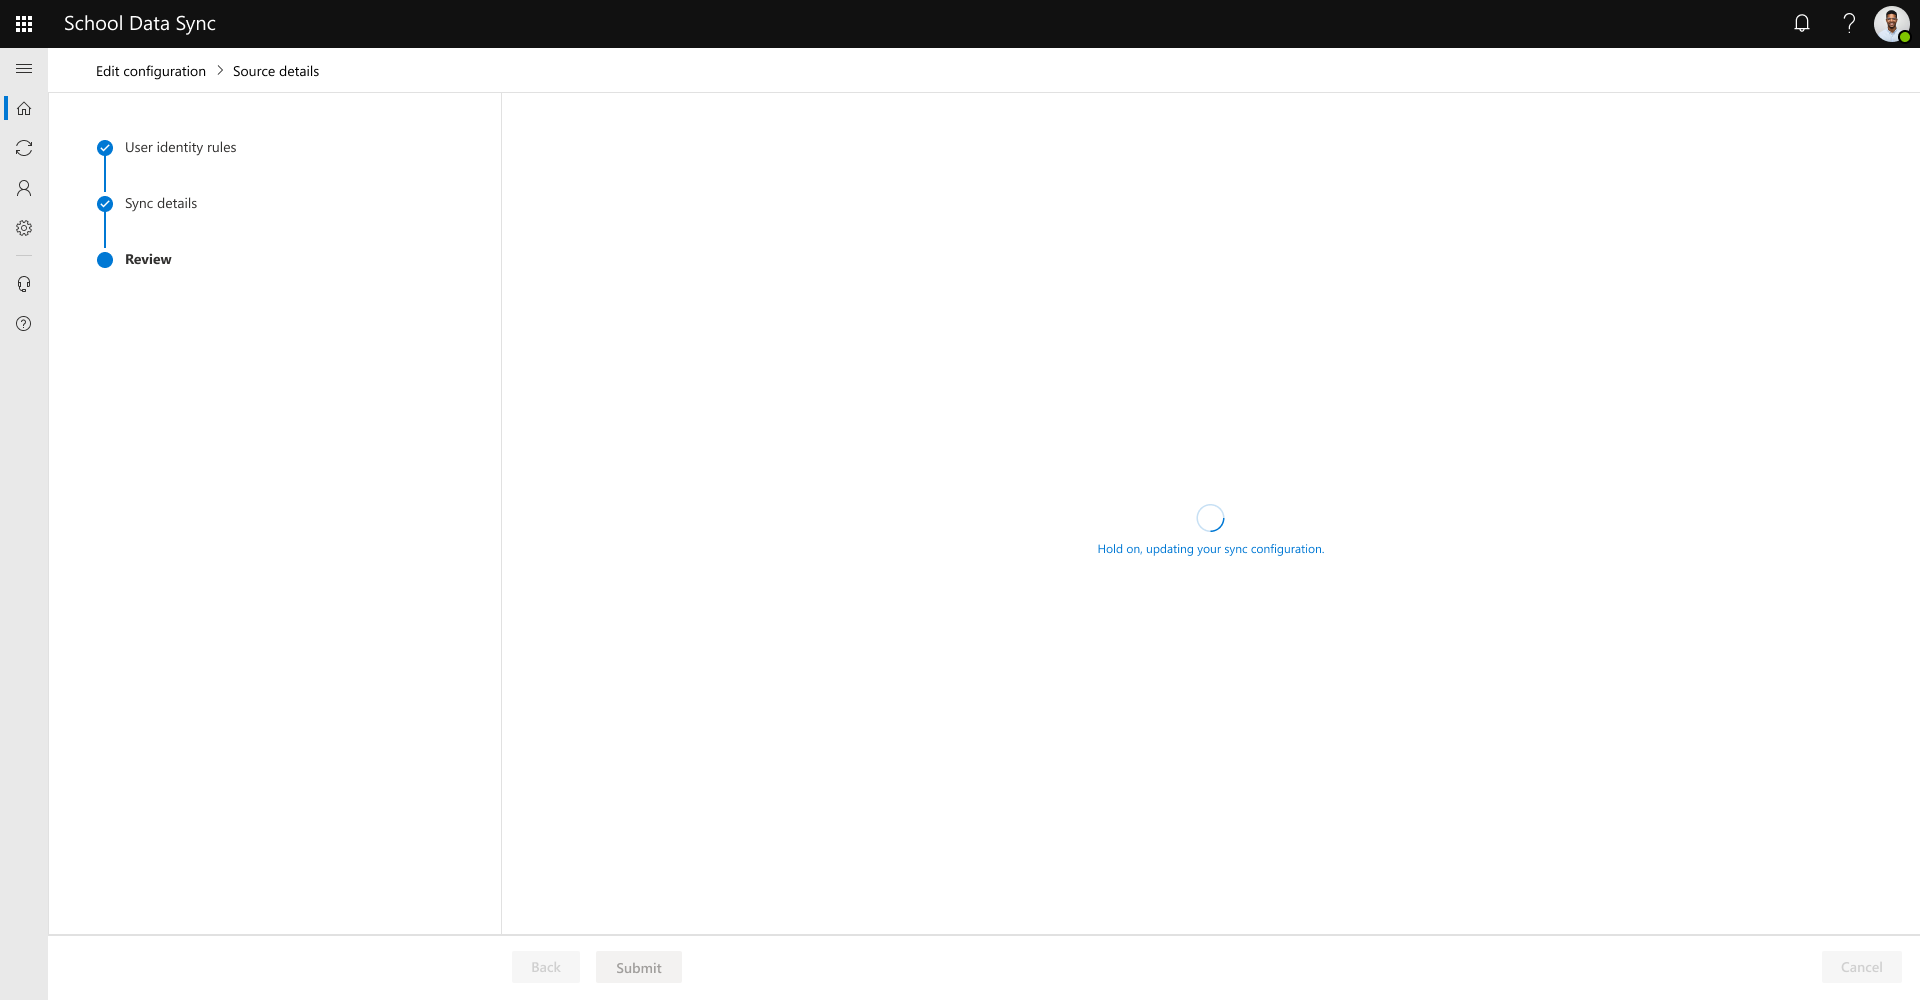
Your connect data configuration is updated, select Close button.