Note
Access to this page requires authorization. You can try signing in or changing directories.
Access to this page requires authorization. You can try changing directories.
Often in an enterprise, you already have a set of workflows that perform real work in Logic Apps. These could be used by other automation services or power front-end applications that humans interact with. In Semantic Kernel, you can add these exact same workflows as plugins so your agents can also use them.
Take for example the Logic Apps workflows used by the Semantic Kernel team to answer questions about new PRs. With the following workflows, an agent has everything it needs to retrieve code changes, search for related files, and check failure logs.
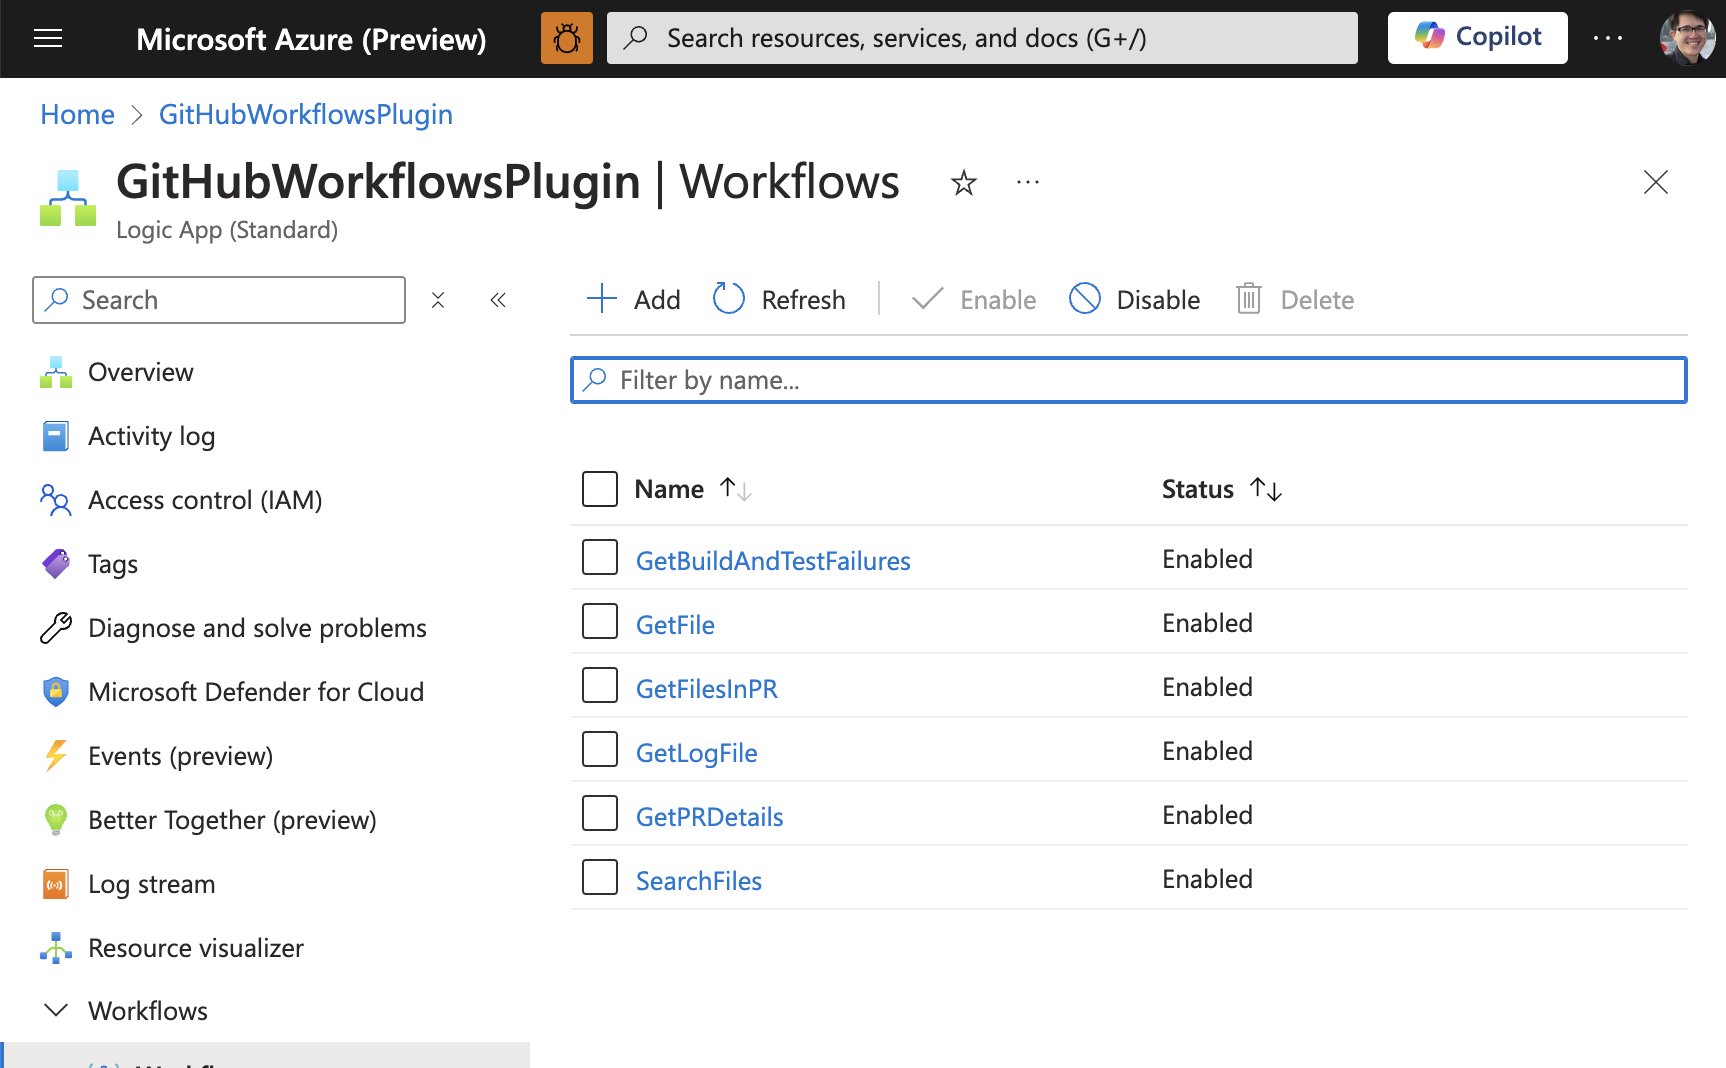
- Search files – to find code snippets that are relevant to a given problem
- Get file – to retrieve the contents of a file in the GitHub repository
- Get PR details – to retrieve the details of a PR (e.g., the PR title, description, and author)
- Get PR files – to retrieve the files that were changed in a PR
- Get build and test failures – to retrieve the build and test failures for a given GitHub action run
- Get log file – to retrieve the log file for a given GitHub action run
Leveraging Logic Apps for Semantic Kernel plugins is also a great way to take advantage of the over 1,400 connectors available in Logic Apps. This means you can easily connect to a wide variety of services and systems without writing any code.
Important
Today, you can only add standard Logic Apps (also known as single-tenant Logic Apps) as plugins. Consumption Logic Apps are coming soon.
Importing Logic Apps as plugins
To add Logic Apps workflows to Semantic Kernel, you'll use the same methods as loading in an OpenAPI specifications. Below is some sample code.
await kernel.ImportPluginFromOpenApiAsync(
    pluginName: "openapi_plugin",
    uri: new Uri("https://example.azurewebsites.net/swagger.json"),
    executionParameters: new OpenApiFunctionExecutionParameters()
    {
        // Determines whether payload parameter names are augmented with namespaces.
        // Namespaces prevent naming conflicts by adding the parent parameter name
        // as a prefix, separated by dots
        EnablePayloadNamespacing = true
    }
);
Setting up Logic Apps for Semantic Kernel
Before you can import a Logic App as a plugin, you must first set up the Logic App to be accessible by Semantic Kernel. This involves enabling metadata endpoints and configuring your application for Easy Auth before finally importing the Logic App as a plugin with authentication.
Enable metadata endpoints
For the easiest setup, you can enable unauthenticated access to the metadata endpoints for your Logic App. This will allow you to import your Logic App as a plugin into Semantic Kernel without needing to create a custom HTTP client to handle authentication for the initial import.
The below host.json file will create two unauthenticated endpoints. You can do this in azure portal by going to kudu console and editing the host.json file located at C:\home\site\wwwroot\host.json.
{
  "version": "2.0",
  "extensionBundle": {
    "id": "Microsoft.Azure.Functions.ExtensionBundle.Workflows",
    "version": "[1.*, 2.0.0)"
  },
  "extensions": {
    "http": {
      "routePrefix": ""
    },
    "workflow": {
      "MetadataEndpoints": {
        "plugin": {
          "enable": true,
          "Authentication":{
              "Type":"Anonymous"
          }
        },
        "openapi": {
          "enable": true,
          "Authentication":{
              "Type":"Anonymous"
          }
        }
      },
      "Settings": {
        "Runtime.Triggers.RequestTriggerDefaultApiVersion": "2020-05-01-preview"
      }
    }
  }
}
Configure your application for Easy Auth
You now want to secure your Logic App workflows so only authorized users can access them. You can do this by enabling Easy Auth on your Logic App. This will allow you to use the same authentication mechanism as your other Azure services, making it easier to manage your security policies.
For an in-depth walkthrough on setting up Easy Auth, refer to this tutorial titled Trigger workflows in Standard logic apps with Easy Auth.
For those already familiar with Easy Auth (and already have an Entra client app you want to use), this is the configuration you’ll want to post to Azure management.
#!/bin/bash

# Variables
subscription_id="[SUBSCRIPTION_ID]"
resource_group="[RESOURCE_GROUP]"
app_name="[APP_NAME]"
api_version="2022-03-01"
arm_token="[ARM_TOKEN]"
tenant_id="[TENANT_ID]"
aad_client_id="[AAD_CLIENT_ID]"
object_ids=("[OBJECT_ID_FOR_USER1]" "[OBJECT_ID_FOR_USER2]" "[OBJECT_ID_FOR_APP1]")

# Convert the object_ids array to a JSON array
object_ids_json=$(printf '%s\n' "${object_ids[@]}" | jq -R . | jq -s .)

# Request URL
url="https://management.azure.com/subscriptions/$subscription_id/resourceGroups/$resource_group/providers/Microsoft.Web/sites/$app_name/config/authsettingsV2?api-version=$api_version"

# JSON payload
json_payload=$(cat <<EOF
{
    "properties": {
        "platform": {
            "enabled": true,
            "runtimeVersion": "~1"
        },
        "globalValidation": {
            "requireAuthentication": true,
            "unauthenticatedClientAction": "AllowAnonymous"
        },
        "identityProviders": {
            "azureActiveDirectory": {
                "enabled": true,
                "registration": {
                    "openIdIssuer": "https://sts.windows.net/$tenant_id/",
                    "clientId": "$aad_client_id"
                },
                "validation": {
                    "jwtClaimChecks": {},
                    "allowedAudiences": [
                        "api://$aad_client_id"
                    ],
                    "defaultAuthorizationPolicy": {
                        "allowedPrincipals": {
                            "identities": $object_ids_json
                        }
                    }
                }
            },
            "facebook": {
                "enabled": false,
                "registration": {},
                "login": {}
            },
            "gitHub": {
                "enabled": false,
                "registration": {},
                "login": {}
            },
            "google": {
                "enabled": false,
                "registration": {},
                "login": {},
                "validation": {}
            },
            "twitter": {
                "enabled": false,
                "registration": {}
            },
            "legacyMicrosoftAccount": {
                "enabled": false,
                "registration": {},
                "login": {},
                "validation": {}
            },
            "apple": {
                "enabled": false,
                "registration": {},
                "login": {}
            }
        }
    }
}
EOF
)

# HTTP PUT request
curl -X PUT "$url" \
    -H "Content-Type: application/json" \
    -H "Authorization: Bearer $arm_token" \
    -d "$json_payload"
Use Logic Apps with Semantic Kernel as a plugin
Now that you have your Logic App secured and the metadata endpoints enabled, you’ve finished all the hard parts. You can now import your Logic App as a plugin into Semantic Kernel using the OpenAPI import method.
When you create your plugin, you’ll want to provide a custom HTTP client that can handle the authentication for your Logic App. This will allow you to use the plugin in your AI agents without needing to worry about the authentication.
Below is an example in C# that leverages interactive auth to acquire a token and authenticate the user for the Logic App.
string ClientId = "[AAD_CLIENT_ID]";
string TenantId = "[TENANT_ID]";
string Authority = $"https://login.microsoftonline.com/{TenantId}";
string[] Scopes = new string[] { "api://[AAD_CLIENT_ID]/SKLogicApp" };

var app = PublicClientApplicationBuilder.Create(ClientId)
            .WithAuthority(Authority)
            .WithDefaultRedirectUri() // Uses http://localhost for a console app
            .Build();

AuthenticationResult authResult = null;
try
{
    authResult = await app.AcquireTokenInteractive(Scopes).ExecuteAsync();
}
catch (MsalException ex)
{
    Console.WriteLine("An error occurred acquiring the token: " + ex.Message);
}

// Add the plugin to the kernel with a custom HTTP client for authentication
kernel.Plugins.Add(await kernel.ImportPluginFromOpenApiAsync(
    pluginName: "[NAME_OF_PLUGIN]",
    uri: new Uri("https://[LOGIC_APP_NAME].azurewebsites.net/swagger.json"),
    executionParameters: new OpenApiFunctionExecutionParameters()
    {
        HttpClient = new HttpClient()
        {
            DefaultRequestHeaders =
            {
                Authorization = new AuthenticationHeaderValue("Bearer", authResult.AccessToken)
            }
        },
    }
));
Next steps
Now that you know how to create a plugin, you can now learn how to use them with your AI agent. Depending on the type of functions you've added to your plugins, there are different patterns you should follow. For retrieval functions, refer to the using retrieval functions article. For task automation functions, refer to the using task automation functions article.