Note
Access to this page requires authorization. You can try signing in or changing directories.
Access to this page requires authorization. You can try changing directories.
The Manage Workspaces feature in Microsoft Engage Center allows administrators to create, edit, link, and delete child workspaces in order to manage access to digital entitlements.
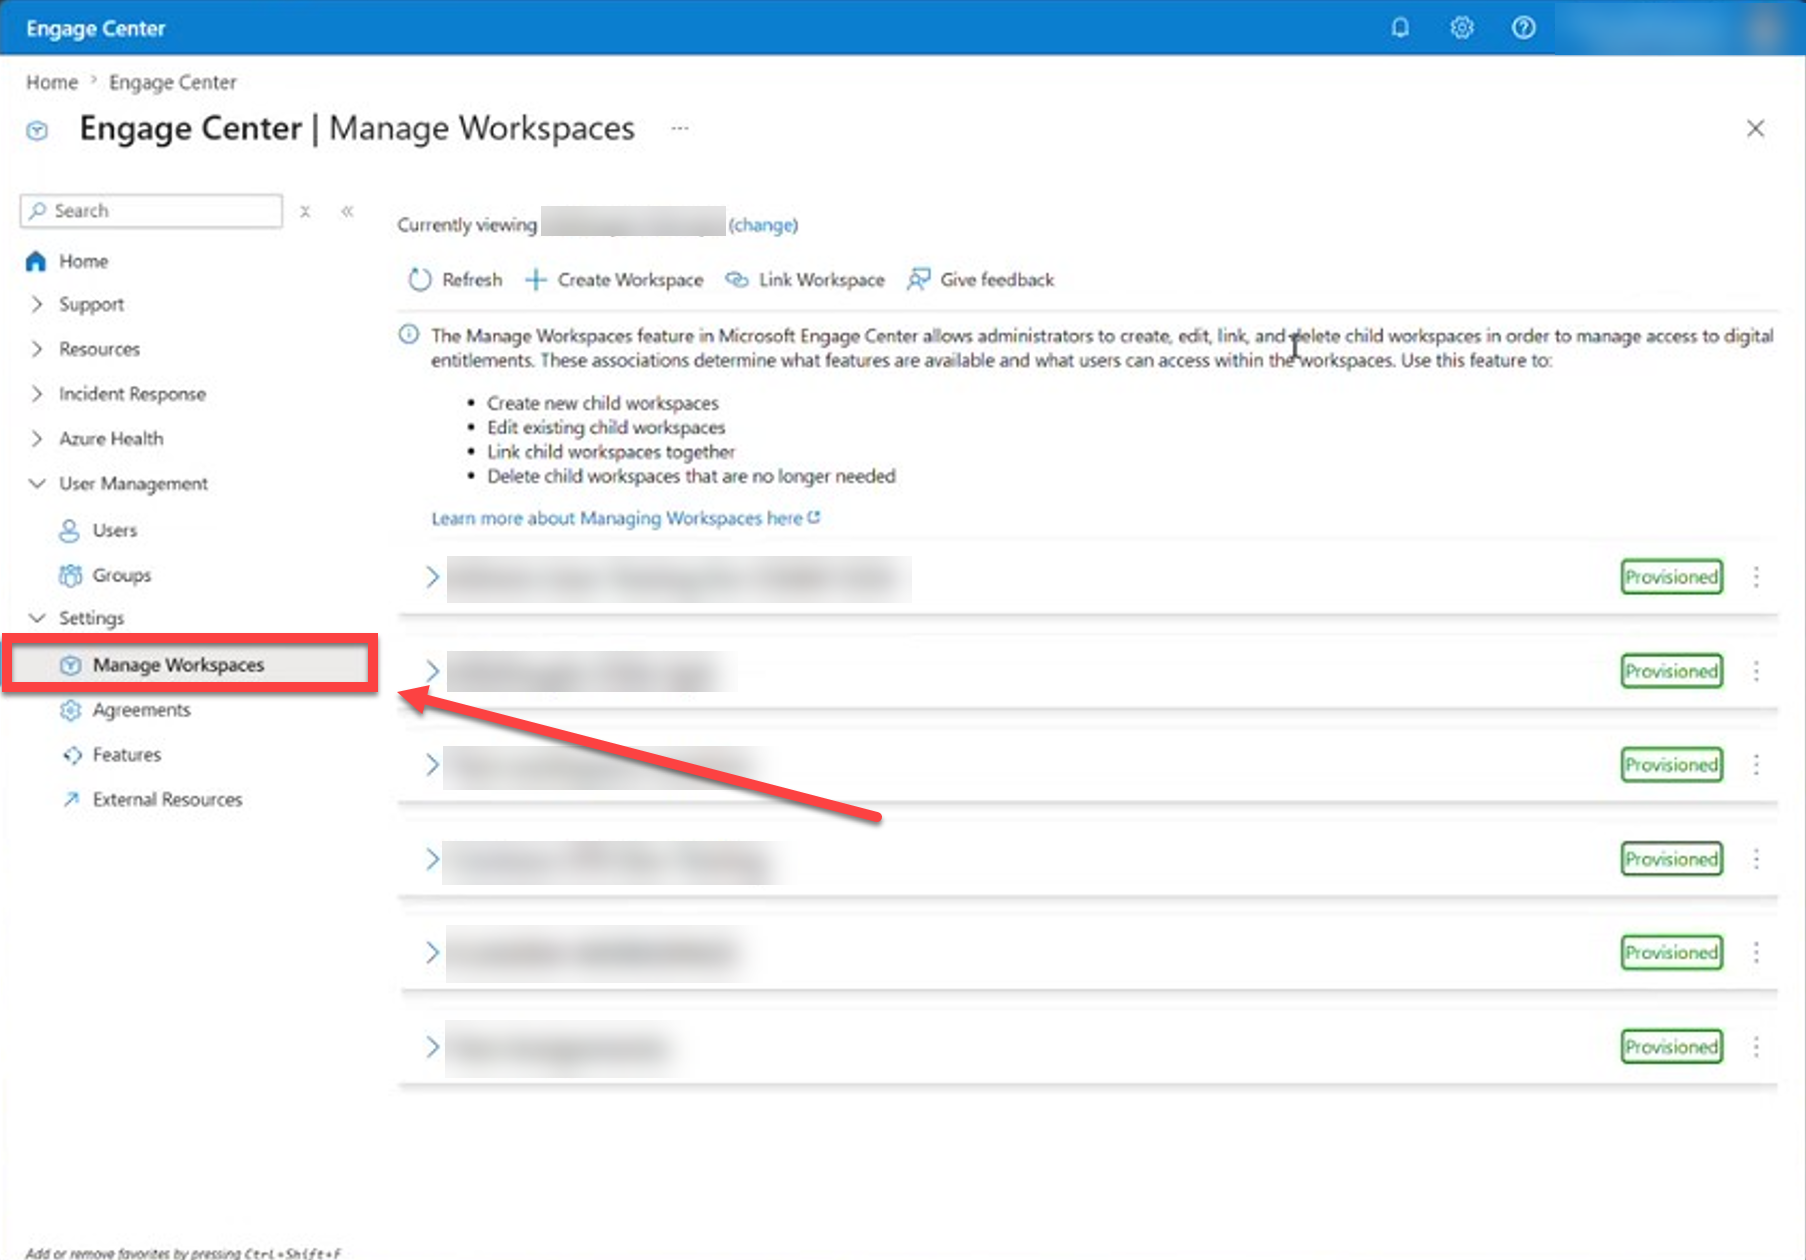
This feature is available only from a Rollup workspace and is used to manage the child workspaces beneath it. For an overview of workspace types and how Rollup workspaces relate to child workspaces, see Microsoft Engage Center workspaces.
Prerequisites
You must be listed as a Customer Support Manager (CSM) or Customer Success Account Manager (CSAM) on a support agreement to add new agreements or services to a child workspace.
What Manage Workspaces does
Using this feature, administrators can:
- Create new child workspaces
- Edit existing child workspaces
- Link child workspaces together
- Delete child workspaces that are no longer needed
Create a workspace
To create a workspace:
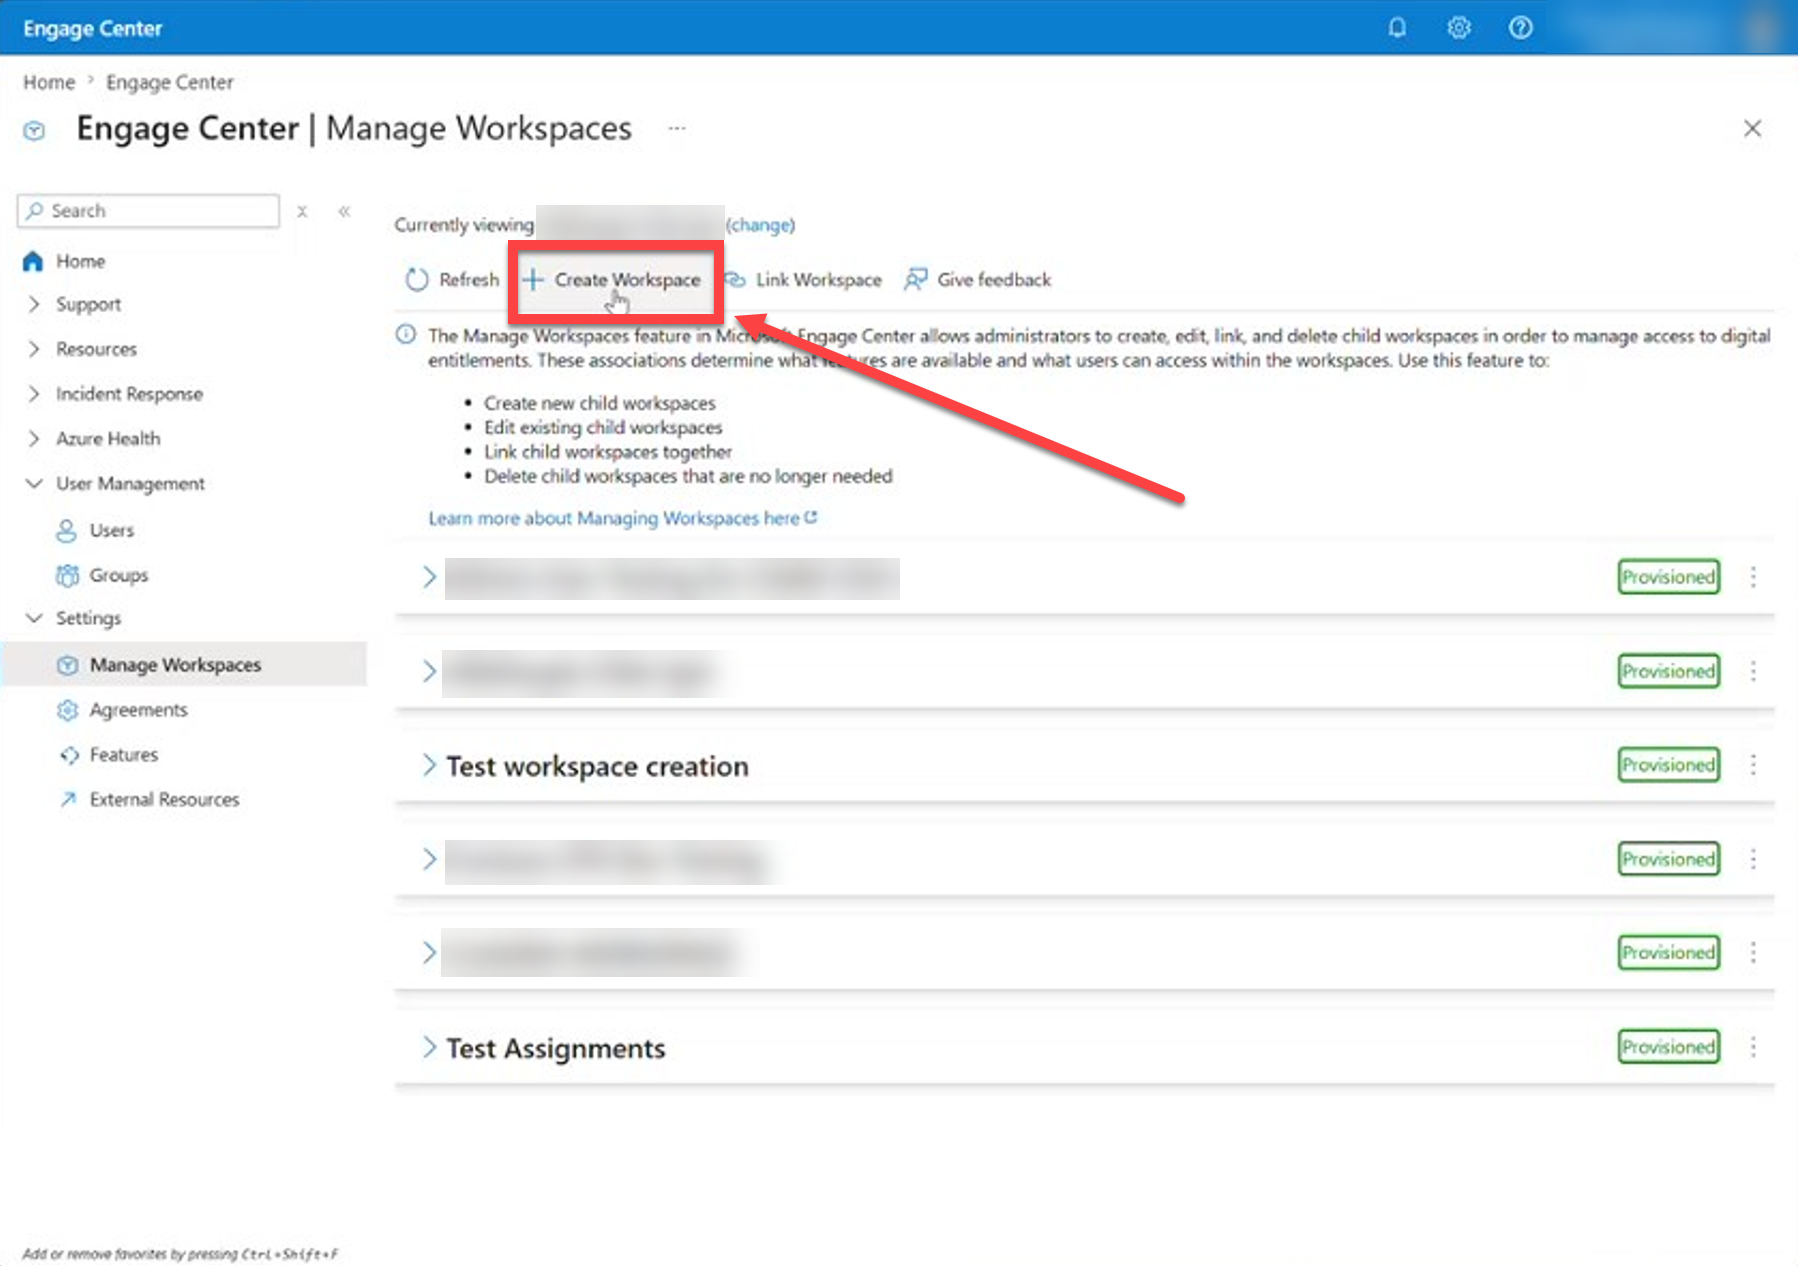
Select Create Workspace.
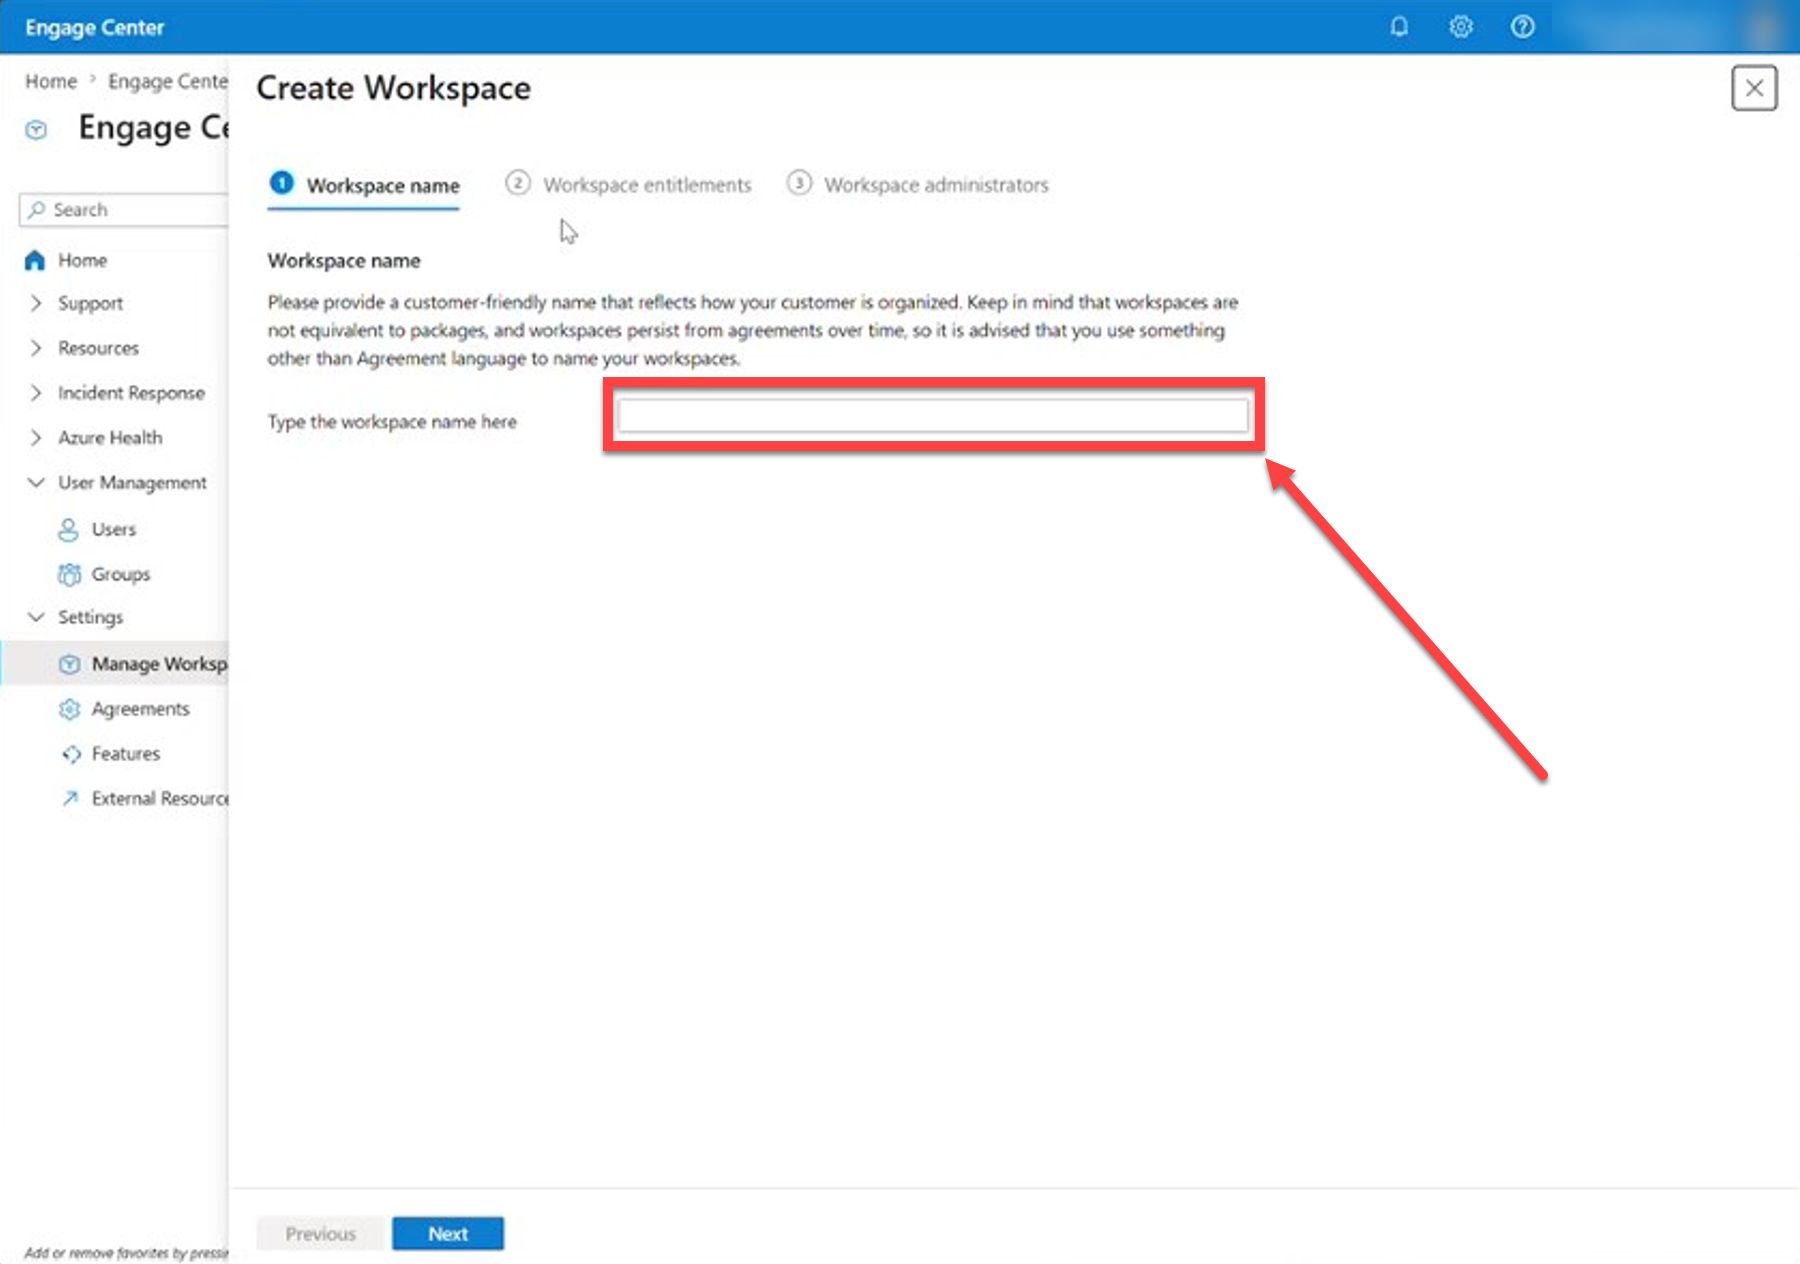
Enter a workspace name.
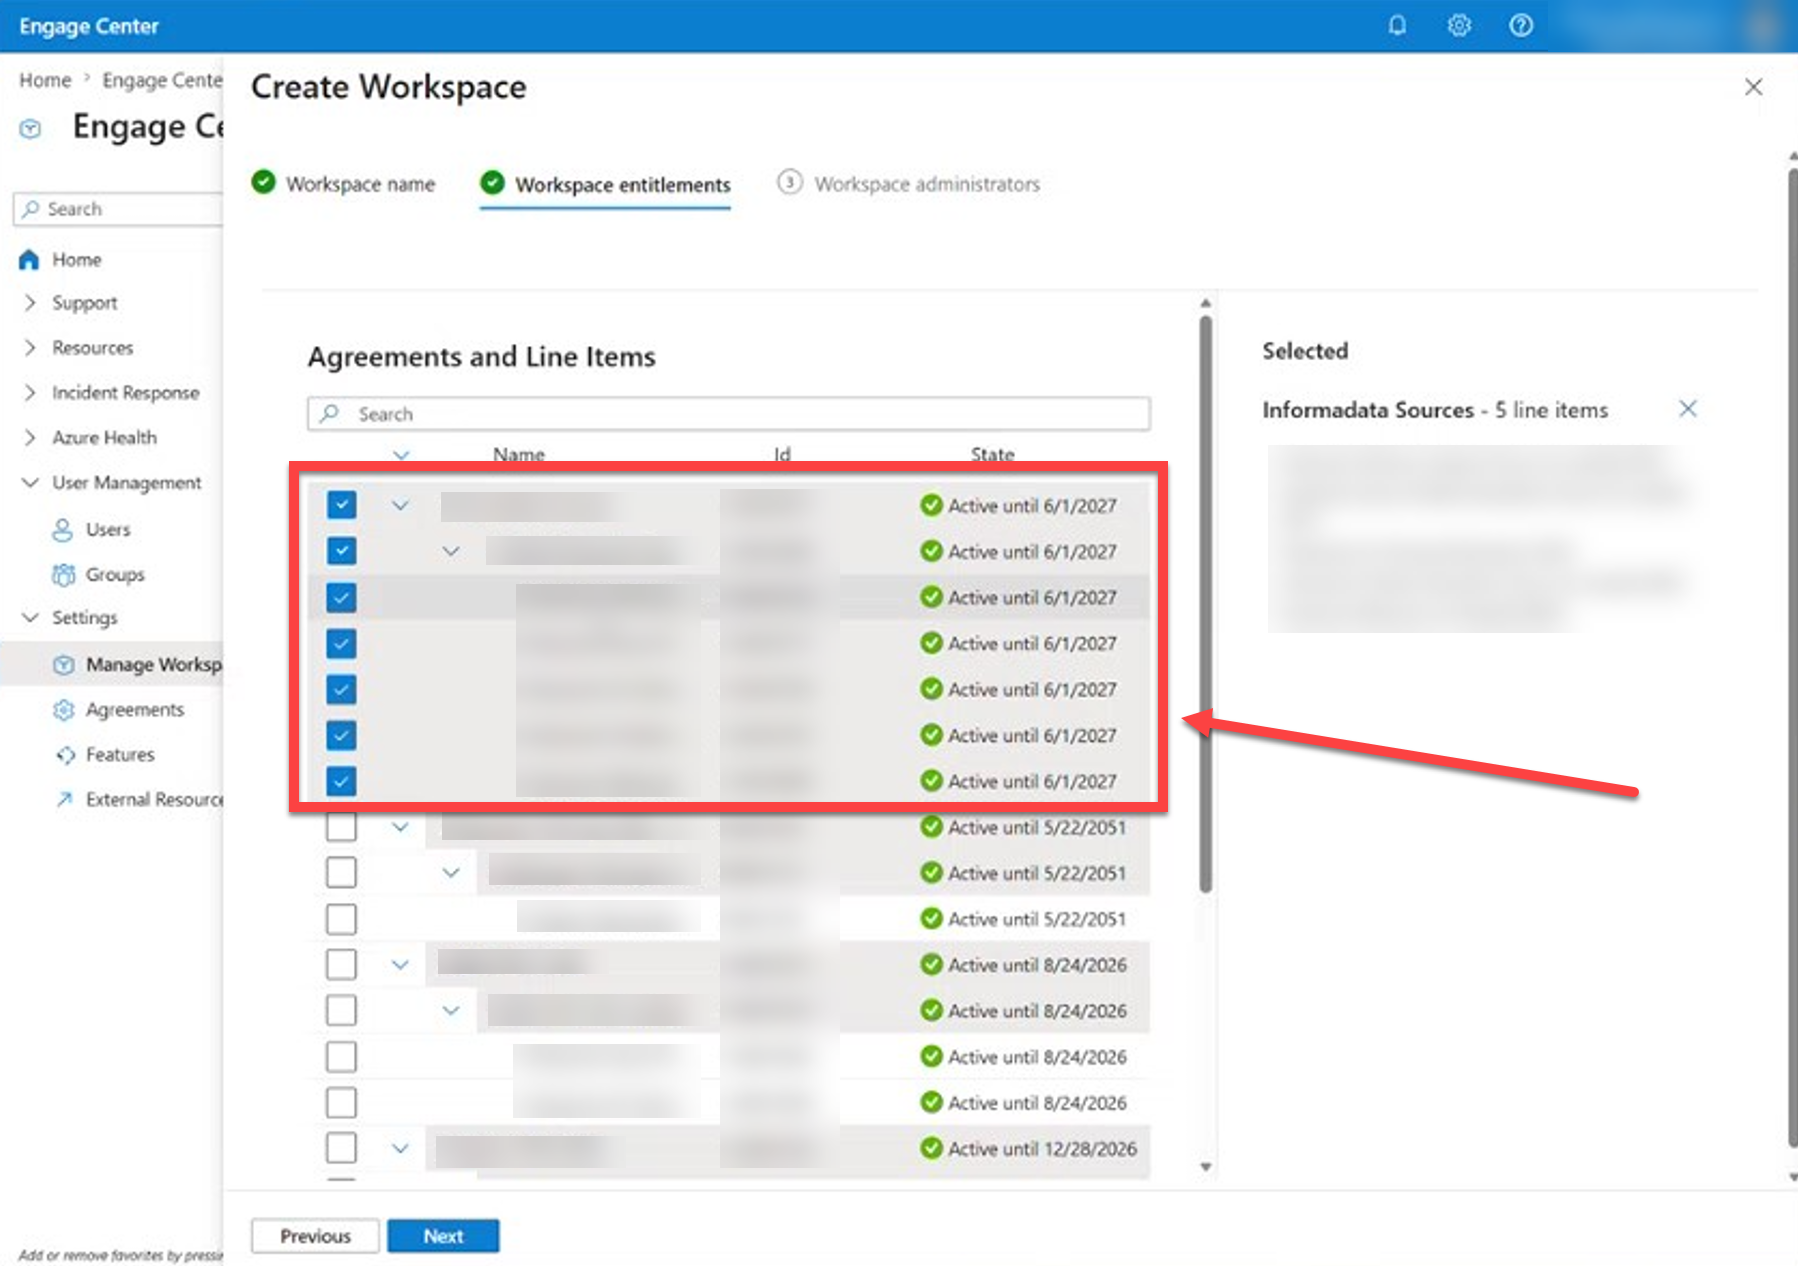
Select the appropriate services to associate with the workspace.
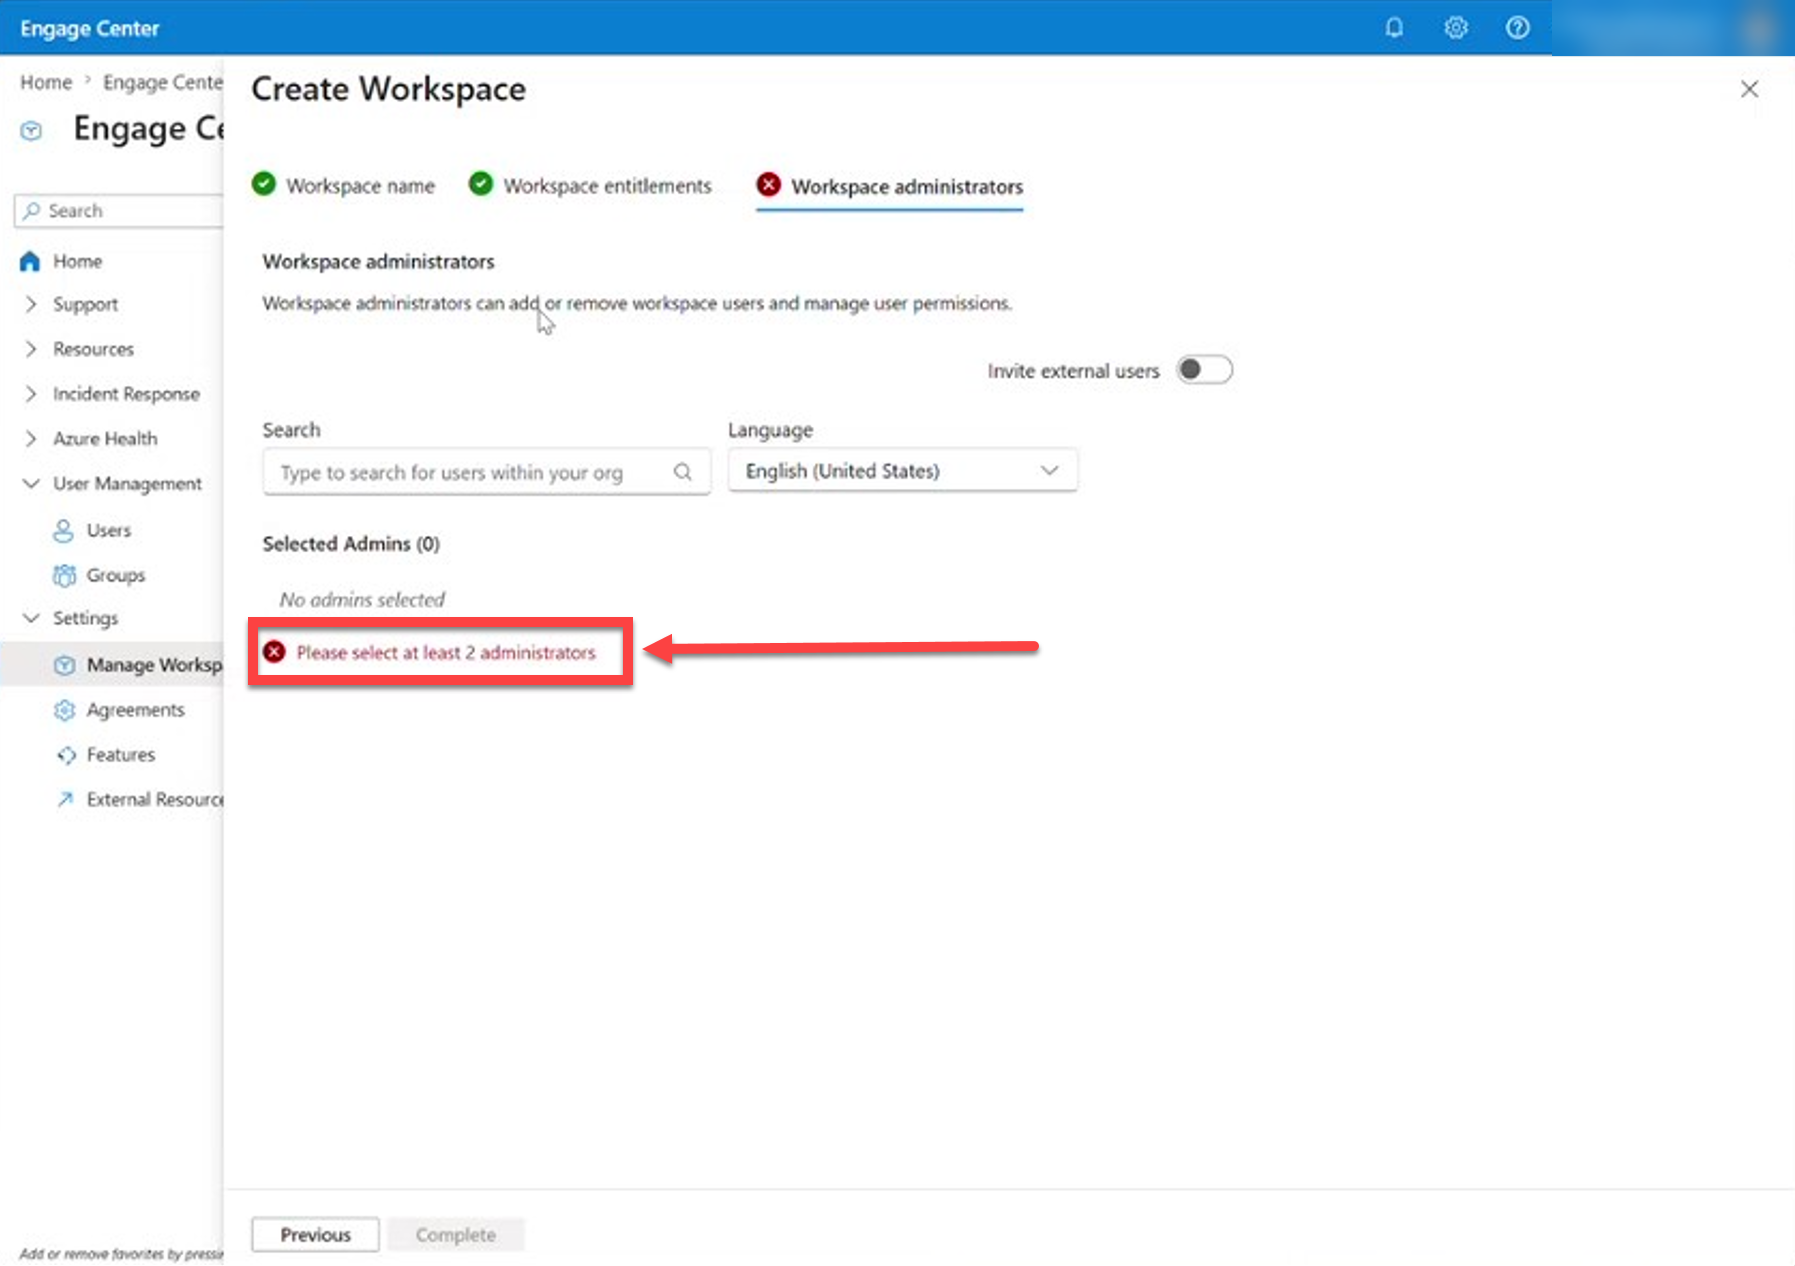
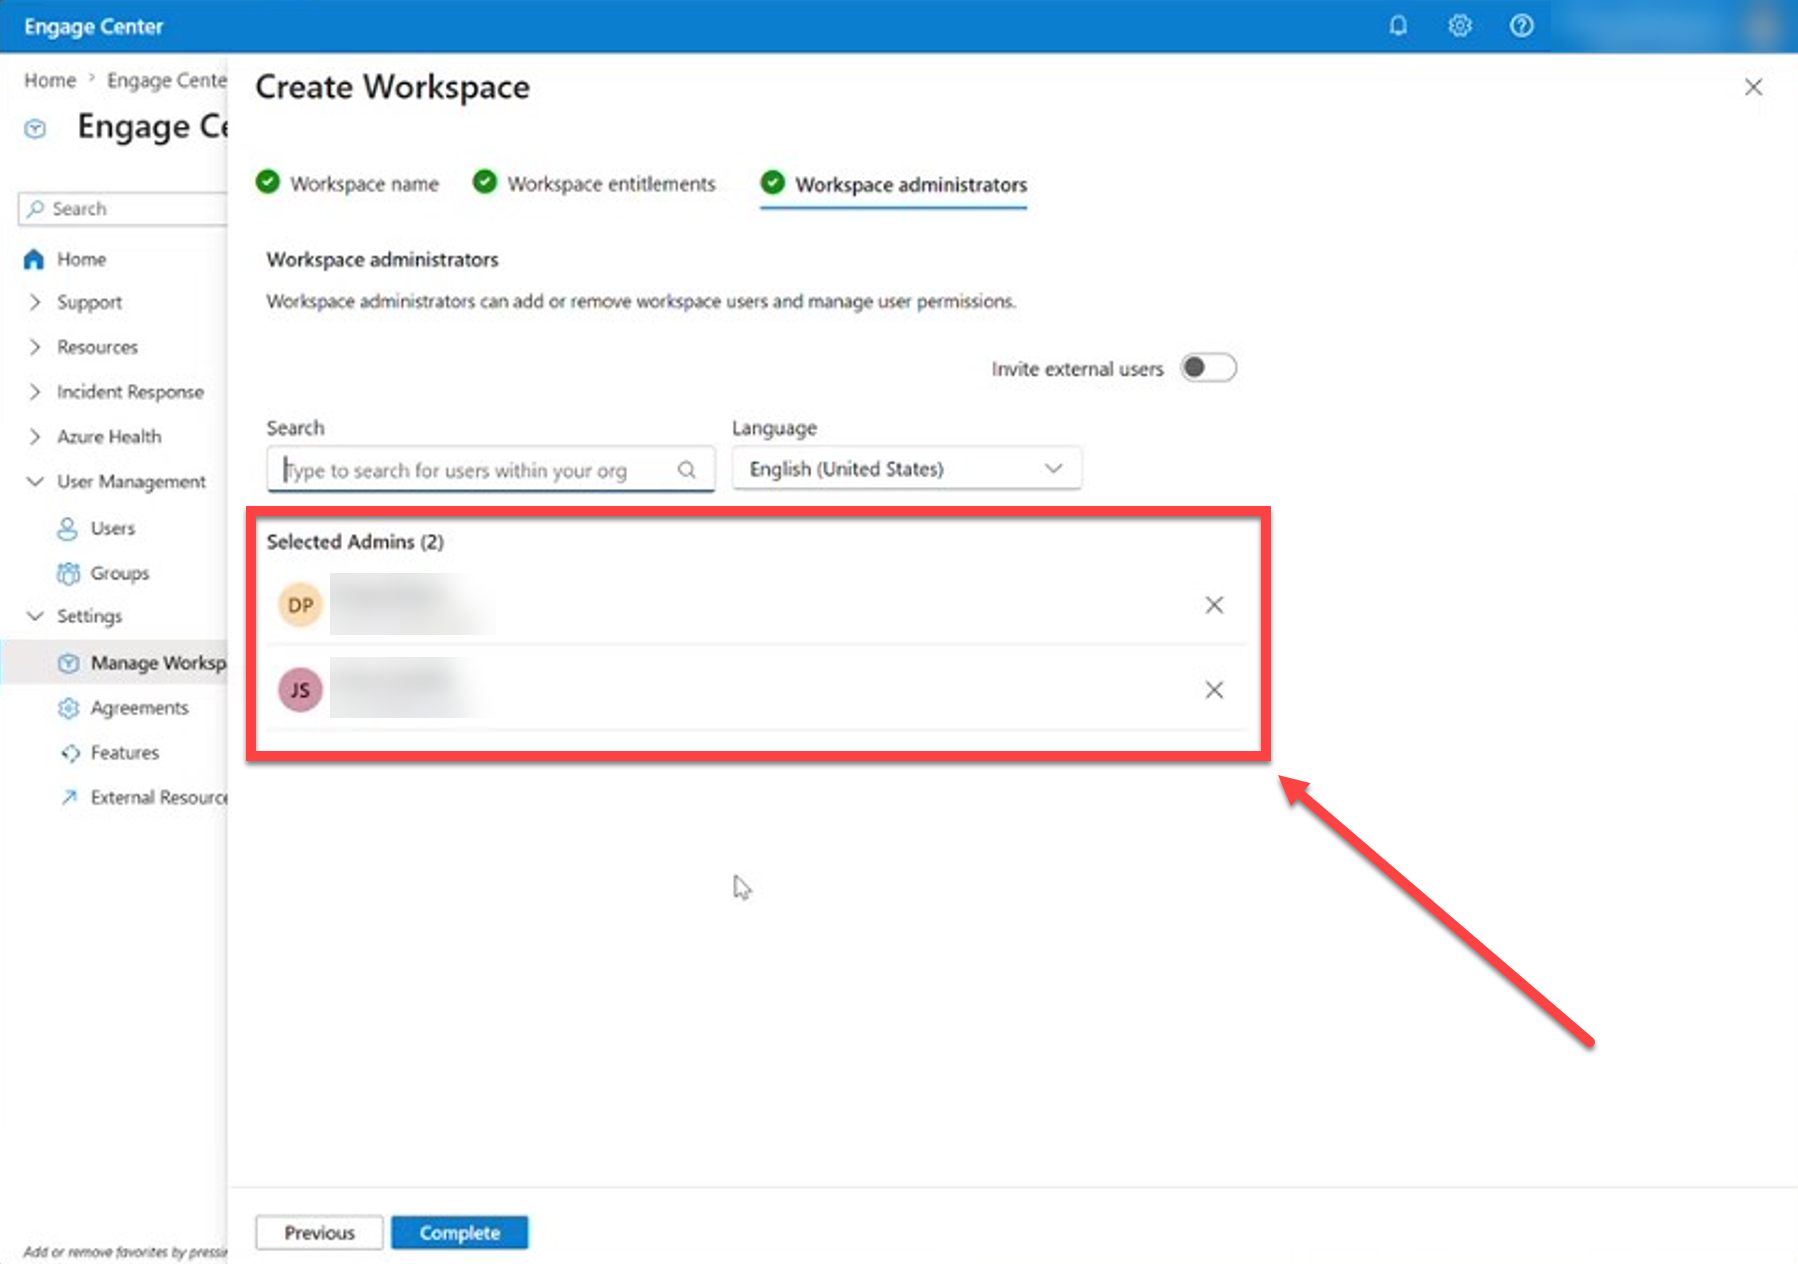
Add at least two workspace administrators.
Note
When you add an administrator this way, you're adding them specifically as a Managed Administrator. For details about the Managed Administrator role, see Managed Administrator (Rollup-assigned).
Important
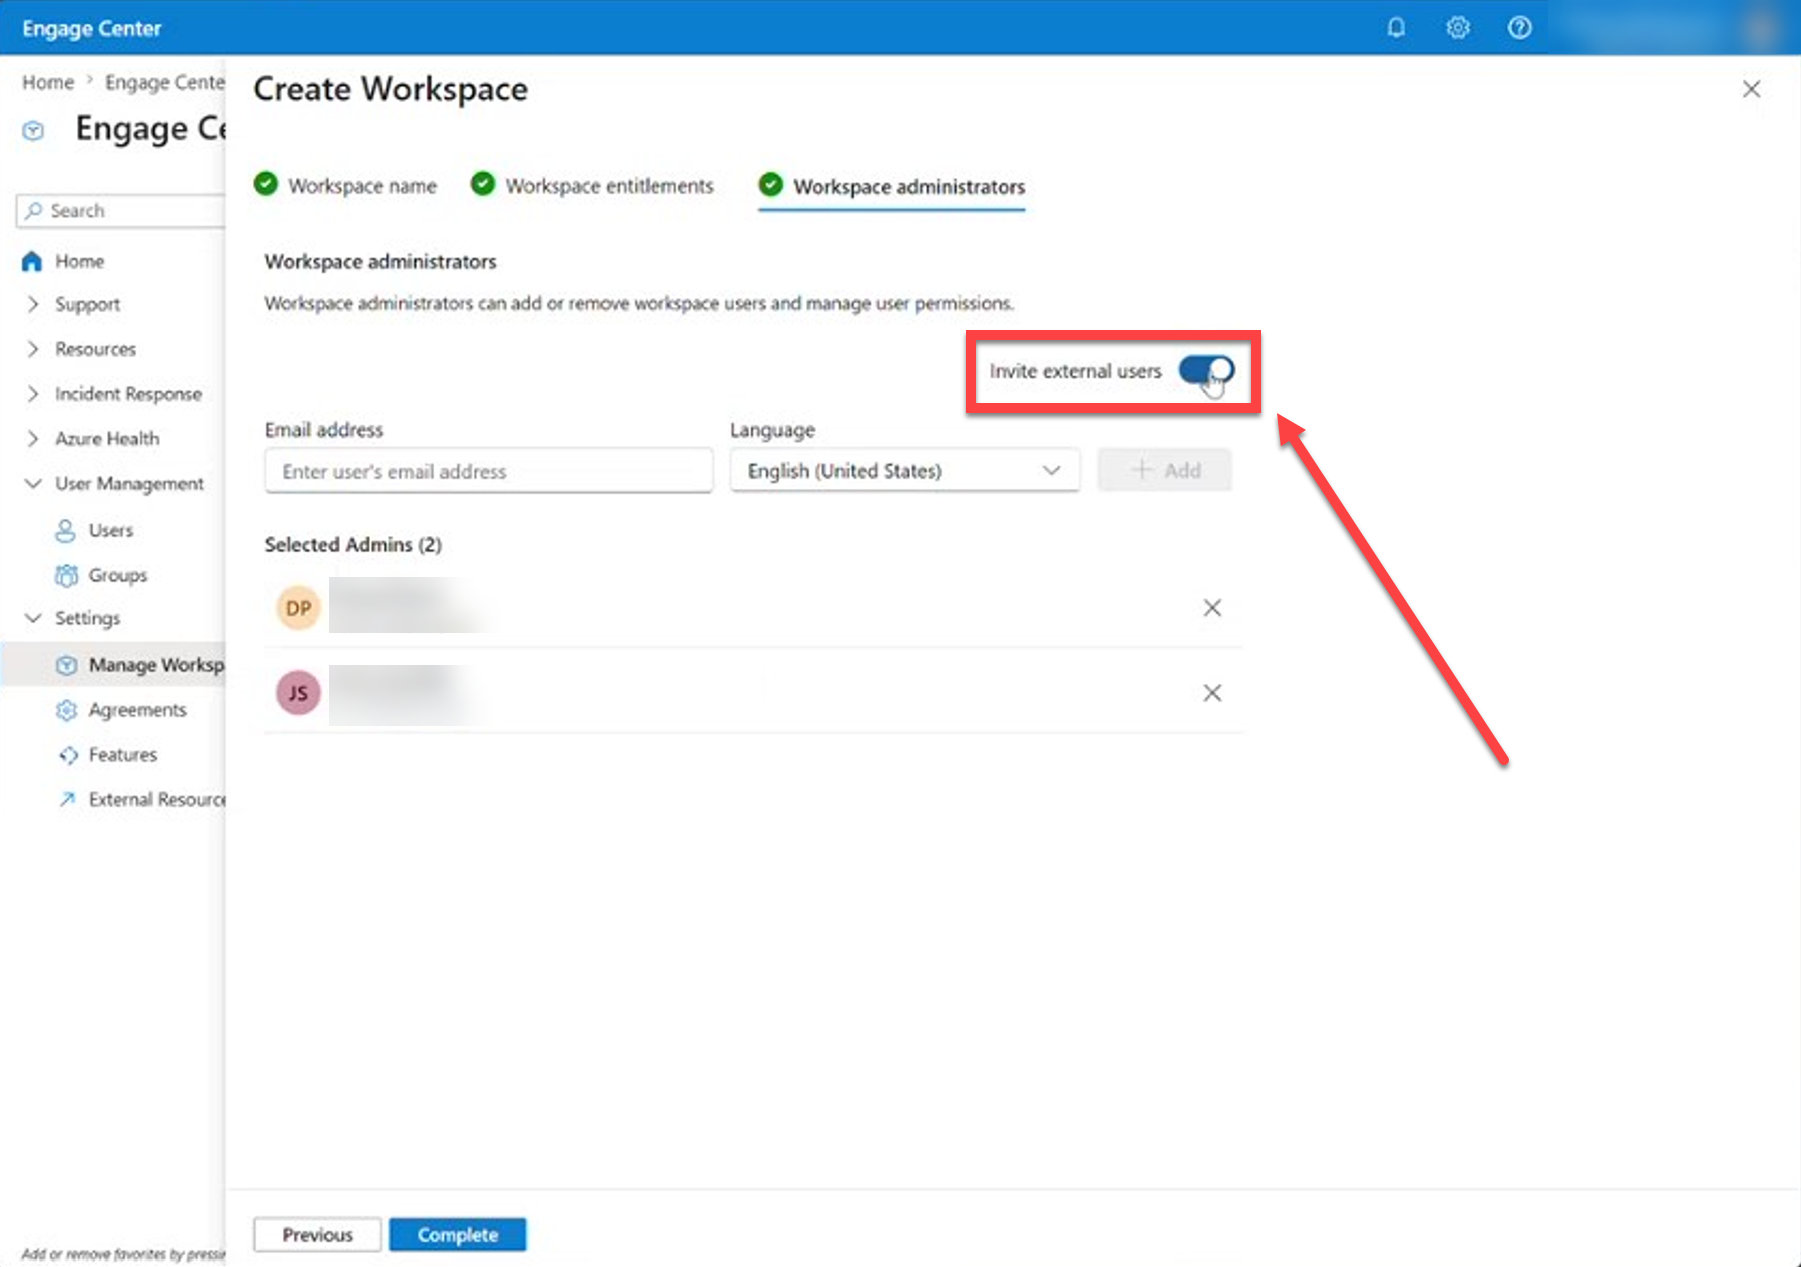
If you're a Microsoft employee creating the workspace, make sure you turn the external users toggle switch on (as shown in the following screenshot):
Select Complete to create the workspace and invite the administrators.
Once created, the new workspace appears as a child workspace under the Rollup workspace, and your selected administrators can sign in and manage it.
Edit a workspace
When editing a workspace, you can:
- Change the workspace name
- Update associated services
- Add additional workspace administrators
The edit experience uses the same prompts as workspace creation.
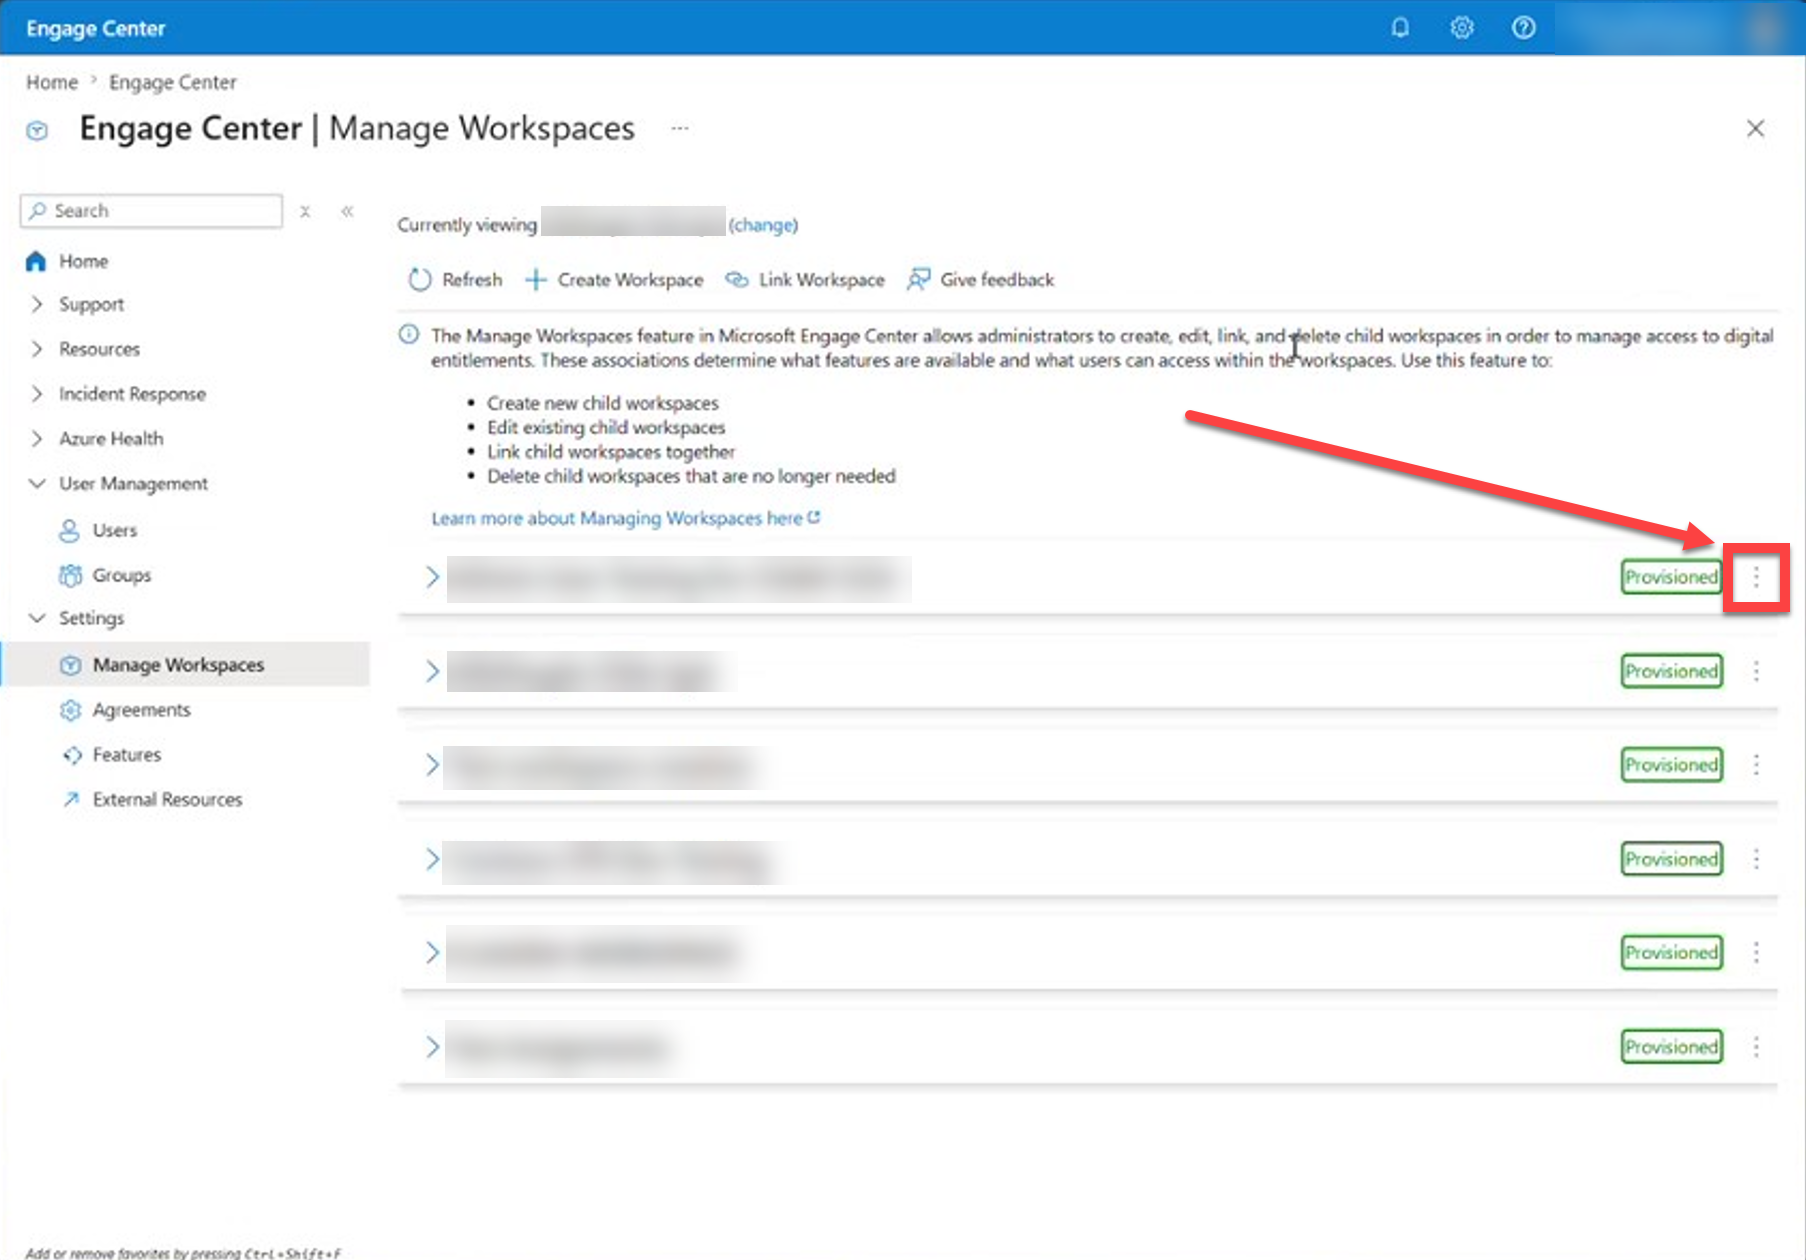
- Select the three dots on a workspace list item.
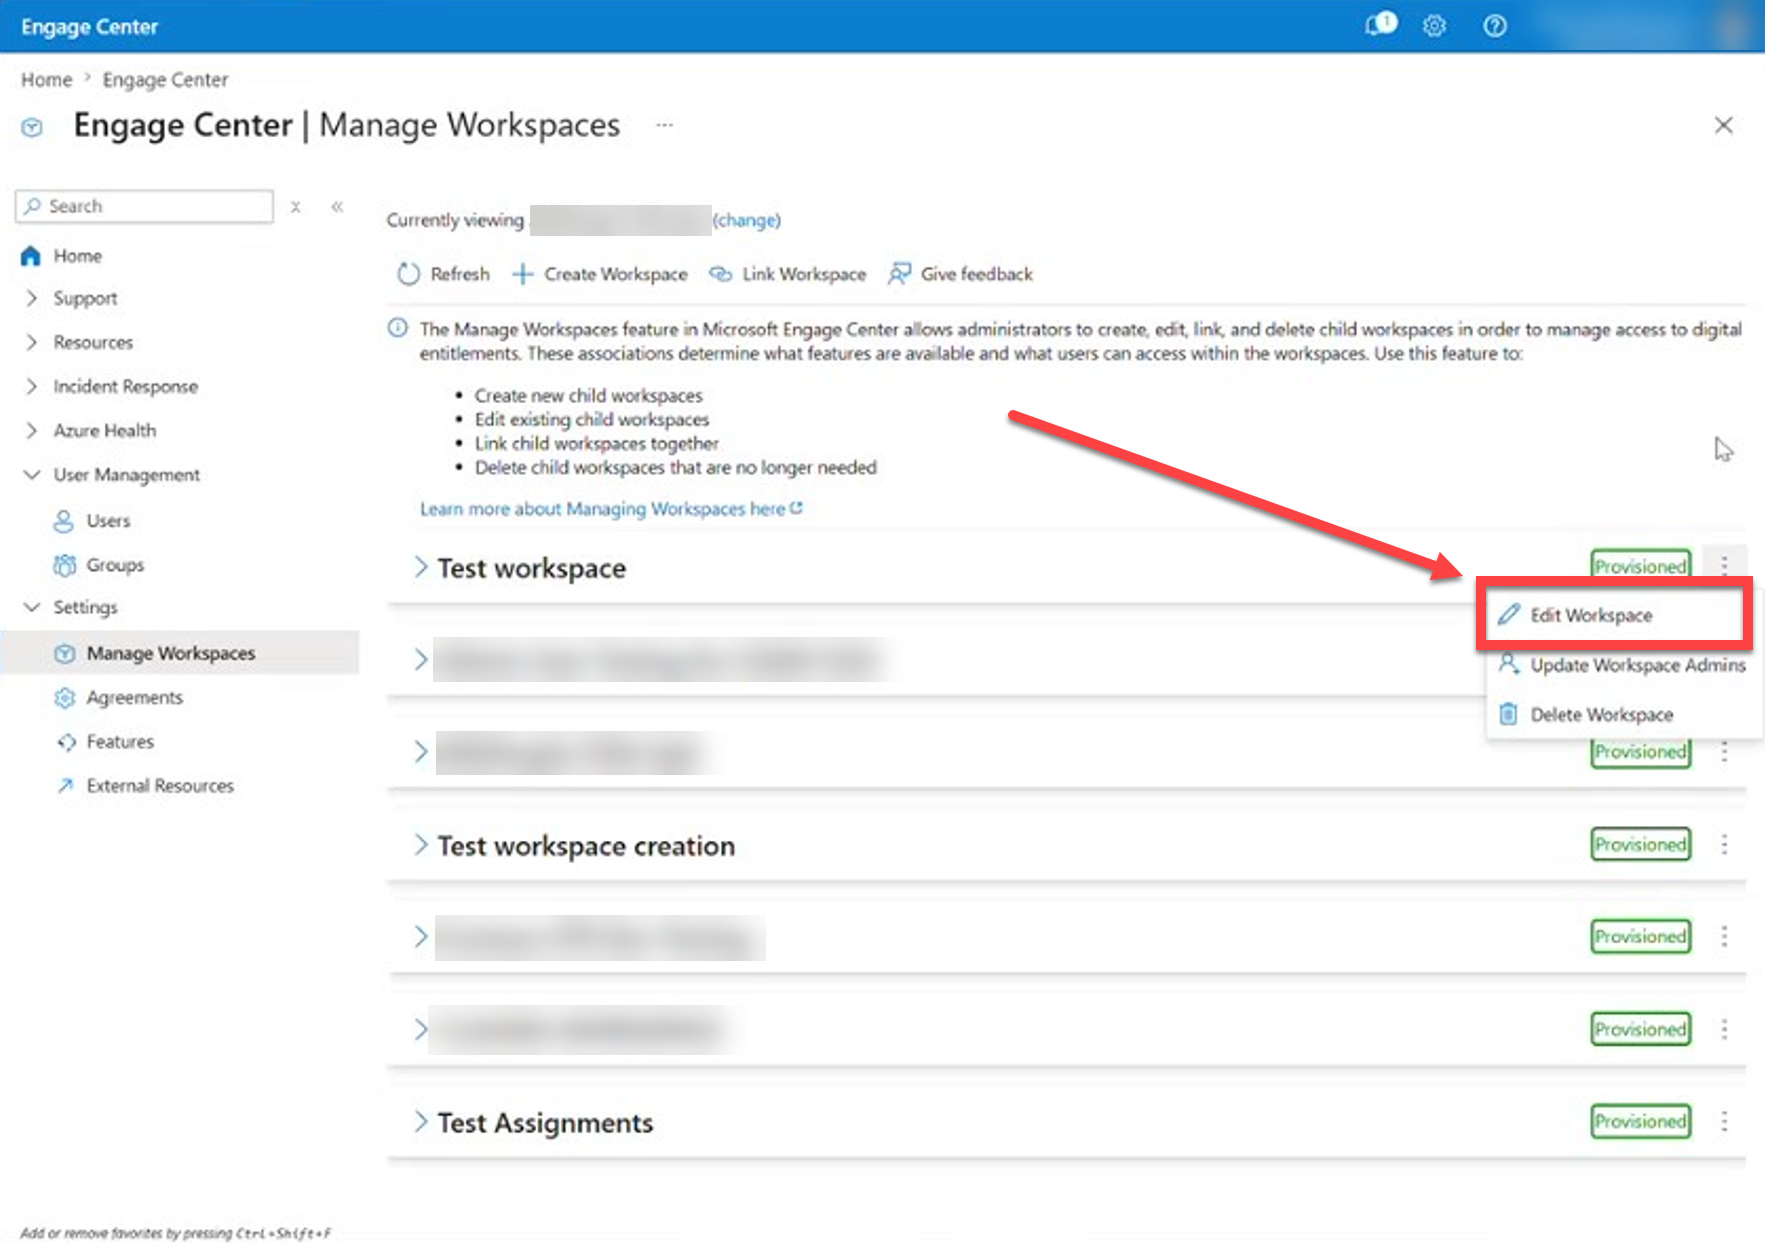
Select Edit Workspace.
Update administrators
Add or remove administrators for your workspace as needed.
Note
When you add an administrator this way, you're adding them specifically as a Managed Administrator. For details about the Managed Administrator role, see Managed Administrator (Rollup-assigned).
To add an administrator:
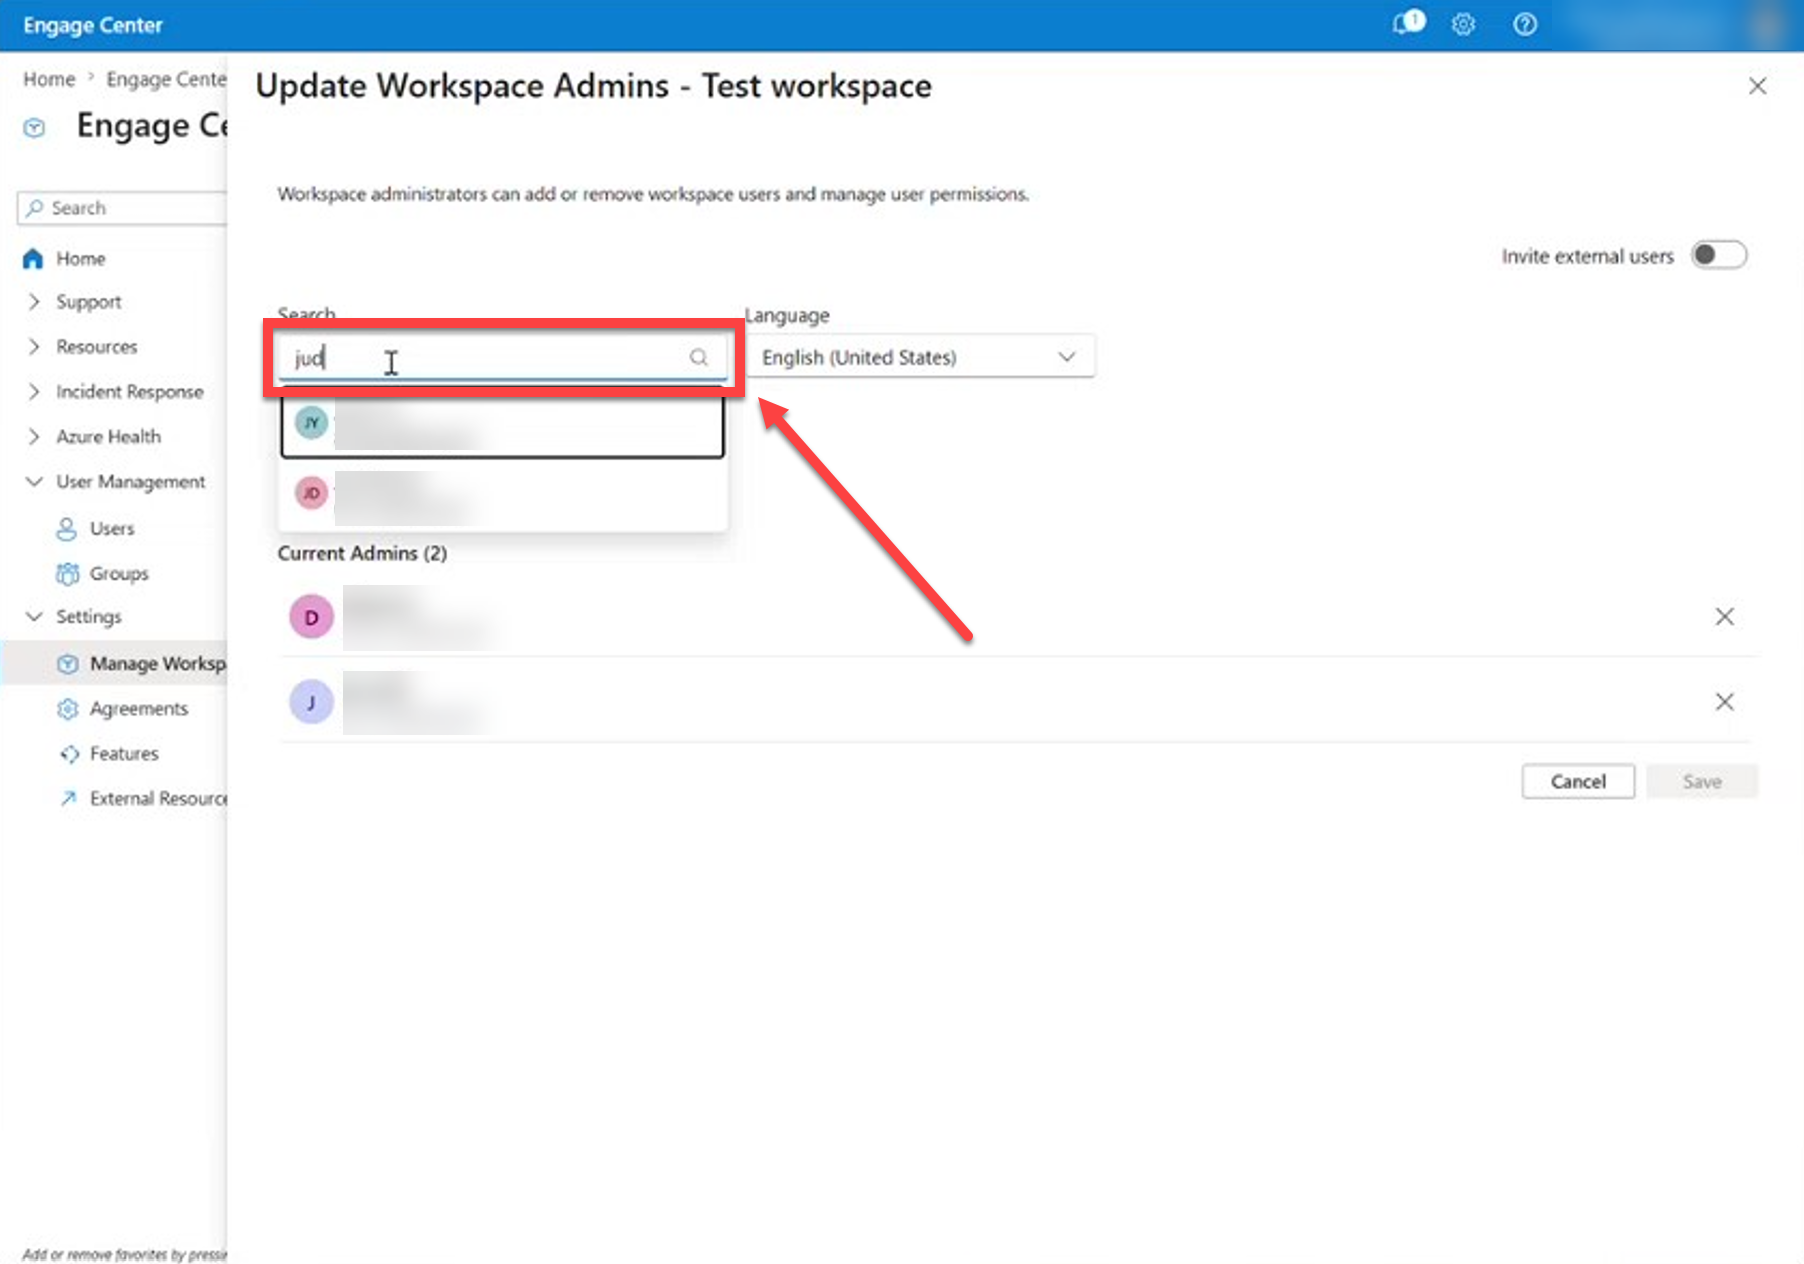
Use the search bar to locate a user you want to add, then select them.
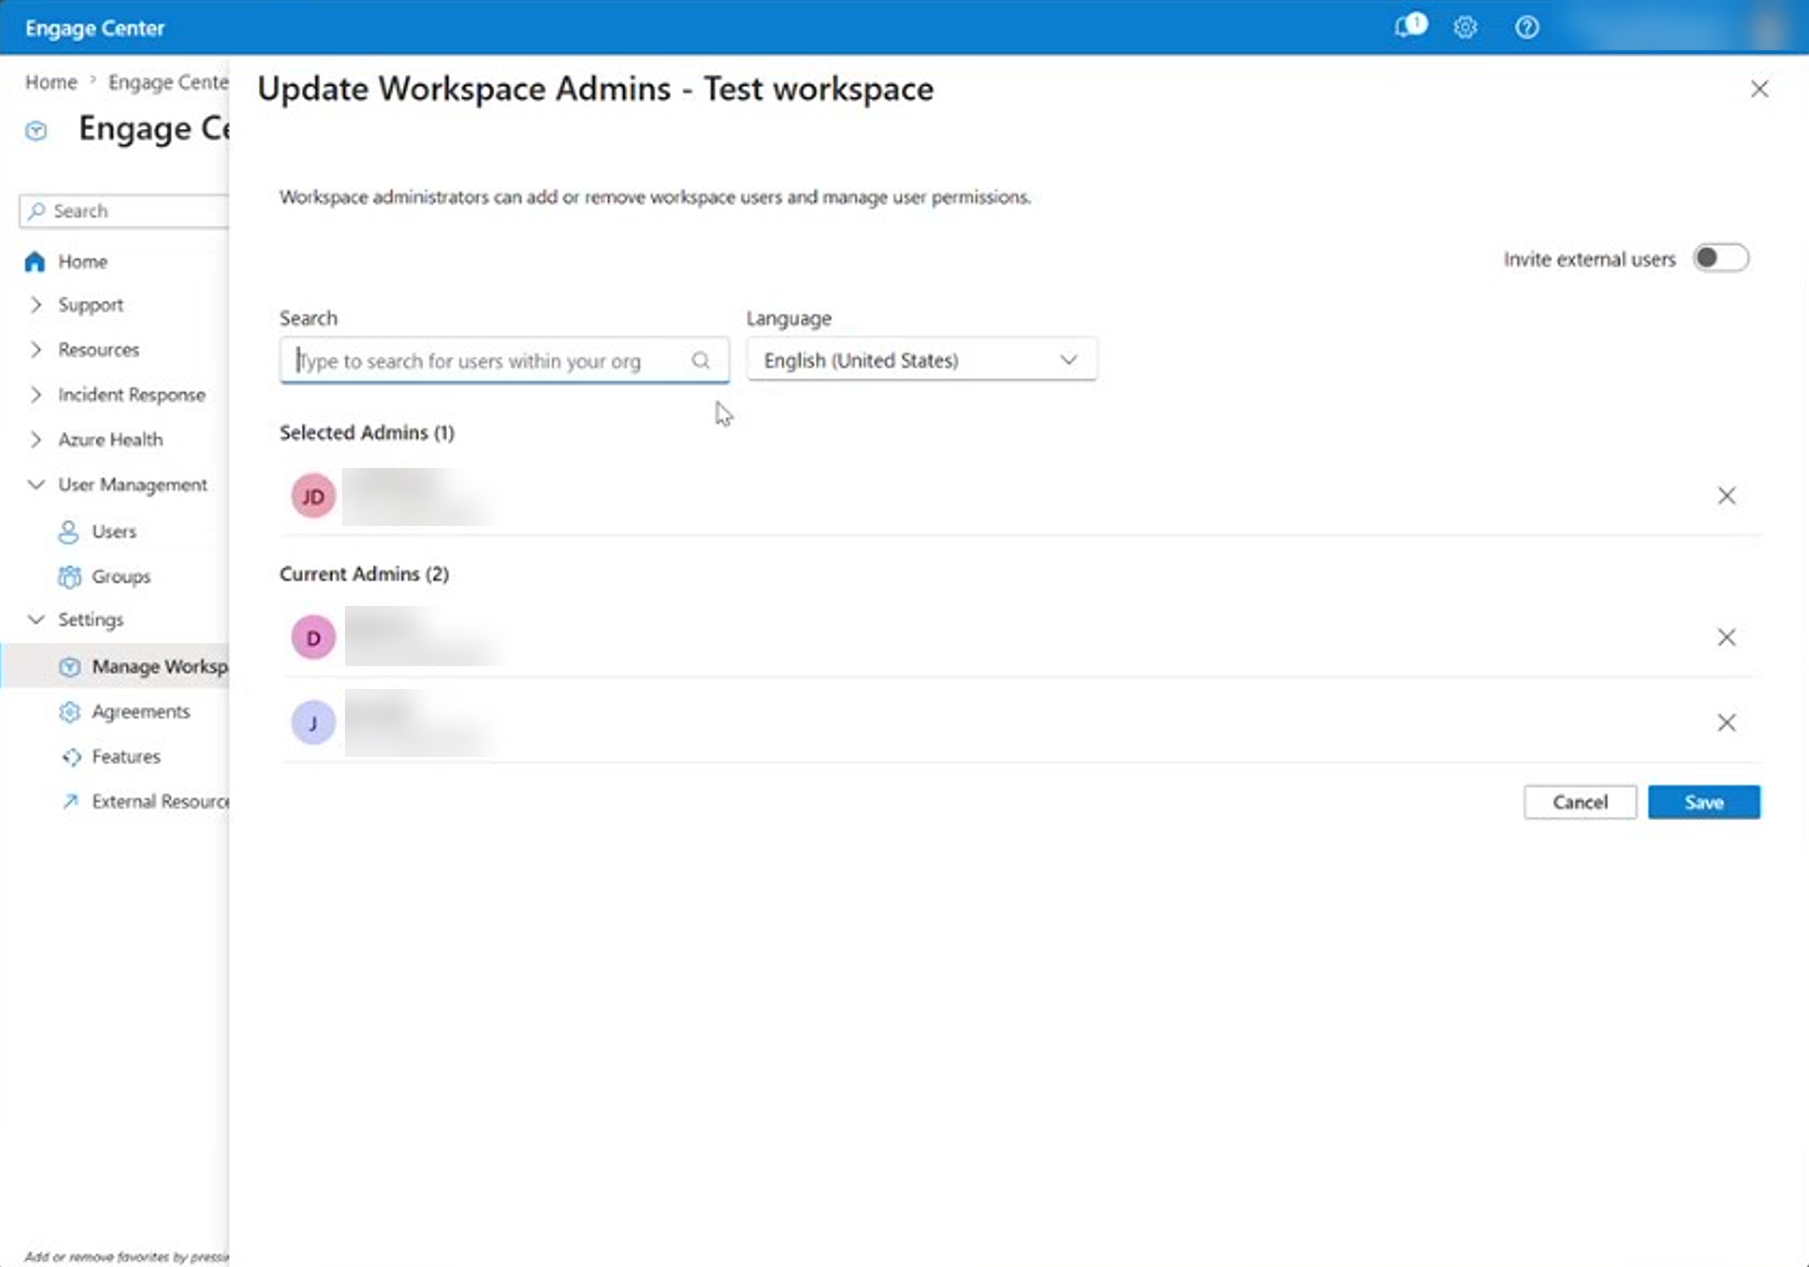
After the user is successfully added, you can see them in the administrator list for the workspace you're editing.
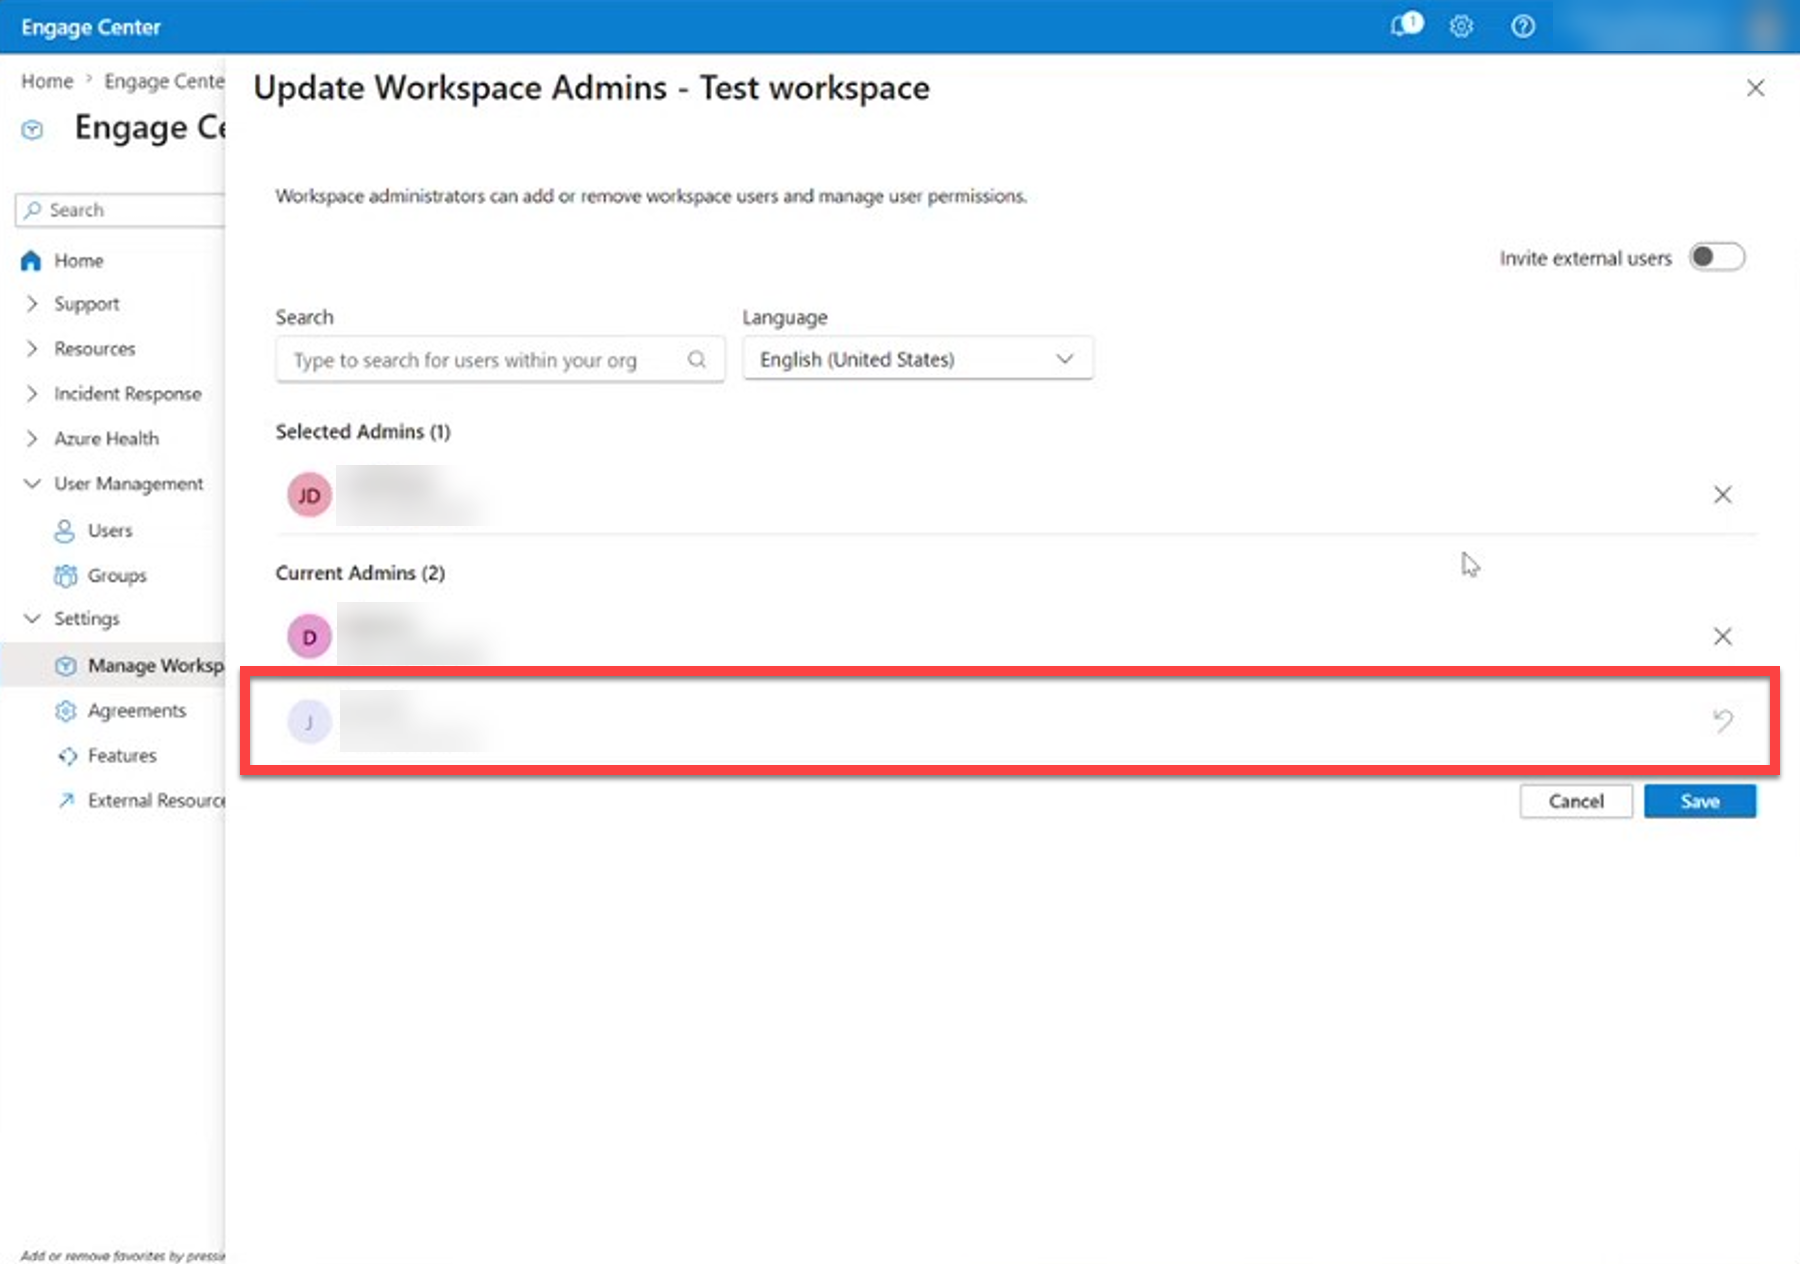
To remove an administrator:
Select the X button on an administrator's listing.
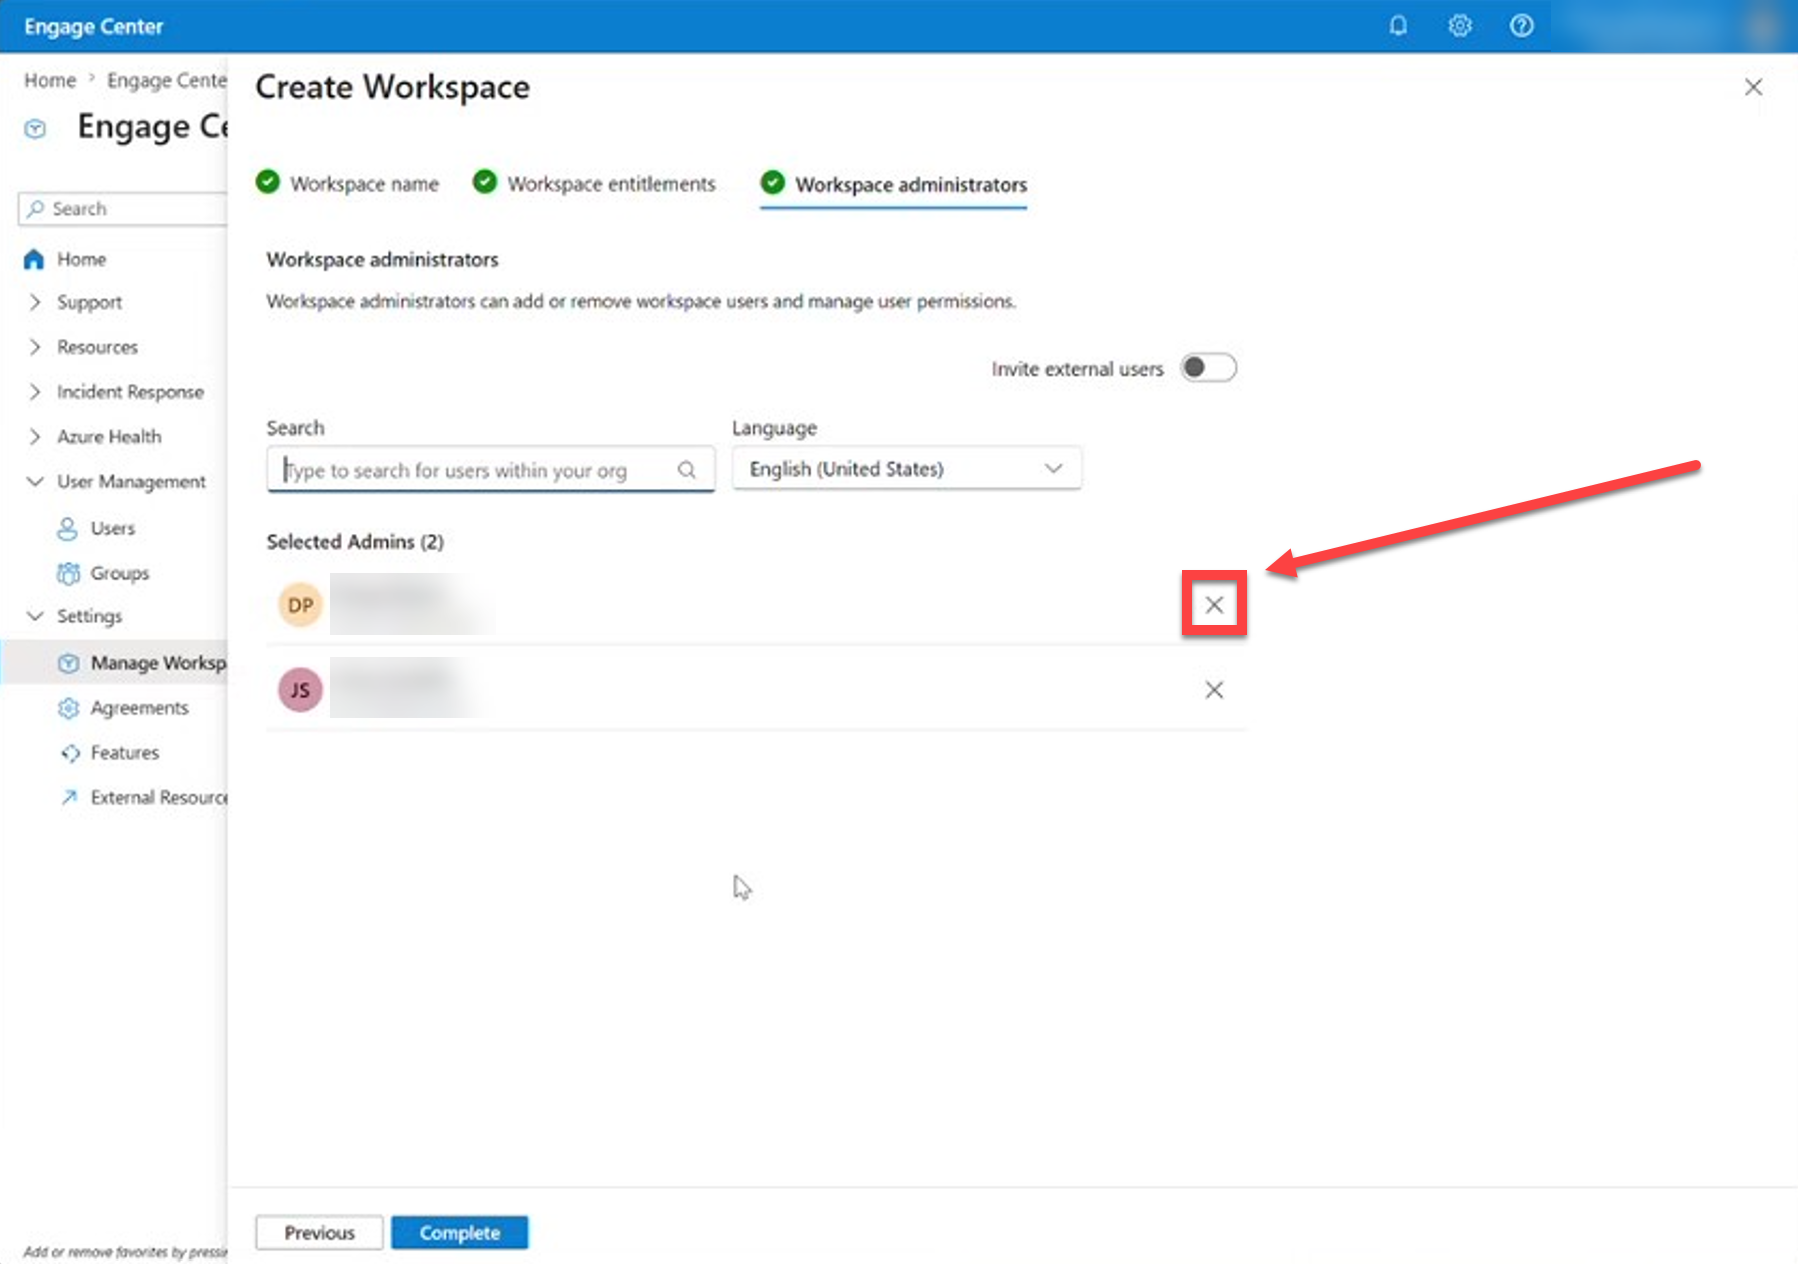
The administrator becomes grayed out and is no longer assigned to your workspace.
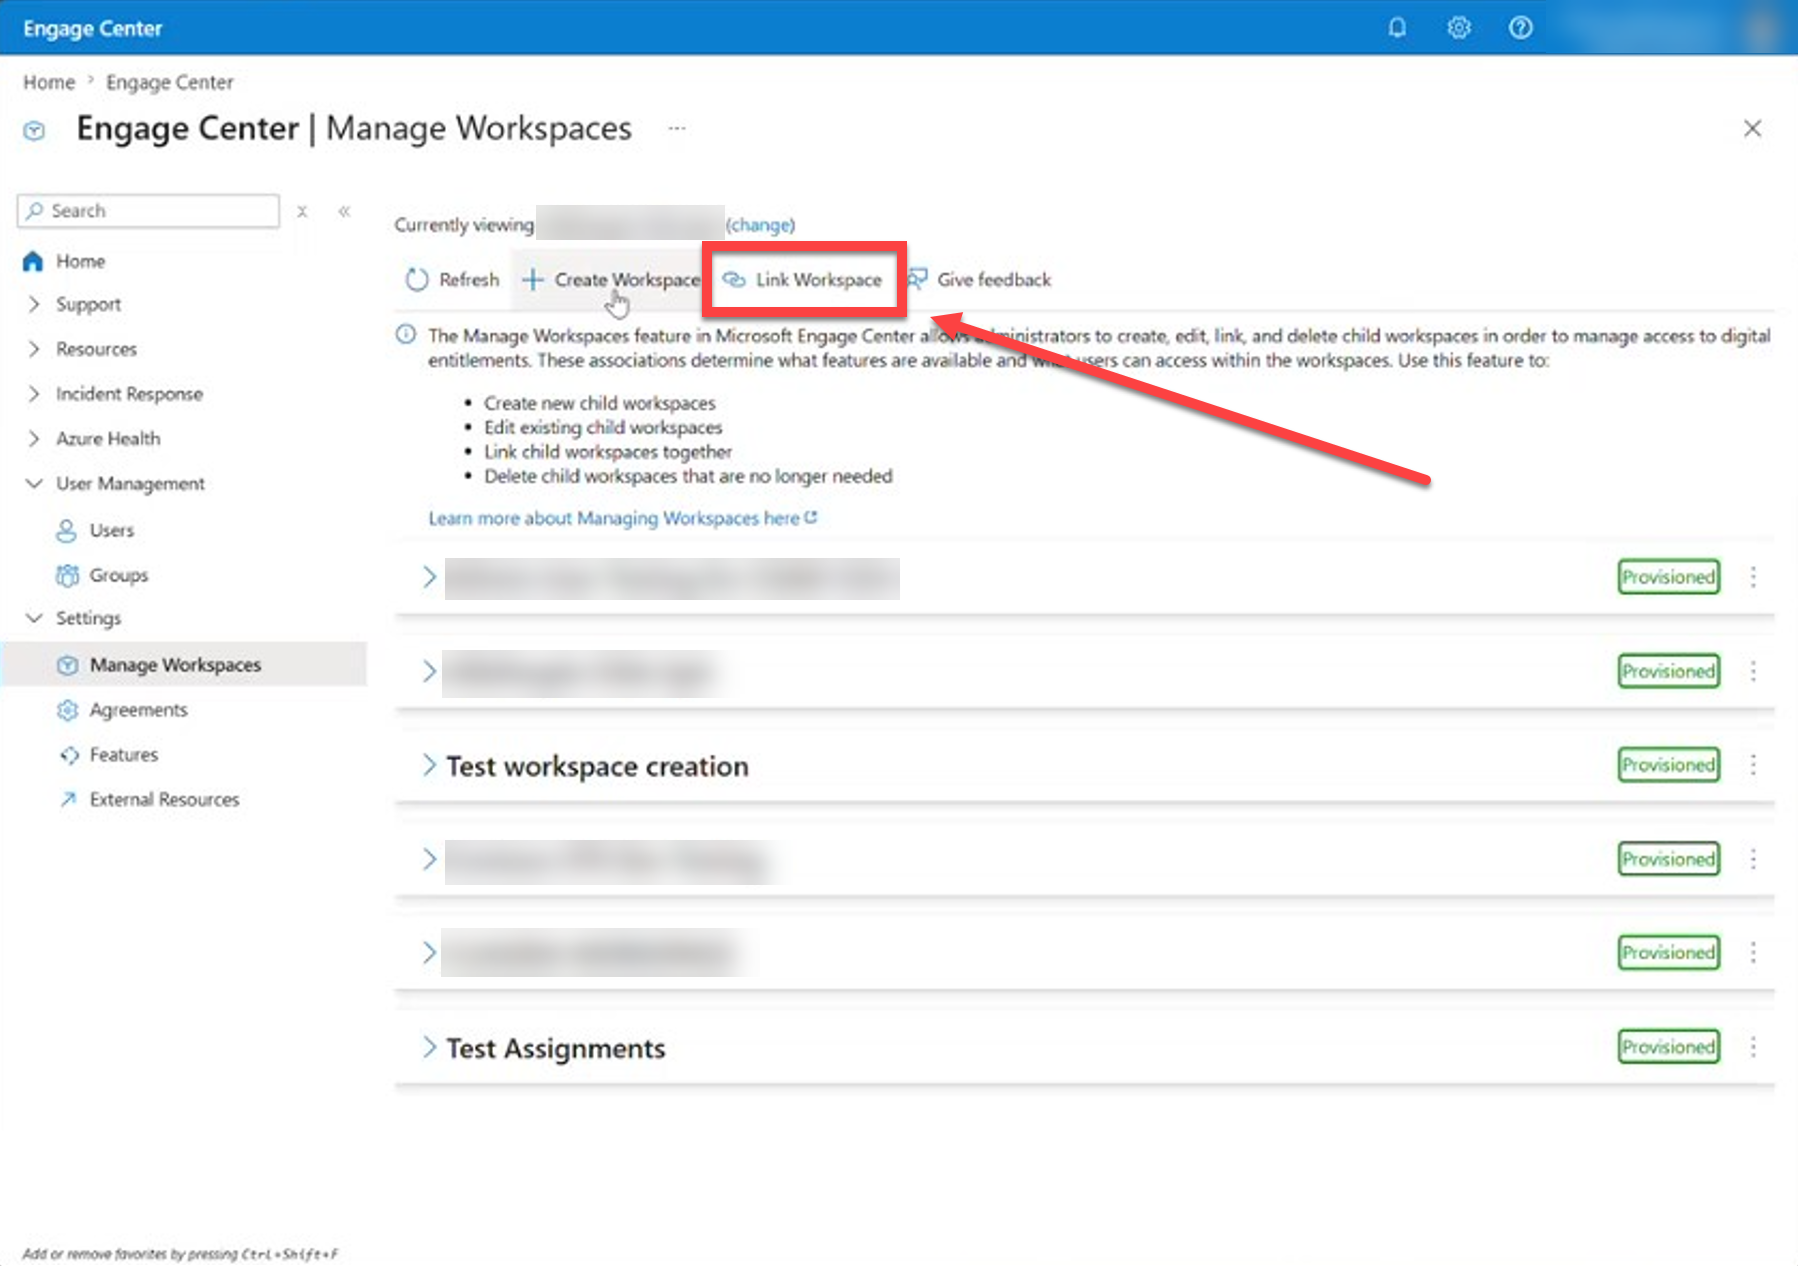
Link workspaces
Manage workspaces allows administrators to link additional child workspaces under the current Rollup workspace.
This is used when a customer has multiple workspaces—for example, workspaces associated with different agreements—and wants to manage them as a single entity.
Important
A workspace can be linked only if it's not already part of another rollup relationship.
Delete a workspace
Administrators can delete child workspaces that are no longer needed.
To delete a workspace:
Select the three dots on a workspace list item.
Select Delete Workspace.
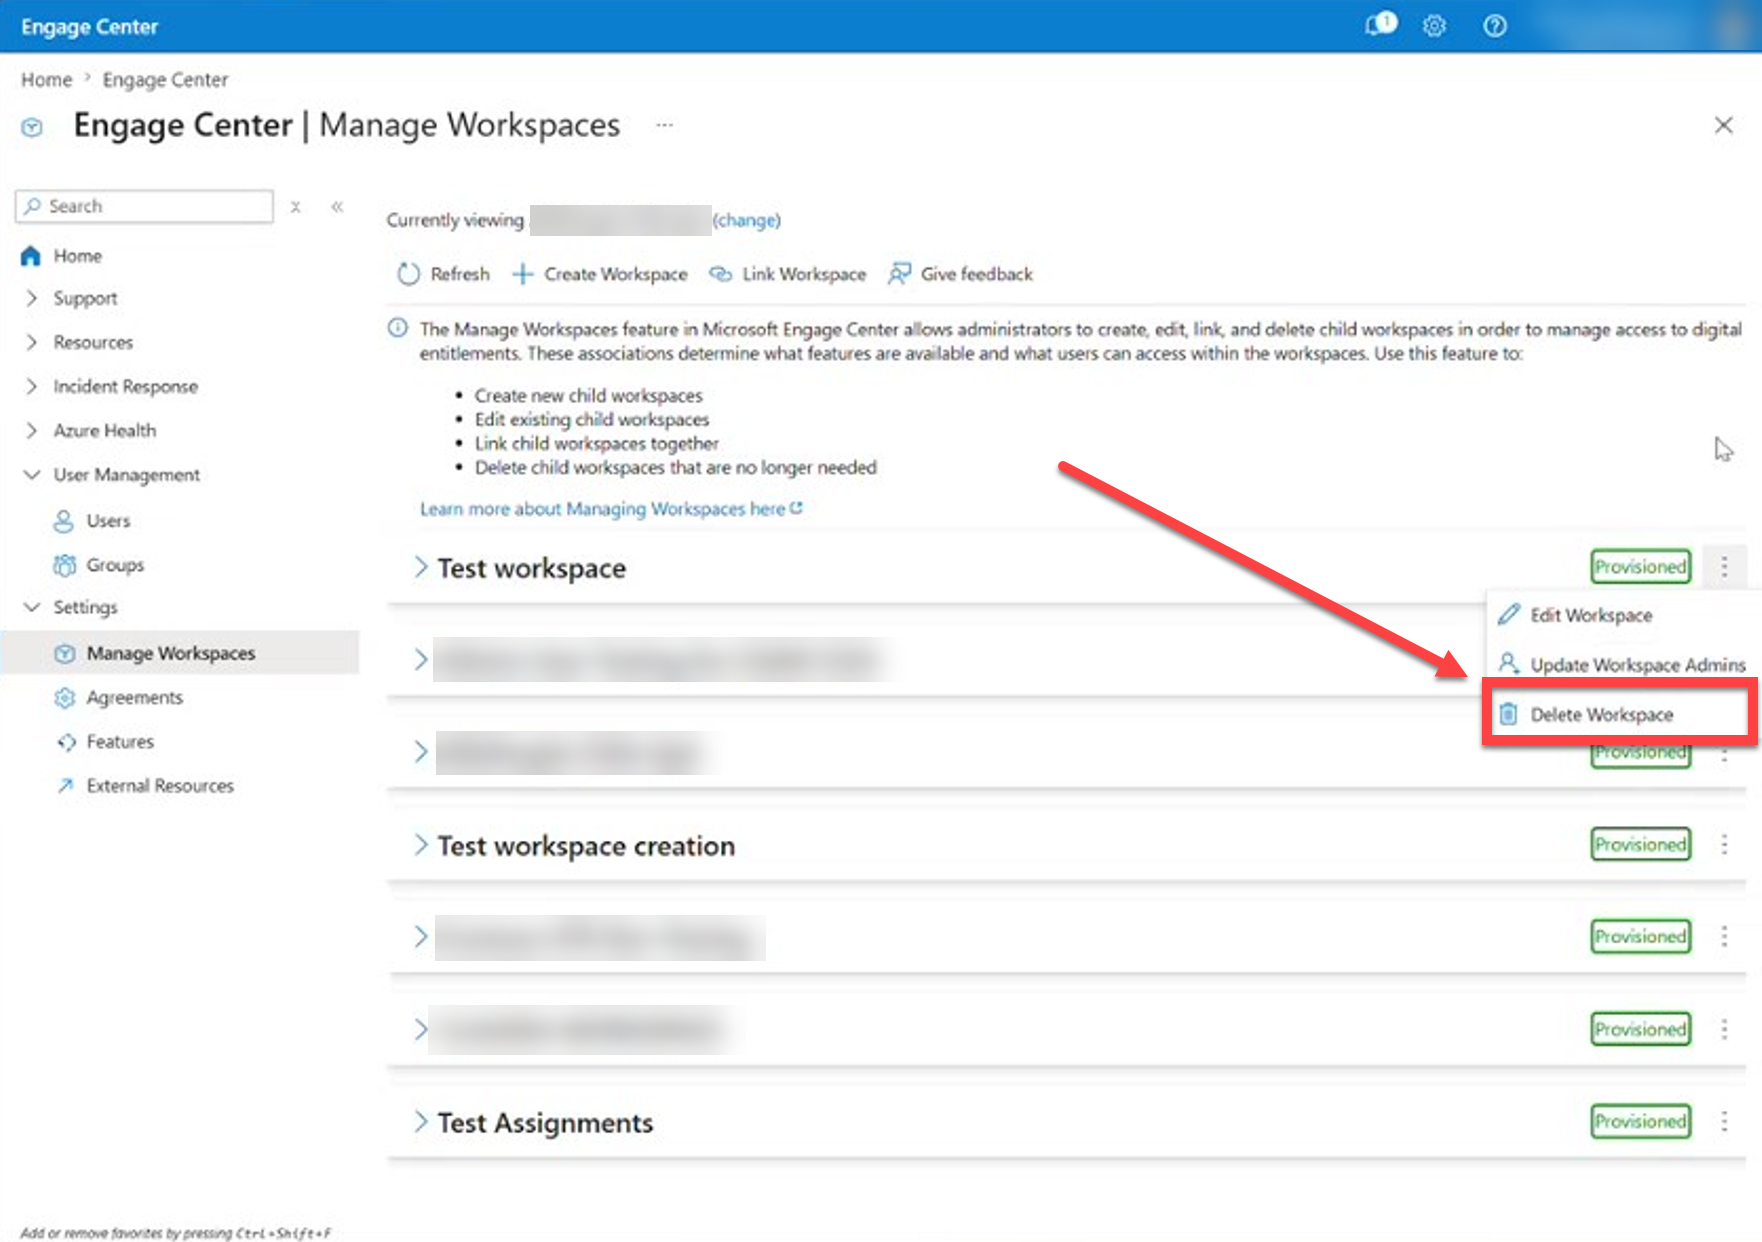
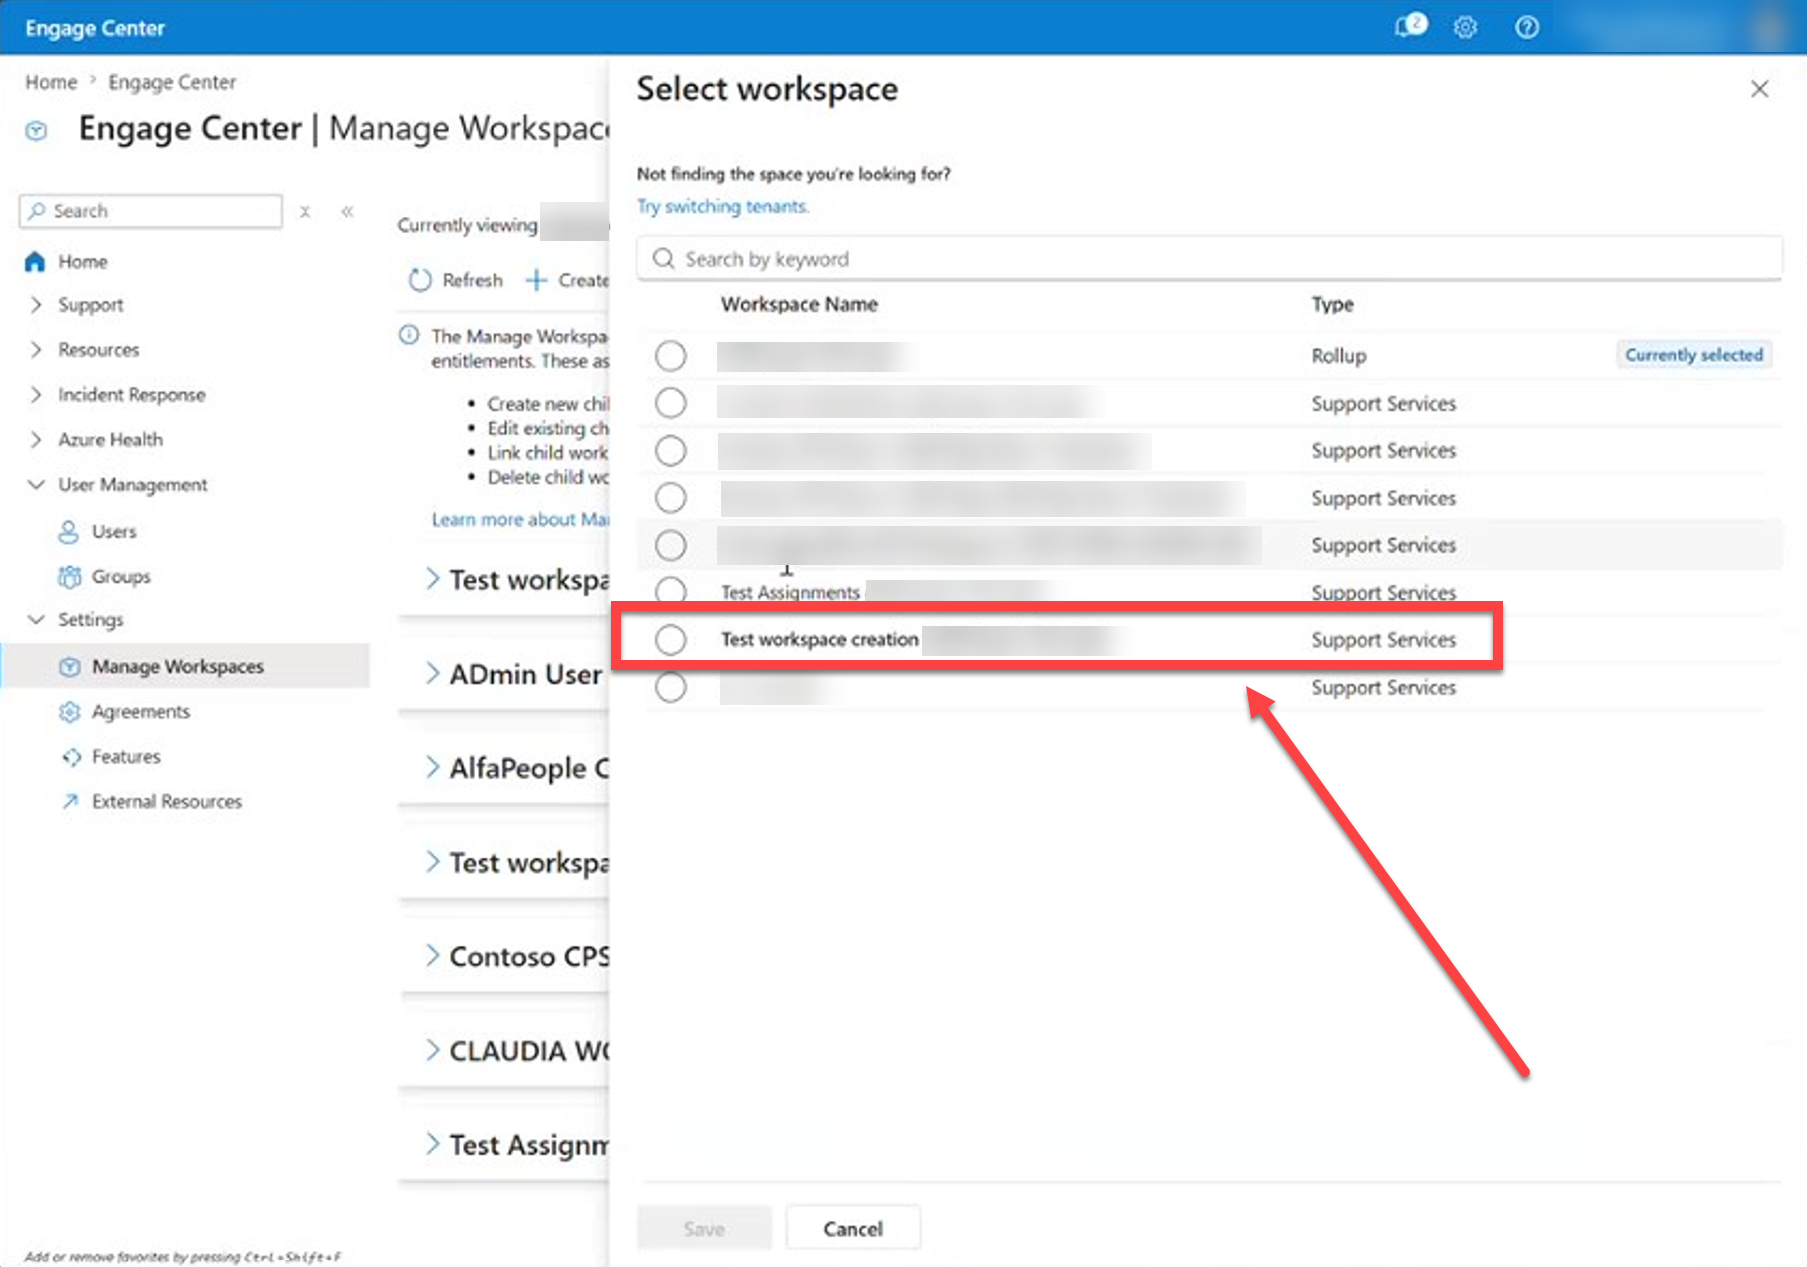
Choose the workspace to delete.
Review the warning message.
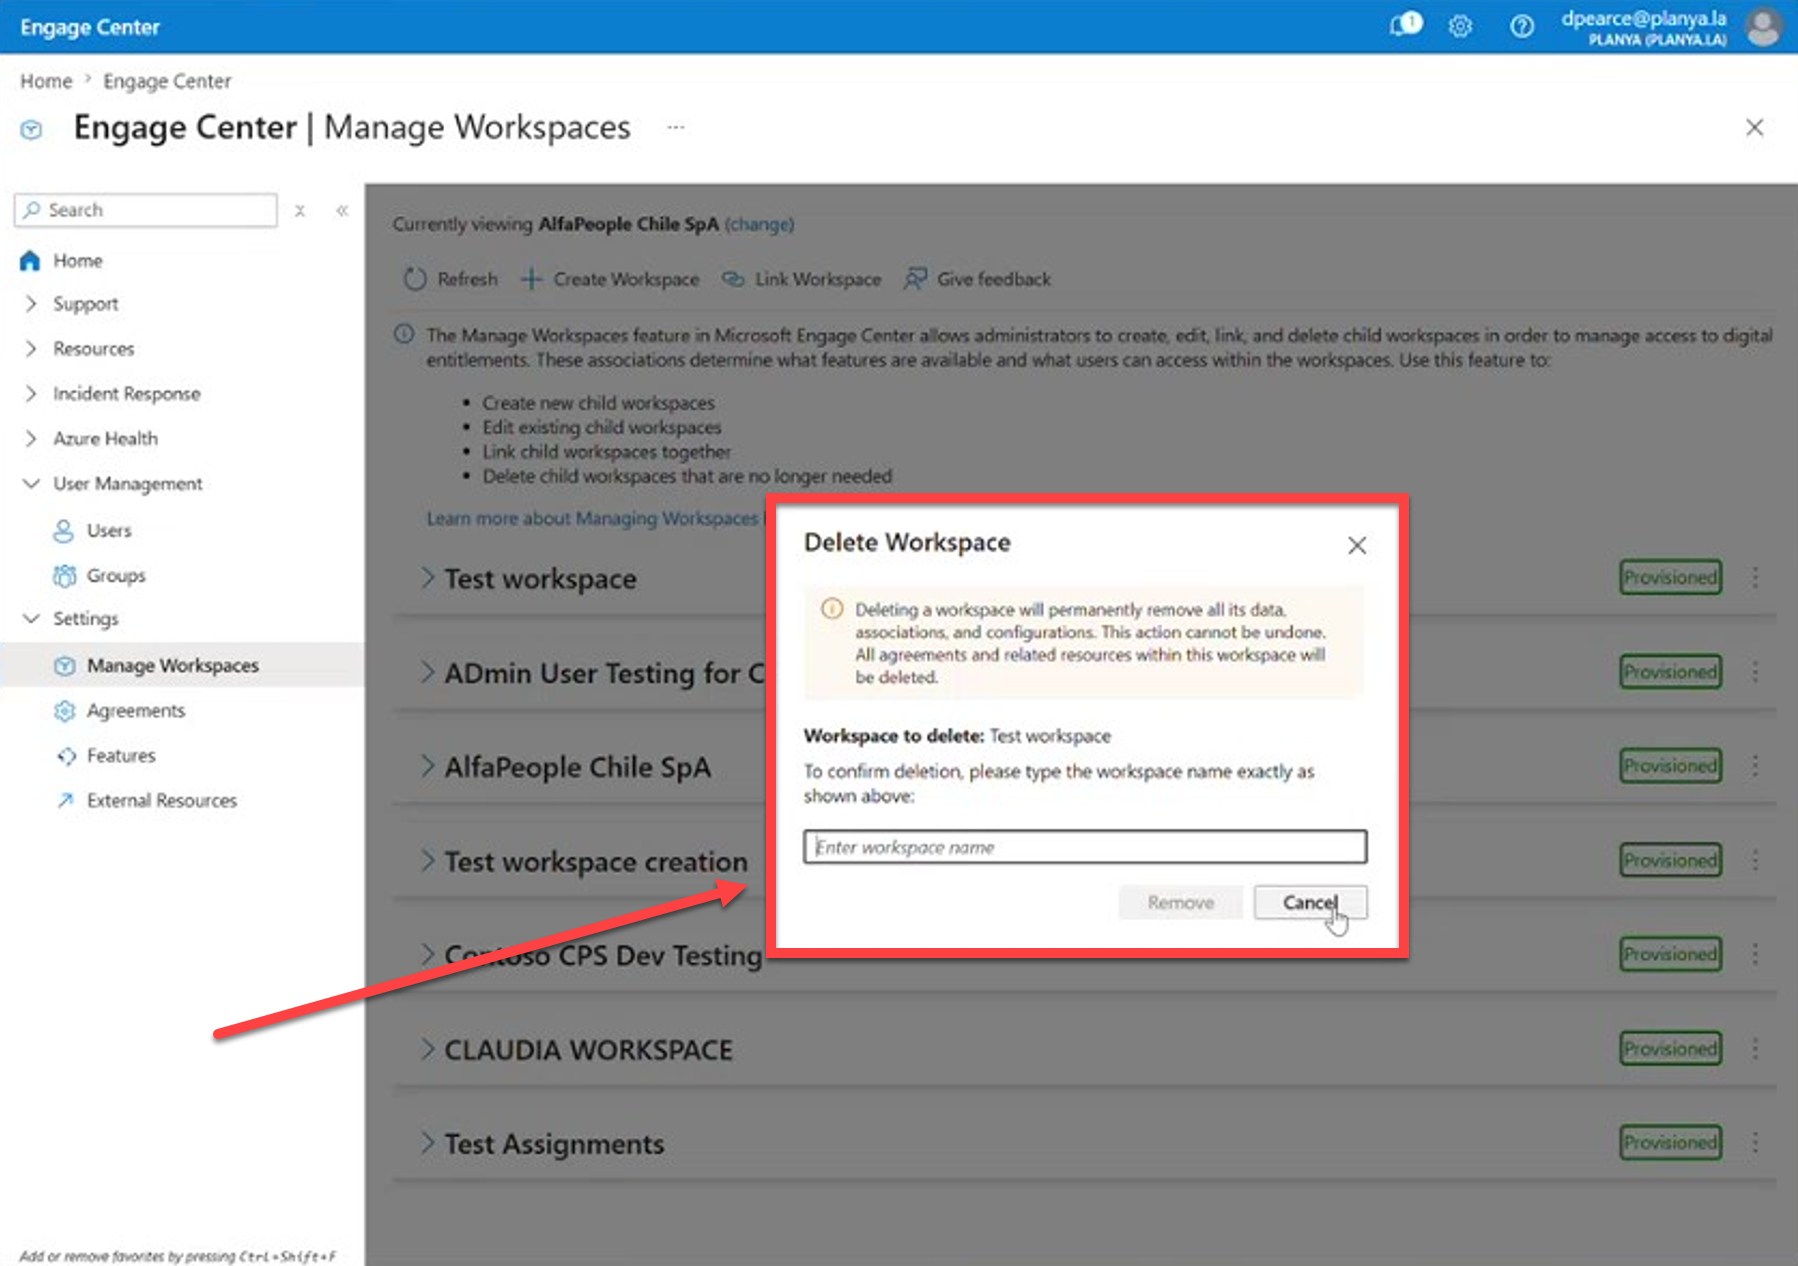
Confirm the deletion.
Once deleted, the workspace is permanently removed.
How changes affect your child workspaces
Changes you make in Manage Workspaces directly impact your workspaces:
- Adding services enables the ability to utilize these services in the workspace.
- Removing services removes access to related services Your workspace's capabilities are determined by the support services associated with it.