How to add a custom search vertical to your search results page in SharePoint Server
APPLIES TO:  2013 2016 2019 Subscription Edition
  SharePoint in Microsoft 365
Note
Custom search verticals are available in both the modern search result experience and the classic search result experience, starting with SharePoint Server Subscription Edition Version 24H1. In previous versions of SharePoint Server, custom search verticals were only available in the classic search result experience.
In the previous article in this series, How to add refiners to your search results page in SharePoint Server, we showed you how to add and configure refiners for your search results page. In this article you'll learn:
Using a search vertical in an everyday situation
You may not have heard the term "search vertical" before, but it's likely you have used them several times. Let's take a closer look at what we mean by the term "search vertical."
Suppose you enjoy skiing, so you often search for ski-related content. When you enter the word "ski" in a search engine, you get many search results.
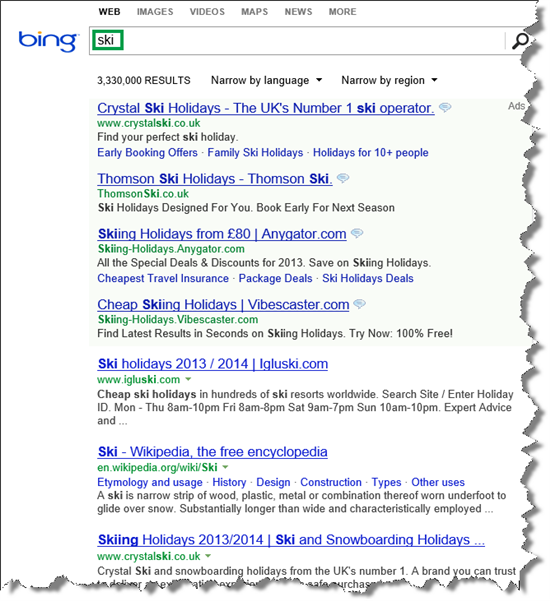
You're delighted to see there's much information out there about skiing, but in this case, you're just looking for great ski pictures. This is where search verticals can be used.
On the same search results page, you select IMAGES, and in an instant your screen is filled with images of people in colorful clothing, racing down white slopes while bathing in sunshine from a clear blue sky. Wow!
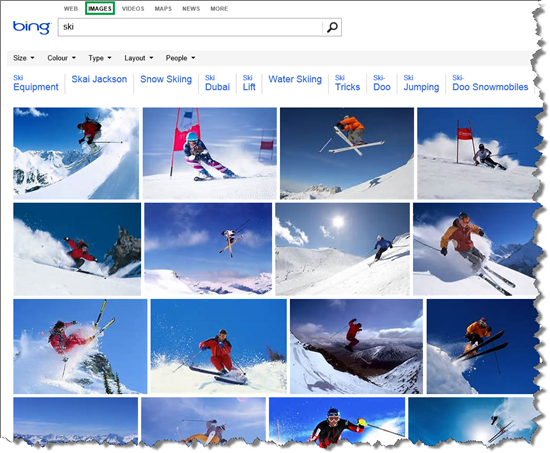
When you select IMAGES, you're using a search vertical. Bing has five search verticals: WEB, Images, VIDEOS Maps, and NEWS.

A search vertical filters search results so only a certain type of search results are displayed. When we clicked the IMAGES search vertical, the search results were filtered so only images were displayed.
About search verticals in SharePoint Server
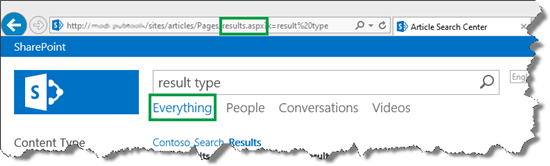
In SharePoint Server, search verticals are displayed in the Search Navigation Web Part. There are four default search verticals: Everything, People, Conversations, and Videos.

When users select one of these search verticals, it will in fact move to a new page. For example, the default search results page, the Everything search vertical, uses the results.aspx page.
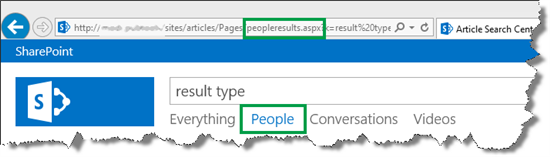
When a user selects the People search vertical, they navigate to the peopleresults.aspx page.
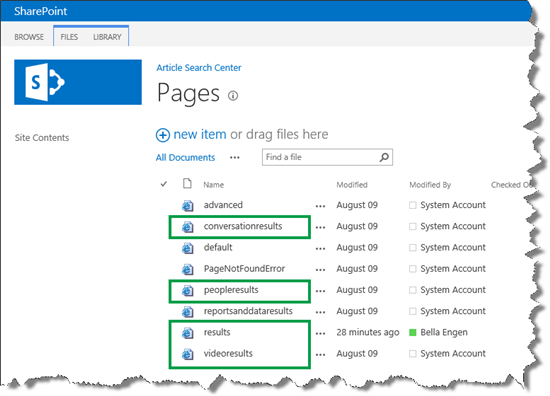
The following are the default pages that are used for the four search verticals:
| Search vertical | Use this page |
|---|---|
| Everything |
results |
| People |
peopleresults |
| Conversations |
conversationresults |
| Videos |
videoresults |
To view these pages, from the Site settings menu, select Site contents --> Pages.
The default vertical pages all use these Web Parts:
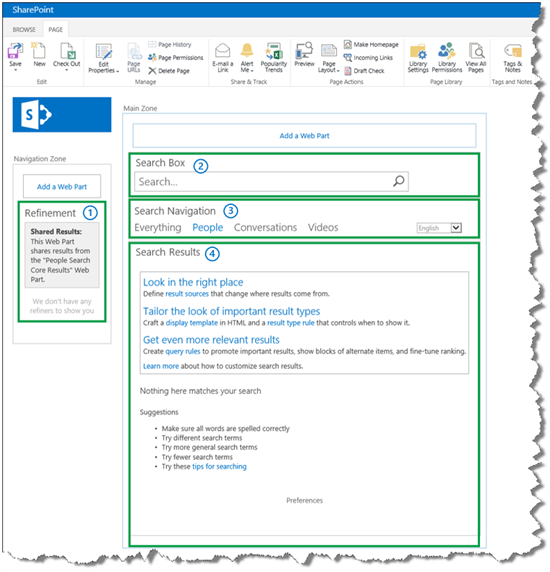
Refinement Web Part
Search Box Web Part
Search Navigation Web Part
Search Results Web Part
The difference between these pages is how the Search Results Web Part is configured. To be specific: the Web Parts are configured to use different result sources.
Result sources - why setting limits is a good thing
As explained in an earlier article, a result source specifies the source from which your search results can come. For example, suppose that your search index is the cube as shown in the following diagram, where you have four result sources:
Result source 1: search results can come from the complete cube.
Result source 2: search results can come only from the Bs.
Result source 3: search results can come only from the Cs.
Result source 4: search results can come only from the Ds.

So, by limiting from where search results can come from, you can make it easier for your users to find what they're looking for.
In our internal search center scenario, all search results are list items that represent a type of media file, for example an article, an image or a video. We wanted to create three custom search verticals for three specific types of media files:
Art: list items that represent images
Video: list items that represent videos
Interop: list items that represent interoperable articles (interoperable articles are a specific type of article we produce)
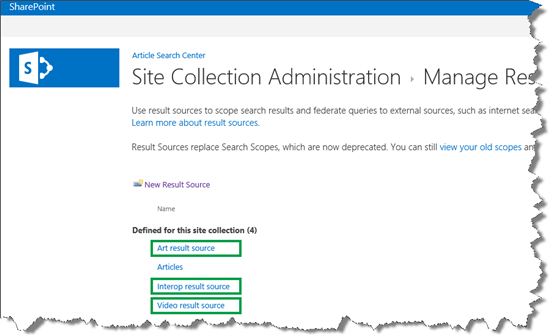
But, before we could begin to create these search verticals, we had to create one result source for each custom search vertical. We showed you how to create a result source in How to create a result source.
This is how we defined the Art result source.
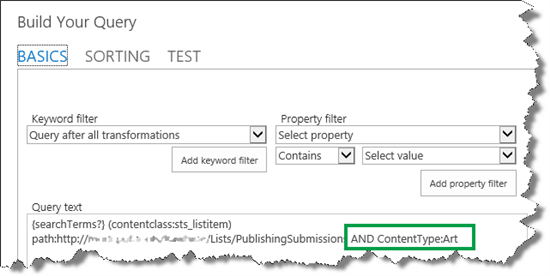
Remember, {searchTerms?}(contentclass:sts_listitem) path:http://<path> was the query text of the Article result source that we created earlier. To this, we added AND ContentType:Art
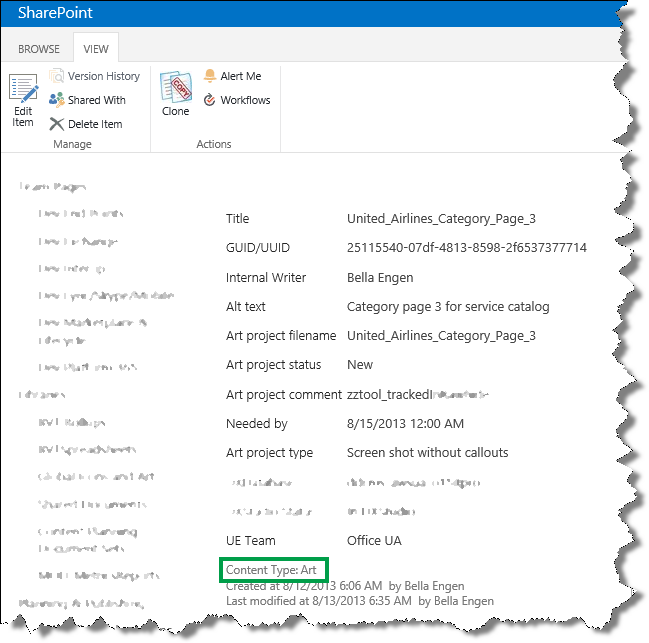
In our lists, we use the site column Content Type to specify the different media files. For example, all images have the value Art for Content Type.
So, by adding AND ContentType:Art to the query text, only list items that have the value Art for Content Type will be returned in search results.
Here are the three new result sources we created.
Now that we had three new result sources, we could move on to creating the custom search verticals.
How to create a custom search vertical
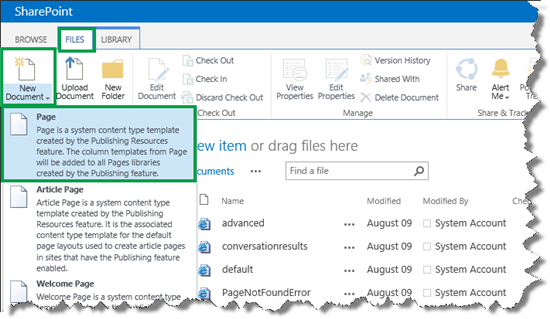
When you create a custom search vertical, the first thing that you must do is to create a page the search vertical will use. Here are the steps to create a new page:
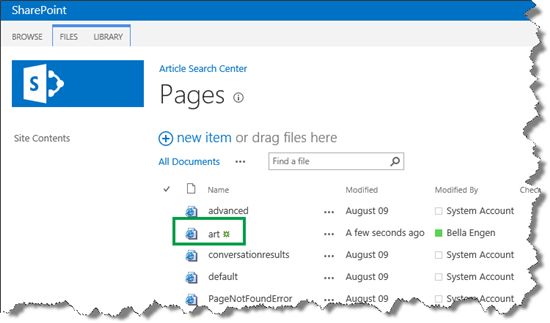
From the Site Settings menu, select Site contents.
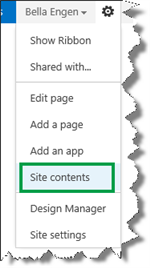
Select Pages.
In the Pages library, select the FILES tab --> New Document --> Page.
On the Create Page page, enter a Title and a URL Name.
In our scenario, we entered Art and art .
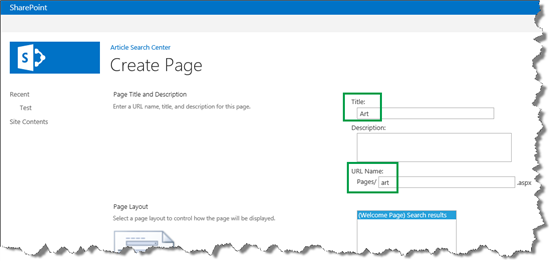
Select Create.
Your new page is displayed in your Pages library.
Now that you have a page for your custom search vertical, you can begin to create the actual search vertical. Here's what you should do:
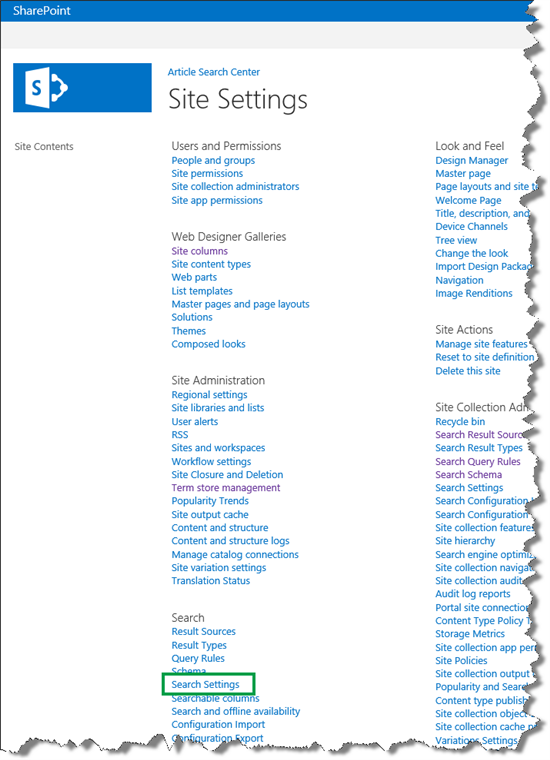
On the Site Settings page, select Search Settings.
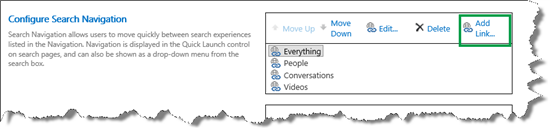
On the Search Settings page, in the Configure Search Navigation section, select Add Link.
Important
Deleting default search navigation items will only take effect in the classic search results page, but not in the modern search results page.
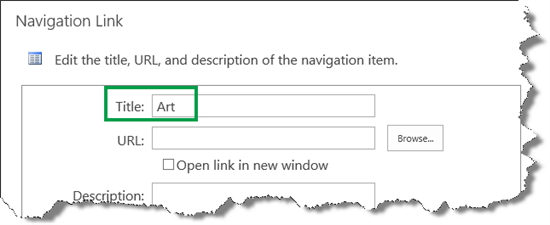
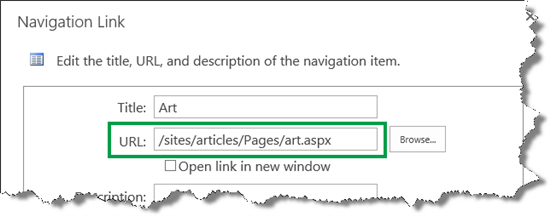
In the Navigation Link dialog, in the Title field, enter the search vertical title. This text will appear as the "tab" name on your search results page.
In our scenario, we entered Art.
In the URL field, select Browse and select a page for your search vertical.
In our scenario, we selected the art page we just created.
Select OK to close the Navigation Link dialog.
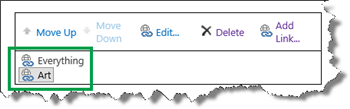
On the Search Settings page, in the Configure Search Navigation section, select the search verticals that you don't want to display, and then select Delete.
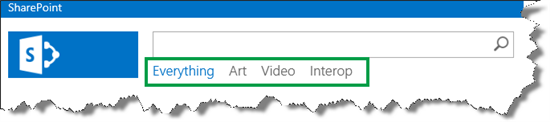
In our scenario, we deleted the People, Conversations, and Videos verticals so that we were only left with the Everything and the Art search vertical.
Select OK to save all changes.
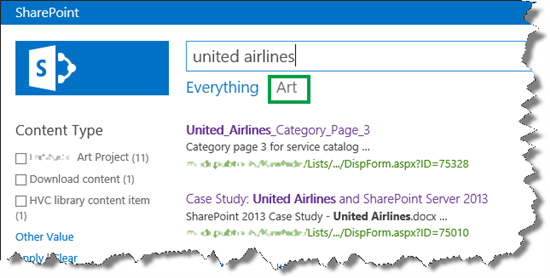
In your Search Center, enter a query. On your search results page, your newly created search vertical is displayed.
On our search results page, the Art vertical was displayed.
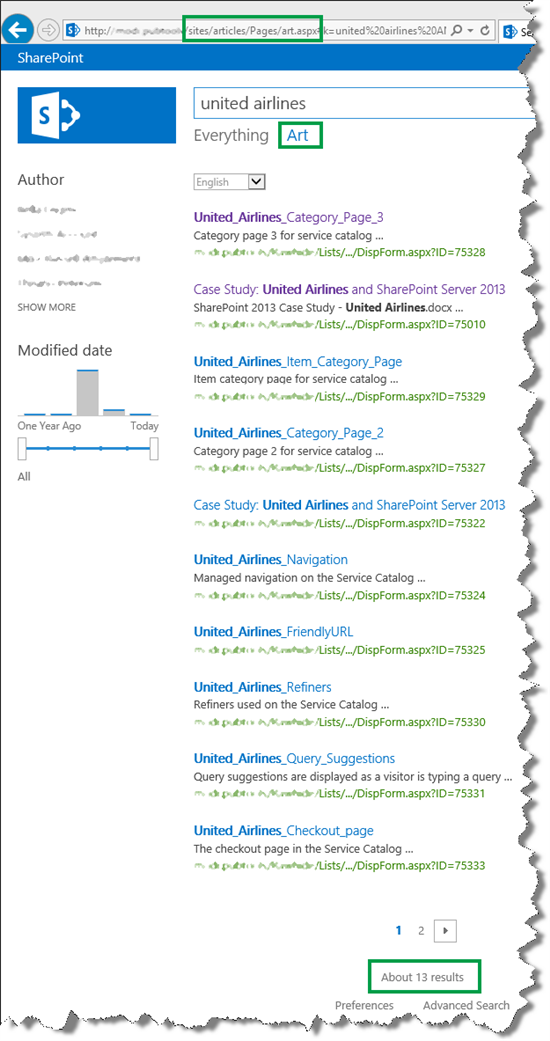
On your search results page, select on your newly created search vertical, and verify that the URL is the same as you specified in step 4.
In our scenario, we clicked Art, and verified that the URL was <site>/articles/Pages/art.aspx. We also noticed that 13 search results were displayed.
On your new search vertical page, select to edit the page, and then to edit the Search Results Web Part.
In the Web Part tool page, select Change query. This opens a dialog.
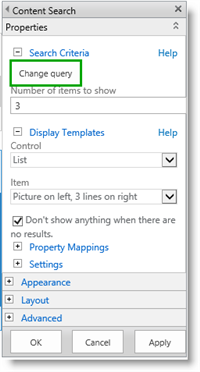
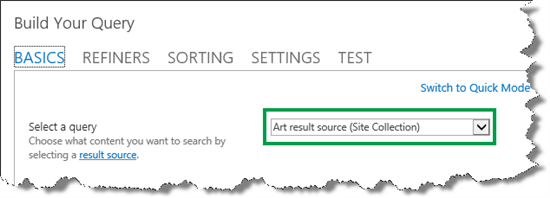
In the Build Your Query dialog, from the Select a query menu, select the result source that you created for this search vertical (what we did in the previous section).
In our scenario, we selected Art result source (Site Collection) .
Select OK and save the page.
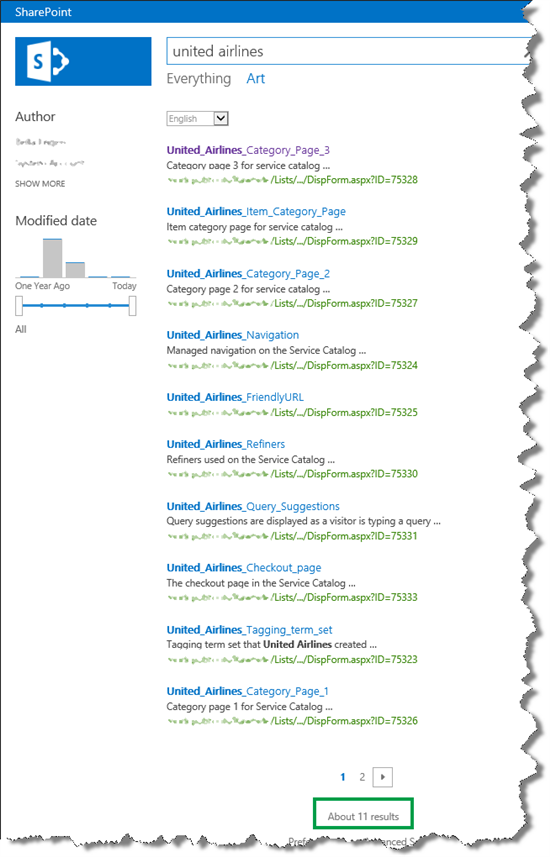
On your new search vertical page, enter a query to verify that the correct search results are displayed.
In our scenario, we entered united airlines again, and noticed that only 11 search results were displayed. Remember, before we changed the result source in the Search Result Web Part, 13 results were displayed. So our new vertical was working. Nice!
In our scenario, we added two more search verticals, Video and Interop. And with that, we had completed the Search Center set up.
What you can do after you have successfully set up a Search Center
When you have successfully set up a Search Center, the first thing that you should do is congratulate yourself on a job well done! Nice job!
But, the job usually doesn't end here. To make the Search Center even more user-friendly, you can change the way search results are displayed, for example to display information that is specific to your company or business. You can read about how to do that in series How to change the way search results are displayed in SharePoint Server.