Note
Access to this page requires authorization. You can try signing in or changing directories.
Access to this page requires authorization. You can try changing directories.
Applies to: ![]() SQL Server
SQL Server
You can configure your instance of SQL Server enabled by Azure Arc with Microsoft Defender for Cloud by following these steps.
Prerequisites
Your Windows-based SQL Server instance is connected to Azure. Follow the instructions to Connect your SQL Server to Azure Arc.
Note
Microsoft Defender for Cloud is only supported for SQL Server instances on Windows machines. This will not work for SQL Server on Linux machines.
Your user account is assigned one of the Security Center Roles (RBAC)
Create a Log Analytics workspace
Search for Log Analytics workspaces resource type and add a new one through the creation pane.
Note
You can use a Log Analytics workspace in any region so if you already have one, you can use it. But we recommend creating it in the same region where your SQL Server enabled by Azure Arc resource is created.
Go to Agents management > Log Analytics agent instructions and copy Workspace ID and Primary key for later use.
Install Log Analytics Agent
The next step is needed only if you haven't yet configured MMA on the remote machine.
Go to Azure Arc > Servers and open the Azure Arc-enabled server resource for the machine where the SQL Server instance is installed.
Open the Extensions pane and click + Add.
Select Log Analytics Agent - Azure Arc and click Next.
Set the Workspace ID and Workspace key using the values you saved in the previous step.
After validation succeeds, select Create to install the agent. When the deployment completes, the status updates to Succeeded.
For more information, see Extension management with Azure Arc.
Enable Microsoft Defender for Cloud
Go to Azure Arc > SQL Servers and open the Azure Arc-enabled SQL Server resource for the instance that you want to protect.
Click on the Microsoft Defender for Cloud tile. If Enablement Status shows Disabled at the subscription-level, follow the steps documented in Enable Microsoft Defender for SQL servers on machines.
Note
The first scan to generate the vulnerability assessment happens within 24 hours after enabling Microsoft Defender for Cloud. Successive scans run automatically every Sunday.
Explore
Explore security anomalies and threats in Azure Security Center.
Open your SQL Server – Azure Arc resource and select Microsoft Defender for Cloud in the Settings section of the left menu. to see the recommendations and alerts for that SQL Server instance.
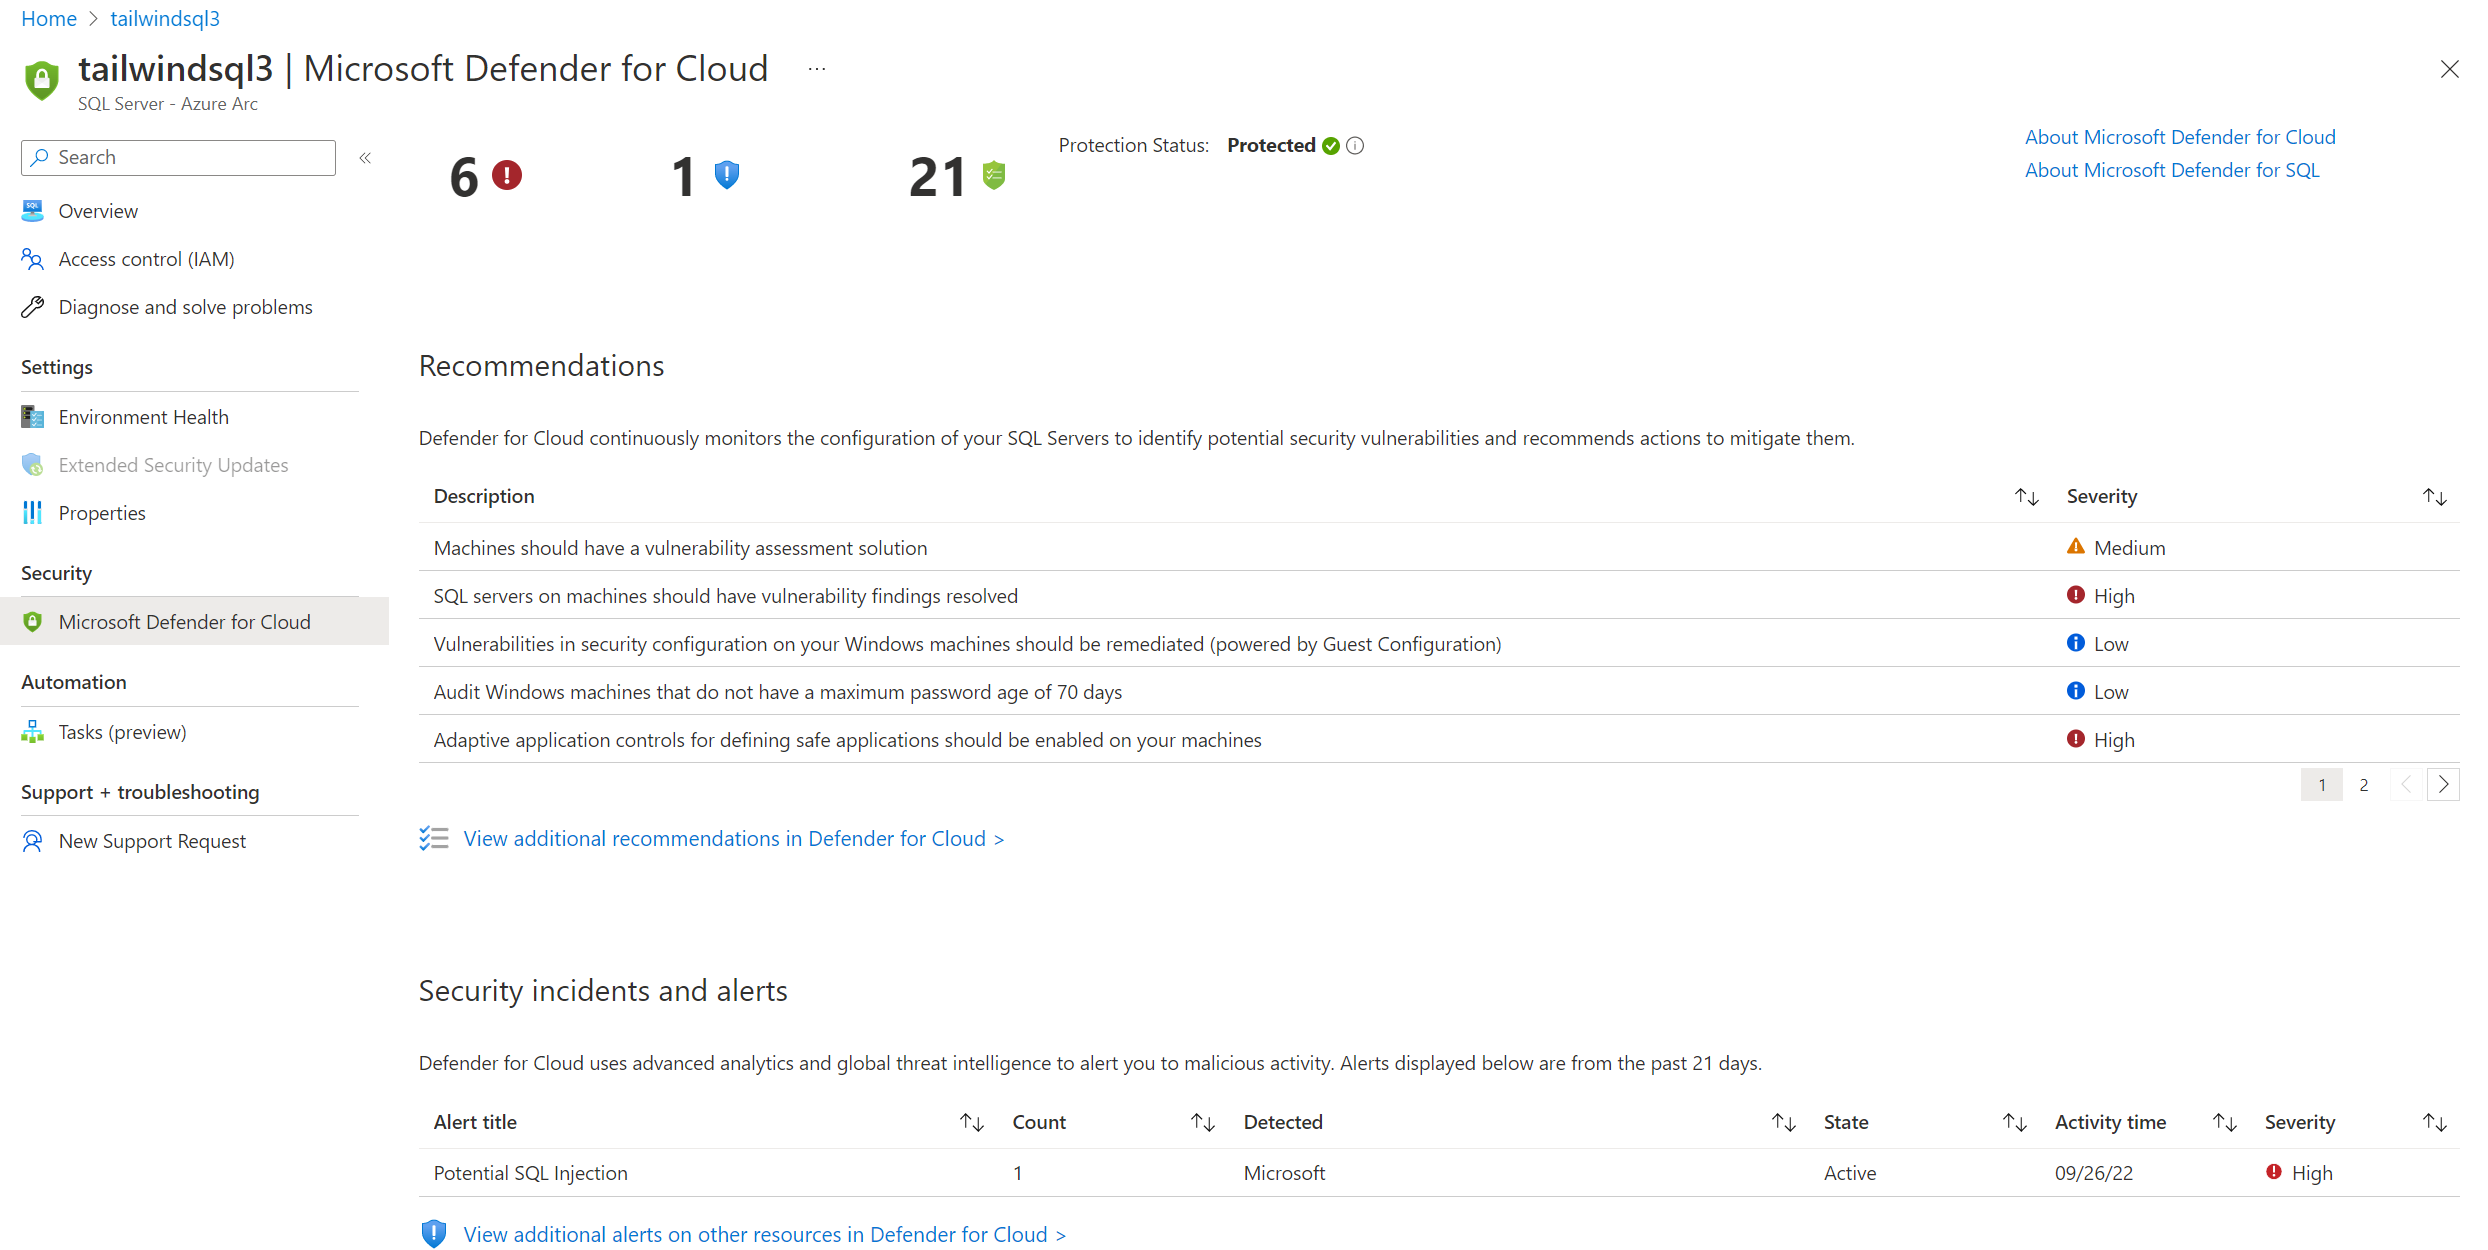
Select any of the recommendations to see the vulnerability details.

Select any security alert for full details and further explore the attack. The following diagram is an example of the Potential SQL Injection alert.
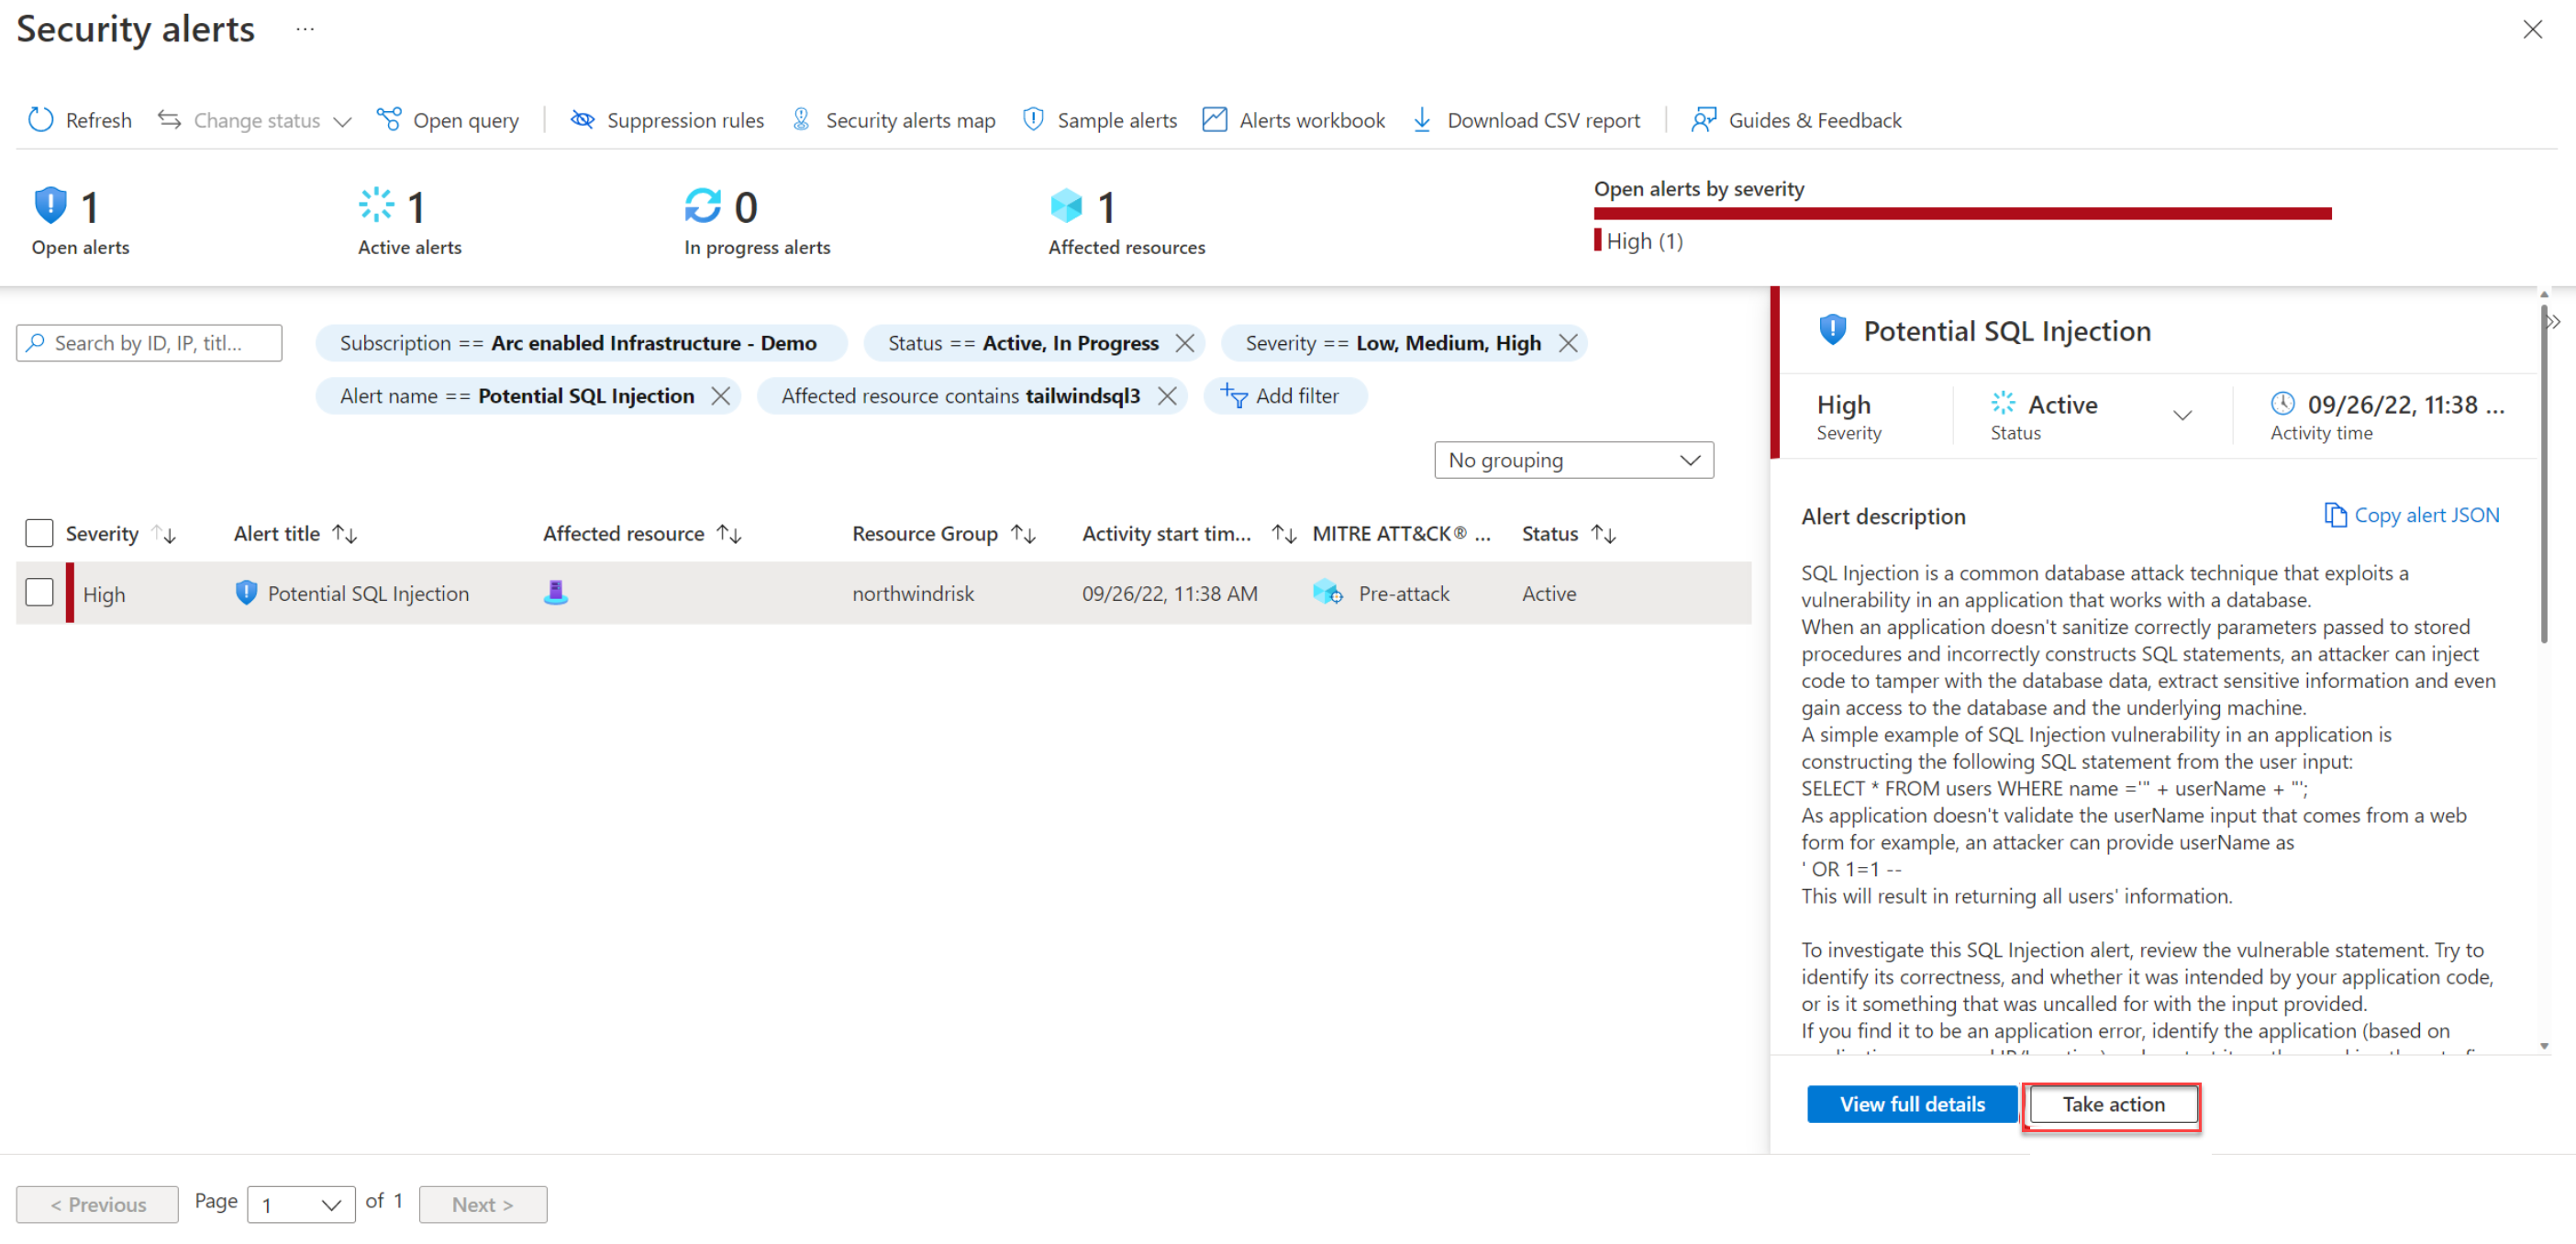
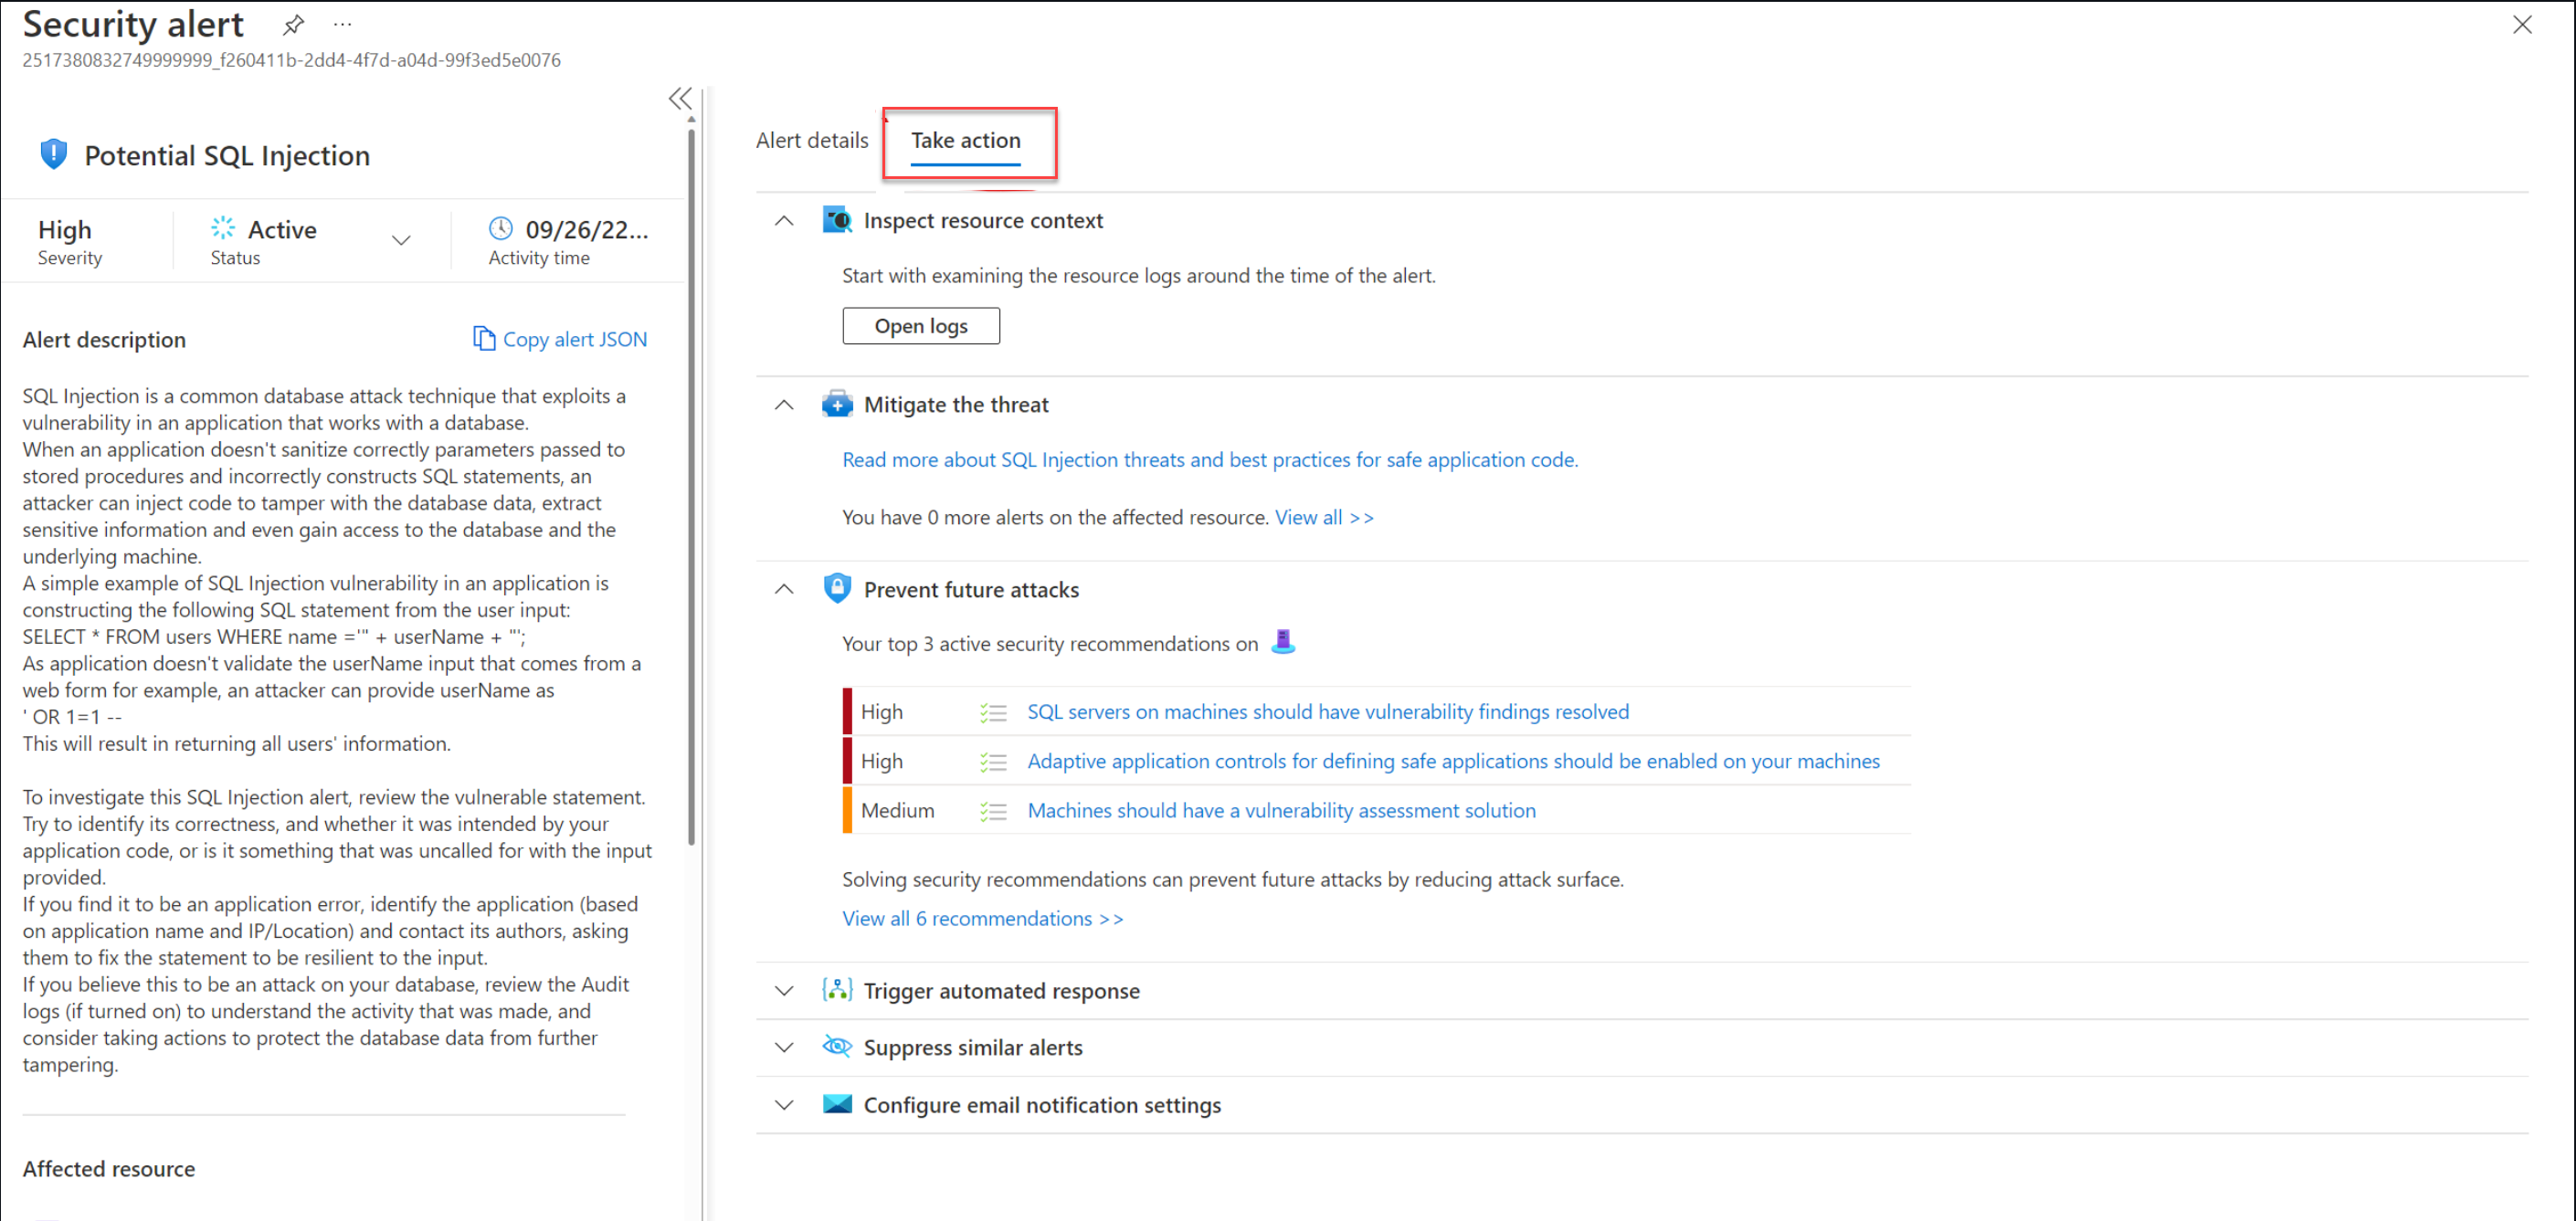
Select Take action to mitigate the alert.
Next steps
- SQL Server enabled by Azure Arc deployment options
- You can further investigate the security alerts and attacks using Azure Sentinel. For details, see on-board Azure Sentinel.