1-day guide to migrate data from Stream (Classic) to Stream (on SharePoint)
Note
This is a 1-day migration tool guide which uses tool defaults and avoids tool complexities and is recommended for tenants with less amount of data. If you want to allocate custom permissions and destinations, you can follow the 3-part Migration guide.
We're merging the powerful capabilities of Stream and SharePoint to bring your native video experiences integrated across Microsoft 365.
Tenant admins are required to migrate their videos from Stream classic to Stream (SharePoint). This migration must be completed before deprecation timelines.
You need to follow the steps mentioned in the documentation below, which can also be viewed by downloading this video.
Step 1: Access the Migration tool
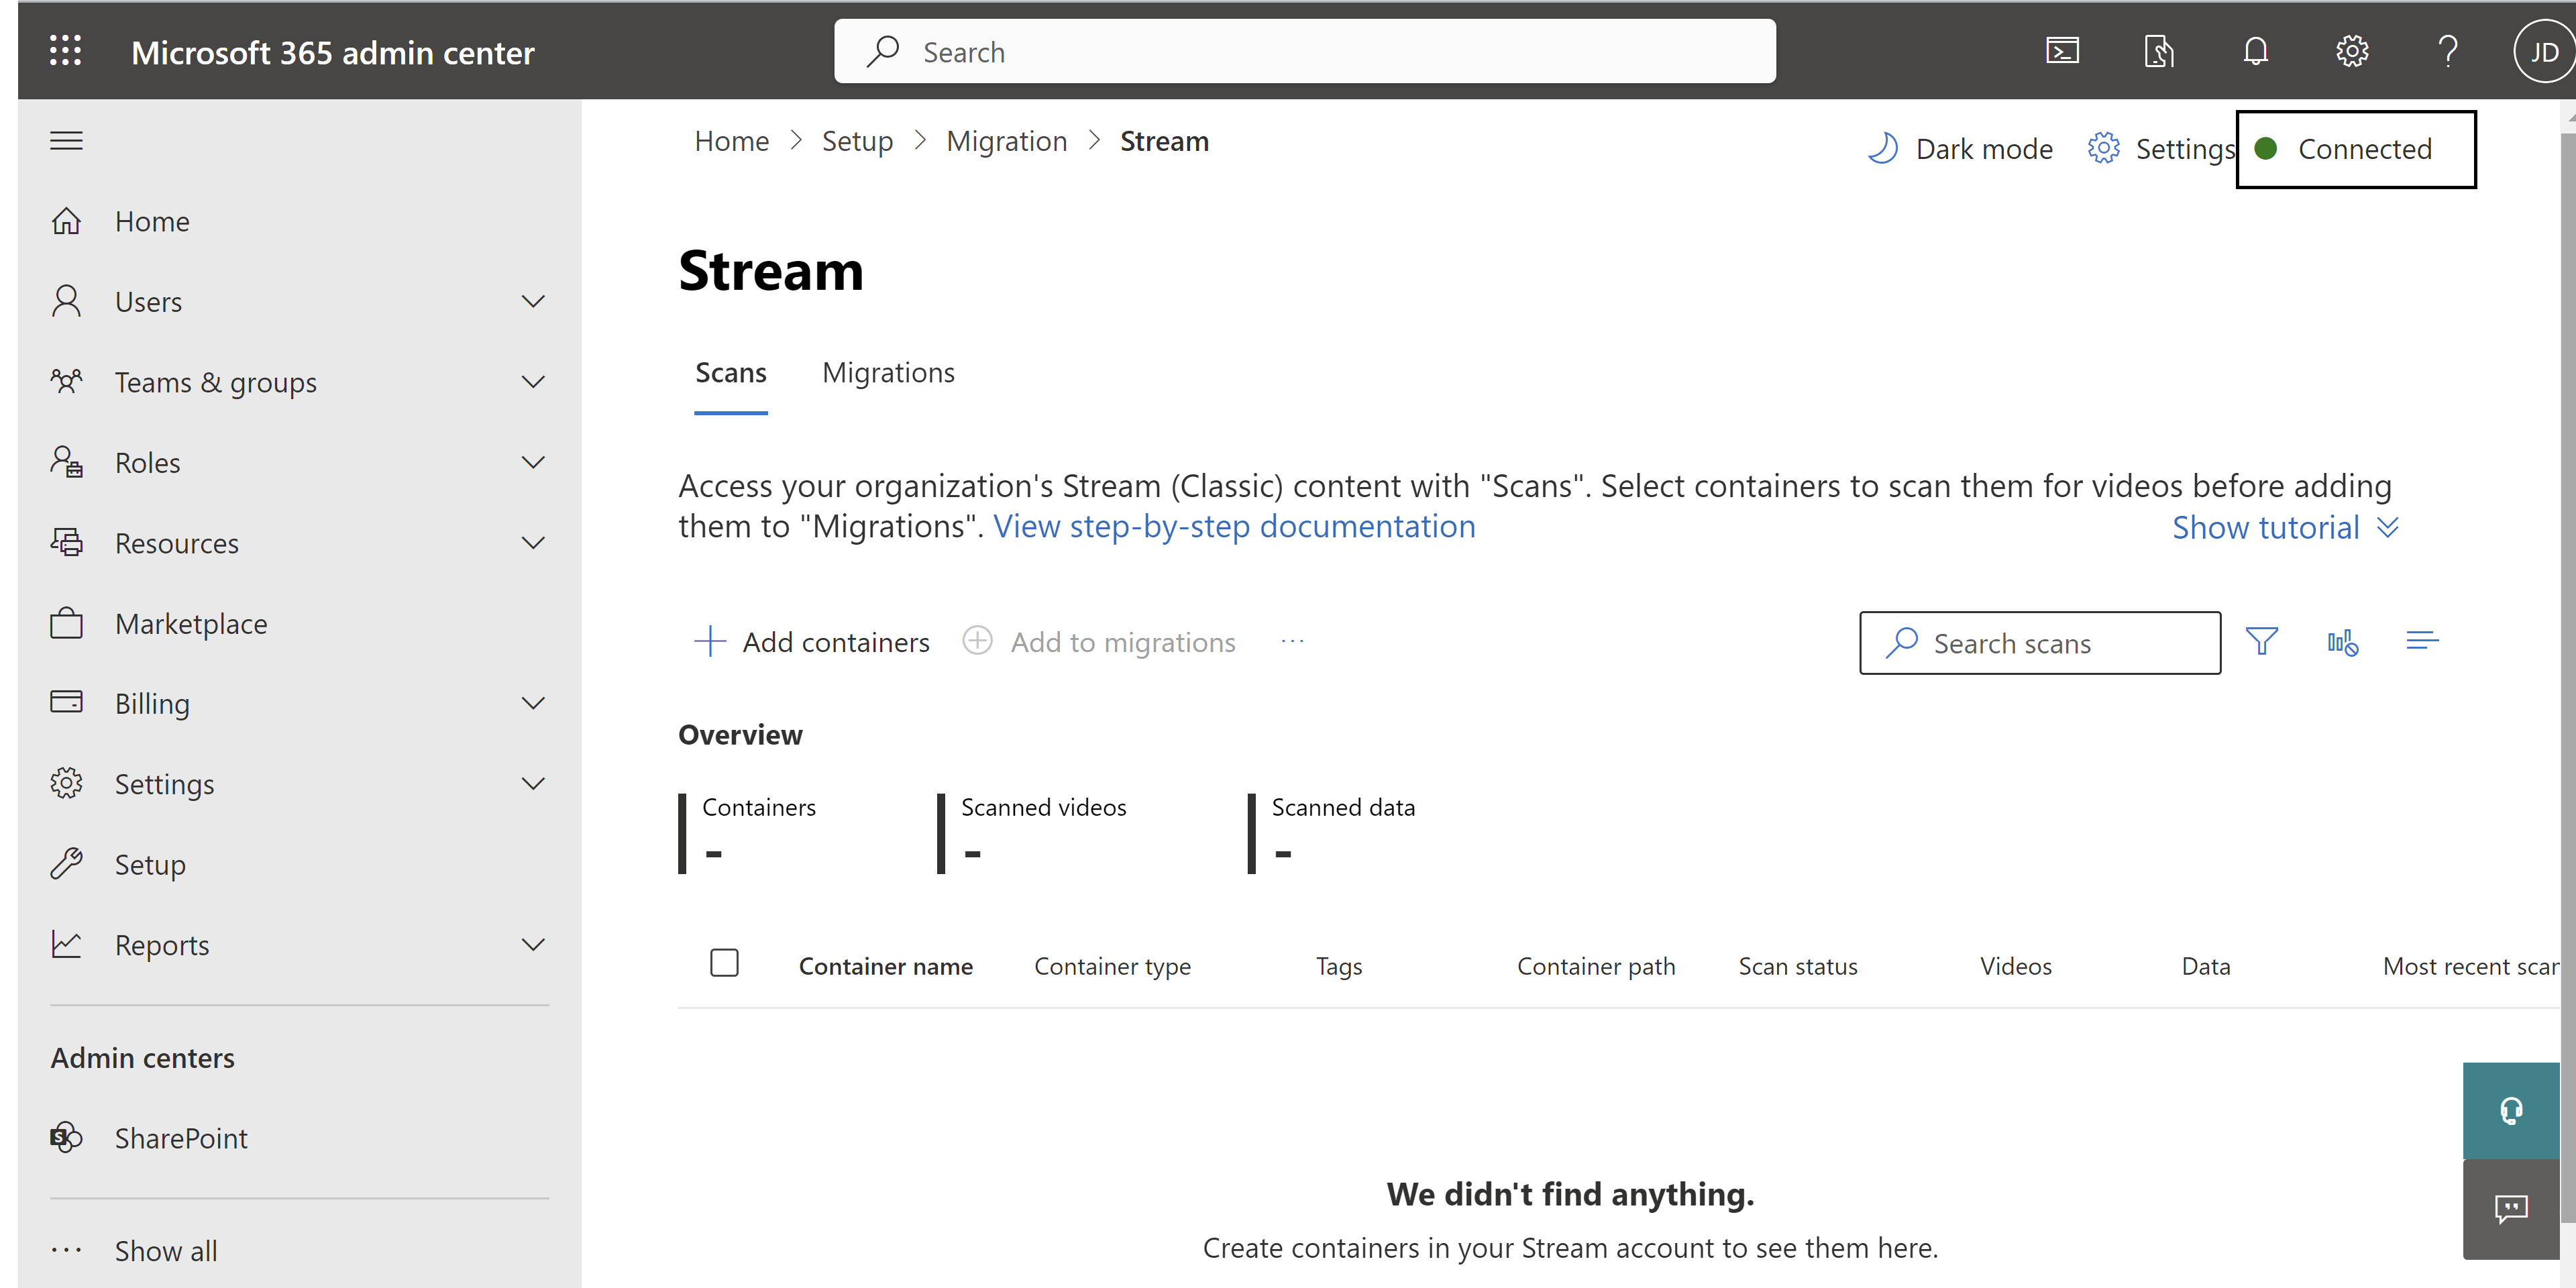
The migration tool is available on Microsoft Admin Center. Direct link to access the migration tool is https://admin.microsoft.com/#/featureexplorer/migration/StreamMigration/.
Alternatively, you can also access it by following any of the following two routes:
- Stream admin center: Sign into the Stream Admin Center. Navigate to Stream migration -> Migration tool -> Launch migration tool.
- Microsoft admin center: Sign into the Microsoft Admin Center. Navigate to Set up -> Migration -> Microsoft Stream.
Once you select the Launch Migration tool button, you land on the Stream connector inside Migration Manager.
Note
- You'll need Global or SharePoint admin credentials to access the migration tool from Microsoft Admin Center.
- The migration tool was previously also available on SharePoint admin center, but it is now deprecated.
Important
Make sure that you check for the green dot on top right corner of your screen. This indicator confirms that Stream is successfully connected. If it isn't green, the tool isn't going to work properly and you need to add the following two URLs to your allowlist: <https://api.mover.io> and <https://api.microsoftstream.com/>. If you're a GCC tenant, in addition to these two URLs, you also new to add <https://api.prod.migrations.microsoft.com>.
Step 2: Discovering the containers
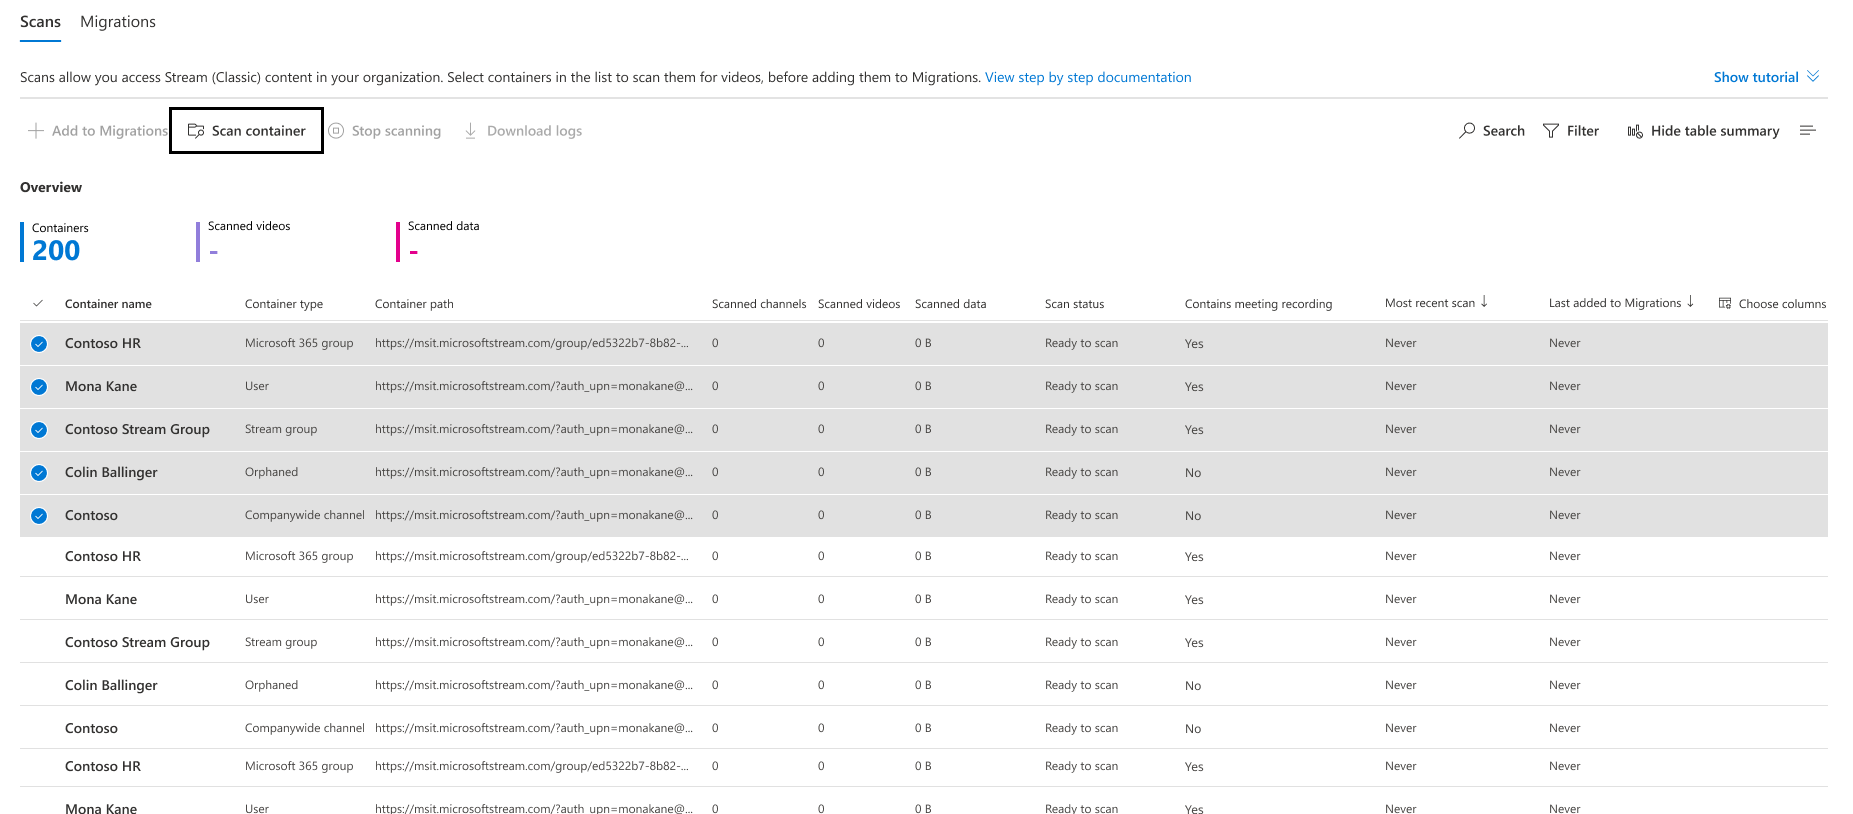
Once you are in the Stream connector, auto discover Scan should start to discover the existing containers. The stream migration tool contains two tabs: Scans and Migrations. The Scans tab is where you'll find all the Stream (Classic) content available in your tenant. Migrations is where you migrate videos. The migration tool groups all the videos available in your tenant into entities called Containers.
There are five types of containers:
| Container Name | Classic Content Mapping |
|---|---|
| Microsoft 365 Group | Videos in Microsoft 365 Groups and channels inside them |
| User | Videos in ‘My Content’ in Stream (Classic). Each user who has published at least a video and not associated that video with a group or channel will display as one container in the tool. (Recorded Teams meeting recording count as published videos.) |
| Stream group | Videos in Stream only groups. These containers only show up for customers that migrated from Office 365 Video to Stream (Classic). |
| Companywide Channel | Videos in companywide channel |
| Orphan Videos | Videos with no active owner, combined into one or multiple containers. Videos that belonged to uploader who left the organization and no other User, Microsoft 365 group or channel was assigned as owner are added to orphaned containers. |
Destination for Microsoft 365 Group and User containers is auto mapped, which admins can override. Destination needs to be defined manually for the remaining three container types. Destination assignment and updating options are available in subsequent steps.
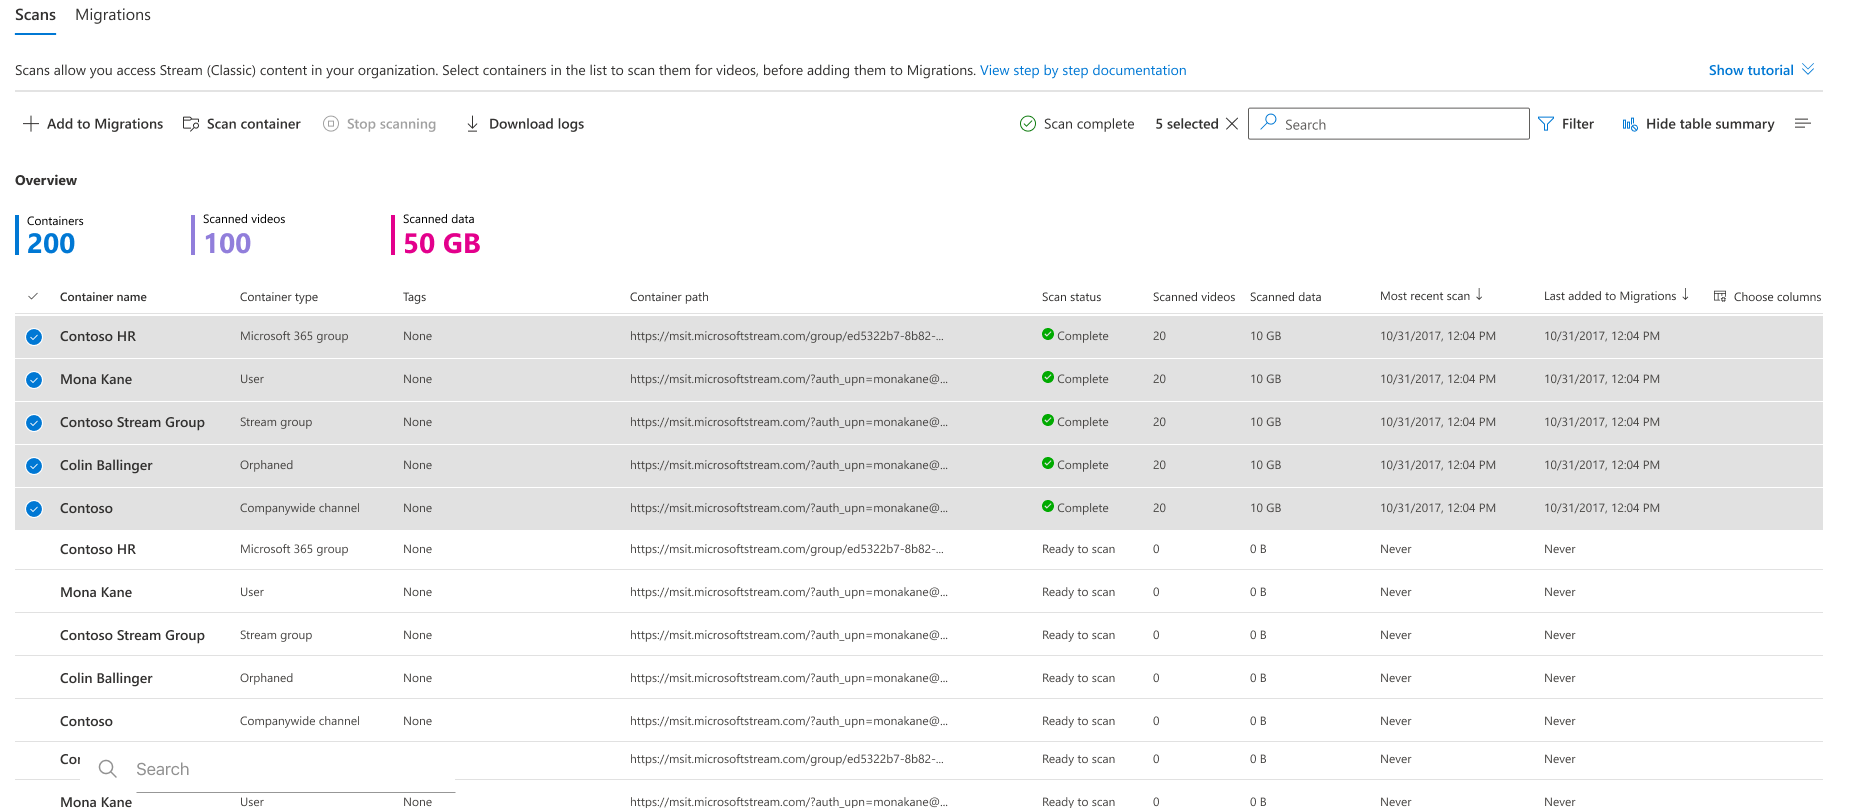
Select all containers you want to migrate and click on Scan Container.
As a container is scanned for videos, its status changes from queued, in-progress, finalizing, to complete.
Step 3: Destination assignment of containers
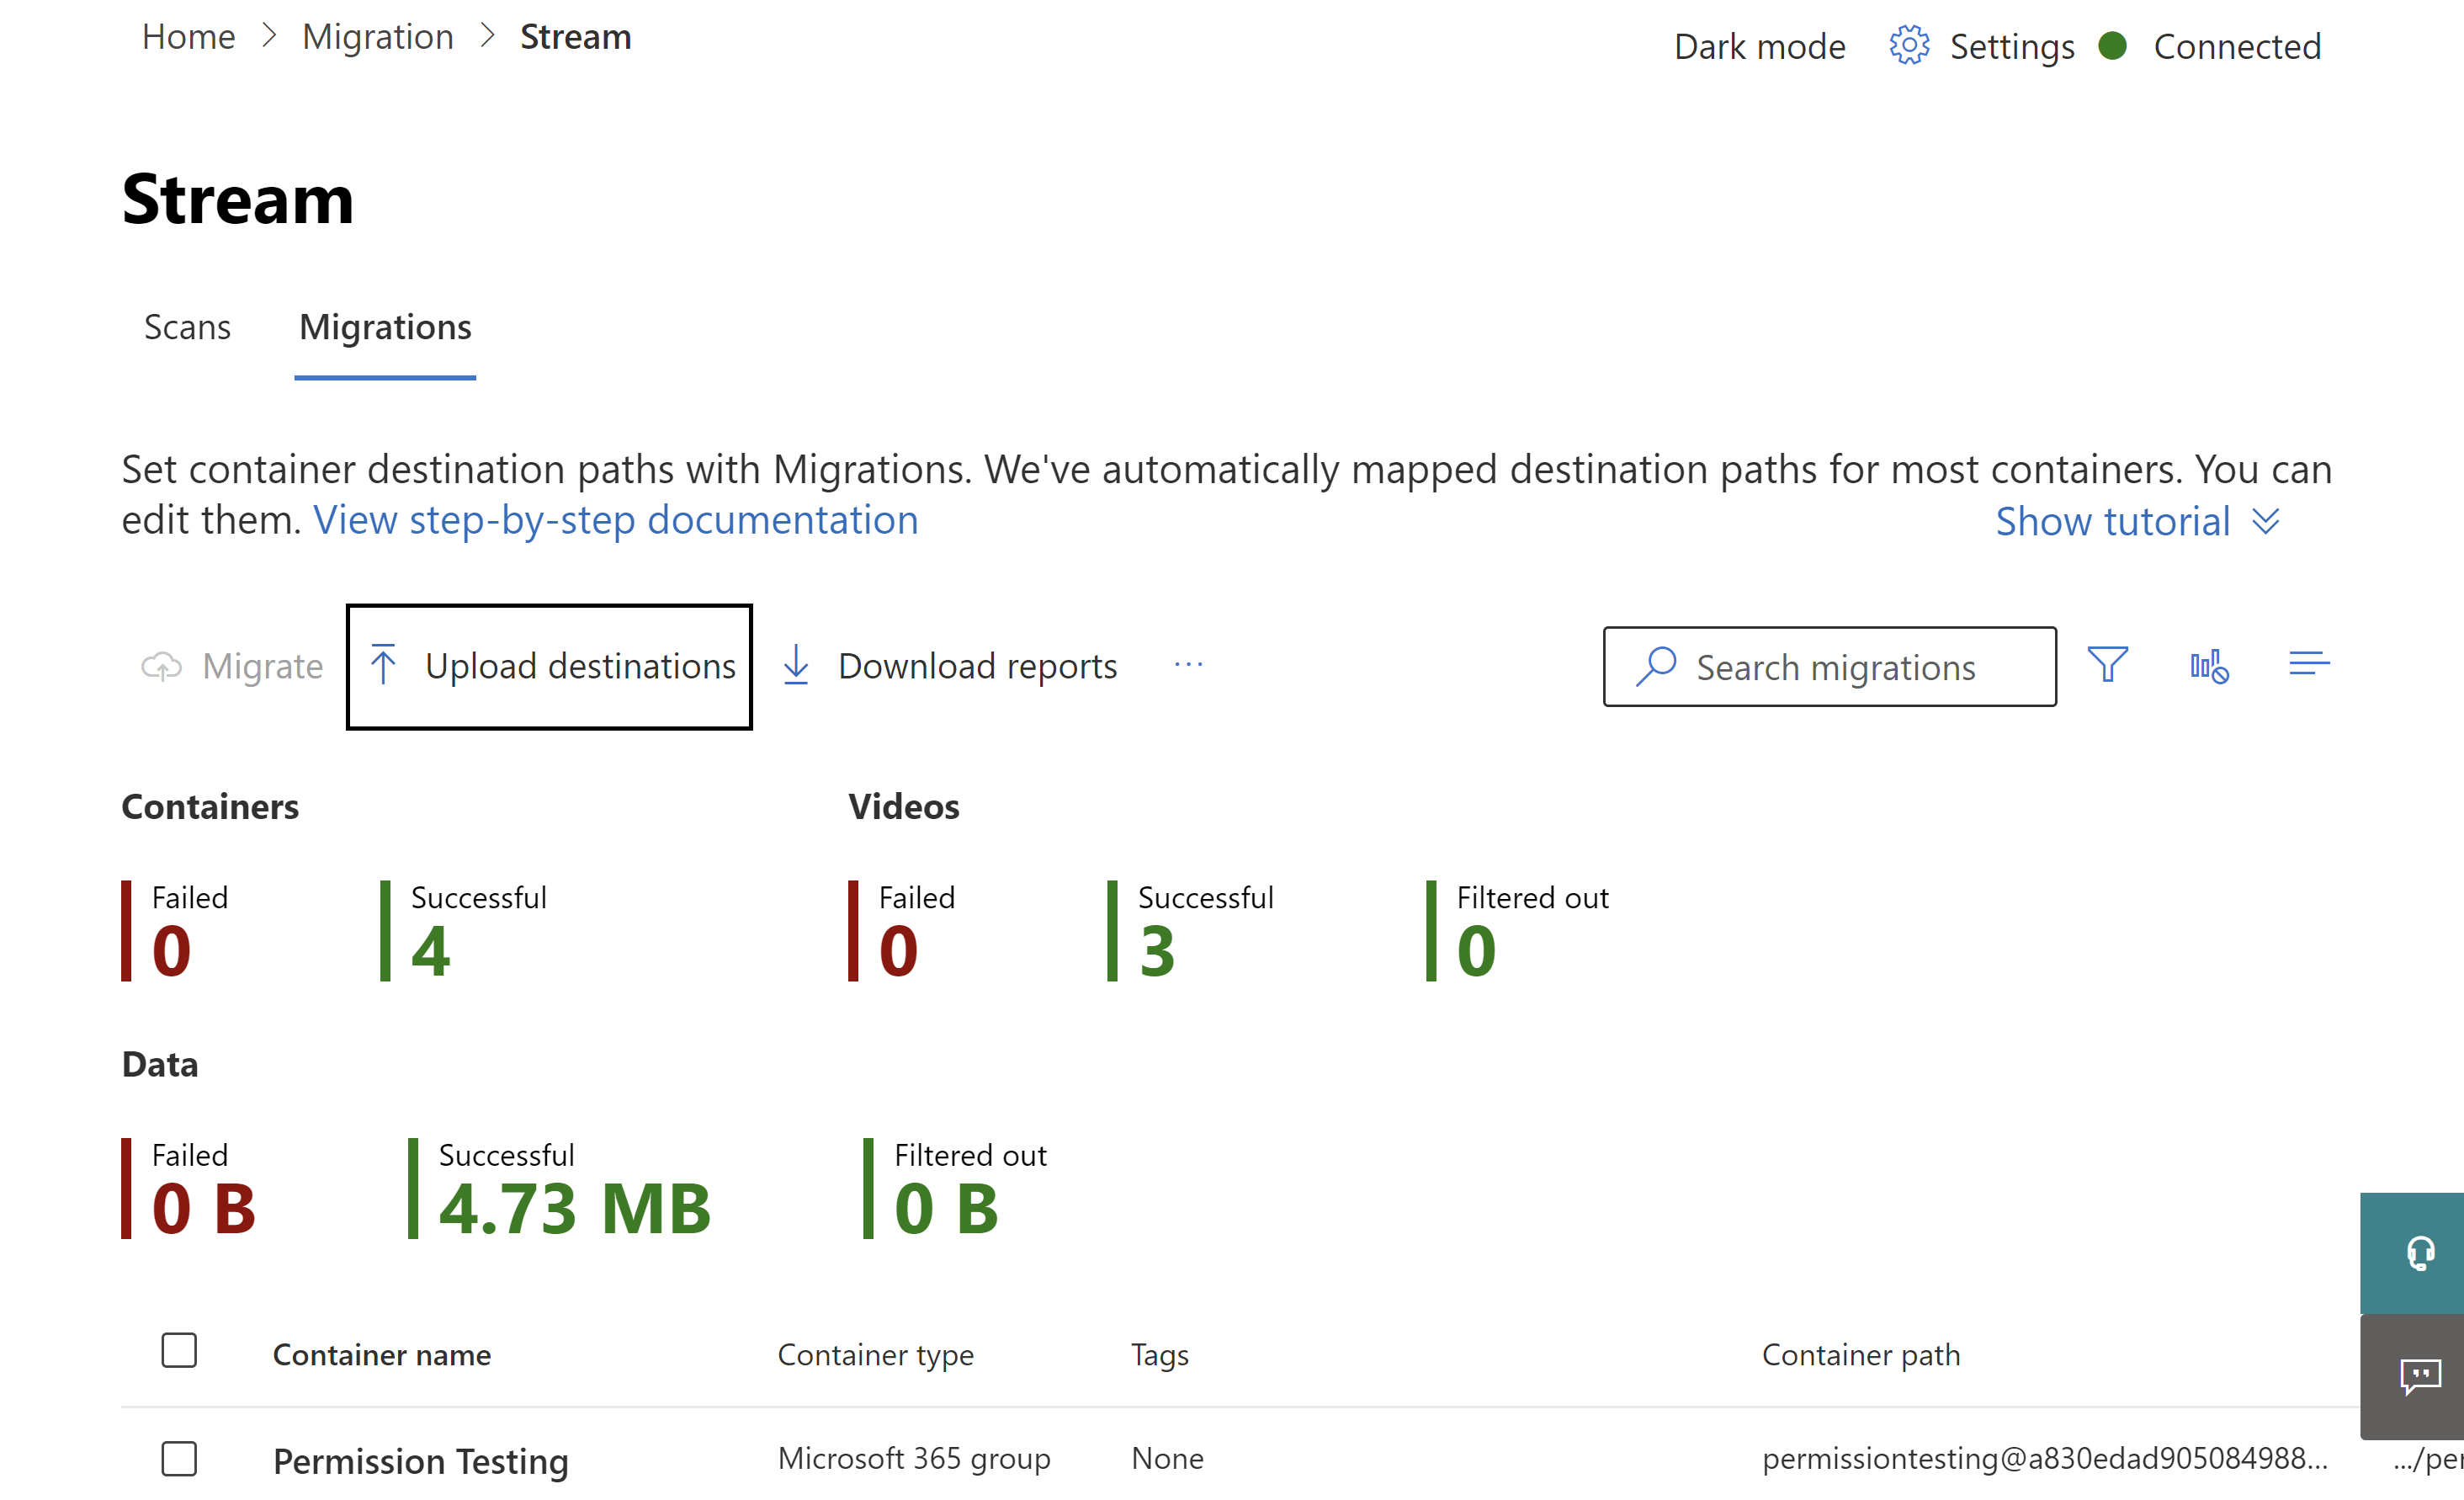
Navigate to the Migrations tab to review the containers that have been added.
The destination paths for two container types: Microsoft 365 groups, and Users are automatically assigned to the corresponding SharePoint site and OneDrive respectively, which you can edit if you want. For the other three container types (Orphan, Stream only and Companywide), the destination isn't autoassigned and you must assign it manually for the migration to happen.
Note
If a video in a Microsoft 365 group isn't assigned to the group as ‘Owner’ but only as 'Display', then the video moves with the User who is assigned as Owner.
If a video is associated with multiple entities, it follows the following order:
Stream Only group> M365 group> Orgwide Channel> Individual
If this allocation heirarchy doesn't fit within your requirements, you can follow the 3-day migration guide for custom allocations.
Case 1: Destination Path is already assigned -
This is usually the case for all User and M365 group containers. You don't need to do anything in this case and can proceed to next step.
Case 2: Destination path shows "Assign destination" -
Here, you can upload destinations in bulk with the Upload destination button. Clicking on Upload destination button lets you download MiigrationDestinations.csv file. While setting destination paths in this csv template, the path needs to be until the document library or a folder inside it. Any other path causes an error during migration. You can create 2 SharePoint sites, one for orphaned containers, and one for non-orphaned containers (Stream only Groups and Companywide Channels). Use these two destination paths for all your containers without predefined destinations in csv file.
Step 4: Migrating the containers
Select all containers you're ready to migrate then select the Migrate button. And then select Migrate again from the right pane.
Step 5: Run Post Migration Inventory report
Run the Stream (classic) inventory report 48 hours (about two days) after you complete the migration. This report provides you details of all Stream (Classic) videos along with the destination where they were migrated to. We recommend you preserve this report for future reference.


