Note
Access to this page requires authorization. You can try signing in or changing directories.
Access to this page requires authorization. You can try changing directories.
In System Center - Operations Manager, when an alert is generated, Operations Manager can notify designated individuals by email, instant message (IM), or text message (SMS). Notifications can also run commands automatically when an alert is raised on a monitored system. A notification requires a channel, a subscriber, and a subscription.
These procedures will explain how to specify the criteria or conditions that determine the alerts that will generate a notification, use of classes and groups, and criteria or conditions in your subscriptions to filter and align notifications with your organizational escalation path. A subscription also defines the channel to be used for the notification and the subscribers to receive the notification. You can use the combination of subscriber and subscription to tailor which alerts are sent to individuals or teams.
Notification channels and subscribers must be configured before you create a subscription.
Subscription filtering options
Before creating a subscription, we will review the two methods you can use to filter alert notifications so that you can deliver alerts that meet certain conditions, such as all critical severity alerts with high priority notify IT Operations or from specific monitored objects like all systems for a particular remote location notify that on-site IT support team.
Specifying which alerts generate notifications (Conditions)
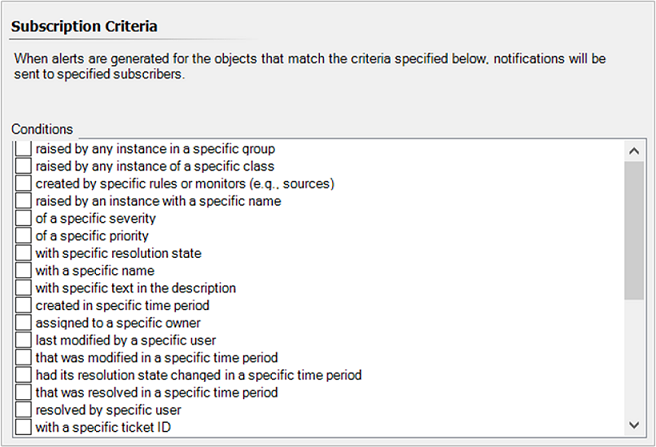
When you create a subscription to be notified when Operations Manager generates alerts, you must specify the criteria or conditions that determine the alerts that will generate a notification. The following illustration shows the conditions you can choose from.

When you select a condition, it's added to the Criteria description. In the Criteria description box, the word specific is blue and underlined, and is a placeholder for the value for the condition. Select specific to set the value for that condition.
For example, for the condition of a specific severity, select specific, and then select from the available values: Information, Warning, and Critical.
When you create a notification subscription from an alert that has been generated, the conditions for the subscription are configured automatically with values from the specific alert.
Subscription filter options
Before creating a subscription, we'll review the two methods that you can use to filter alert notifications so that you can deliver alerts that meet certain conditions, such as all critical severity alerts with high priority notify IT Operations or from specific monitored objects like all systems for a particular remote location notify that on-site IT support team.
Specify the alerts that generate notifications (Conditions)
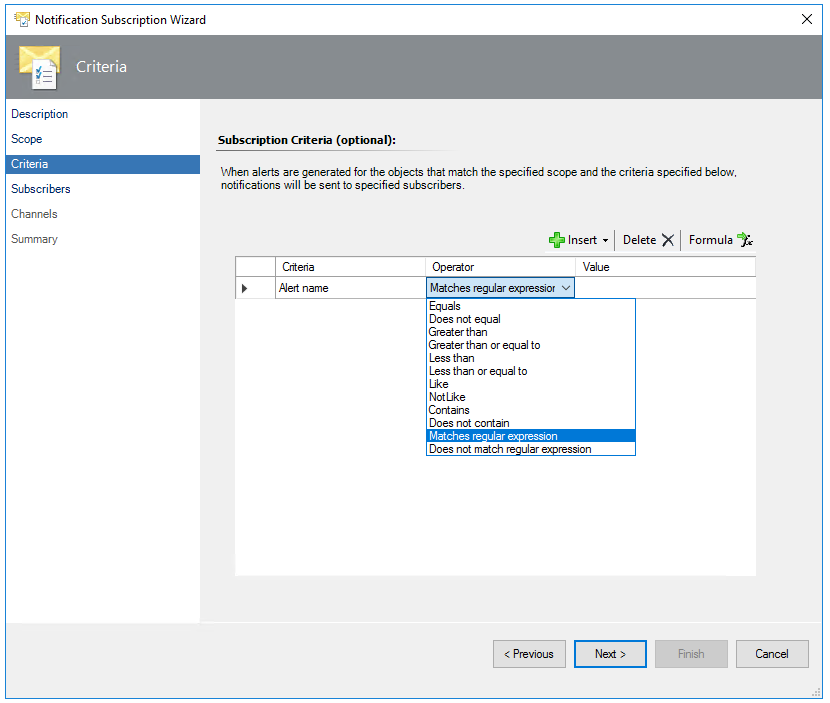
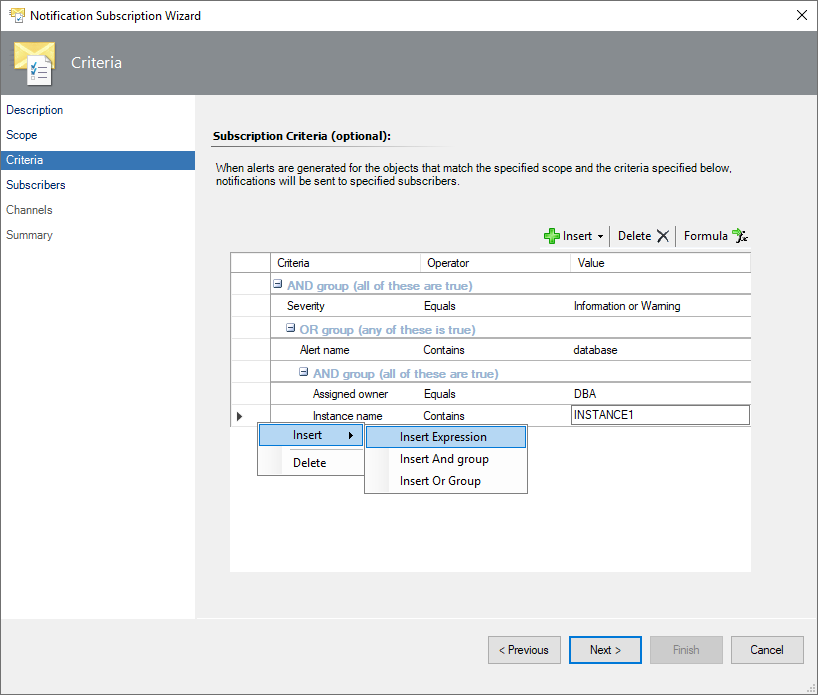
When you create a subscription to be notified when Operations Manager generates alerts, you must specify the criteria or conditions that determine the alerts, which will generate a notification. Criteria builder has been enhanced to allow you to build complex yet useful/efficient subscription criteria by using the ability to exclude objects, use AND/OR groupings, and use regular expressions to notify based on the required criteria.
In Scope, you can choose the scope for a subscription by selecting the specific group(s) or class(es). Defining a scope is optional, if scope isn't defined, then the conditions defined in the next screen (Criteria) won't be scoped to any groups/classes.
In Criteria, you can set the conditions for the notifications to be sent to the specified subscribers. If you don't set the conditions, notifications will be sent for all alerts. These conditions will be applied on the scope defined in the earlier screen to send notification to the specified subscribers, if scope isn't defined in the earlier screen, then these conditions won't be scoped to any groups/classes.
The following are the examples of the criteria builder showcasing single expression and groups of expressions:
Example - single expression

Example - groups of expressions

Using classes and groups to include specific alerts
You can use classes and groups to configure the subscription. Two of the conditions for alerts that you can select for a subscription are:
Raised by any instance in a specific group.
Raised by any instance in a specific class.
You can select multiple groups or classes when you set the value for either condition.
Note
Operations Manager doesn't support "not equal to" or "not a member of" options in Scope tab.
Groups
Groups are logical collections of objects, such as Windows-based computers, hard disks, or instances of Microsoft SQL Server. Some groups are created by Operations Manager, such as the Operations Manager Agent Managed Computer Group and the All Windows Computers group. You can create groups to meet your specific monitoring needs, such as all Windows computers in a specific organizational unit (OU). For more information on creating groups, see Creating and Managing Groups.
Groups can have explicit or dynamic membership. Suppose you wanted to create a subscription that would send notifications for alerts generated by five specific servers to one person and notifications for alerts generated by a different five servers to a second person. You could create two groups and explicitly assign each server to one of the groups, and then create a subscription that would send notifications for each group to the appropriate person.
When you select a specific group as a condition for an alert notification, notifications are sent for alerts raised by any member of the specified group.
Classes
A class represents a kind of object, and every object in Operations Manager is considered an instance of a particular class. All instances of a class share a common set of properties. Each object has its own values for these properties, which are determined when the object is discovered. Most management packs define a set of classes that describe the different components that make up the application that is being monitored and to the relationships between those classes.
Every class in Operations Manager has a base class. A class has all the properties of its base class and potentially adds more. All of the classes from the different management packs installed in your management group can be arranged in a tree with each class positioned under its base class. If you start at any class, and then walk up the tree following its base class, and then the base class of that class, and so on, you eventually reach the Object class that is the root of the System Center class library.
When you select a specific class as a condition for an alert notification, notifications are sent for alerts raised by any instance of the specified class.
Examples
Example 1: To send notifications of alerts for UNIX computers to your UNIX administrator, you create a subscription using the condition Raised by any instance in a specific group, select the UNIX/Linux Computer Group as the value for the condition, and select the UNIX administrator as the subscriber.
Example 2: To send notifications of new alerts with a critical severity and high priority to your IT Operations team, you create a subscription using the condition of Critical severity, of a High priority, with New (0) resolution state, and select your subscriber representing the IT Operations team.
In the first example, the UNIX administrator would be notified of alerts raised by the operating system on a UNIX computer, and any other alerts that are raised by a UNIX computer. In the second example, the notifications would only be sent when new alerts are raised with critical severity and high priority.
To create a notification subscription as an administrator
Sign in to the computer with an account that is a member of the Operations Manager Administrators role.
In the Operations console, select Administration.
In the Administration workspace, expand Notifications, right-click Subscriptions, and select New subscription. The Notification Subscription Wizard starts.
On the Description page, in Subscription name, enter a descriptive name for the subscription, enter a short description, and select Next.
On the Subscription Criteria page, you can set conditions that will determine when notifications will be sent to specified subscribers. If you don't set conditions, notifications will be sent for all alerts. Select Next.
Note
You will also receive notifications when an alert is updated.
On the Subscribers page, select Add to add subscribers who are already defined, or select New to add new subscribers. For more information on defining subscribers, see How to Create Notification Subscribers.
Select Next.
On the Channels page, select Add to add a channel that is already defined, or select New to add a new channel. For more information on defining channels, see How to Enable an Email Notification Channel, How to Enable an Instant Message Notification Channel, How to Enable a Text Message Notification Channel, and How to Enable a Command Notification Channel.
In the Alert aging section on the Channels page, select to send notifications without delay or set a value in minutes that notification should be delayed unless conditions remain unchanged, and select Next.
Review the settings on the Summary page, select Finish, and select Close.
To create a notification subscription as an operator
Sign in to the computer with an account that is a member of the Operations Manager Operators or Advanced Operators role.
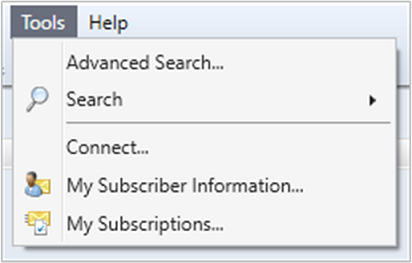
In the Operations console, select Tools in the top menu bar, and then select My Subscriptions.

In the Notification Subscriptions window, select New.
On the Description page, in Subscription name, enter a descriptive name for the subscription, enter a short description, and select Next.
On the Subscription Criteria page, you can set conditions that will determine when notifications will be sent to specified subscribers. If you don't set conditions, notifications will be sent for all alerts. Select Next.
Note
You will also receive notifications when an alert is updated.
On the Subscribers page, select Add to add subscribers who are already defined or select a subscriber in the Selected subscribers box, and select Edit to change the settings for this subscription. For more information on defining subscribers, see How to Create Notification Subscribers.
Select Next.
On the Channels page, select Add to add a channel that is already defined, or select New to create a customized copy of an existing channel. For more information on defining channels, see How to Enable an Email Notification Channel, How to Enable an Instant Message Notification Channel, How to Enable a Text Message (SMS) Notification Channel, and How to Enable a Command Notification Channel.
In the Alert aging section on the Channels page, select to send notifications without delay or set a value in minutes that notification should be delayed unless conditions remain unchanged, and then select Next.
Review the settings on the Summary page, select Finish, and select Close.
Next steps
- To designate when to send notifications and the addresses to which the notifications should be sent to, review How to Create Notification Subscribers.