Exercise – Deploy and activate agents
Members of your organization can request agents that need your review before they're made available. For example, agents created by members of your organization using Copilot Studio, Foundry, or Microsoft 365 Agents Toolkit are submitted for admin approval. These approval requests are listed in the Requests tab.
From the Requests list, you can select an agent, and review its details to better understand the agent's capabilities, data sources, and custom actions before you publish it to your organization.
In the Requests lists, the agents have the following states:
Pending review: The agent is waiting for admin review before it can be published to the store. You can review the agent details and decide whether to publish or reject it.
Pending activation: The agent is waiting for admin approval before users can create instances of it. You can review the agent details and decide whether to approve or reject the activation request.
Pending update: The agent has an update that's waiting for admin review before it can be published to the store. You can review the updated details and decide whether to publish or reject the update.
You can take the following actions on the agent requests:
Publish agents to store: Publishing an agent makes it available in the store for specific users, groups, or the entire tenant. This allows users to add and use Agent 365 agents within your governance policies. Before you approve a request, review key information on the Details, Data & Tools, Security, and Permissions tabs to decide whether to publish or reject the agent. This helps prevent ungoverned agent publishing.
Activate agents: Activating an agent means approving users to create instances of the agent. You can review the agent details such as the description, owner, data, and tools, and then approve the request and activate or reject it. When you activate an agent, you can also scope its audience to specific users, groups, or everyone, ensuring a controlled rollout.
In this exercise, you as Reed publish and activate agents created by members of your organization. You can take action to respond to agent requests.
Prerequisites
Create user groups in Microsoft Entra for agent management. For example, create a group named Procurement Group that includes users who need access to use the Zava Procurement agent. For more information, see Create groups and add members.
Create access packages in Microsoft Entra. For more information, see Access packages for Agent identities.
(Optional) Create custom policy templates. For more information, see Exercise - Set up policy template.
Assign the Attribute Assignment Administrator role to apply custom policies.
Publish agents
Before you publish an agent, review its details to ensure it has the right permissions and security posture. Apply appropriate policy templates and permissions to ensure governance. You can publish agents so that specific users, groups, or the entire tenant can add and use Agent 365 agents securely and within governance policies you set.
Before you approve a request, review key information and decide whether to publish or reject it. This helps prevent ungoverned agent deployment or publishing. Once you select any of these requested agents, you can see multiple tabs associated to that agent.
Go to Microsoft 365 admin center.
In the left navigation pane, select Agents > Overview.
In the Top actions for you section, select Manage requests.
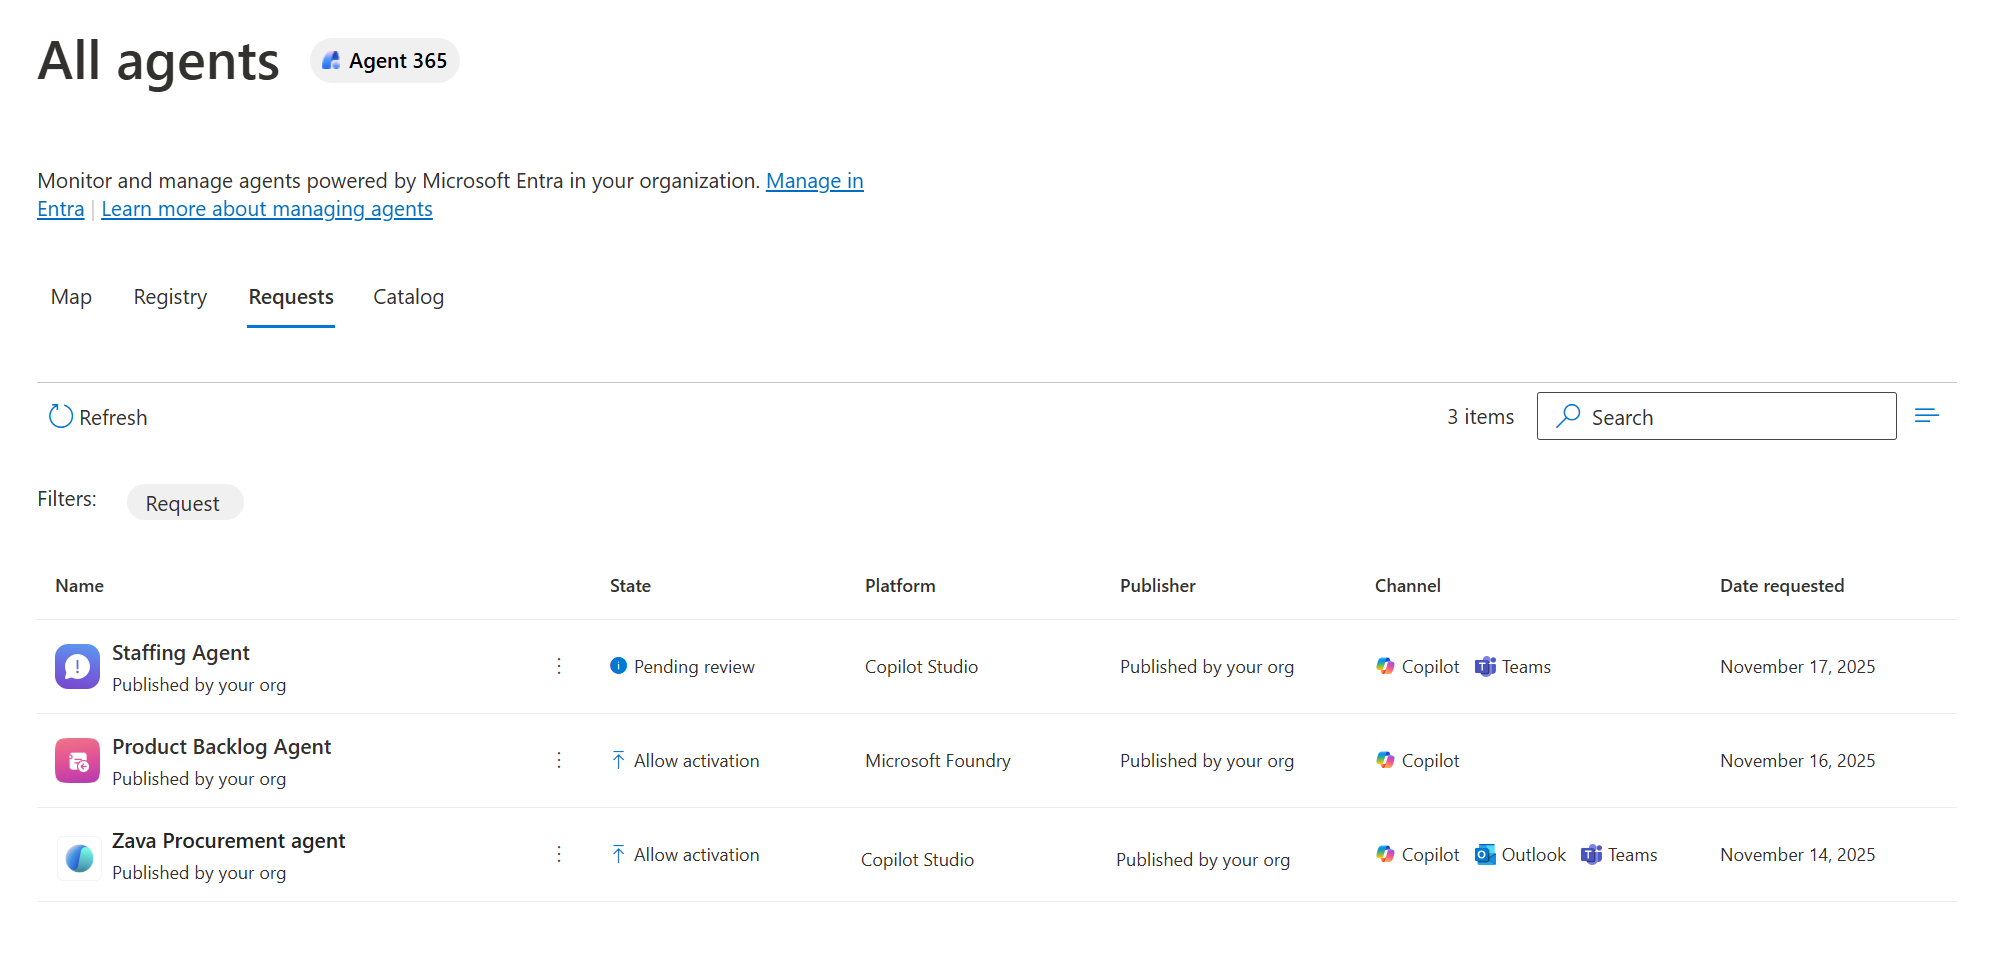
You're taken to the Requests tab in the All agents section. This tab lists all pending agent requests submitted by users in your organization.
In the requests list, select an agent with the Pending review state. Select the Zava Procurement agent.
Review the agent details on the Details, Data & Tools, **Security, and Permissions tabs.
In the Details tab, notice that the agent has an owner Mateo Caldwell.
In the Data & Tools tab, review the agent's connectors, knowledge sources, and tools. For example, Sharepoint and Enterprise websites are connectors, while trusted websites are knowledge sources. Tools include the Agent 365 Files Model Context Protocol (MCP) server and Agent 365 Notes MCP server.
In the Security tab, review the applied policies. The default template enables audit trails for activity logging, provides observability, and supports continuous monitoring. It also identifies areas needing attention and data security controls to safeguard against sensitive data leaks and oversharing.
In the Permissions tab, confirm that the least privileges principle is applied.
Select Publish to store.
In the Publish agent to selected users, select Specific users/groups, and then select Procurement Group.
In the Select users or groups who will have the agent pre-installed (optional), select None.
Select Next.
In the Apply template page, select Default agent template for all agents except AI teammates. For more information on the policy templates, see Exercise - Set up policy template.
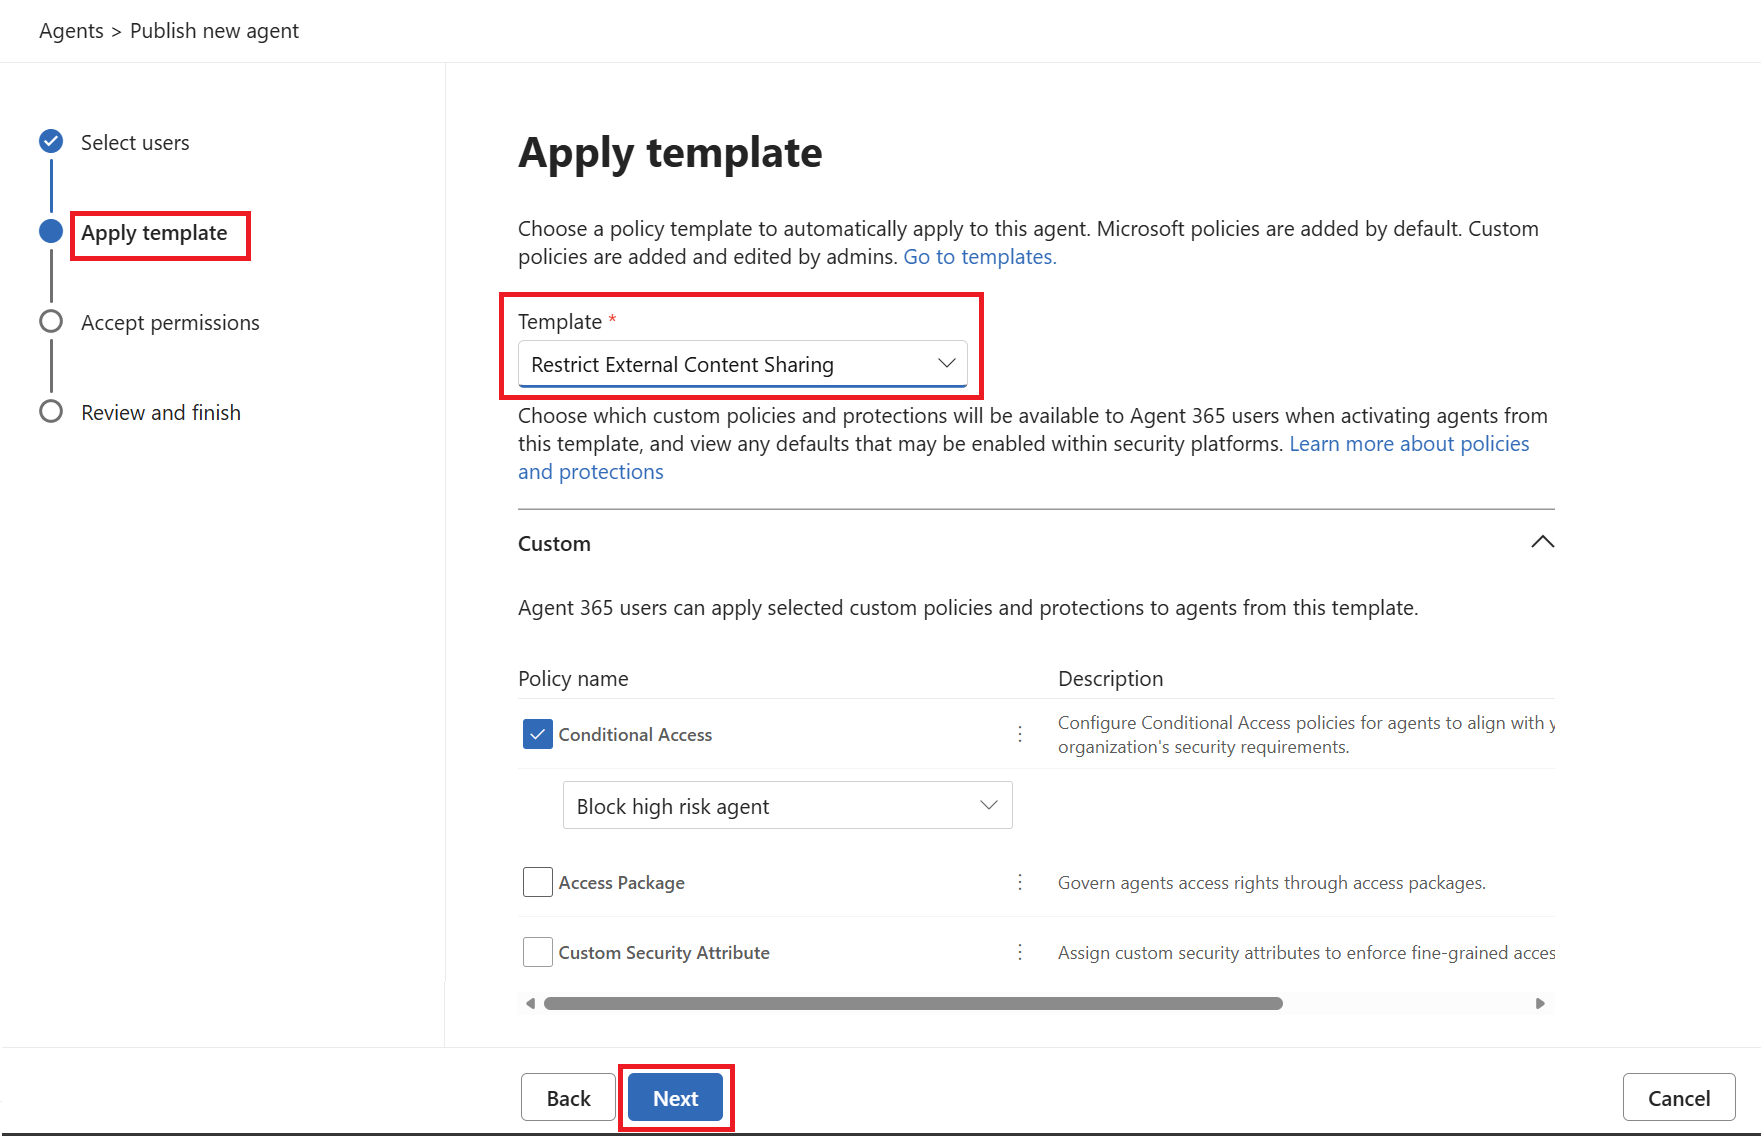
Select Next.
In the Review permissions page, review the permissions, and then select Next.
Review the settings for the agent and then select Publish.
Select Done.


Activate agent
When you activate an agent, you approve users to create instances of the agent. By approving a request, you allow specific users, groups, or the entire tenant to add and use Agent 365 agents securely, within governance policies you set. You can review the agent details and ensure the right permissions; security posture is provided to the agent before you activate it. Before approval, you inspect key information. This helps prevent ungoverned agent deployment or publishing.
In this exercise, you activate the agent and assign an owner who's responsible for managing it, reviewing and approving user requests, monitoring agent performance, and ensuring compliance with governance policies. Before approving, you inspect key information and publish the agent. This helps prevent ungoverned agent deployment or publishing.
You approve user requests for the agent after the agent is activated and the state of the agent shows as Allow activation. When you approve a user's request, you activate this agent for the user. Once activated, the user can create instances of the agent.
Go to Microsoft 365 admin center.
In the left navigation pane, select Agents > Overview.
In the Top actions for you section, select Manage requests. This opens the Requests tab in the All agents section. This tab lists all pending agent requests submitted by users within organization.
In the list of pending agent requests, filter agents with the Pending activate state.
Select the agent to open its Details tab.
Select the Requests tab.
Select a user from the list.
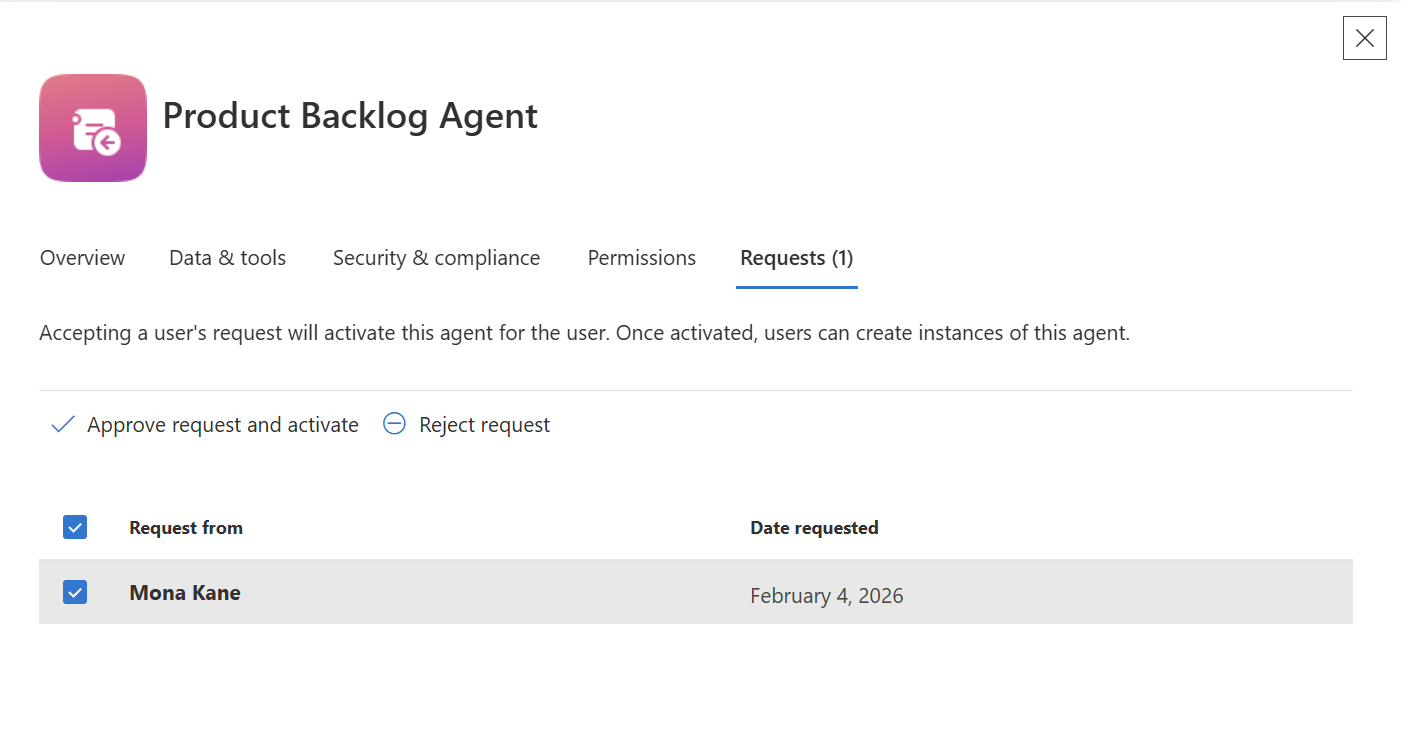
Select Approve request and activate.
In the Activate an agent page, select the users who can create instances of the agent. Select All users.
On the confirmation pop-up, select Activate.
