Exercise - Create a grounded prompt in AI Builder
AI Builder provides a prompt builder that allows makers to write, test, save, and use prompts to generate text.
Prerequisite
This prerequisite is only for this module, and not needed to work with grounded prompts. To complete this exercise, you need to complete the following steps to access the sample data set:
Download Create AIBuilder Prompt zip file
Sign in to Power Automate. On the left navigation, select Solutions
On the top bar menu, select Import Solution
Select Browse, select CreateAIBuilderpromptsusingyourownDataversedata_1_0_0_1_managed zip file from your local device.
Select Next twice
Select Import. It should take a few moments to get your solution imported. (refresh your browser if needed).
In solutions, select Create AI Builder prompts using your own Dataverse data. Select Import dataset, select Run from the bar menu, select Run flow, select Done. It should take a few moments to get your flow ran. (refresh your browser if needed).
Sign in to Power Apps. On the left nav, select Tables, select All.
You should have these 3 tables with data installed on your environment:
Issuer
Proposal
RelatedParty
You can now start the unit.
Create a prompt
In this module, you assume the role of a sales representative. In this scenario, Bob, the issuer, prepares a proposal for a customer. Your task is to review a summary description of this proposal, titled Proposal Name 1. Bob and Ada are people who are associated with this proposal.
To create a prompt in AI Builder, follow these steps:
Sign in to Microsoft Power Apps or Microsoft Power Automate.
On the left pane, select the ellipsis (...) to expand the More menu and then select AI hub.
Under Discover an AI capability, select AI prompts.
Note
To keep AI prompts permanently on the menu for quick access, select the pin icon.
Select Create text with GPT using a prompt.
Give your prompt a name.
In this example, name your prompt Learning grounded prompt or use a name of your choice.

Prompt settings
Your next step is to explore and edit the various prompt settings.
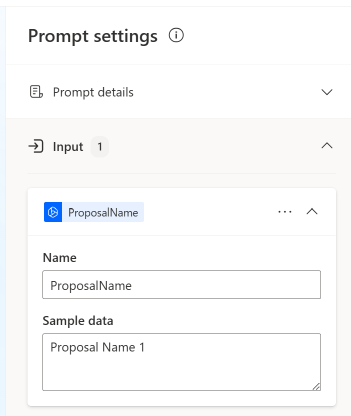
On the right pane, select Input, select + Add input, and then name your input ProposalName.
Note
Adding inputs and data grounding in your prompt settings helps you fine-tune your prompt response.
On the right pane, select Data used (preview). Select + Add data. Expand the Proposal section to select a data source from the Filter attribute dropdown menu. Enter a name in the Filter value field. Select + Add value and then select ProposalName.
By adding filters, your goal is to refine the data that you're working with, making it more focused on and relevant to your needs.
The Input and Data used (preview) tabs should resemble the following images.


In the Prompt window, write the following prompt by using natural language:
Create a summary of the proposal ProposalName as paragraphs and fewer than 50 words.
Highlight ProposalName in the prompt window, select + Insert, and then select ProposalName, as shown in the following screenshot.

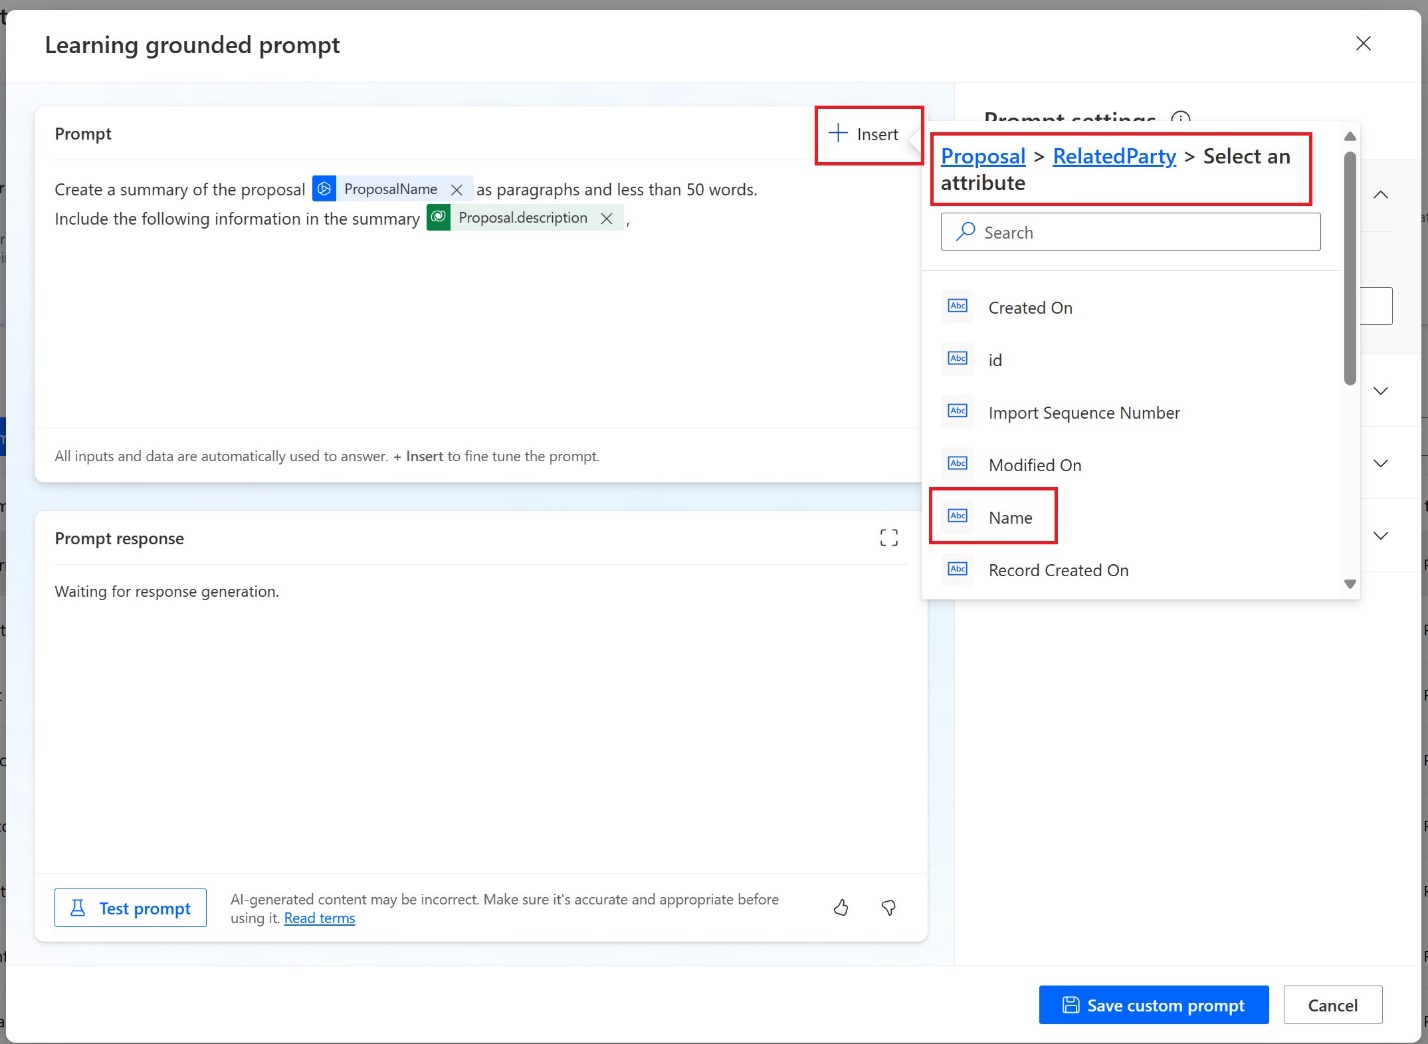
In the Prompt window, enter Include the following information in the summary after the first prompt. Select + Insert > Proposal > Select an attribute, and then search for description, as shown in the following image.

Select + Insert > Proposal > RelatedParty > Select an attribute and then search for Name.
Repeat the previous step, select Proposal > Issuer > Select an attribute, and then search for Name.
In the Prompt window, enter Also include the at the end of the prompt. Select + Insert > Select an attribute and then search for Name to insert the ProposalName attribute. Then, enter the phrase as the title of the summary after the inserted attribute, as shown in the following screenshot.


Now that you've crafted a grounded prompt by using natural language, data, and filtering techniques, you can test your prompt.
Test your prompt
In this section, you ask for a summary of Proposal Name 1 in the Microsoft Dataverse table called Proposal.
In the right pane in the prompt settings, select Input > ProposalName.
In the Sample data field, enter Proposal Name 1.
In the right pane in the prompt settings, select Data used (preview) > Proposal, as shown in the following screenshot.

In the right pane in the prompt settings, select Output > Text.
Select Test prompt.
Your prompt response should resemble the following image.


