Exercise - Enable trust between Azure IoT Central and your Azure Sphere tenant
In this unit, you'll enable trust between your Azure IoT Central application and Azure Sphere and do related tasks.
After you enable trust, any device claimed into your Azure Sphere tenant will automatically be enrolled in your Azure IoT Central application when it first connects.
Create a trust relationship
If you're using Windows, open a Windows PowerShell command line. If you're using Linux, open a terminal.
Sign in to your Azure Sphere tenant:
azsphere loginMake a note of the current folder. You'll need the name of this folder in the next step.
Download the Azure Sphere tenant's CA certificate:
azsphere ca-certificate download --destination CAcertificate.cerThe output file must have the .cer extension.
Create an enrollment group
From the Azure IoT Central web portal, select the menu button on the upper-left corner of the screen to expand the sidebar menu.
Select Administration > Device Connection.
Select + New.
Name the enrollment group Azure Sphere.
Leave group type set to IoT devices.
In the Attestation type dropdown list, select Certificates (X.509).
Select Save.
Upload the Azure Sphere tenant's CA certificate to Azure IoT Central and generate a verification code
Select + Manage primary.
Select the folder icon next to the Primary box and browse to the folder where you downloaded the certificate. If you don't see the .cer file in the list, ensure that the view filter is set to All files (*). Select the certificate, and then select the gear icon next to the Primary box.
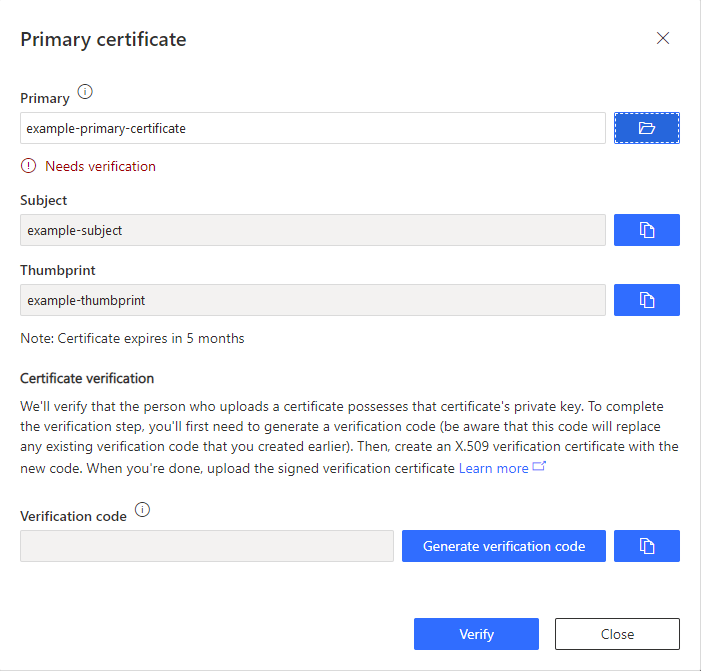
The Primary certificate dialog appears. The Subject and Thumbprint boxes contain information about the current Azure Sphere tenant and primary root certificate. Select Generate verification code.
Copy the verification code to the clipboard.
Verify the tenant CA certificate
Return to the PowerShell command line or Linux terminal.
Download a validation certificate. Replace
<code\>in the following command with the verification code from the previous step:azsphere ca-certificate download-proof --destination ValidationCertification.cer --verification-code <code>The Azure Sphere Security Service signs the validation certificate with the verification code to prove that you own the CA certificate.
Use the validation certificate to verify the tenant's identity
Return to Azure IoT Central and select Verify.
When you're prompted, select the validation certificate that you generated in the previous step. When the verification process is complete, the Primary certificate dialog displays the Verified message.
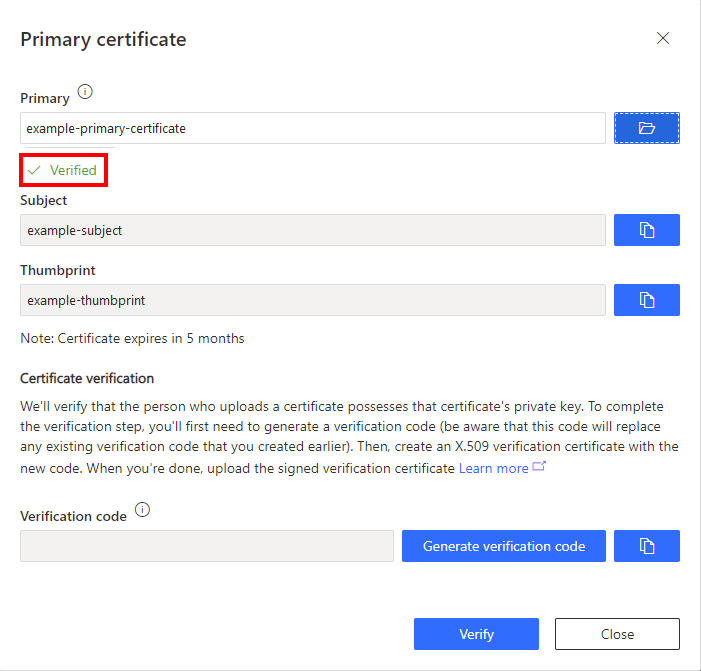
Select Close to close the dialog.
Select Save.