Exercise - Customize your Azure IoT Central application
In this exercise, you'll follow detailed steps to customize your Azure IoT Central application.
Open the Azure IoT Central device explorer
Go to Azure IoT Central.
On the left pane, select Devices, select the Altair on Azure Sphere template, and then select your device.
It might take a minute or two for your device to be displayed in the devices section of Azure IoT Central.
The device name is your Azure Sphere device ID. You can display your device ID by running the following command at the Windows PowerShell command prompt or Linux terminal:
azsphere device show-attached
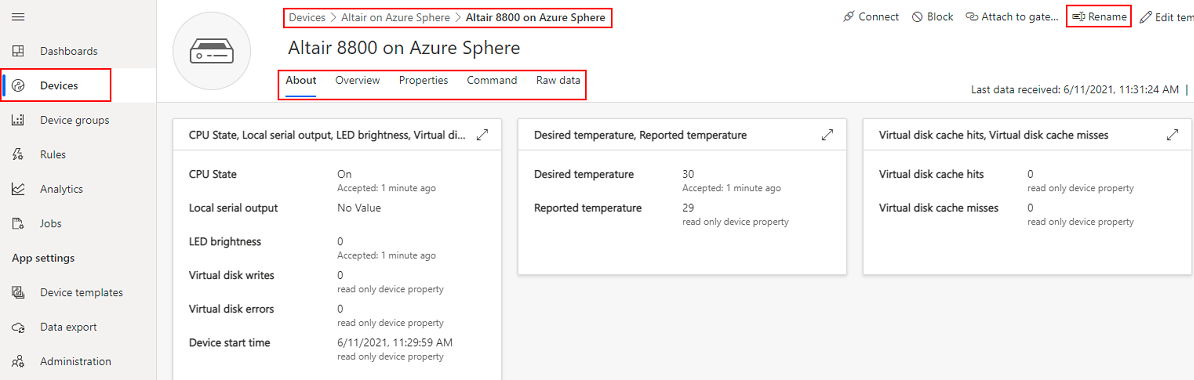
Rename your device
Rename your device in Azure IoT Central, ensuring that the name is unique. The web terminal uses this name to retrieve the channel ID property from Azure IoT Central. The channel ID is used to create the unique MQTT topic names that are used by the Altair emulator and the web terminal.
To rename your device, on the left pane, select Device, select Manage device, and then select Rename.

Customize the Altair on Azure Sphere template
Customize properties
On the left pane, select Device, select Manage template, then select Edit template.
Select Customize, and then expand the Desired temperature property.
Update the property by using the information from the following table:
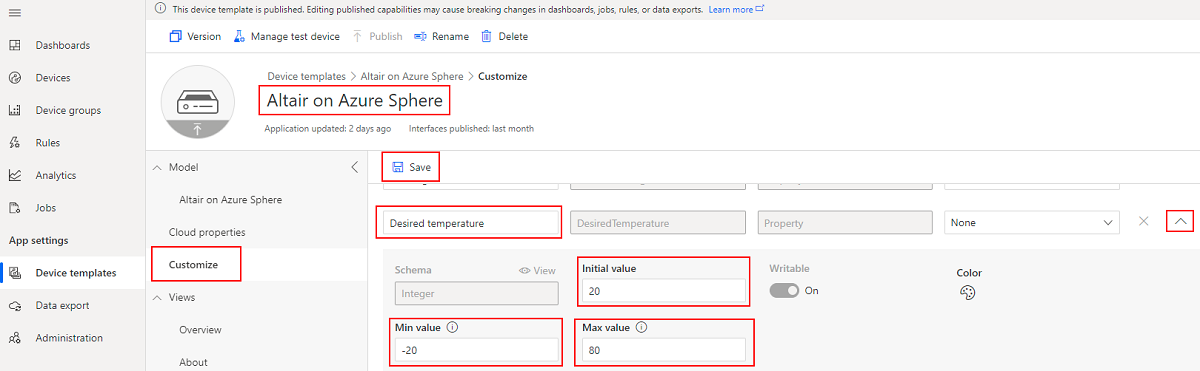
Display name Initial value Min. value Max. value True name False name Desired temperature 20 -20 80 n/a n/a LED brightness 2 0 15 n/a n/a CPU state On n/a n/a Running Stopped Local serial port Enabled n/a n/a Enabled Disabled Select Save.
Repeat the preceding steps for the LED brightness, CPU state, and Local serial port properties.
Add the Properties view
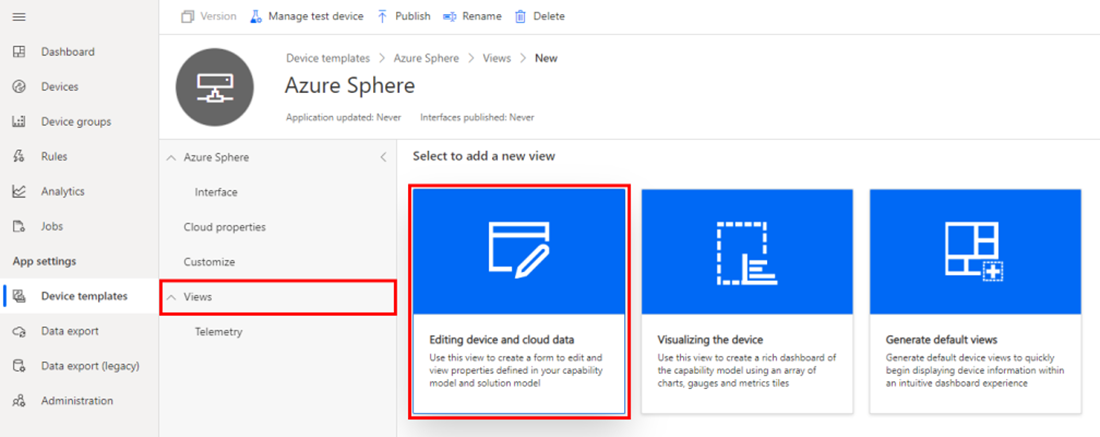
On the left pane, select Views, and then select the Editing device and cloud data tile.
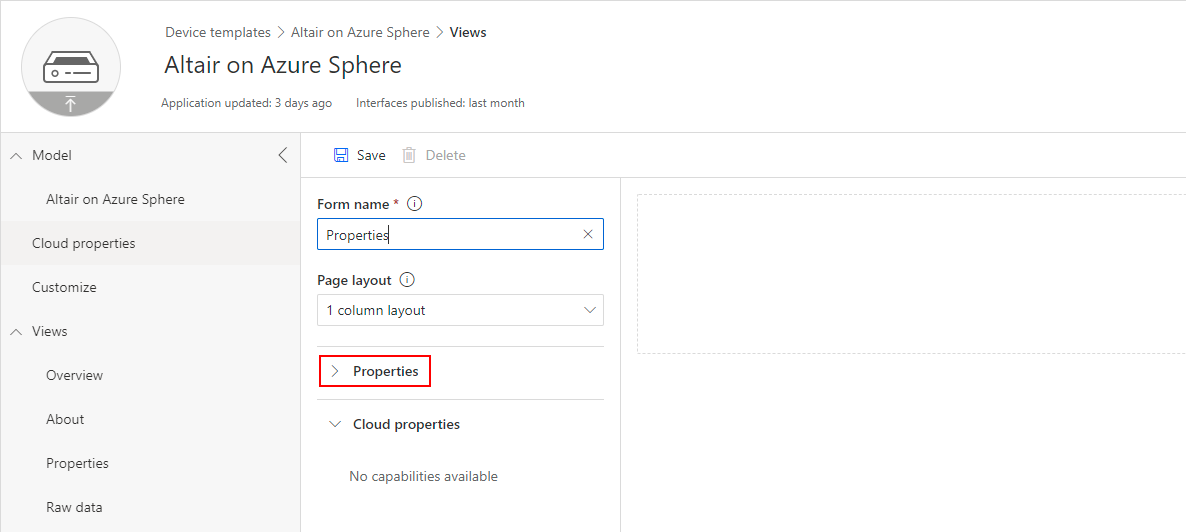
For Form name, enter Properties.
Expand Properties.
Select the checkboxes next to the following properties:
- Channel ID
- CPU state
- Desired temperature
- LED brightness
- Local serial output
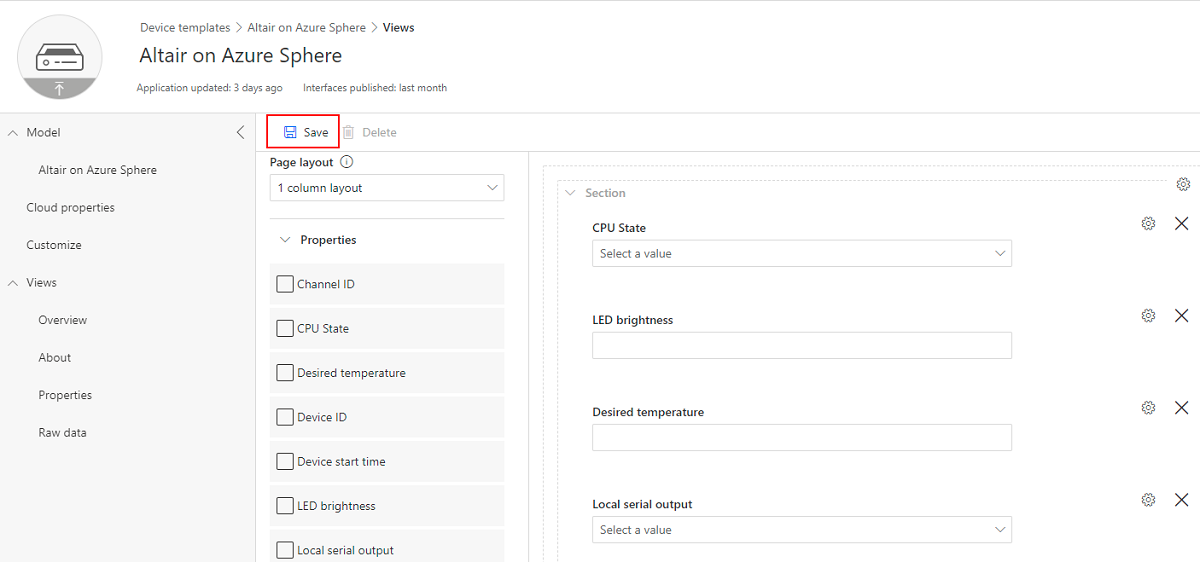
Select Add section.
Select Save.
Select Back.
Add an environment data visualization view
On the left pane, select Views, and then select the Visualizing the device tile.

Name the view Environment.
In the Start with a visual list, select Line chart, and then select Add tile.
Select the Configure icon on the tile.
Select Capability.
In the capability list, select Temperature.
Select Capability.
In the capability list, select Pressure.
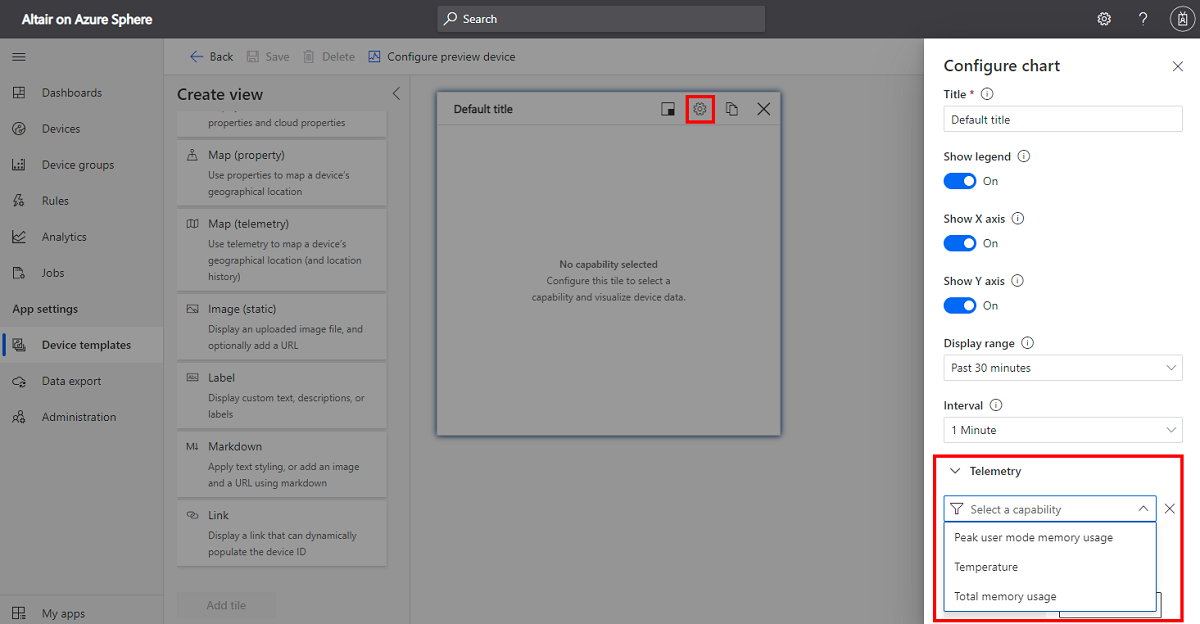
Select Update.
Select Save.
Select Back.
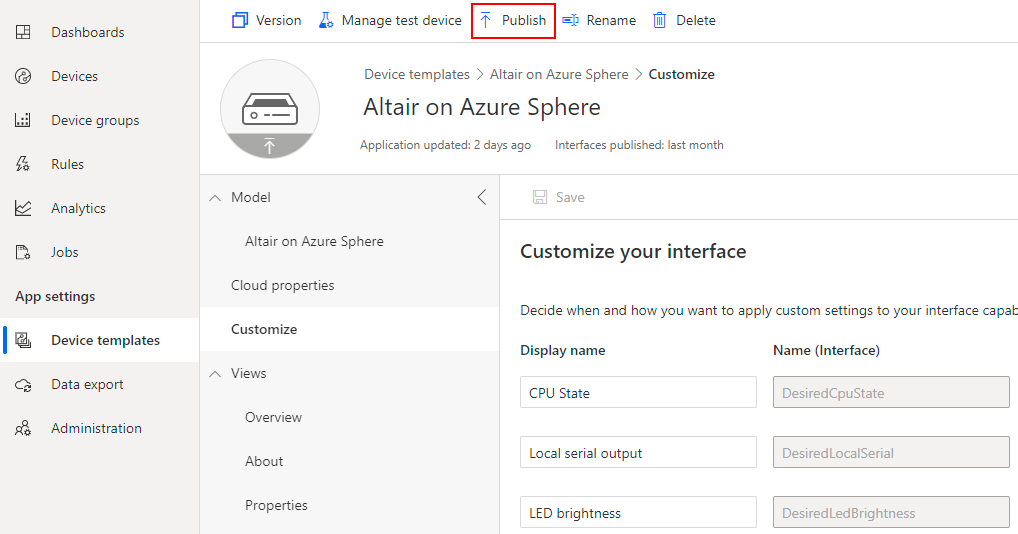
Publish the template
To publish the template to the Azure IoT Central application, select the Publish button.
View your Altair on Azure Sphere device
On the left pane, select Devices, select the Altair on Azure Sphere template, and then select your device.
To explore the device views, select the various tabs.
Update the device properties
Select the Properties tab.
For the Altair emulator initial state, enter the following values:
- CPU state: Running
- Local serial output: Disabled
- LED brightness (Avnet with LED click): 2
- Desired temperature (Celsius): 30
- The channel ID is for information only.
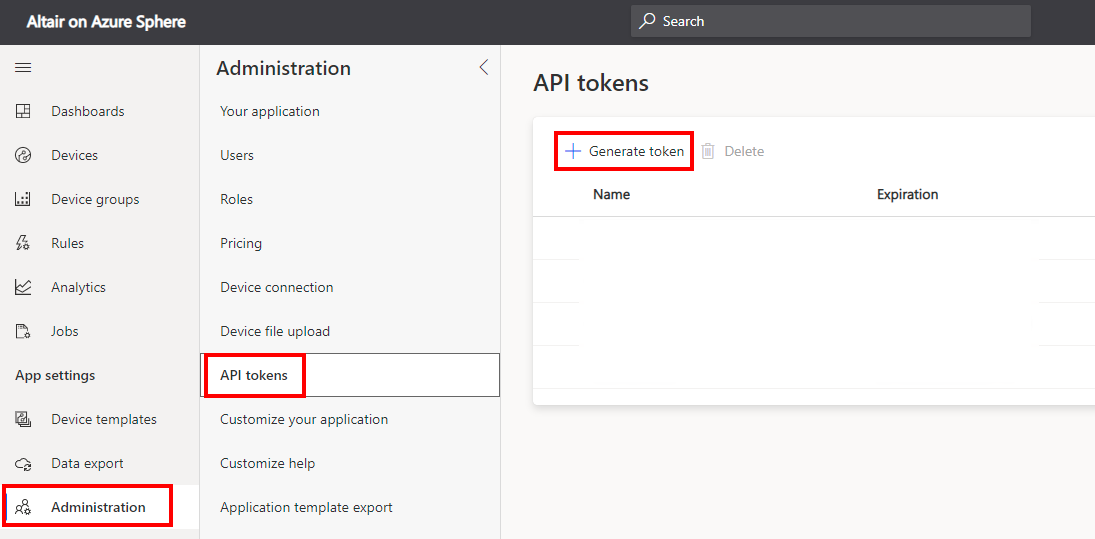
Create an Azure IoT Central API token
The web terminal uses the Azure IoT Central device name to connect to the Altair emulator. The web terminal needs an Azure IoT Central API token to access and set the channel ID property for the device name. The web terminal and the Altair emulator use the channel ID to form unique MQTT topics. Messages flow between the Altair emulator and the web terminal by using these MQTT topics.
On the Azure IoT Central left pane, select Administration, and then select API tokens.
Select New.
Name your token Altair-Web-Terminal.
Select Generate.
Copy the generated token to use in the next unit.
Generate the Azure IoT Central URL
In the next unit, when you create the Altair web terminal, you'll need to add the Azure IoT Central URL to it.
In your browser address bar, copy the base address of your Azure IoT Central application to use in the next unit, as shown in the following screenshot. Be sure to remove the trailing slash (/) character from the URL.
