Exercise - Deploy the Altair emulator to Azure Sphere
In this exercise, you'll configure the Altair emulator and deploy it to Azure Sphere.
Get your Azure Sphere tenant ID
You'll need your Azure Sphere tenant ID for the next step. To get the ID:
From the Windows PowerShell command line or Linux terminal, run the following command:
azsphere tenant show-selectedThe output of this command should look similar to the following code:
------------------------------------ -------------------
Id                                   Name
========================================================
99999999-e021-43ce-9999-fa9999499994 yourSphereTenant
------------------------------------ -------------------
Copy the Azure Sphere tenant ID to Notepad.
Open the Altair emulator with Visual Studio Code
- Start Visual Studio Code.
- Select Open folder.
- Open the Altair8800Emulator folder that you cloned to your computer.
Configure the Azure Sphere application
From Visual Studio Code, open the app_manifest.json file. The resources that this application requires must be declared in the Capabilities section.
Update the connection properties for the Azure IoT Central application:
- Update CmdArgs with your Azure IoT Central ID scope.
- Update DeviceAuthentication with the Azure Sphere tenant ID. The tenant ID is the numeric value that you got from running the
azsphere tenant show-selectedcommand.
Update AllowedConnections with the Azure IoT Central application endpoints that you copied to Notepad in an earlier module.
Include a network endpoint for test.mosquitto.org in the AllowedAllowedConnections list.
If you want, format app_manifest.json by right-clicking it and selecting Format Document from the shortcut menu.
Review your updated app_manifest.json file. It should look similar to the following code:
{
  "SchemaVersion": 1,
  "Name": "AltairHL_emulator",
  "ComponentId": "ac8d863a-4424-11eb-b378-0242ac130002",
  "EntryPoint": "/bin/app",
  "CmdArgs": [ "--ScopeID", "0ne0099999D" ],
  "Capabilities": {
    //  Uncomment the following line to enable SPI on ISU1 for the Altair front panel
    //  "SpiMaster": [ "$MT3620_ISU1_SPI" ],
    "MutableStorage": { "SizeKB": 8 },
    "Gpio": [
        "$MQTT_CONNECTED_LED",
        "$AZURE_CONNECTED_LED",
        "$SWITCHES_LOAD",
        "$SWITCHES_CHIP_SELECT",
        "$LED_MASTER_RESET",
        "$LED_STORE",
        "$LED_OUTPUT_ENABLE",
        "$BUTTON_A",
        "$BUTTON_B",,
        "$LED_RED",
        "$LED_GREEN",
        "$LED_BLUE"
    ],
    "Uart": [ "$MT3620_ISU3_UART" ],
    "I2cMaster": [ "$ISU2" ],
    "PowerControls": [ "ForceReboot" ],
    "AllowedConnections": [
        "test.mosquitto.org",
        "global.azure-devices-provisioning.net",
        "iotc-9999bc-3305-99ba-885e-6573fc4cf701.azure-devices.net",
        "iotc-789999fa-8306-4994-b70a-399c46501044.azure-devices.net",
        "iotc-7a099966-a8c1-4f33-b803-bf29998713787.azure-devices.net",
        "iotc-97299997-05ab-4988-8142-e299995acdb7.azure-devices.net",
        "iotc-d099995-7fec-460c-b717-e99999bf4551.azure-devices.net",
        "iotc-789999dd-3bf5-49d7-9e12-f6999991df8c.azure-devices.net",
        "iotc-29999917-7344-49e4-9344-5e0cc9999d9b.azure-devices.net",
        "iotc-99999e59-df2a-41d8-bacd-ebb9999143ab.azure-devices.net",
        "iotc-c0a9999b-d256-4aaf-aa06-e90e999902b3.azure-devices.net",
        "iotc-f9199991-ceb1-4f38-9f1c-13199992570e.azure-devices.net",
        "api.timezonedb.com",
        "api.openweathermap.org",
        "get.geojs.io"
    ],
    "DeviceAuthentication": "9d799999-9999-43ce-9999-fa8888888894"
    "AllowedApplicationConnections": [
        "2e319eae-7be5-4a0c-ba47-9353aa6ca96a",
        "9b684af8-21b9-42aa-91e4-621d5428e497"
    ]
  },
  "ApplicationType": "Default"
}
Save the updated app_manifest.json file.
Set your developer board configuration
The Altair project works on Azure Sphere developer boards from Avnet and Seeed Studio. The default developer board configuration is the Avnet Azure Sphere Starter Kit Revision 1 with no front panel.
In Visual Studio Code, go to the cmake folder.
Open the altair_config.cmake file.
Add
#at the beginning of theset AVNETline to disable it.Uncomment the
setcommand that corresponds to your Azure Sphere developer board. Ensure that only one developer board is enabled.# SELECT DEVELOPER BOARD ########################################################################################## # set(AVNET TRUE "AVNET Azure Sphere Starter Kit Revision 1 ") # set(AVNET_REV_2 TRUE "AVNET Azure Sphere Starter Kit Revision 2 ") # set(SEEED_STUDIO_RDB TRUE "Seeed Studio Azure Sphere MT3620 Development Kit (aka Reference Design Board or rdb)") # ###################################################################################################################Select your front panel configuration. Uncomment the
setcommand that corresponds to your front panel configuration. Ensure that only one front panel configuration is enabled.# SELECT FRONT PANEL CONFIG ####################################################################################### # set(ALTAIR_FRONT_PANEL_NONE TRUE "Altair on Azure Sphere with no panel.") # set(ALTAIR_FRONT_PANEL_RETRO_CLICK TRUE "Avnet with the MikroE 8800 Retro Click") # set(ALTAIR_FRONT_PANEL_KIT TRUE "Altair front panel board") # ###################################################################################################################Enable SD card support by uncommenting the
setcommand. This step is only for the Avnet Azure Sphere Starter Kit with the MikroE microSD Click.# ENABLE SD CARD ################################################################################################## # # The MikroE microSD Click must be placed in socket 1 of the Avnet Azure Sphere Starter Kit # Uncomment the "set(MICRO_SD_CLICK" line below to enable the MikroE microSD Click # # set(MICRO_SD_CLICK TRUE "MikroE microSD Click for CP/M read/write to SD Card") # ###################################################################################################################By default, the Altair emulator boots CP/M on startup. If you want to boot Altair BASIC, comment out the
add_compile_definitions(BOOT_CPM)command.Note
You can't save files to the SD card or the virtual disk server from Altair BASIC.
# BOOT CONFIG #####################################################################################################
#
# Comment out the "add_compile_definitions(BOOT_CPM) line below to boot Altair BASIC 4.0
#
add_compile_definitions(BOOT_CPM)
#
###################################################################################################################
Save the altair_config.cmake file. Saving the file will autogenerate the CMake cache.
Enable support for the Altair front panel
Ignore this step if you haven't built the Altair front panel kit.
- Open the app_manifest.json file.
- Uncomment the line
// "SpiMaster": [ "$MT3620_ISU1_SPI" ],by removing the//characters.
Deploy the application to Azure Sphere
Start the app build and deployment process
Open main.c.
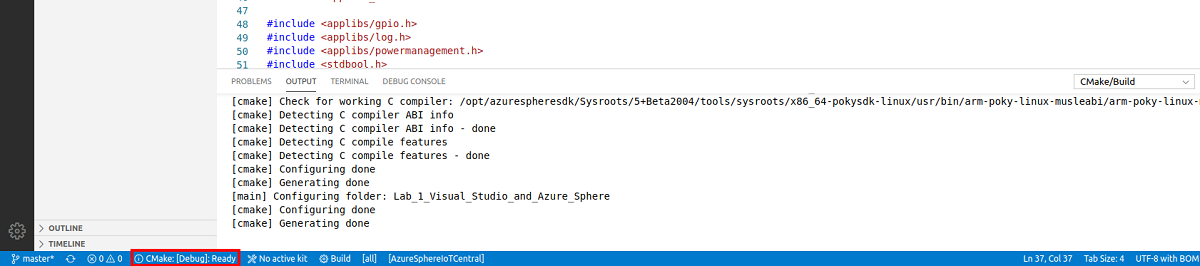
Select CMake: [Release]: Ready from the Visual Studio Code status bar.
From Visual Studio Code, select Ctrl+F5 to build, deploy, and start the application on the Azure Sphere device.

View debugger output
Select the Visual Studio Code Output tab to view the output from Log_Debug statements in the code. You'll see the device negotiating security with Azure IoT Central.
Tip
You can also open the Output tab by using the Visual Studio Code Ctrl+Shift+U shortcut.
Observe device behavior
Observe the WLAN status LED on your developer board while the device establishes a secure connection to Azure IoT Central and the MQTT broker:
- While the device is establishing a Wi-Fi connection, the WLAN LED will blink on for 700 ms and then off for 700 ms.
- While the device is establishing a connection to Azure IoT Central and the MQTT broker, the WLAN LED will blink on for 100 ms and then off for 1,300 ms.
- When the connection has been established with Azure IoT Central, the WLAN LED will blink on for 1,400 ms and then off for 100 ms.