Use the Outlook interface for Business Central
Business Central empowers you to manage business interactions with your customers and vendors directly in Microsoft Outlook. With the Business Central Outlook add-in, you can see financial data that is related to customers and vendors, in addition to being able to create and send financial documents such as quotes and invoices.
Get the add-in
You can install the Business Central Outlook add-in in two ways. You can choose to execute this installation in a centralized way. This means specific users, groups or the entire organization. You can start this process from assisted setup in Business Central.
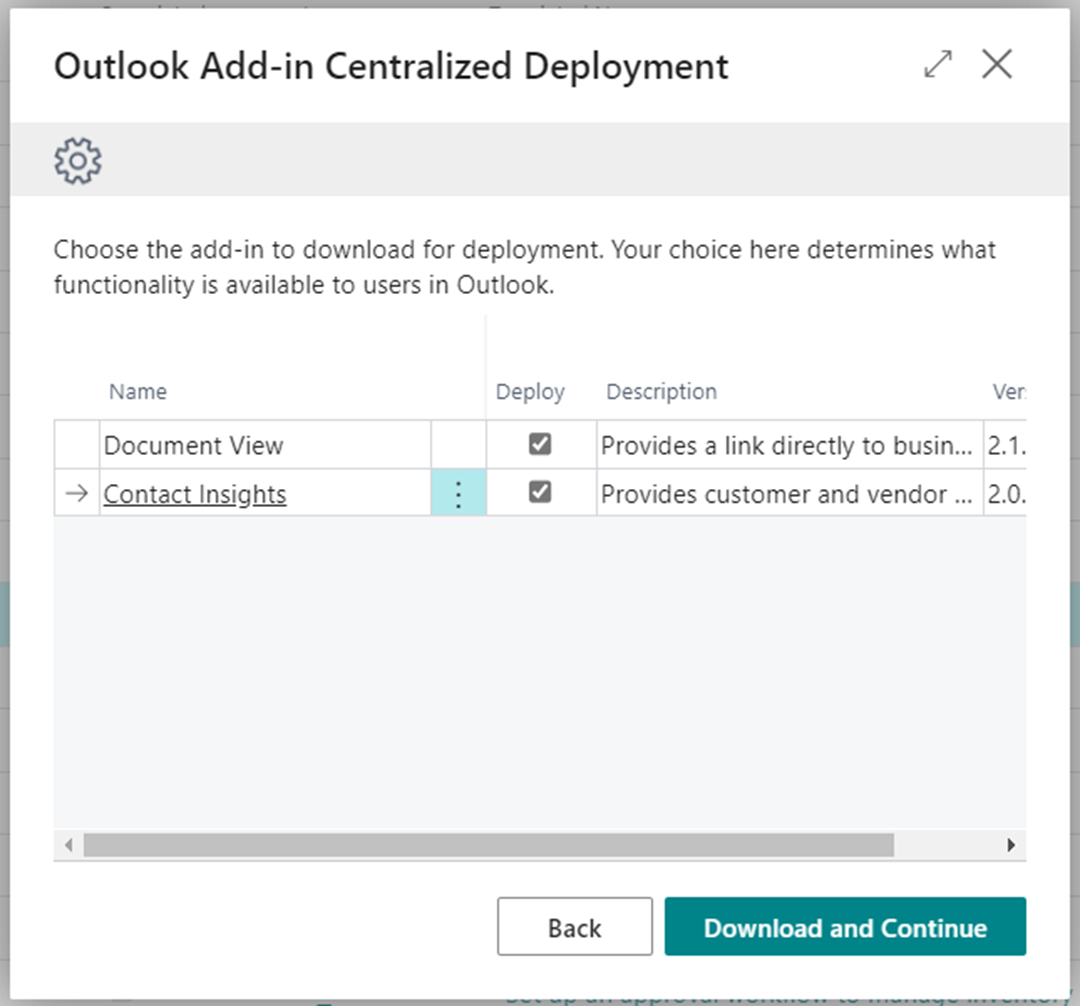
Search for assisted setup and then for Outlook. You will then find the Outlook Add-in Centralized Deployment wizard. In order to deploy an add-in using Centralized Deployment, you need to be either a Global admin or an Exchange admin in the organization.
This wizard is intended for an admin to assign the add-in directly to one or many users or the entire organization. The wizard allows you to select the functionality you want to leverage. You probably want to assign to your users both the document view and the contact insights.
In the next step, you'll need to configure Microsoft 365 from the admin center by following the deployment instructions.
A second option is to use the Get the Outlook Add-in wizard in Business Central.
With this wizard, you can set up Outlook with Business Central for your own Outlook account.
Run the wizard and confirm the option to receive a sample email message from a contact in the evaluation company to evaluate the Outlook add-in.
Confirm the option to receive a sample email message from a contact in the evaluation company to evaluate the Outlook add-in.
You are now ready to start using Outlook as the interface for Business Central. You'll find an email in your Business Central Inbox confirming that you can now use the Outlook interface for Business Central.
Use Contact Insights
You can look up and consult Business Central information directly from email with Contact Insights.
Select the assist edit button in the upper-right corner of the email, and then locate Contact Insights on the Business Central menu.
If you run assisted setup successfully but don't see Contact Insights as shown in the preceding image, you might want to wait because it might take some time before this configuration influences your Outlook client (it might take several hours).
Select Contact Insights to open the menu. You might need to sign in. You can pin and unpin the Contact Insights menu.
From this menu you can conveniently:
Create new documents.
Look up the customer details by switching between details.
Edit the customer's details in Business Central.
Go to the contact card page.
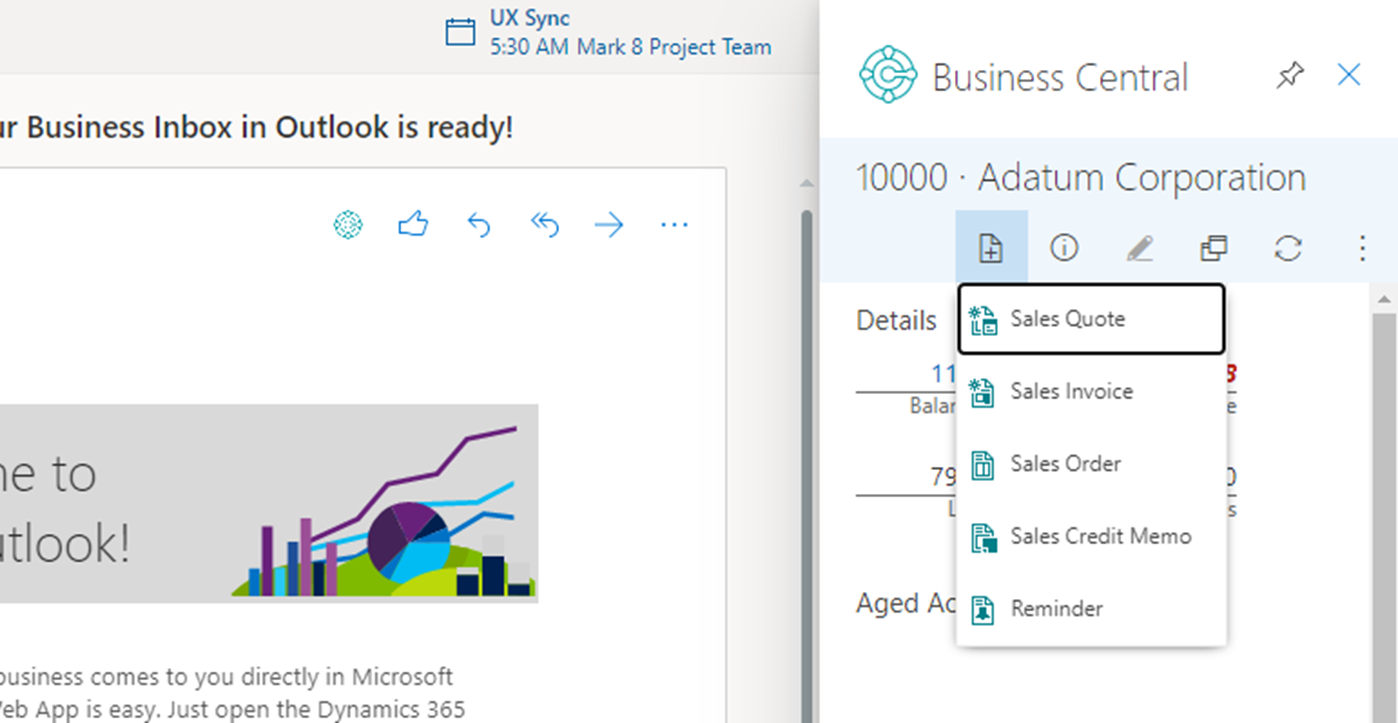
You can create the following new documents directly from within Outlook:
Sales quotes
Sales invoices
Sales orders
Sales credit memos
Reminders
Select New, select the document that you want to create, and then you can start processing your new document. The document will be created for the involved contact. The header of the document will be populated automatically so that you can focus on the lines section.
The Business Central integration app will check the text of the email to search for matching items. If matching items are found, then suggested line items are created. In this way, your lines are also populated automatically.
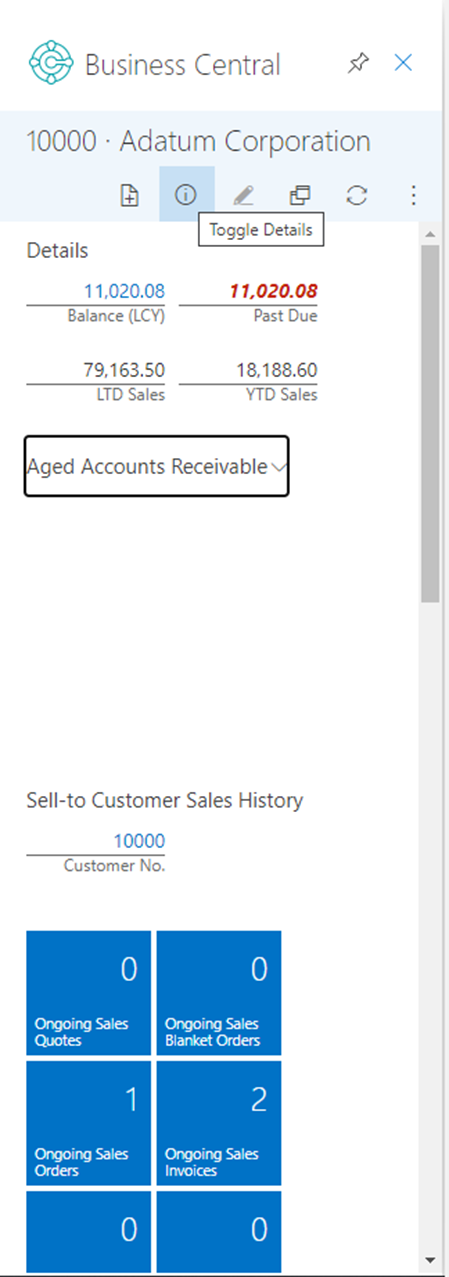
You might want to consult the customer details only. Use the Toggle Details functions and find the customer information that you need.
If needed, you can edit the customer's details in Business Central directly from Outlook.
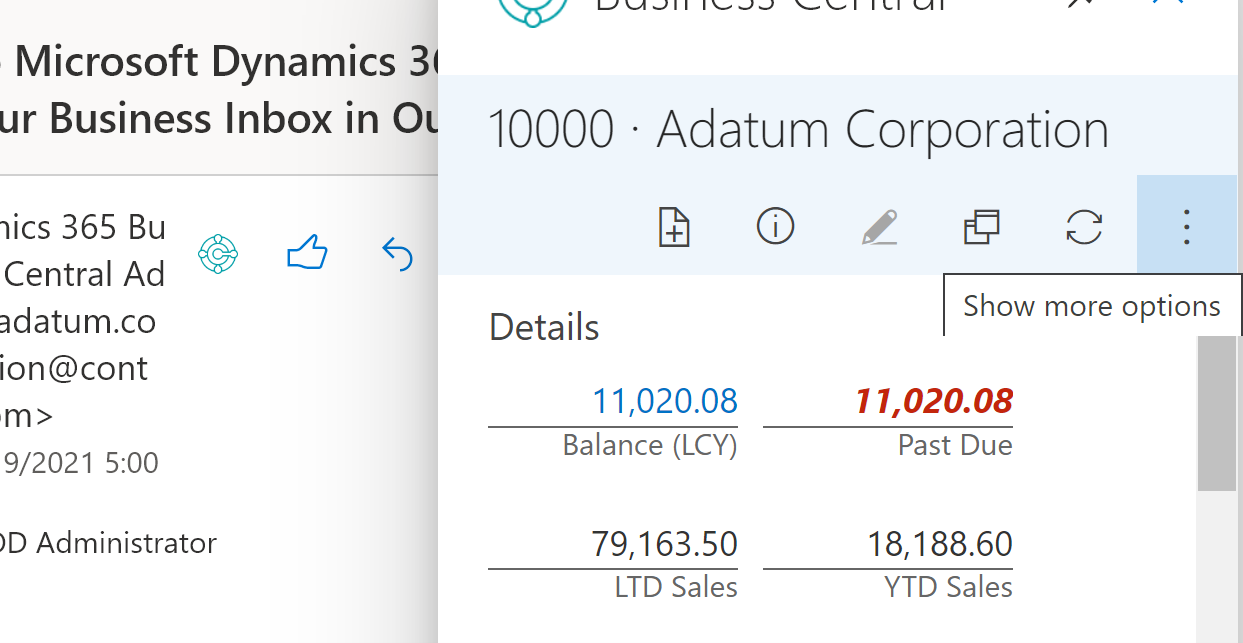
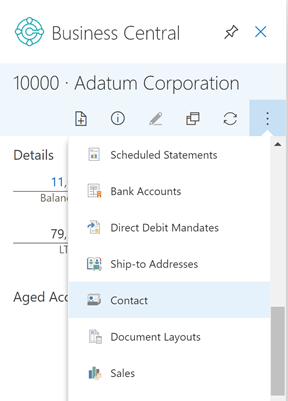
You can also find the corresponding contact for this customer. Select Show more options.
Scroll down until you see Contact in the list.
You can open the contact card page by selecting Contact and then use relationship management functionalities, such as creating opportunities directly from Outlook.
This explanation began with an existing customer in the scenario. You received an email from Adatum Corporation, which is known in Business Central as a customer. The Business Central connection app in Outlook recognized this customer and was able to show all relevant Business Central information.
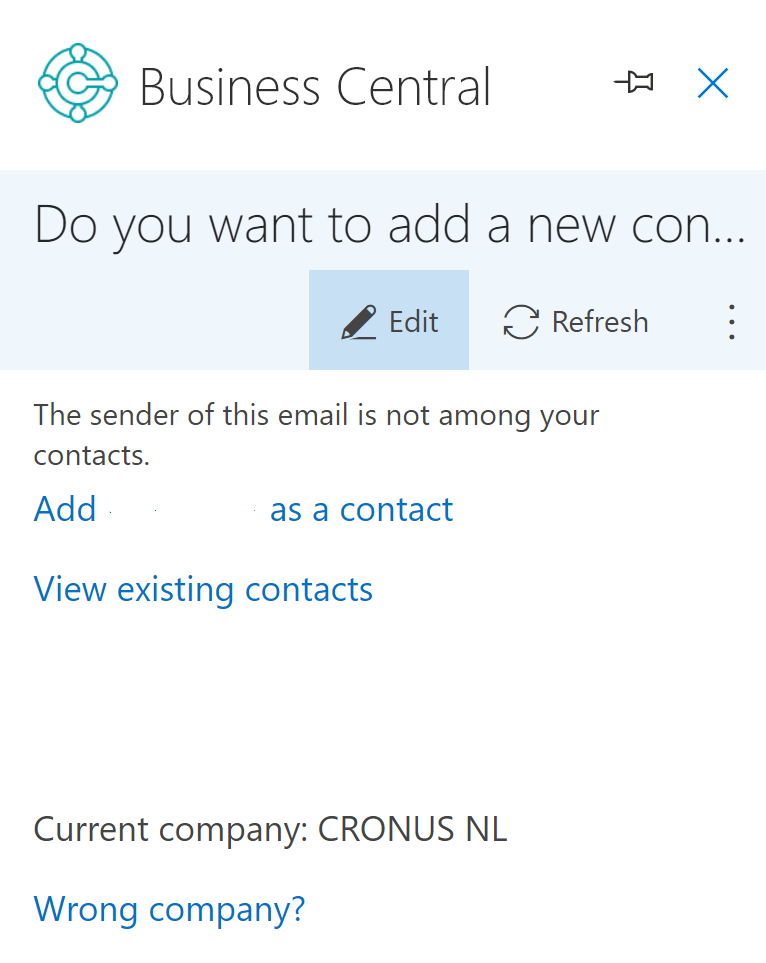
However, in a scenario where you receive an email from someone who is unknown in Business Central, you'll be asked if you want to register this person as a contact in Business Central.
The Outlook integration with Business Central works on the tenant level and you'll be able to switch between companies.

