Exercise - Authorize your service principal for deployments
In the previous exercise, you created a service principal for your website's deployment pipeline, and you tested that you could sign in by using its key. Now you're ready to grant the service principal access to your Azure environment. In this exercise, you'll create a role assignment for the service principal, and then deploy a Bicep file by using the service principal.
During the process, you'll:
- Sign in as your own user account.
- Create a resource group for your company's website.
- Create a role assignment to allow the service principal to deploy resources to the resource group.
- Sign in as the service principal and deploy the Bicep file that creates your company's website resources.
- Verify the deployment.
- Clean up the resource group and service principal.
Sign in as your user account
In the previous exercise, you signed in by using the service principal and then signed out. You need to sign in as your own user account again so that you can follow along with the next steps in this exercise.
In Visual Studio Code's Azure Cloud Shell (bash) terminal, sign in to Azure by running the following command:
Azure CLIaz loginIn the browser that opens, sign in to your Azure account.
In Visual Studio Code's Azure Cloud Shell (PowerShell) terminal, sign in to Azure by running the following command:
Azure PowerShellConnect-AzAccountIn the browser that opens, sign in to your Azure account.
Create a resource group
Now you'll create a resource group to contain the toy company's website resources.
Run this Azure CLI command in the Visual Studio Code terminal to create a resource group:
Azure CLIaz group create --name ToyWebsite --location eastusLook at the JSON output from the previous command. It includes a property named
id, which is the resource group's ID. Copy this somewhere safe. You'll use it soon.
Run this Azure PowerShell command in the Visual Studio Code terminal to create a resource group:
Azure PowerShellNew-AzResourceGroup -Name ToyWebsite -Location eastusLook at the output from the previous command. It includes a property named
ResourceId, which is the resource group's ID. Copy this somewhere safe. You'll use it soon.
Create a role assignment
For your website's deployment pipeline, you decide to create a role assignment with the following details:
- Assignee: The service principal that you created in the previous exercise.
- Role: The Contributor built-in role.
- Scope: The resource group that you created in the previous step.
Run the following Azure CLI command in the Visual Studio Code terminal to create the role assignment. Replace the placeholders with the values that you copied earlier.
az role assignment create \
  --assignee APPLICATION_ID \
  --role Contributor \
  --scope RESOURCE_GROUP_ID \
  --description "The deployment pipeline for the company's website needs to be able to create resources within the resource group."
Run the following Azure CLI command in the Visual Studio Code terminal to create the role assignment. Replace the placeholders with the values that you copied earlier.
New-AzRoleAssignment `
  -ApplicationId APPLICATION_ID `
  -RoleDefinitionName Contributor `
  -Scope RESOURCE_GROUP_ID `
  -Description "The deployment pipeline for the company's website needs to be able to create resources within the resource group."
Create a Bicep file
You previously created a Bicep file that deploys your website's resources. Here, you save this file so that you can test it by using the service principal.
Create a new file called main.bicep.
Add the following content to the main.bicep file. You'll deploy the template soon.
Bicep@description('The Azure region into which the resources should be deployed.') param location string = resourceGroup().location @description('The name of the App Service app.') param appServiceAppName string = 'toywebsite${uniqueString(resourceGroup().id)}' @description('The name of the App Service plan SKU.') param appServicePlanSkuName string = 'F1' var appServicePlanName = 'toy-website-plan' var applicationInsightsInstanceName = 'toy-website-insights' resource appServicePlan 'Microsoft.Web/serverFarms@2020-06-01' = { name: appServicePlanName location: location sku: { name: appServicePlanSkuName } } resource applicationInsightsInstance 'Microsoft.Insights/components@2018-05-01-preview' = { name: applicationInsightsInstanceName location: location kind: 'web' properties: { Application_Type: 'web' } } resource appServiceApp 'Microsoft.Web/sites@2020-06-01' = { name: appServiceAppName location: location properties: { serverFarmId: appServicePlan.id httpsOnly: true siteConfig: { appSettings: [ { name: 'APPINSIGHTS_INSTRUMENTATIONKEY' value: applicationInsightsInstance.properties.InstrumentationKey } { name: 'APPLICATIONINSIGHTS_CONNECTION_STRING' value: applicationInsightsInstance.properties.ConnectionString } ] } } }Save the changes to the file. You can either select File > Save As or select Ctrl+S in Windows (⌘+S on macOS). Be sure to remember where you've saved the file. For example, you might want to create a scripts folder to save it in.
Deploy the Bicep file by using the service principal
You don't currently have a deployment pipeline, so you'll simulate what a pipeline does to deploy your Bicep file.
Run the following Azure CLI command in the Visual Studio Code terminal to sign in by using the service principal's credentials. Replace the placeholders with the values that you copied in the previous exercise.
Azure CLIaz login --service-principal \ --username APPLICATION_ID \ --password SERVICE_PRINCIPAL_KEY \ --tenant TENANT_IDDeploy the Bicep file by running the following Azure CLI command:
Azure CLIaz deployment group create \ --resource-group ToyWebsite \ --template-file main.bicepThe deployment might take a minute or two to finish, and then you'll see a successful deployment.
Run the following Azure PowerShell command in the Visual Studio Code terminal to securely prompt you for the service principal's credentials. Use the service principal's application ID and key from the previous exercise for the username and password, respectively.
Azure PowerShell$credential = Get-CredentialRun the following Azure PowerShell command in the Visual Studio Code terminal to sign in by using the service principal's credentials. Replace the
TENANT_IDplaceholder with the value that you copied earlier.Azure PowerShellConnect-AzAccount -ServicePrincipal ` -Credential $credential ` -Tenant TENANT_IDDeploy the Bicep file by running the following Azure PowerShell command:
Azure PowerShellNew-AzResourceGroupDeployment -ResourceGroupName ToyWebsite -TemplateFile main.bicepThe deployment might take a minute or two to finish, and then you'll see a successful deployment.
Verify the deployment
Use the Azure portal to inspect the resources that you deployed and to inspect the results of the deployment.
Go to the Azure portal.
On the left pane, select Resource groups.
Select ToyWebsite.
Select Deployments to see the successful deployment.
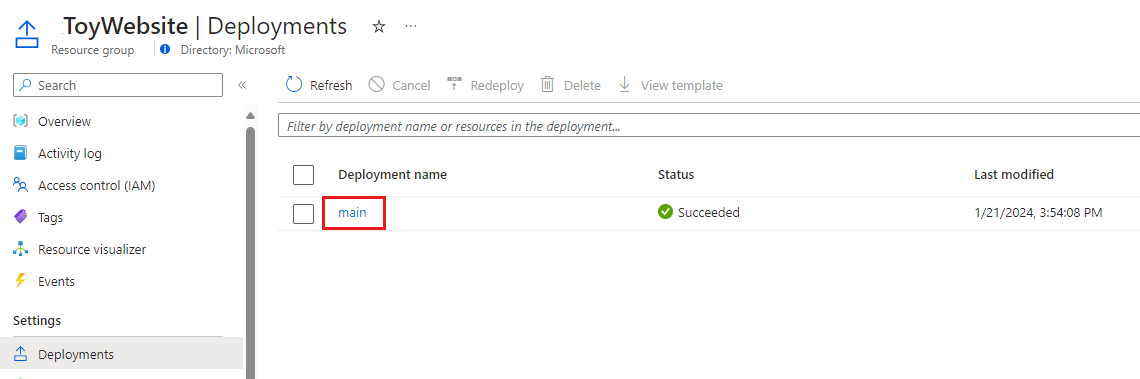
You might also see a deployment named Failure-Anomalies-Alert-Rule-Deployment. Application Insights creates this deployment automatically.
Select the main deployment to see what resources were deployed, and then expand Deployment details.
In this case, the App Service plan, the app, and the Application Insights instance are listed.
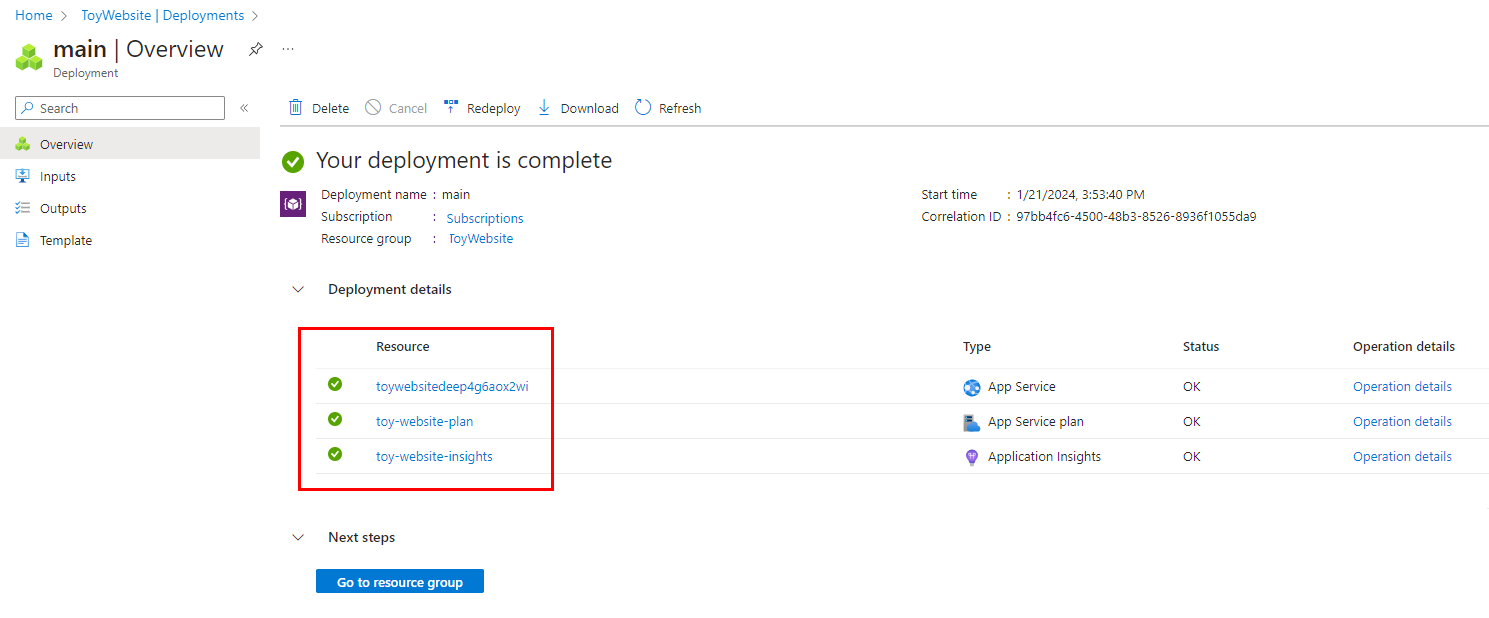
Notice that there's nothing unusual about this deployment. Even though a service principal initiated it, it's just like any other Bicep deployment.
Clean up the resource group and service principal
You've successfully created a service principal and role assignment, and you've deployed your website's resources by using a Bicep file. You can now remove the resources that you created.
Sign out of the service principal's account by using the following command:
Azure CLIaz logoutSign back in to Azure with your own user account by running the following command:
Azure CLIaz loginIn the browser that opens, sign in to your Azure account.
Run the following Azure CLI command to delete the resource group, its contents, and the role assignment:
Azure CLIaz group delete --name ToyWebsiteWhen you're prompted to confirm, enter
y.Run the following command to delete the service principal. Replace the
APPLICATION_IDplaceholder with the application ID that you copied in the previous exercise:Azure CLIaz ad sp delete --id APPLICATION_ID
Sign out of the service principal's account by using the following command:
Azure PowerShellLogout-AzAccountSign back in to Azure with your own user account by running the following command:
Azure PowerShellConnect-AzAccountIn the browser that opens, sign in to your Azure account.
Run the following Azure PowerShell command to delete the resource group, its contents, and the role assignment:
Azure PowerShellRemove-AzResourceGroup -Name ToyWebsiteWhen you're prompted to confirm, enter
y.Run the following command to delete the service principal. Replace the
APPLICATION_IDplaceholder with the application ID that you copied in the previous exercise:Azure PowerShellRemove-AzADServicePrincipal -ApplicationId APPLICATION_IDWhen you're prompted to confirm, enter
y.
Next unit: Knowledge check
Having an issue? We can help!
- For issues related to this module, explore existing questions using the #azure training tag or Ask a question on Microsoft Q&A.
- For issues related to Certifications and Exams, post on Certifications Support Forums or visit our Credentials Help.