Create steps in your guide
Steps are the central building block for creating a guide in Dynamics 365 Guides. After you create the structure for your guide on the Outline page, you use the Step Editor to add instructional text and 3D models or media to support those steps. The instructions that you create in the what-you-see-is-what-you-get (WYSIWYG) Step Editor match what the operator will see on the Step card on HoloLens.
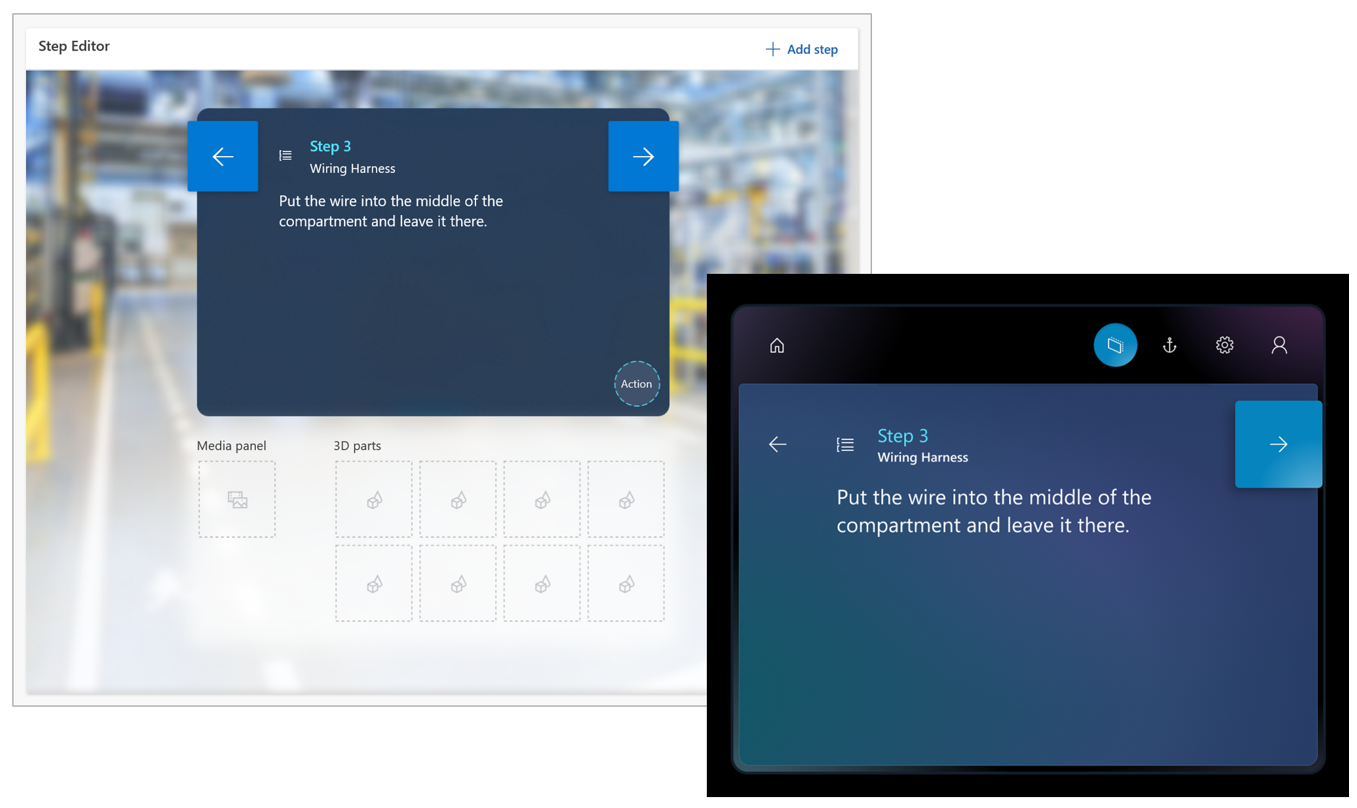
The following illustration shows the Step Editor in the PC app and the Step card that the user sees on HoloLens.
Open the Step Editor and add instructions
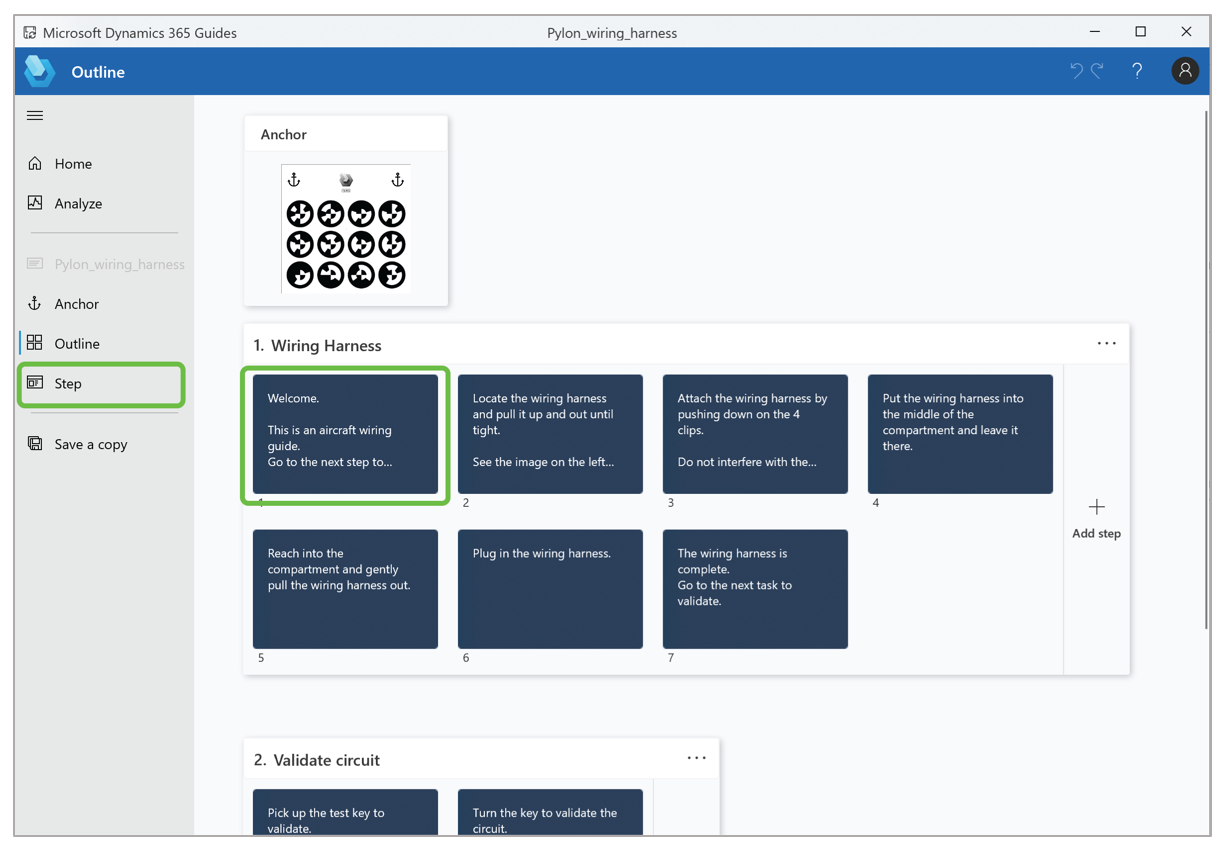
You open the Step Editor page from the Outline page.
Select any step on the Outline page, or select Step in the left navigation.
Enter your instructional text in the blue rectangle in the middle of the page.
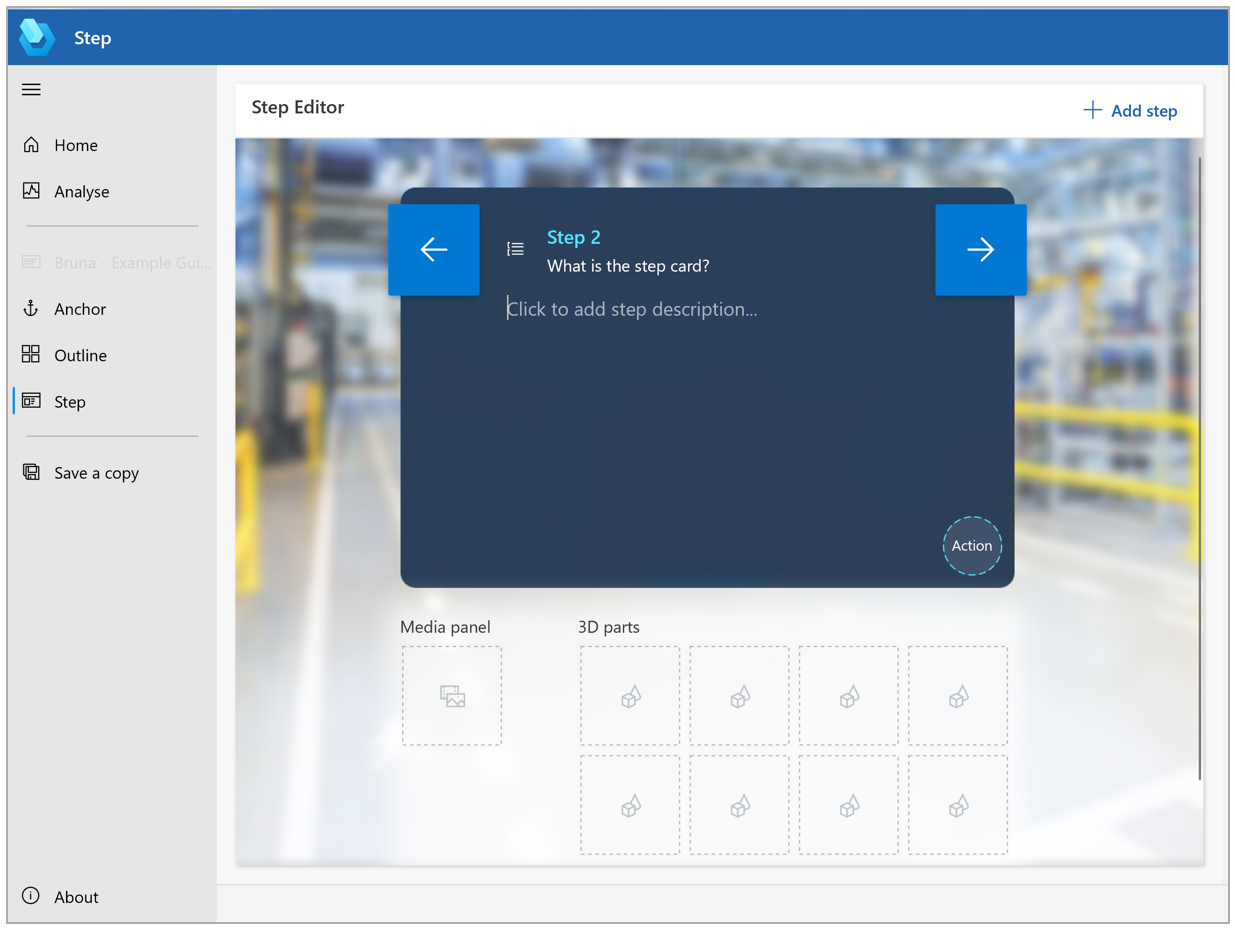
When you're ready to add another step, select Add step in the upper-right corner of the page.
Best practices for instructional text and supporting content
Here are some best practices that we recommend.
You can add lots of steps, but keep the text short. Instruction text is limited to 280 characters per step.
For the best results, write your guide in casual human language. Avoid technical jargon.
Use descriptive words, such as locate, find, get, go to, pick up, put down, insert, attach, and remove.
NOTE steps are useful for quality checks. This type of step can come before or after another step. Just be sure to add it in the right place.
Add a WARNING step for things that could be dangerous or cause a quality issue. To reinforce the warning, you can add a style in the HoloLens app.
Substeps inside a step can be helpful, but feel free to create separate steps for easier reading.
When you've finished writing a step, be sure to move the cursor outside the text box to activate Auto-Save.
Try to limit yourself to one type of content per step. Too much media or 3D content can overwhelm the operator and can be too time-consuming to absorb. Think about the type of content that best gets across the point.
Go to other pages from the Step Editor page
Use the buttons in the navigation pane on the left side of the Step Editor page to go to other pages in the PC app. The following list describes the buttons in the navigation pane.
Open navigation button
 Expand the navigation bar so that it includes a description for each button.
Home button
 Go to the Welcome page, where you can create a new guide or open an existing guide.
Analyze button
 Go to the Analyze page, where you can set up Power BI reports (Guides Analytics) to analyze your guides.
Anchor button
 Open the Choose an anchor method wizard, where you can select different anchoring methods for your guide or change the type anchoring method.
Outline button
 Go to the Outline page, where you can structure or restructure your guide. You can also open the Choose an anchor method wizard from that page.