Anchor a guide
When you open a guide in the Microsoft Dynamics 365 Guides HoloLens app, the first thing that you see is the anchoring instructions that were created in the Dynamics 365 Guides PC app. The method that you use to anchor the guide depends on the type of anchor that was created in the PC app.
For more information about how to create an anchor, and the types of anchors, see the Anchor your guide to the real world unit in this module.
Anchor a guide by using a QR code anchor
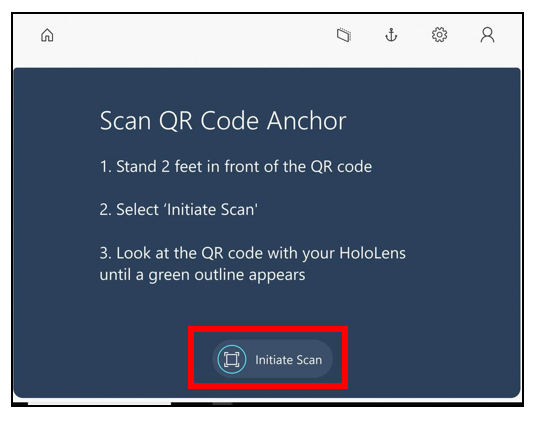
To anchor a guide by using a QR code anchor, follow these steps.
Put on your HoloLens, and stand about two feet in front of the QR code anchor.
On the Scan QR Code Anchor page, select Initiate Scan.
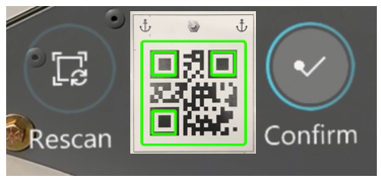
With your HoloLens, look at the QR code anchor until a green outline appears. Use your gaze to align the green box with the anchor, and then select Confirm.
On the QR Code Anchor Found page, select Confirm.
Tip
You can re-align holographic content that might seem offset from the real world (for example, a rectangle that should be highlighting a tool, but is floating in the air away from the tool bench). When using a QR code anchor, a good way to control hologram offset is to make sure the green outline aligns with the QR code. If the green outline isn’t aligned, you may need to tap the Anchor button to rescan.
Anchor a guide by using a circular code anchor
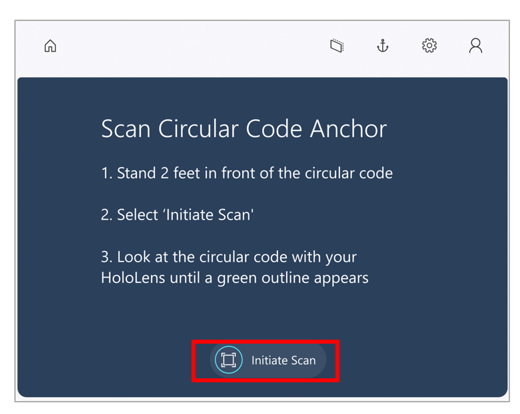
To anchor a guide by using a circular code anchor, follow these steps.
Put on your HoloLens, and stand about two feet in front of the circular code anchor.
On the Scan Circular Code Anchor page, select Initiate Scan.
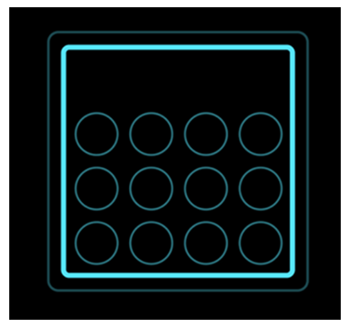
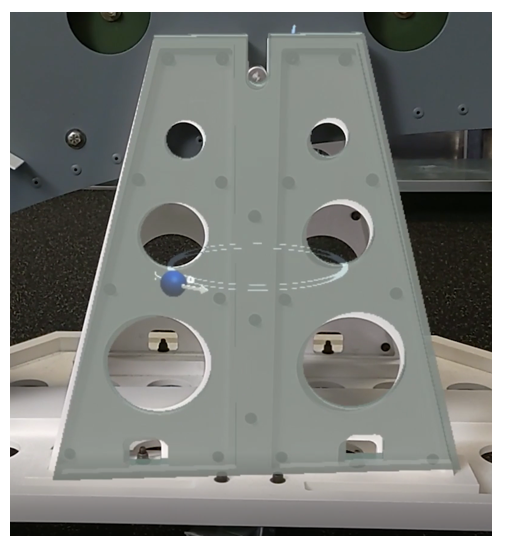
On your HoloLens, you will see a holographic image that looks like the following illustration.
With your HoloLens, look at the circular code anchor until a green outline appears. Use your gaze to align the green box with the anchor, and then select Confirm.
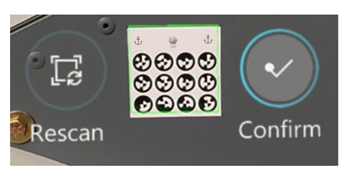
On the Circular Code Anchor Found page, select Confirm.
Tip
You can re-align holographic content that might seem offset from the real world (for example, a rectangle that should be highlighting a tool, but is floating in the air away from the tool bench). When using a circular code anchor, a good way to control hologram offset is to make sure the green outline aligns with the circular code. If the green outline isn’t aligned, you may need to tap the Anchor button to rescan.
Anchor a guide by using a holographic anchor
Use air tap and hold to move the holographic anchor and align it to its real-world counterpart. To rotate the anchor, tap and hold the blue spheres.
On HoloLens 2, you can use your hand to directly select and place a digital anchor when you author a guide.
Tip
You can re-align holographic content that might seem offset from the real world (for example, a rectangle that should be highlighting a tool, but is floating in the air away from the tool bench). When using a holographic anchor, select the Anchor button to make sure the digital version of the real object and the object itself are still aligned.
Re-anchor a guide
When you anchor your guide, the anchoring information is stored on your HoloLens. Therefore, you don't have to re-anchor the guide every time that you open it. However, you can use the Anchor button to re-anchor a guide at any time, if you feel that the holograms are out of alignment. For more information, see the Place holograms, add styles, and more unit in this module.