Exercise - Work with change data capture
This module requires a sandbox to complete. A sandbox gives you access to free resources. Your personal subscription will not be charged. The sandbox may only be used to complete training on Microsoft Learn. Use for any other reason is prohibited, and may result in permanent loss of access to the sandbox.
Microsoft provides this lab experience and related content for educational purposes. All presented information is owned by Microsoft and intended solely for learning about the covered products and services in this Microsoft Learn module.
In this exercise, you'll start by enabling CDC to track the data changes on table, and then fetch and review the changes.
In Azure SQL Database, CDC uses a scheduler that invokes stored procedures to start periodic capture and cleanup of the CDC tables. The scheduler runs capture and cleanup automatically within SQL Database, without any external dependency for reliability or performance. Users still have the option to run capture and cleanup manually on demand.
You'll need SQL Server Management Studio to connect to your database and complete these exercises.
Key use cases
- Tracking data changes for audit purposes
- Propagating changes to downstream subscribers or executing ETL operations to move all the data changes from the OLTP system to the data lake or warehouse
- Performing analytics on change data
- Programming reactive/event-based solutions
Setup: Use the scripts to deploy Azure SQL Database
At the right is Azure Cloud Shell, which is a way to interact with Azure by using a browser. Before you start the exercise, you'll run a script in Cloud Shell to create your environment database AdventureWorksLT in Azure SQL Database. In the script, you'll be prompted for a password for the new database and your local IP address to enable your device to connect to the database.
These scripts should take three to five minutes to complete. Be sure to note your password, unique ID, and region, because they won't be shown again.
Start by obtaining your local IP address. Ensure that you're disconnected from any VPN service, and open a local PowerShell terminal on your device. Run the following command and note the resulting IP address:
PowerShell(Invoke-WebRequest -Uri "https://ipinfo.io/ip").ContentTip
If you're not on a Windows device, you need to locate your IP address with another method. In your terminal, you can run
curl ifconfig.co.Run the following commands in Cloud Shell. Enter a complex password and, at the prompt, enter your local public IP address, which you obtained in the preceding step.
PowerShell$adminSqlLogin = "cloudadmin" $password = Read-Host "Your username is 'cloudadmin'. Enter a password for your Azure SQL Database server that meets the password requirements" # Prompt for local ip address $ipAddress = Read-Host "Disconnect your VPN, open PowerShell on your machine and run '(Invoke-WebRequest -Uri "https://ipinfo.io/ip").Content'. Enter the value (include periods) next to 'Address': " # Get resource group and location and random string $resourceGroup = Get-AzResourceGroup | Where ResourceGroupName -like "Sandbox resource group name" $resourceGroupName = "Sandbox resource group name" $uniqueID = Get-Random -Minimum 100000 -Maximum 1000000 $storageAccountName = "mslearnsa"+$uniqueID $location = $resourceGroup.Location # The logical server name has to be unique in the system $serverName = "dr-server$($uniqueID)"Output and store in a text file the information you'll need throughout the module by running the following code in Cloud Shell. You'll likely need to press Enter after you paste the code, because the last line won't be run by default.
PowerShellWrite-Host "Your unique ID for future exercises in this module:" $uniqueID Write-Host "Your resource group name is:" $resourceGroupName Write-Host "Your resources were deployed in the following region:" $location Write-Host "Your server name is:" $serverNameRemember to note your password, unique ID, and region. You'll use them throughout the module.
Run the following script to deploy an Azure SQL Database instance and logical server with the AdventureWorksLT sample. The script will also add your IP address as a firewall rule, enable Advanced Data Security, and create a storage account for use in future units. Allow several minutes for this script to complete.
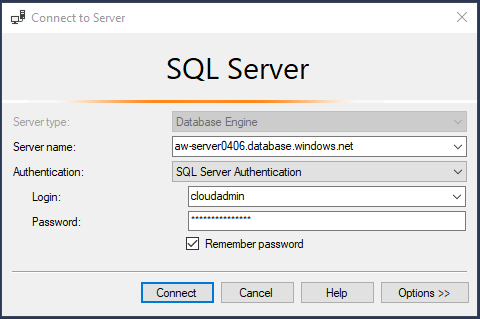
PowerShell# The logical server name has to be unique in the system $serverName = "dr-server$($uniqueID)" # The sample database name $databaseName = "AdventureWorksLT" # The storage account name has to be unique in the system $storageAccountName = $("sql$($uniqueID)") # Create a new server with a system wide unique server name $server = New-AzSqlServer -ResourceGroupName $resourceGroupName ` -ServerName $serverName ` -Location $location ` -SqlAdministratorCredentials $(New-Object -TypeName System.Management.Automation.PSCredential -ArgumentList $adminSqlLogin, $(ConvertTo-SecureString -String $password -AsPlainText -Force)) # Create a server firewall rule that allows access from the specified IP range and all Azure services $serverFirewallRule = New-AzSqlServerFirewallRule ` -ResourceGroupName $resourceGroupName ` -ServerName $serverName ` -FirewallRuleName "AllowedIPs" ` -StartIpAddress $ipAddress -EndIpAddress $ipAddress $allowAzureIpsRule = New-AzSqlServerFirewallRule ` -ResourceGroupName $resourceGroupName ` -ServerName $serverName ` -AllowAllAzureIPs # Create a database $database = New-AzSqlDatabase -ResourceGroupName $resourceGroupName ` -ServerName $serverName ` -DatabaseName $databaseName ` -SampleName "AdventureWorksLT" ` -Edition "GeneralPurpose" -Vcore 2 -ComputeGeneration "Gen5" # Enable Advanced Defender $azureDefender = Enable-AzSqlServerAdvancedDataSecurity ` -ResourceGroupName $resourceGroupName ` -ServerName $serverName # Create a storage account $storageAccount = New-AzStorageAccount -ResourceGroupName $resourceGroupName ` -AccountName $storageAccountName ` -Location $location ` -Type "Standard_LRS"Open SQL Server Management Studio (SSMS), and then create a new connection to your logical server. For server name, enter the name of your Azure SQL Database logical server (for example, dr-server
<unique ID>.database.windows.net). If you didn't save the name earlier, you might need to go to the Azure portal to get it. In the Azure portal, search for AdventureWorksLT to find your database and its associated logical server.In SSMS, change the authentication to SQL Server Authentication, and enter the corresponding server admin login and password, which you provided during deployment in the previous exercise.
Select the Remember password check box, and then select Connect.
Note
Depending on your local configuration (for example, VPN), your client IP address might differ from the IP address that the Azure portal used during deployment. If it does differ, you'll get a pop-up message that reads, "Your client IP address does not have access to the server. Sign in to an Azure account and create a new firewall rule to enable access." If you get this message, sign in with the account you're using for the sandbox and add a firewall rule for your client IP address. You can complete all of these steps by using the pop-up wizard in SSMS.
Enabling and disabling CDC
Enable CDC on your database
In SQL Server Management Studio (SSMS), open a new query window and enable CDC on the AdventureWorksLT database by running the following T-SQL:
-- Connect to your AdventureWorksLT  Azure SQL Database, enable CDC
EXEC sys.sp_cdc_enable_db
GO
Enable CDC on your tables
Once you enable CDC on the database, you'll notice the CDC artifacts being created in the same source database (five system tables under the CDC schema).
Enable CDC for table
SalesLT.Customeron theAdventureWorksLTdatabase by running the following T-SQL:SQLEXEC sys.sp_cdc_enable_table @source_schema = N'SalesLT', @source_name = N'Customer', @role_name = NullOnce you enable CDC on your table, you'll notice two more CDC system tables being created: the CDC scheduler jobs for scan and cleanup (
cdc.cdc_jobs) and the change table (cdc.SalesLT_Customer_CT) associated with the table you enabled for CDC. As expected, the change table is still empty because no changes were made to the source table.Insert a new customer into the
SalesLT.Customertable that you enabled for CDC.- Be aware that
PasswordHashandPasswordSaltcan't beNULL
SQLINSERT INTO [SalesLT].[Customer] (FirstName, MiddleName, LastName, PasswordHash, PasswordSalt) VALUES ('Mary', 'L.', 'Smith', 'PjZGQm+Xpzc7RKwDhS11T=', '1KjXYs4=');- Be aware that
Check the change table and you'll see that a new record has automatically been added by the CDC scheduler, which runs scan and cleanup.
SQLSELECT * FROM cdc.SalesLT_Customer_CTThe entire row is added and the _$operation record is 2 (as expected), which represents an insert statement.
The column __$operation records the operation that is associated with the change: 1 = delete, 2 = insert, 3 = update (before image), and 4 = update (after image).
Note
In case you don't get the change data updated in the above table, then you may wait for scheduler to run. Otherwise, you can run the scheduler manually (
EXEC sys.sp_cdc_scan) and check again.Let’s try out one more type of DML operation, this time an update statement.
SQLUPDATE [SalesLT].[Customer] SET FirstName = 'Bob', MiddleName = 'M.' WHERE CustomerID = 1;Check the change table again and now you'll notice that there are two more rows, since CDC records both pre-image (before update) and after image (after update) for update operations. The data columns of the row that results from an insert operation contain the column values after the insert. The data columns of the row that results from a delete operation contain the column values before the delete. An update operation requires one-row entry to identify the column values before the update, and a second row entry to identify the column values after the update.
SQLSELECT * FROM cdc.SalesLT_Customer_CT
Disable CDC on your table
You can disable CDC on SalesLT.Customer table by running following query:
EXEC sys.sp_cdc_disable_table
@source_schema=N'SalesLT',
@source_name=N'Customer',
@capture_instance = N'SalesLT_Customer'
Note
It's not necessary to disable individual tables before you disable the database.
Once you disable CDC on the table, the change tracking table also gets dropped. You can confirm this by running the same command again, and seeing that the table no longer exists:
SELECT * FROM cdc.SalesLT_Customer_CT
Disable CDC on your database
You can disable CDC on database by executing sys.sp_cdc_disable_db stored procedure:
EXEC sys.sp_cdc_disable_db
Next unit: Synchronize data on Azure SQL Database with SQL Data Sync
Having an issue? We can help!
- For issues related to this module, explore existing questions using the #SQL Server Training tag or Ask a question on Microsoft Q&A.
- For issues related to Certifications and Exams, post on Certifications Support Forums or visit our Credentials Help.