Exercise - Recover data by restoring an Azure SQL database
This module requires a sandbox to complete. A sandbox gives you access to free resources. Your personal subscription will not be charged. The sandbox may only be used to complete training on Microsoft Learn. Use for any other reason is prohibited, and may result in permanent loss of access to the sandbox.
Microsoft provides this lab experience and related content for educational purposes. All presented information is owned by Microsoft and intended solely for learning about the covered products and services in this Microsoft Learn module.
Trial restores are a key component of any disaster recovery strategy.
You want to familiarize yourself with the steps to restore a backed-up database to a specific point in time, in case it becomes necessary. You also want to investigate how long a restore operation takes. That way, you can plan for this time in your guidance for your organization.
Let's perform a restore from automated Azure SQL Database backups.
Confirm that backups are active
It can take up to 15 minutes for the first successful backup to finish. We need to make sure that backups are running before we continue the exercise.
In Azure Cloud Shell, run the following PowerShell command to set a variable to the value of your SQL Server instance:
PowerShell$sqlserver=Get-AzSqlServerValidate that continuous backups are running by using this command:
PowerShellGet-AzSqlDatabaseRestorePoint ` -ResourceGroupName [sandbox resource group name] ` -DatabaseName sql-erp-db ` -ServerName $sqlserver.ServerNameYou should get an output similar to the following code if your backups are running. If the command returns no value, a backup hasn't started yet. Rerun this command in a couple of minutes.
OutputResourceGroupName : [sandbox resource group name] ServerName : erpserver-53903 DatabaseName : sql-erp-db Location : East US RestorePointType : CONTINUOUS RestorePointCreationDate : EarliestRestoreDate : 9/24/19 4:21:21 PM RestorePointLabel :RestorePointTypeisCONTINUOUS, indicating that backups are automatically happening.EarliestRestoreDateindicates the timestamp of the first backup. With backups in place, let's continue the exercise.
Drop a table from the database
Let's start by simulating a mistaken database modification.
On the Azure portal menu or from the Home page, select All resources, select erpserver-NNNN, select SQL databases, and then select the sql-erp-db database.
Select Query editor (preview), then sign in with the dbadmin user and the password that you specified for this account.
Let's drop the Person table that we created earlier. In a new query window, run this command.
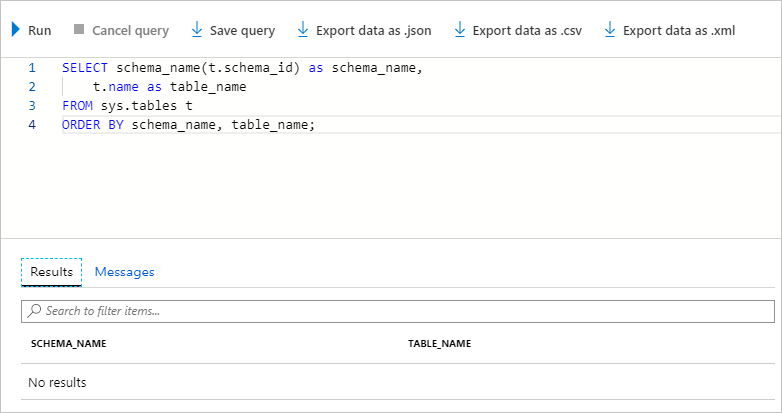
SQLDROP TABLE PersonTo check the tables in the database, select New Query. Then, in the Query 2 window, run this command to list all tables in the database:
SQLSELECT schema_name(t.schema_id) as schema_name, t.name as table_name FROM sys.tables t ORDER BY schema_name, table_name;You should see No results returned, because we deleted the Person table.
Run a point-in-time restore
The Person table was mistakenly deleted. Now, let's restore the database to its previous state.
On the Azure portal menu or from the Home page, select All resources, and then select the sql-erp-db database.
At the top of the Overview page, select Restore.
Complete the Basics tab on the Restore database page with these values, and then select Review + create.
Setting Value Select source Point-in-time Database name sql-erp-db-xxxxx Restore point Select a time 10 minutes ago, before you dropped the Person table Server erpserver-xxxxx Want to use SQL elastic pool? No Compute + storage Default value Backup storage redundancy Locally-redundant backup storage 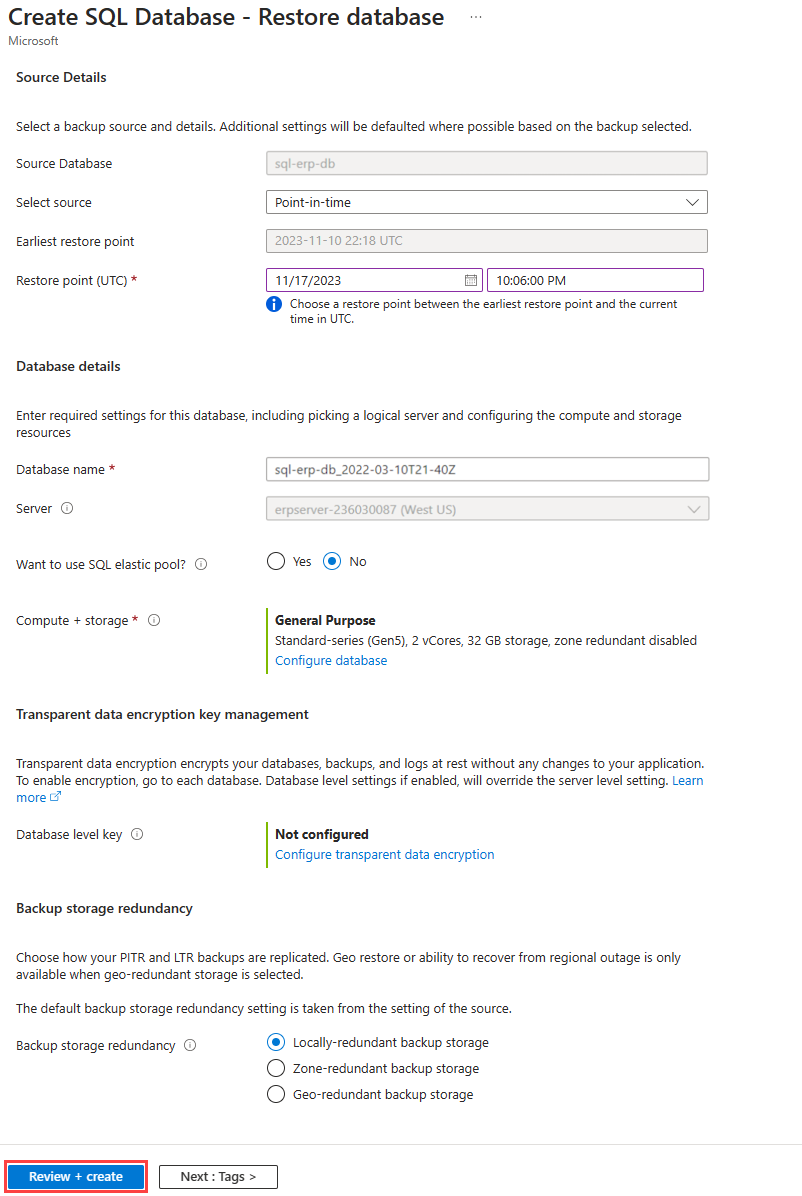
Select Create. The database restore takes several minutes to complete.

View the restored database
The restored database should contain the Person table. You can check that in the portal.
In the Azure portal menu or from the Home page, select All resources, and then select the sql-erp-db-restored database.
Select Query editor (preview), and then sign in with the dbadmin user and the password that you specified for this account.
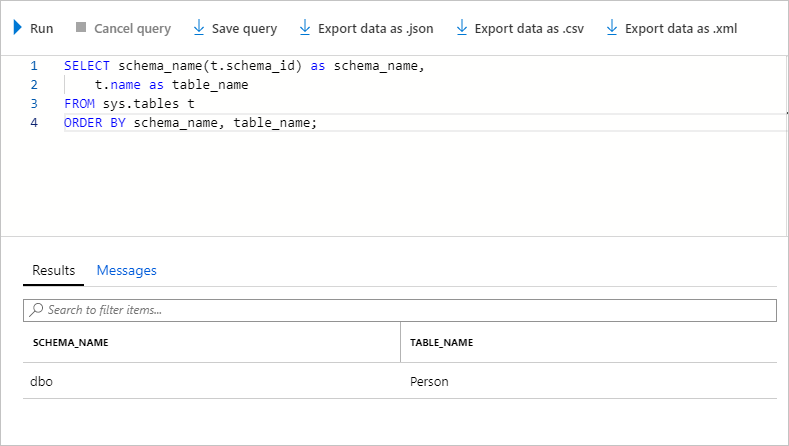
To check the tables in the database, in the Query 1 window, run this command:
SQLSELECT schema_name(t.schema_id) as schema_name, t.name as table_name FROM sys.tables t ORDER BY schema_name, table_name;The Person table should now be present.
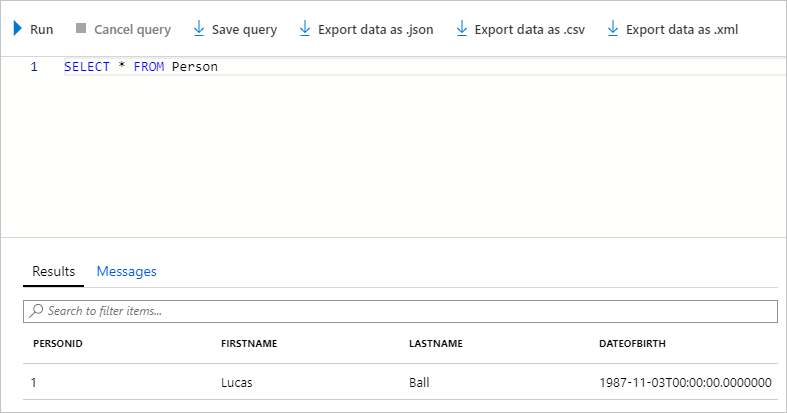
Confirm that the data is in the table by running this command:
SQLSELECT * FROM PersonYou should see the data that you entered previously.
You've now learned how you can restore a database if something unintended happens to the data. You've familiarized yourself with the restore process. You can now assure your organization that you've properly defined the backup and restore procedures.
Next unit: Summary
Having an issue? We can help!
- For issues related to this module, explore existing questions using the #azure training tag or Ask a question on Microsoft Q&A.
- For issues related to Certifications and Exams, post on Certifications Support Forums or visit our Credentials Help.