Exercise - Deploy to the Ropsten test network
Now we have a smart contract. We've successfully deployed it to our development network. Next we'll focus on deploying to the Ropsten test network.
Exercise overview
For this tutorial, we'll deploy to Ropsten by using MetaMask with test ether. The deployment process requires setting up an Infura account to connect and deploy to the Ropsten testnet. After we deploy, we can use Ropsten Testnet Explorer to inspect the blocks that have been deployed to the testnet.
Exercise setup
To set up the exercise, you'll:
- Install and set up MetaMask.
- Get test ether.
- Install HDWallet-Provider and fs.
- Install Infura and link the endpoints to the Ropsten test network.
Set up MetaMask
If you haven't done so already, install and set up MetaMask. Then sign in to your account in the browser.
Add ether to the MetaMask Ropsten test network
Use your MetaMask account to connect to the Ropsten test network. Begin by getting test ether from the Ropsten Test Faucet:
Open MetaMask.
Connect to Ropsten.
Copy the address of your account.

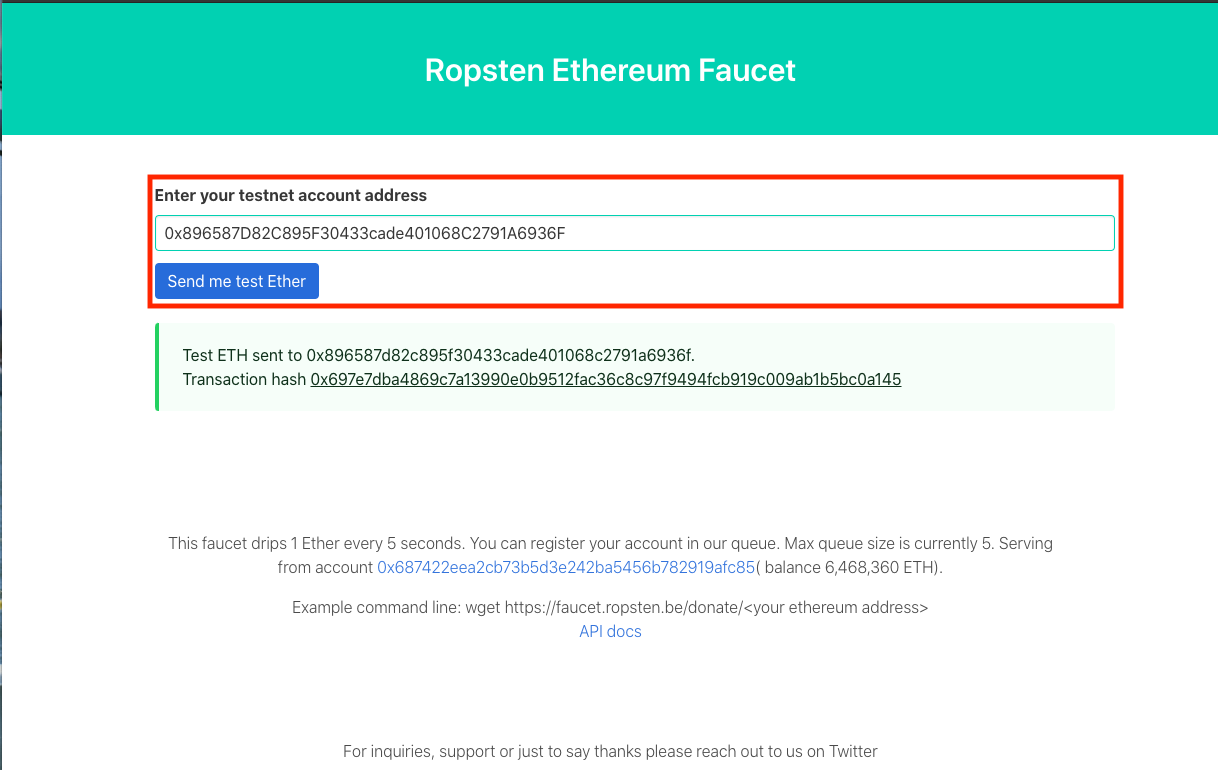
Open a browser window or tab, and go to the Ropsten faucet.
To request ether, enter your testnet account address and then select Send me test Ether.
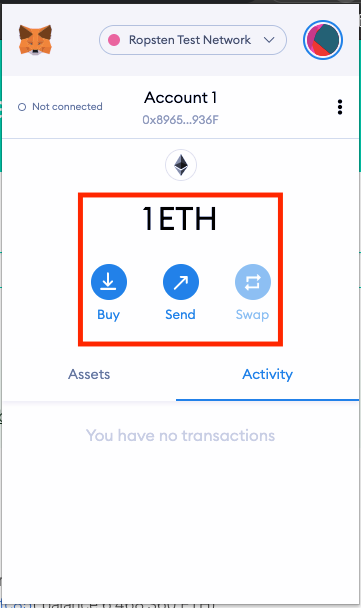
In MetaMask, verify that you now have ether in your account.
Install HDWallet-Provider and fs
Next you'll need HDWallet-Provider. This wallet-enabled Web3 provider creates your secret mnemonic and connection network address. You'll also need fs to read from your file system.
To install both tools, return to the todolist project in Visual Studio Code. Open the terminal pane and run the following commands:
npm initnpm install fsnpm install @truffle/hdwallet-provider
Wait for the installations of fs and HDWallet-Provider to finish. You might see several warnings. As long as these warnings aren't errors, you can ignore them.
Set up Infura and link the endpoints to the Ropsten test network
The Infura development suite provides instant, scalable API access to the Ethereum networks. Infura is a hosted Ethereum node cluster that gives users the ability to run an application on a public network. Use Infura to deploy to and interact with public networks.
To set an account, go to the Infura website and follow these steps:
- Set up an account and confirm your email address.
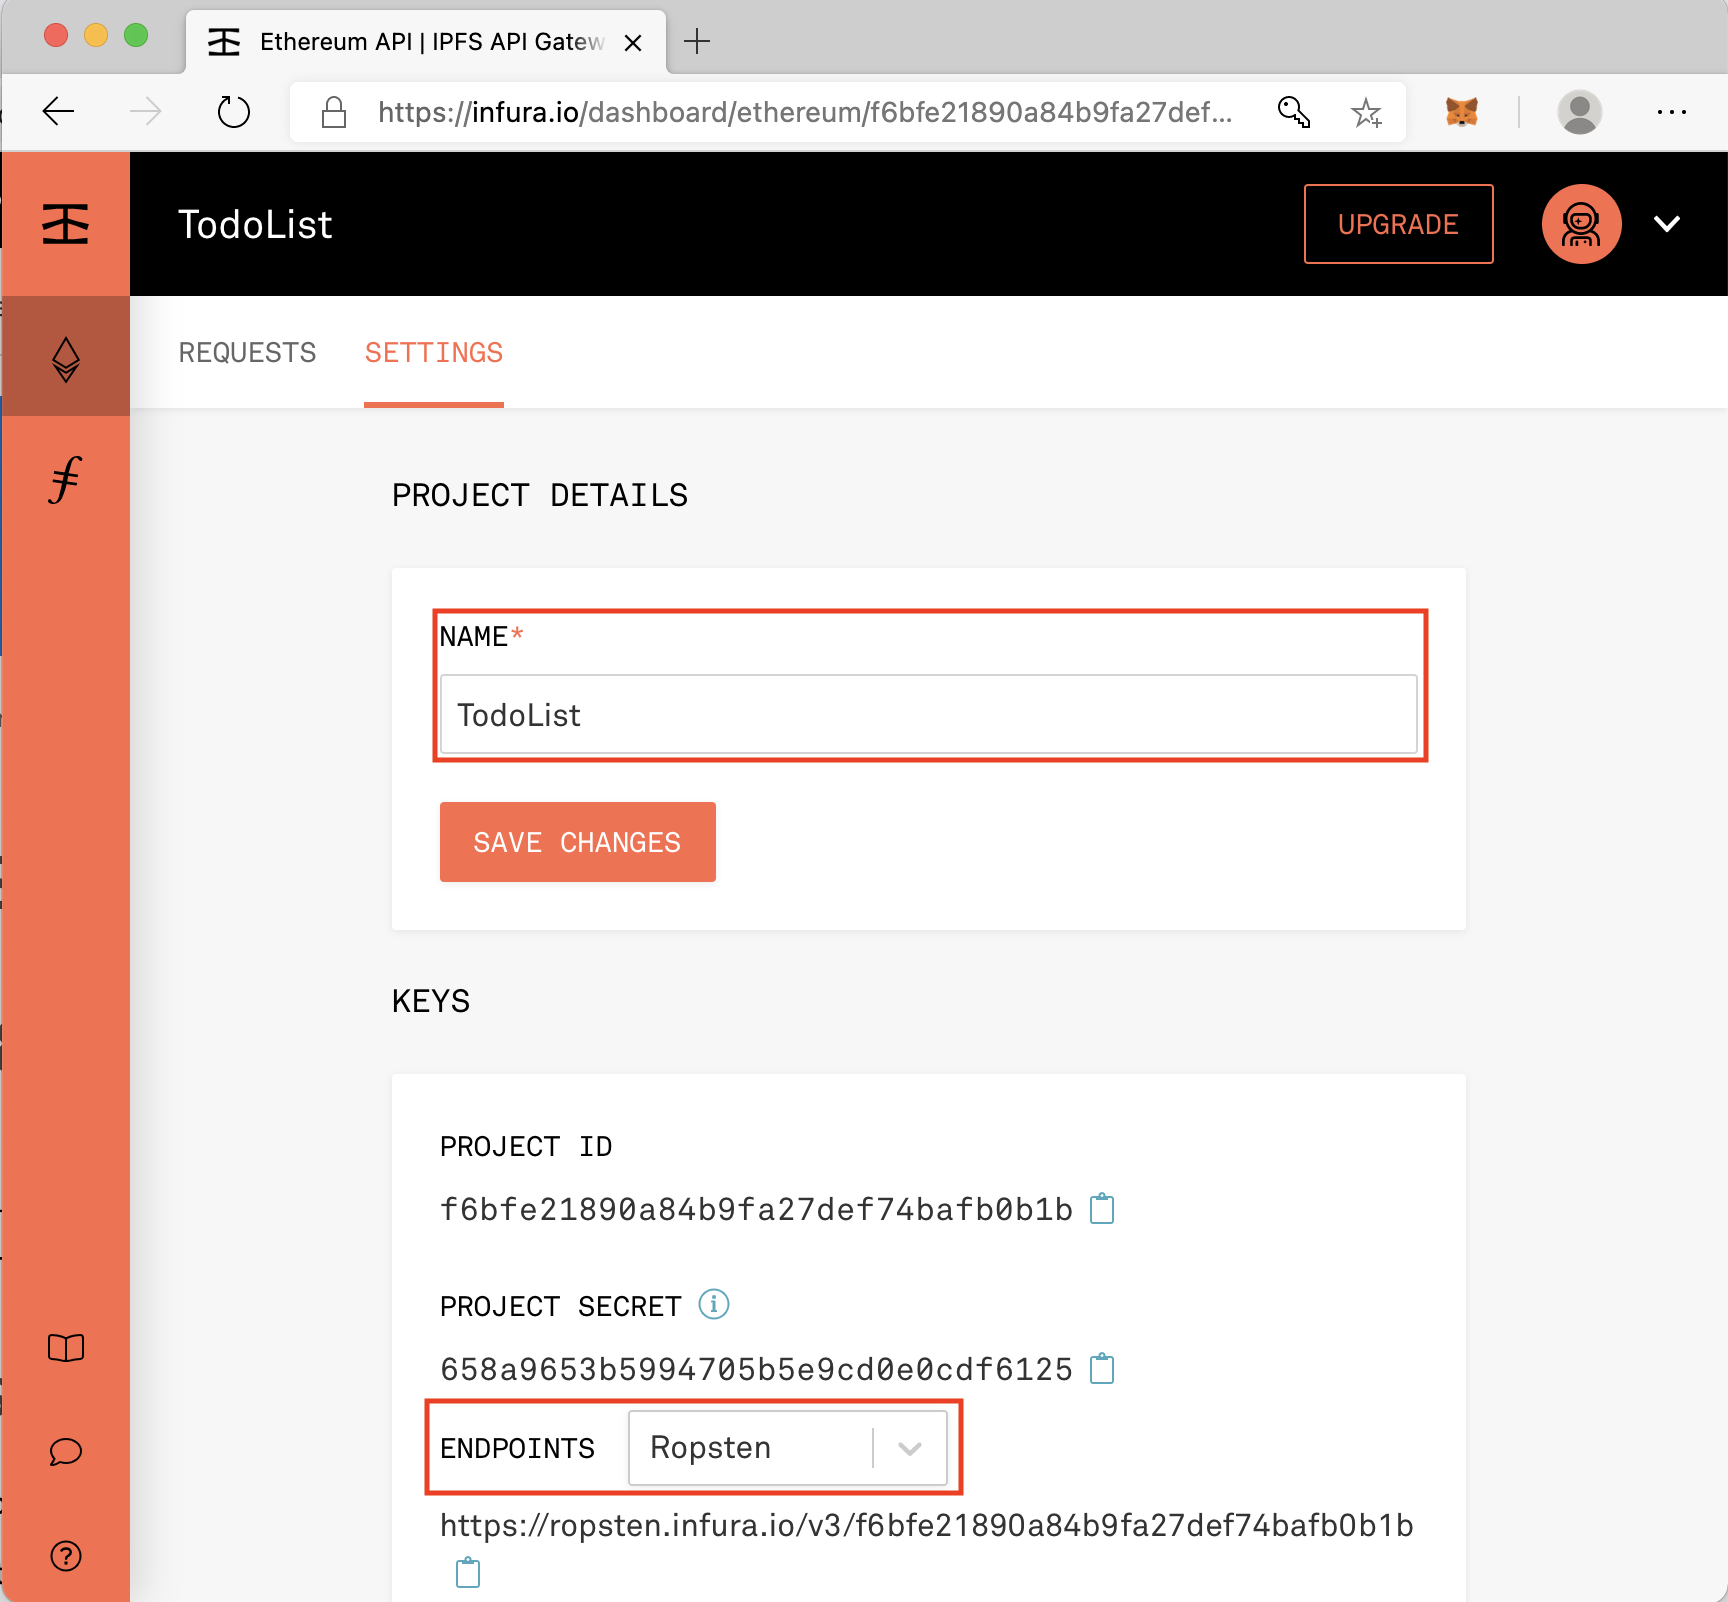
- Select Ethereum > Create new project. Name the project TodoList.
- Under Keys, change the endpoint to Ropsten.
Your view should look similar to the following test project:
Connect to Ropsten
Return to the todolist project folder in Visual Studio Code.
In the Truffle configuration file, ./truffle-config.js, uncomment the lines for
hdwallet-provider,infuraKey,fs, andmnemonic:const HDWalletProvider = require('@truffle/hdwallet-provider'); const infuraKey = "fj4jll3k....."; const fs = require('fs'); const mnemonic = fs.readFileSync(".secret").toString().trim();Go to your Infura account to get the
infuraKeyvalue. In Infura, it's called the Project ID. It's visible in the Ropsten endpoint: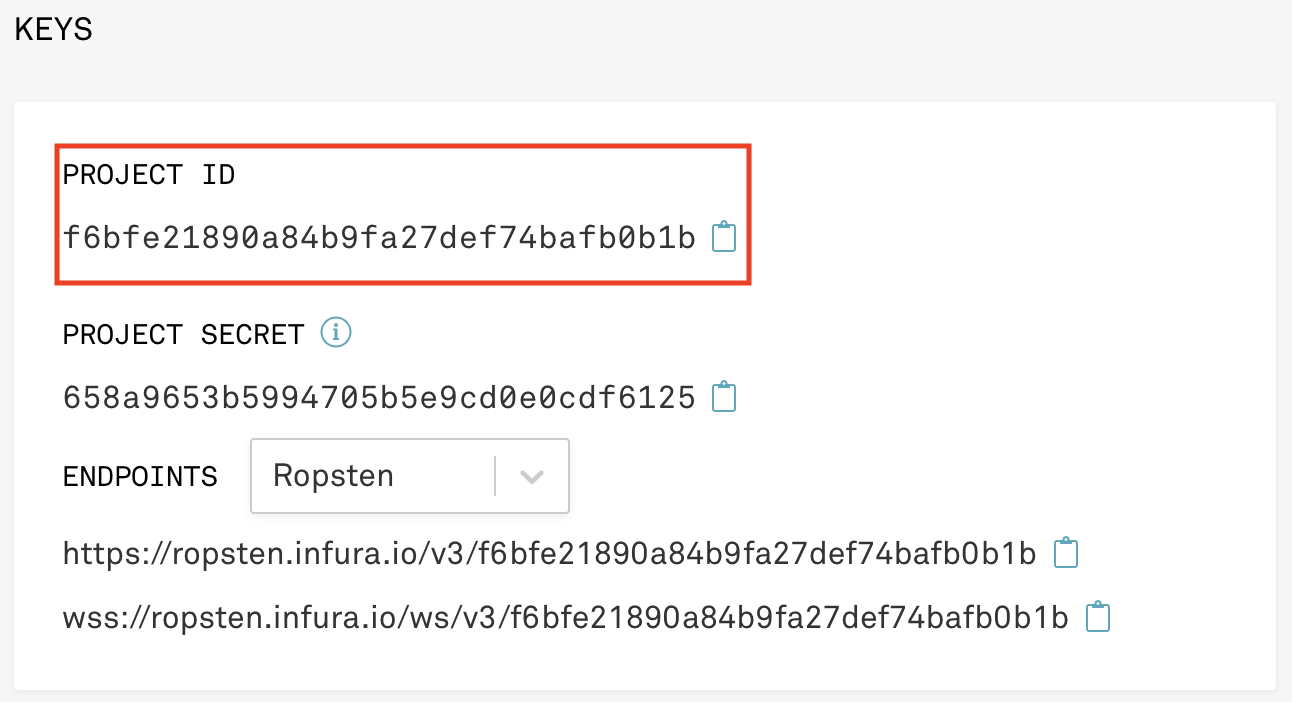
Next to Project ID, select the clipboard icon to copy the ID. Return to ./truffle-config.js to paste in the
infuraKeyvalue.The following image shows an example key to paste. While the example key can be used as a placeholder, your key will be different than the one you see here, and you should use your own infuraKey.
const infuraKey = "f6bfe21890a84b9fa27def74bafb0b1b";Create a file called .secret. Copy your mnemonic to the new file.
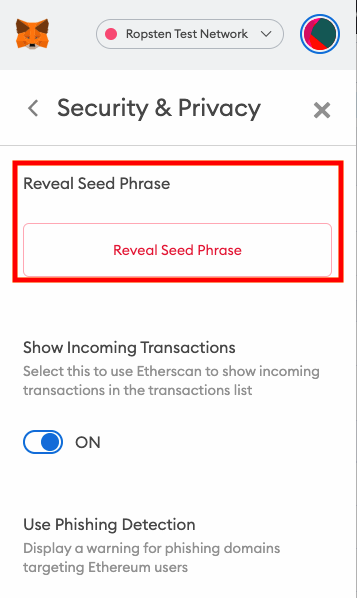
To get your mnemonic, in MetaMask, go to Settings > Security & Privacy. Select Reveal Seed Phrase. Enter your MetaMask password to verify your identity. Then select Copy to clipboard.
Important
Don't share your mnemonic with anyone, or they could access your account. If you use Git, make sure to include .secret in your .gitignore file.
Use the following code to read the seed phrase from the .secret file and to trim all the white spaces:
const mnemonic = fs.readFileSync(".secret").toString().trim();Define the network by uncommenting the Ropsten network settings in truffle-config.js. Make sure that your configuration looks like this code:
ropsten: {
   provider: () => new HDWalletProvider(mnemonic, `https://ropsten.infura.io/v3/${infuraKey}`),
   network_id: 3,       // Ropsten's id
   gas: 5500000,        // Ropsten has a lower block limit than mainnet
   confirmations: 2,    // # of confs to wait between deployments. (default: 0)
   timeoutBlocks: 200,  // # of blocks before a deployment times out (minimum/default: 50)
   skipDryRun: true     // Skip dry run before migrations? (default: false for public nets )
 },
Deploy to Ropsten
To deploy to Ropsten, run the following command from the Visual Studio Code terminal:
truffle migrate --network ropsten
If your connection is successful, you'll see the following output:
Compiling your contracts...
===========================
> Everything is up to date, there is nothing to compile.

Warning: Both truffle-config.js and truffle.js were found. Using truffle-config.js.

Compiling your contracts...
===========================
> Everything is up to date, there is nothing to compile.


Starting migrations...
======================
> Network name:    'ropsten'
> Network id:      3
> Block gas limit: 8000029 (0x7a121d)


1_initial_migration.js
======================

   Deploying 'Migrations'
   ----------------------
   > transaction hash:    0x2f456acc5f842ddf0eb151742e47dd6e8ec5e48d73b1f150e2908cb56e0bf174
   > Blocks: 1            Seconds: 29
   > contract address:    0x789101d0B0Ffa4f8f87E67AF8ff8F84bD519752D
   > block number:        9398701
   > block timestamp:     1609784599
   > account:             0x896587D82C895F30433cade401068C2791A6936F
   > balance:             0.99616138
   > gas used:            191931 (0x2edbb)
   > gas price:           20 gwei
   > value sent:          0 ETH
   > total cost:          0.00383862 ETH

   Pausing for 2 confirmations...
   ------------------------------
   > confirmation number: 1 (block: 9398702)
   > confirmation number: 2 (block: 9398703)

   > Saving migration to chain.
   > Saving artifacts
   -------------------------------------
   > Total cost:          0.00383862 ETH


2_deploy_contracts.js
=====================

   Deploying 'TodoList'
   --------------------
   > transaction hash:    0xad8066308e9cc8503400c86a43674d856a71e02696e2c21b3e55f566df5afc36
   > Blocks: 0            Seconds: 8
   > contract address:    0x48112BE8d0E6e7bA892aFa2d4Ab58e9c43dd37De
   > block number:        9398706
   > block timestamp:     1609784870
   > account:             0x896587D82C895F30433cade401068C2791A6936F
   > balance:             0.98513544
   > gas used:            508959 (0x7c41f)
   > gas price:           20 gwei
   > value sent:          0 ETH
   > total cost:          0.01017918 ETH

   Pausing for 2 confirmations...
   ------------------------------
   > confirmation number: 1 (block: 9398707)
   > confirmation number: 2 (block: 9398708)

   > Saving migration to chain.
   > Saving artifacts
   -------------------------------------
   > Total cost:          0.01017918 ETH


Summary
=======
> Total deployments:   2
> Final cost:          0.0140178 ETH
Verify deployment of the contract
Follow the steps in the next sections to verify that your contract was deployed.
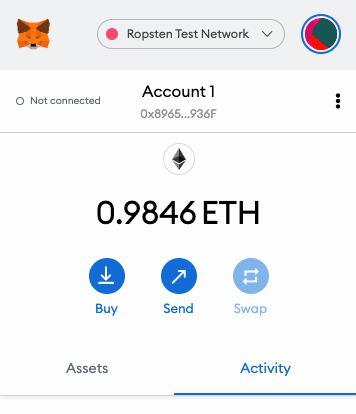
Verify in MetaMask
Check MetaMask to verify that ether was used to deploy the contract.
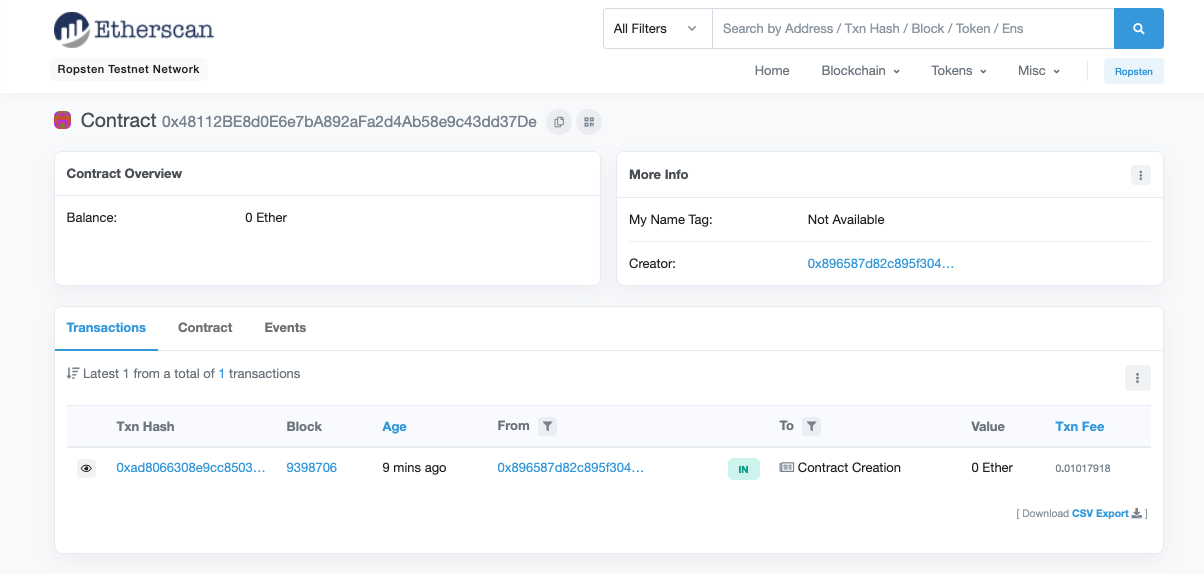
Verify in Ropsten Etherscan
In Ropsten Etherscan, enter the contract address. Then inspect your contract.
You can also verify your deployment by opening a new terminal window within Visual Studio Code. You interact with your contract by using the Truffle console like you do on the Ganache development blockchain.