Exercise - Create the AccidentTable and relationships
In this exercise, you build the main AccidentTable and build out the relationships with the other tables that you created previously.
On the main menu, select Tables. Then select the Start with a blank table button.
For the table name enter:
AccidentTable.Select New column from the data table in the lower half of your screen, then select Edit column.
Under Display name enter:
AccidentId. Then select Update.Create the AccidentDescription column. Select + New column and enter/check the following information:
- Display name -
AccidentDescription - Data type - Single line of text (default)
- Required - toggle on
Select Save.
- Display name -
Add another new column with this information:
- Display name -
AccidentDate - Data type - Date and time
- Format - Date and time
- Required - toggle on
Select Save.
- Display name -
Add another new column with the following information:
- Display name -
ManagerComments - Data type - Single line of text (default)
- Required - toggle off (default)
Save it to continue.
- Display name -
Create a yes/no choice column with this data:
- Display name -
ManagerReviewed - Data type - Choice > Yes/no
- Required - toggle off (default)
- Default choice - No
Notice how the Yes/no column automatically populates the Choices labels with No and Yes, respectively. Save it. Now for the lookup columns.
- Display name -
Let's add our supporting tables to the designer so that we can link our AccidentTable to them. Select the + Existing table from the command bar.
From the Select tables popup, find/select your LocationTable and the TypeofAccidentTable, then select the Add Selected button. You don't need to add the EmployeeTable yet, but you can. We'll revisit this table later.
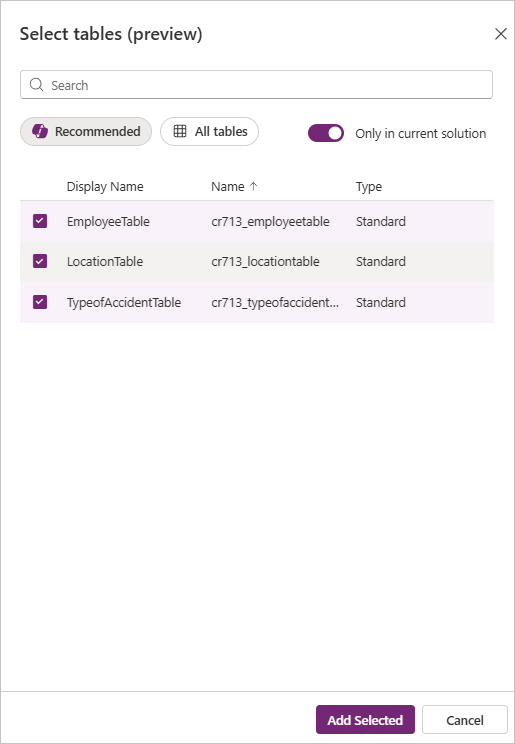
Notice how it adds representations of these tables to the upper half of the screen. Though these tables are not yet linked, we will create these links automatically, as we add lookup columns to our AccidentTable.
Return to the column data in the lower half of your screen to continue creating columns.
Select + New column to create the LocationId lookup column.
Display name -
LocationIdData type - Lookup
Required - toggle on
Related table - LocationTable (select the input field then select your
LocationTable)Note
In the Related table dropdown menu, you select which table to look up values from. Selecting LocationTable that you created in the previous exercise will create a many-to-one relationship: many in the AccidentTable to one in the LocationTable.

After you have saved all changes, the relationships that you created in the table will be visible. Save the new column. Notice that a dashed line appears in the table display in the top part of your screen showing a relationship between these two tables.
In the top part of the screen, zoom out using the mapping buttons in the lower left hand corner of the top of the screen. Then position the LocationTable to the left of your AccidentTable to view this relationship. Notice how the LocationID field has a circled 1 and the dashed line goes to a star in the LocationID column in our AccidentTable.
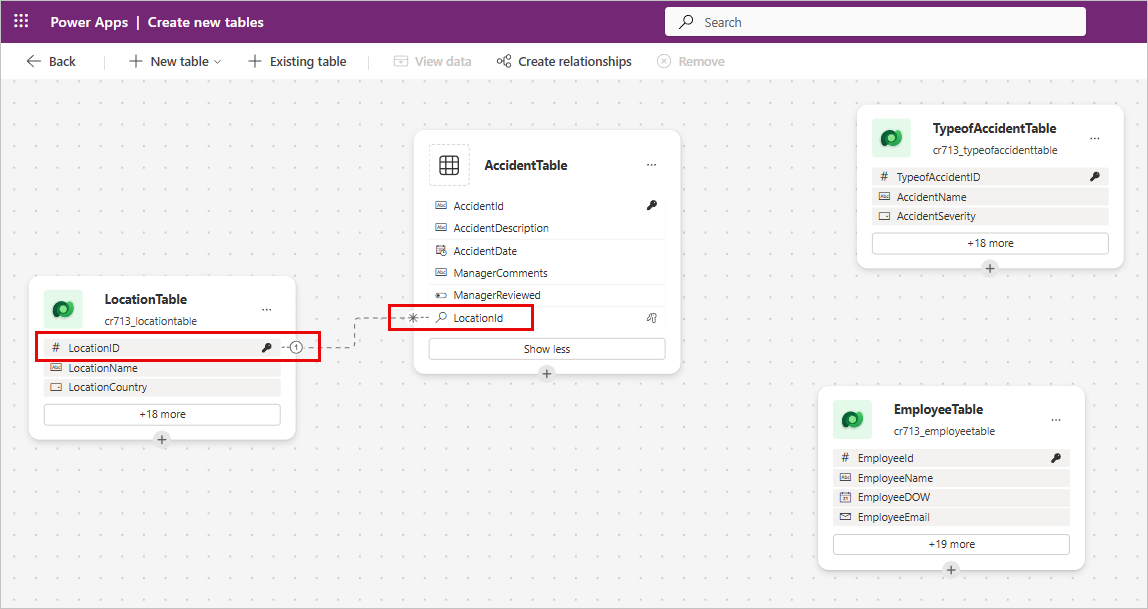
This is a visual representation of a 1-to-many relationship from the LocationTable to the AccidentTable. As we add the other lookup fields to our AccidentTable, you will see relationships appear to the other tables.
Go ahead and position your other tables by dragging and dropping them around your AccidentTable, then reselect your AccidentTable, and select the View data button from the command bar.
Create the AccidentTypeId lookup column, by selecting the + New column button from the data commands.
- Display name -
AccidentTypeId - Data type - Lookup
- Required - toggle on
- Related table -
TypeofAccidentTable
Save your new column.
Note
This selection creates a many-to-one relationship: many in the AccidentTable to one in the AccidentTypeTable.
Next, we will create a many-to-many relationship. We cannot create a this type of relationship in this designer.
- Display name -
Select Save and exit. Once your table is done with creation, you'll return to your tables list.
Find/select your AccidentTable.
Find the Schema pane and select Relationships.
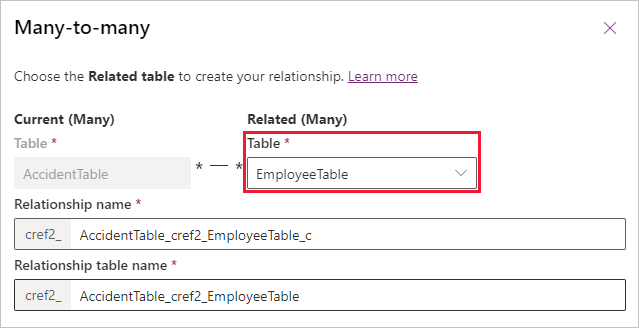
Select New relationship from the command bar and then select + Many-to-many.

The Many-to-many panel appears on the right side of your screen. In the Related (Many) search field, enter
EmployeeTableand select the EmployeeTable that you created in the previous exercise.By default, Dataverse provides a Relationship name and a Relationship table name. You can choose to update and rename those default names. For this exercise, you can keep the default names.
When you're finished, select Done.
Your Relationships list shows the other relationships (Many-to-one and One-to-many) that were created when you added the lookup columns in the previous steps. You can filter the list by relationship type to change the view.

We need to update one column in our AccidentTable to complete this exercise. Return to your AccidentTable and select the AccidentID column from under the columns and data pane. Then select Edit column.
Change Data type to Autonumber.
Select Save.


We've now created several tables and have related them together. As we continue to build our Accident Tracking app, in the next learning module, we'll work on Views and Forms for the tables we created in this module. Let's do a quick knowledge check before we continue!