Lab - Create a table, add fields, and create field groups
Read this first - before you start the lab!
Important
For this lab, you CANNOT sign in with your own credentials. Use the following steps to sign in to your lab environment with the correct credentials.
Ensure that you are signed in to Microsoft Learn.
Select Launch VM mode or Sign in to launch VM mode in this unit.
In the Resources tab on the lab side bar, select the T icon next to Password in the MININT box, to have the administrator password for the Virtual Machine entered for you.
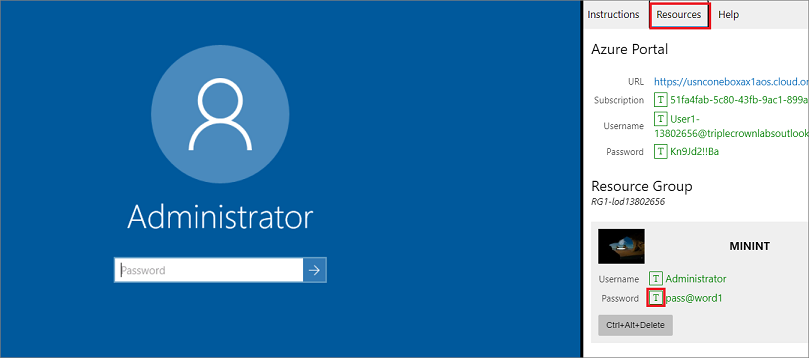
Select Enter.
Microsoft Edge will open. Wait for it to navigate to the Sign in page for finance and operations.
On the Microsoft Sign in page in finance and operations, place your mouse cursor into the Username field.
On the Resources tab of the lab side bar, below the Azure portal heading, select the T icon next to Username, then press Enter.
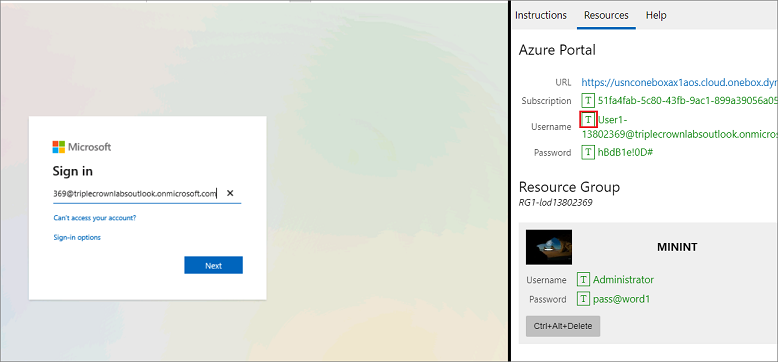
Your mouse cursor will now be in the Password page.
On the Resources tab of the lab side bar, below the Azure portal heading, select the T icon next to select Password, then press Enter.
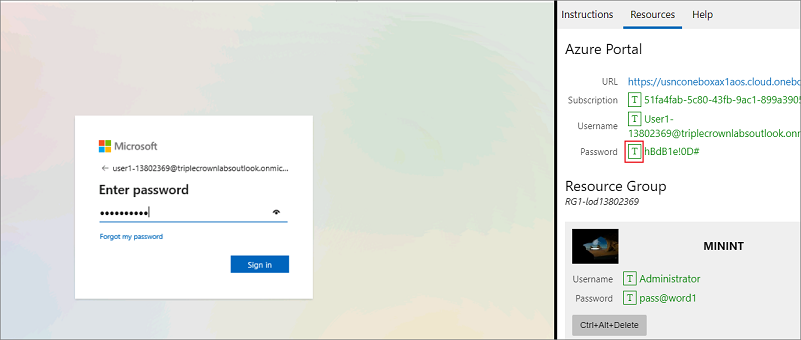
Don't stay signed in or store the password on the virtual machine.
Select Accept in the Permissions requested page.
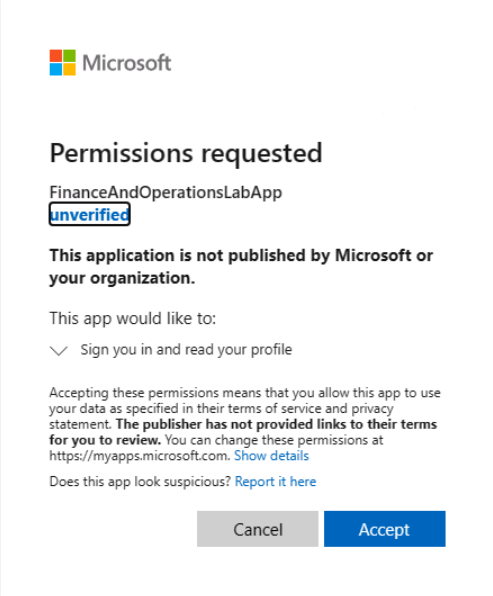
To see the lab instructions, select the Instructions tab on the lab side bar.
You can now begin your work on this lab.
Before you begin
You need to turn off the batch service. Here are the steps to shut off the batch service:
- Open the command prompt in the environment and run as administrator.
- Select Yes in the Do you want to allow this app to make changes to your device? window.
- Type sc queryex DynamicsAxBatch.
- Find the PID number.
- Then enter "taskkill /f /pid PID number .
Scenario
The finance and operations apps developer has been asked to create a new table for the Fleet Management company. The Fleet Management company needs to collect customer information in a different way than the out-of-the-box All Customers page. They want the table to contain both personal and location data by using existing elements in the AOT.
Create a new project
- Minimize the Microsoft Edge window.
- Right-click Visual Studio and select Run as administrator.
- Select Yes in the Do you want to allow this app to make changes to your device? window.
- Select Continue without code.
- Open the File menu and select New > Project.
- In the New Project dialog box, search for Finance Operations , and then select Next.
- In the Configure your new project dialog box, enter FleetManagementProject in the Project name field.
- Select Create.
- To ensure the correct applications suite is referenced, select Dynamics 365 in the Extensions menu.
- Select Model management > Update model parameters.
- Select Fleet Management as the model in the first page.
- Ensure that the Application suite model is referenced.
- Select Next and finish the update.
- Select Dynamics 365 in the Extensions menu again.
- Select Options.
- Under the Dynamics 365 node on the left pane, select Projects.
- Ensure that the checkboxes for Organize projects by element type and Synchronize database on build for newly created project are selected.
- Select OK.
Create a table
- In the Solution Explorer window, right-click the project FleetManagementTableProject.
- Select Add > New Item.
- On the left pane, select Dynamics 365 Items and then select Data Model.
- On the middle pane, select Table.
- Enter FleetCustomersTable in the Name field.
- Select Add.
- The FleetCustomersTable will now be open in the Element Designer window.
- Right-click the FleetCustomersTable heading in the element designer and select Properties.
- In the Properties window, in the Label field, enter Fleet customers.
Add fields to the table
- In the Application object tree (AOT) in the Application Explorer window, expand the Data types node.
- Expand the Extended Data Types node.
- Select and drag the following EDTs onto the Fields node of the table FleetCustomersTable.
- FirstName
- LastName
- Phone
- AddressStreet
- AddressCity
- AddressStateId
- AddressZipCodeId
- Select Save in the ribbon.
- Right-click the project in the Solution Explorer and click Synchronize FleetManagementTableProject(ISV) [Fleet Management]with Database.
- Perform a build by right-clicking the project FleetManagementTableProject in the Solution Explorer window and selecting Build.
Create field groups and add fields to the field groups
- In the Table designer, right-click the Field groups node of the FleetCustomersTable heading.
- Select New group.
- Right-click the new field group and rename it PersonalInfo.
- Expand the Fields node of the FleetCustomersTable.
- Select and drag the FirstName, LastName, Email, and Phone fields from the Fields node to the PersonalInfo Field group.
- In the table designer, right-click the Field groups node of the FleetCustomersTable heading.
- Select New group.
- Right-click the new field group and rename it LocationInfo.
- Expand the Fields node of FleetCustomersTable.
- Select and drag the AddressStreet, AddressCity, AddressStateId, and AddressZipCodeId fields from the Fields node to the LocationInfo field group.
- Right-click the project in the Solution Explorer and click Synchronize FleetManagementTableProject(ISV) [Fleet Management] with Database.
- Perform a build by right-clicking the project FleetManagementTableProject in the Solution Explorer window and then selecting Build.
Close the lab environment
- Select Done in the Instructions pane in the lab side bar.
- In the Lab is complete window, select Continue, and then select Leave to return to the next unit in the module.