Introduction - Create new accounting periods
With accounting periods, users can create time references or reporting periods. These are periods of time for which a company or organization reports financial performance, for example, by generating their income statement or balance sheet.
You can use accounting periods in reporting for example, when you are reviewing posted entries on the Balance/Budget page, where you can specify the reporting interval by accounting period. You can also build an account schedule that compares results for different accounting periods.
Typically, accounting periods refer to the company's fiscal year, which consists of several accounting periods, such as months or quarters. The shortest possible fiscal year consists of one accounting period with one day, meaning that you can set up accounting periods that are different from a calendar year.
For many companies, the fiscal year does not align with the calendar year. For example, the fiscal year might end on June 30 rather than December 31. For newly created companies, the fiscal year might be longer than 12 months.
You can use the Accounting Periods window to perform the following tasks:
Open new fiscal years
Define accounting periods
Close fiscal years
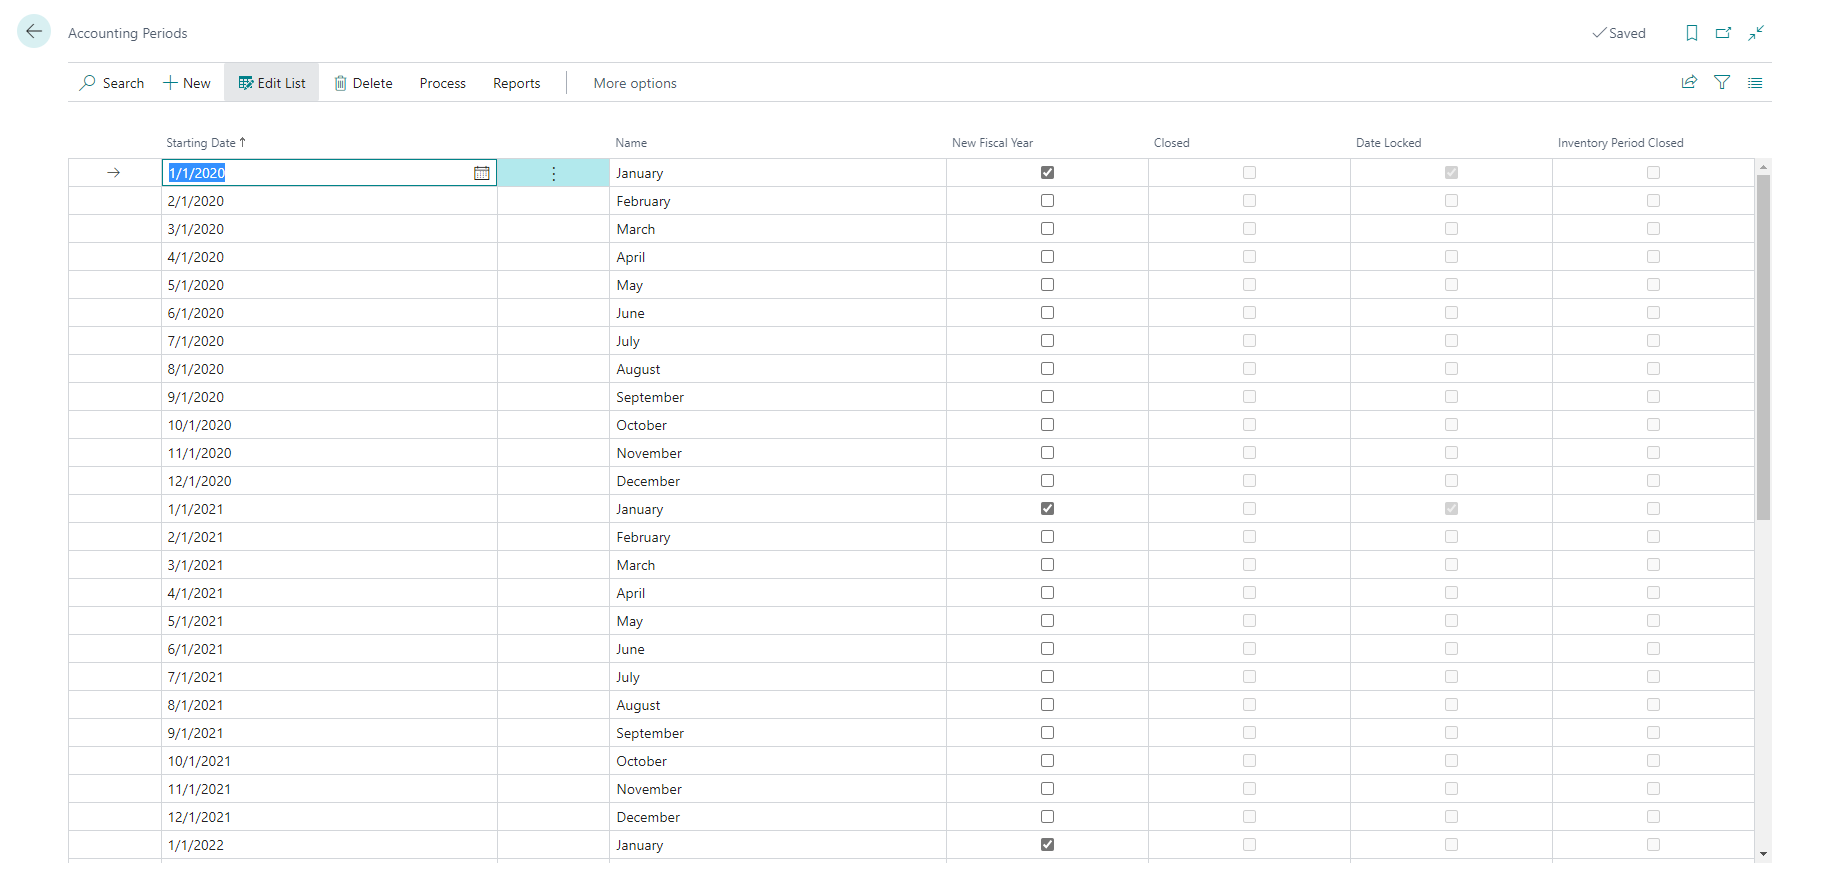
The Accounting Periods page contains the following fields:
Starting Date - Specifies the date that the accounting period will begin. This date can, but does not have to, be the first day of the month. You can change the starting date of a period manually when the Date Locked check box is clear.
Name - Specifies the name of the accounting period. By default, the program will enter the name of the month that corresponds to the starting date.
New Fiscal Year - Specifies whether to use the accounting period to start a fiscal year.
Closed - Specifies if the accounting period belongs to a closed year. By closing a fiscal year, all periods in the year will be closed.
Date Locked - Specifies if you can change the starting date for the accounting period. After you have closed a fiscal year, a check mark will appear in this field for all the periods in the year and the first period of the next fiscal year.
Inventory Period Closed - Specifies that the inventory period with an ending date equal to or greater than the ending date of the accounting period is closed.
Create new accounting periods
You can create accounting periods in bulk either manually or by using the Create Fiscal Year batch job.
Use the Create Fiscal Year batch job if you want to divide a fiscal year into periods of equal length.
Select the Search for Page icon in the top-right corner of the page, enter accounting periods, and then choose the related link.
Select the Process action and then select the Create Year action.
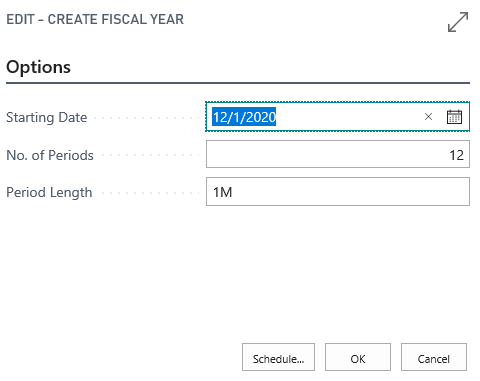
On the Create Fiscal Year page, fill in the following fields:
Starting Date - Enter the date on which the fiscal year starts.
No. of Periods - Enter the number of accounting periods to divide the fiscal year into. There can be up to 365 periods in a year.
Period Length - Enter a duration for each period. For example, 1M for one month, 1Q for one quarter, and 1Y for one year.
If the accounting periods in your fiscal year have different durations, like the 4-4-5 calendar that is often used in retail businesses, you can manually set it up.
Select the Search for Page icon in the top-right corner of the page, enter accounting periods, and then choose the related link.
Create a new line by entering information into the following fields:
Starting Date - Enter the date on which the fiscal year starts.
Name - Enter the name of the month.
New Fiscal Year - Select the check box to indicate that this is the first period in the year. Business Central will use this period to determine which periods to close at year-end.

