Exercise - Migration and modernization
In this unit, you review Azure Migrate and how to use it to migrate specific workloads to Azure.
Virtual machine replication
You can add migration and modernization to your Azure Migrate dashboard, which carries over machines and insights from the assessment completed during the Cloud Adoption Framework planning module. You can begin your replication by selecting Replicate in the tool window.
Azure Migrate performs concurrent replication for up to 500 virtual machines (VMs) and can manage up to 200 concurrent migrations. If you need to do more, we recommend that you create multiple batches. Times for replication vary based on the number and size of VMs, along with connection speeds between your datacenter and Azure.
During the replication setup phase, you can use the migration settings for Azure Virtual Machines sizes that your Azure Migrate assessment suggested. Or, you can specify the settings yourself. This step gives you the option to configure the VM size and storage-disk settings that you feel are appropriate to the workload being migrated.
Also at this stage, you're asked to specify the subscription, resource group, and virtual network where your VMs will reside after migration. You can also configure availability options such as Availability Zones or availability sets, which help to protect your applications and data from datacenter outages and maintenance events.
After you start the replication, you can track and monitor the replication of each of your VMs.
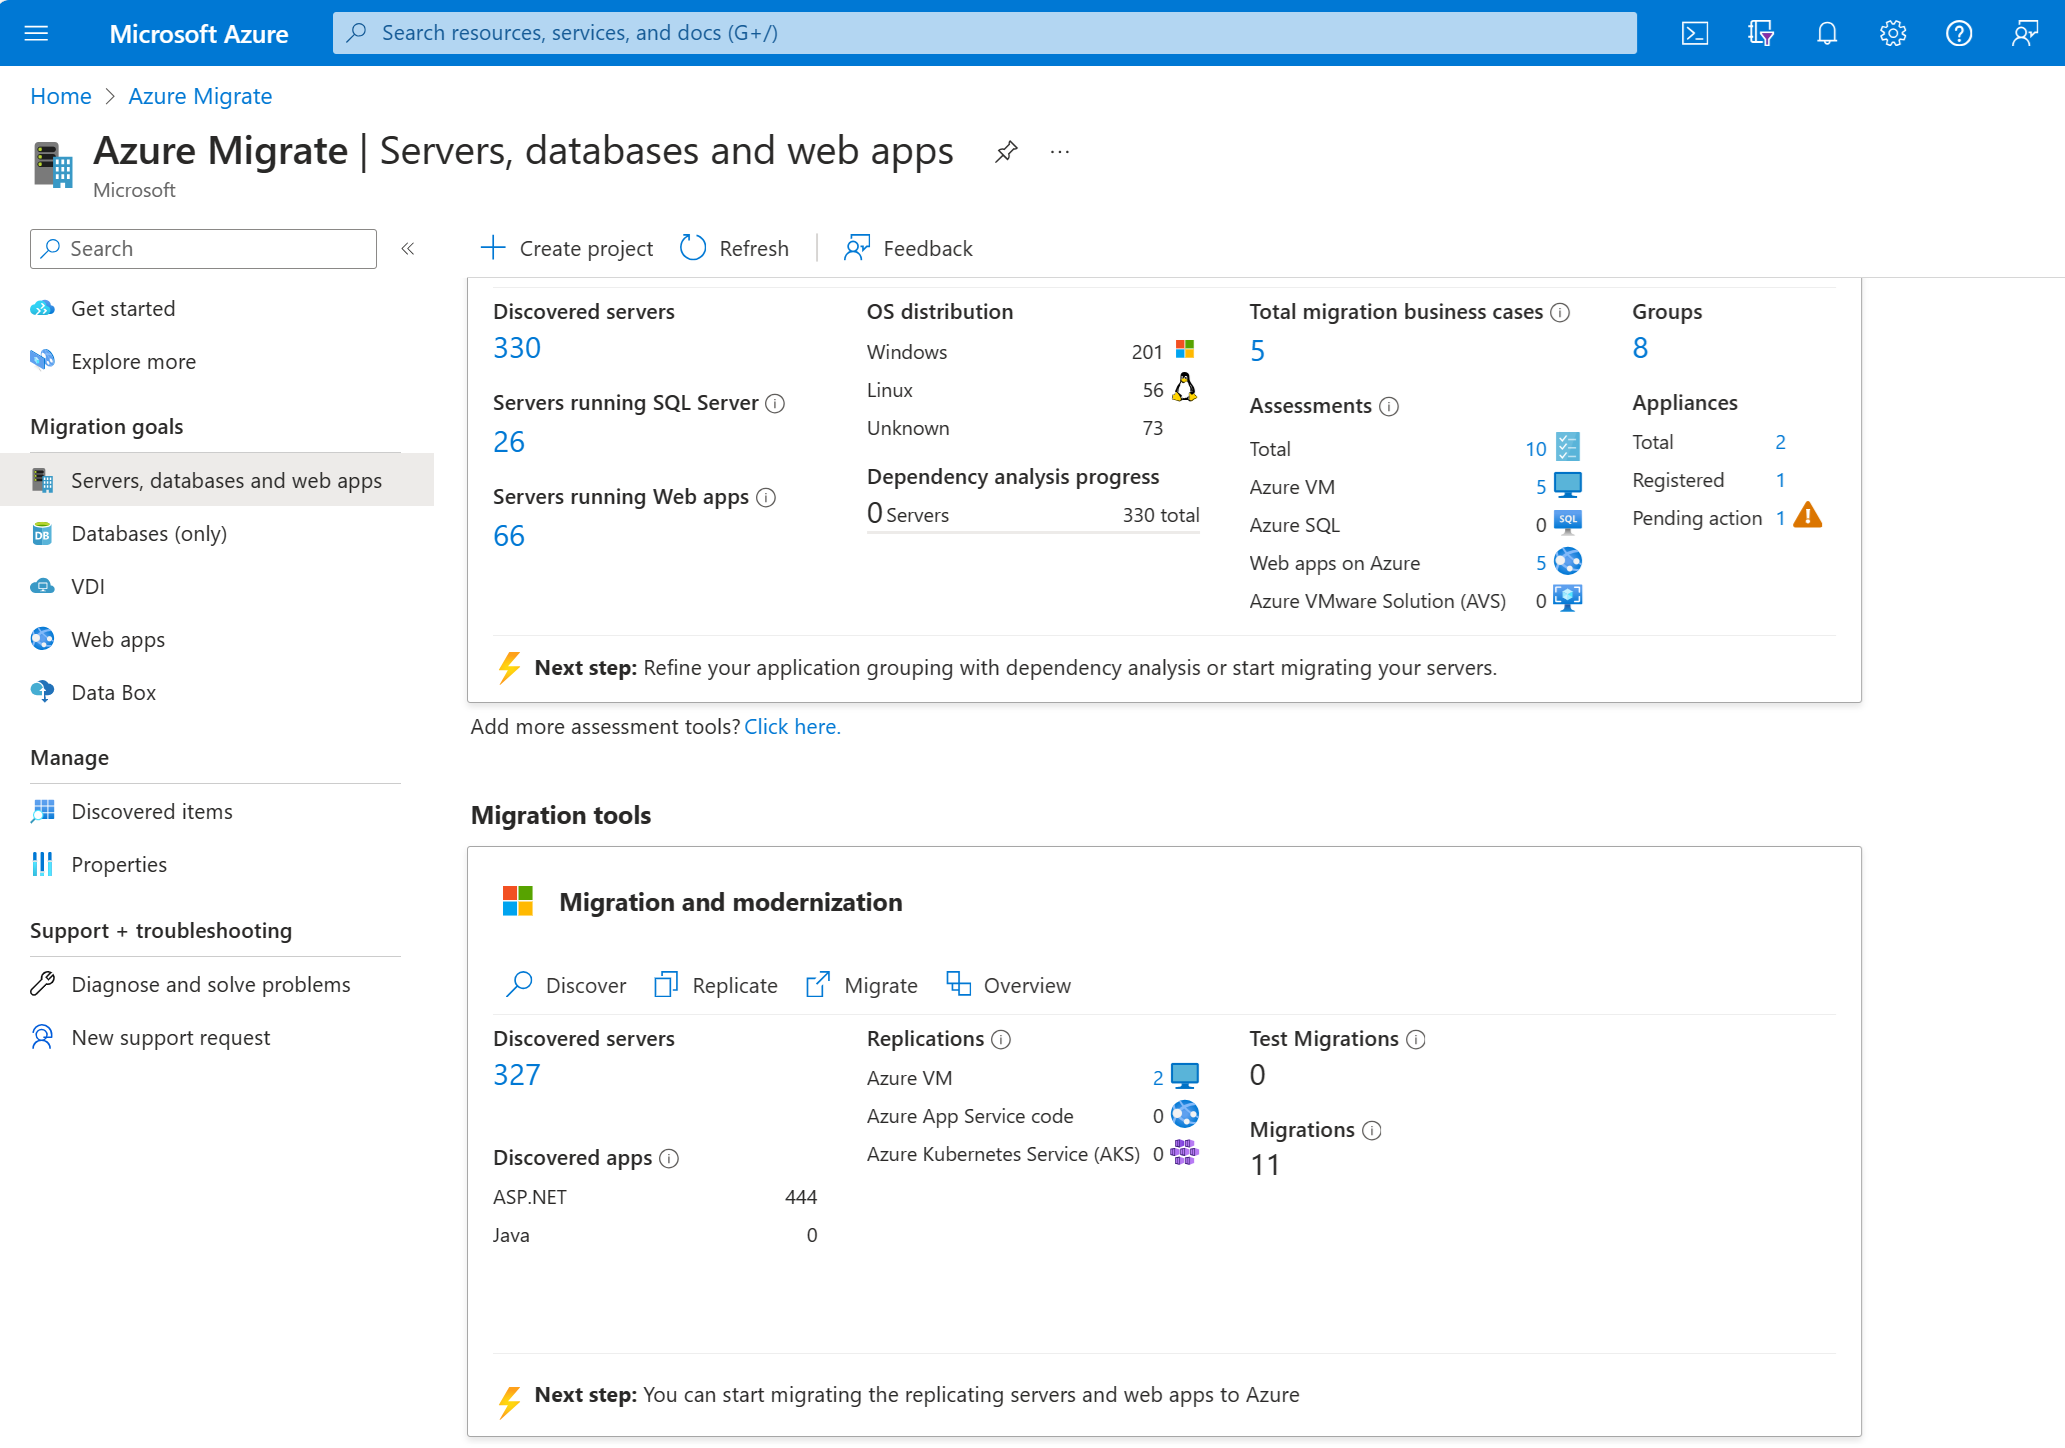
Figure 1: The Azure Migrate - Servers page in the Azure admin center.
Testing migrated virtual machines
After all your targeted VMs are replicated and migrated into Azure, and before you migrate them into production, you can test them to ensure that everything works. The process runs a prerequisite check, prepares for the test, creates a new test VM, and starts the test. This process takes a few minutes.
The test migration functionality in Azure Migrate runs without affecting on-premises machines. It allows you to test the migration process, perform any app testing, and address any issues before a full migration.
Testing your migration is a great feature that helps you become comfortable with the migration process. It also helps you understand any tasks that should happen after migration. You can carry out this test migration as many times as you need in order to refine the process and confirm the steps.
Important
After the test migration, clean up the test resources to ensure that you don't incur any additional costs.
Migrating the virtual machines into production
When you're ready for the production migration, select Migrate from the Replicating machines page of the Azure admin center.
The process prompts you to shut down the machine before migration, which is an optional stage. If you shut down the machine, Azure Migrate performs a planned migration with zero data loss (minimum data loss if you're using agent-based replication for the machine). If you choose not to shut down the machine, a final sync will be performed before the migration, but any changes that happen on the machine after the final sync is started aren't replicated.
Terminating the source machine is an important step, but you should evaluate which option is best suited to each workload.
Because this step might affect production systems, migration should be completed during off-peak hours to minimize disruption to the business.
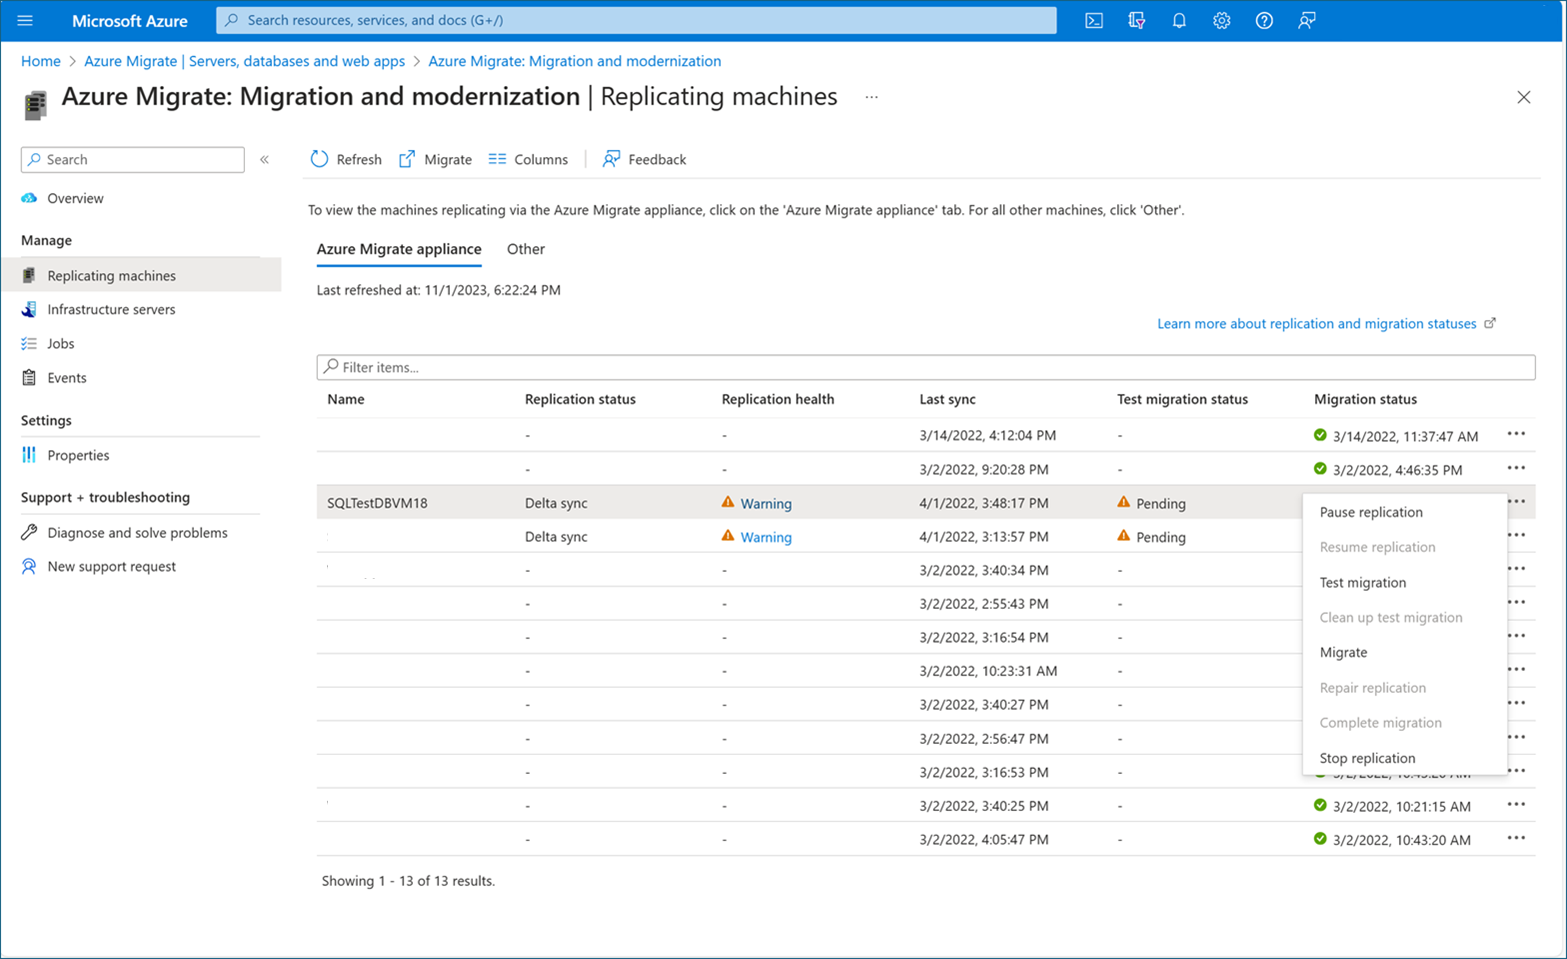
Now, Azure Migrate runs through the production migration process. You can check the status as it validates the prerequisites, prepares for migration, creates the Azure VM, and starts the Azure VM.
Release tasks
After the migration, you can release production traffic to the VM by rerouting network traffic to it. Before you reroute traffic, evaluate the workloads to ensure that each has a completed business-change plan, technical validation, and business validation.
Business change plan: Ensure that the following aspects of the business change plan are properly communicated to avoid business disruption:
- Complete (or at least plan) user training.
- Communicate about any outage windows and get approval.
- Synchronize production data and have users validate it.
- Validate promotion and adoption timing. Ensure that timelines and changes have been communicated to users.
Technical validation: In addition to the business change plan, consider validation of the technical readiness for your workloads. Here are a few suggested tests to complete:
- Network isolation testing. Test and monitor network traffic to ensure proper isolation and no unexpected network vulnerabilities. Validate that any network routing to be severed during cutover isn't experiencing unexpected traffic.
- Dependency testing. Ensure that all workload application dependencies have been migrated and are accessible from the migrated assets.
- Business continuity and disaster recovery (BCDR) testing. Validate that any service-level agreements (SLAs) for backup and recovery are established. If possible, perform a full recovery of the assets from the BCDR solution. At minimum, you should add a backup schedule by using Azure Backup. For more advanced SLAs, you might also want to consider replication to a second region by using Azure Site Recovery.
- User route testing. Validate traffic patterns and routing for user traffic. Ensure that network performance aligns with expectations.
- Final performance check. Ensure that users have completed and approved performance testing. Execute any automated performance testing.
- Additional technical readiness. Restrict network access for unused services by using network security groups. Deploy Azure Disk Encryption to secure the disks from data theft and unauthorized access.
Final business validation: After the business change plan and technical readiness have been validated, the following final tasks can complete the business validation:
- Cost validation (plan versus actual). Testing is likely to produce changes in sizing and architecture. Ensure that deployment pricing still aligns with the original plan.
- Communicate and execute cutover plan. Prior to cutover, communicate the cutover and execute accordingly.
Complete cleanup tasks for the remaining on-premises servers. Such tasks might include removing the servers from local backups and removing their raw disk files from storage-area network (SAN) storage to free up space. Update documentation related to the migrated servers to reflect their new IP addresses and locations in Azure.
After the final task in the preceding list is completed, the VM and supported workload are considered released. The final phase or discipline of migration is now finished for that workload.