Set up electronic payment formats
When you use Finance, you can make electronic payments to vendors. The system provides various out-of-the-box electronic payment formats. If necessary, you can adjust existing payment formats and set up new ones.
Configuration
Two primary ways are available for getting file formats that you can use for methods of payment: a generic electronic export format and a built-in export format.
Add bank information for the USMF company
Follow these steps to add bank information for the USMF legal entity that's referenced later in a registered payment:
- Go to Organization administration > Organizations > Legal entities.
- On the Legal entities page, select USMF legal entity. Then, on the Bank account information FastTab, in the Bank accounts group, select USMF_OPER bank accounts.
- On the Bank accounts page, on the Additional identification FastTab, select the SWIFT code field and enter USBKUS44111.
Set up the Electronic Reporting framework to use payment formats
You'll need to set up the following minimal set of Electronic Reporting (ER) parameters before you can start using standard ER formats.
Set up Electronic Reporting parameters
To set up your ER parameters, follow these steps:
- Go to Organization administration > Workspaces > Electronic reporting.
- On the Localization configurations page, in the Related links section, select Electronic reporting parameters.
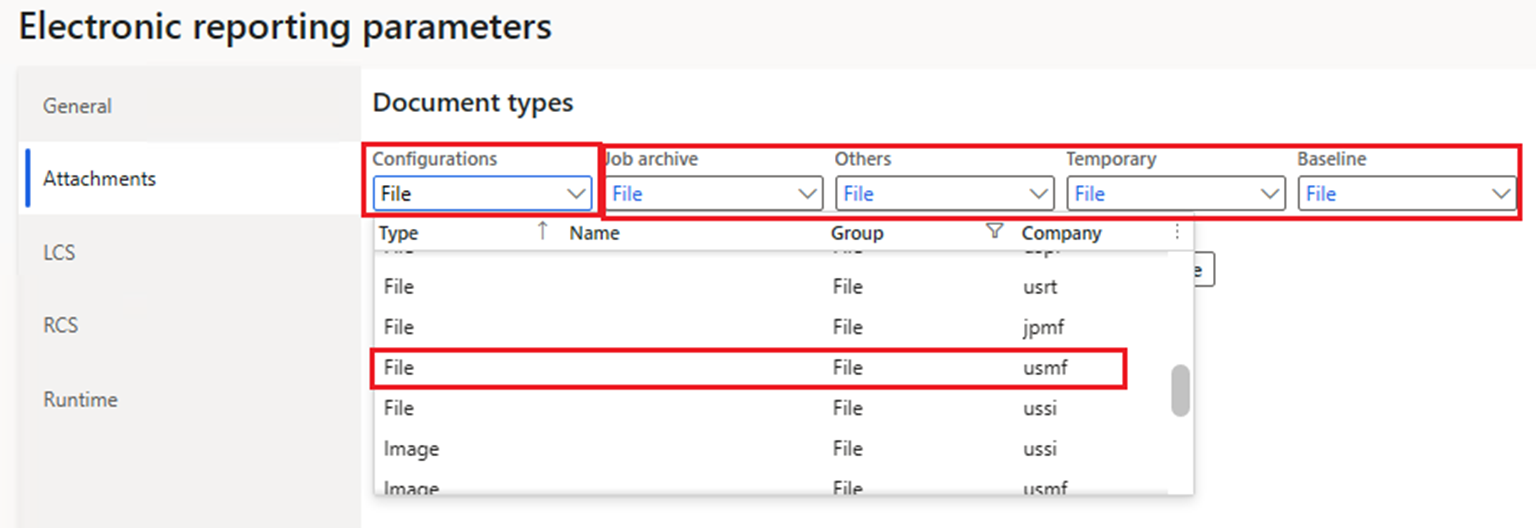
- On the Attachments tab, set the following parameters:
- In the Configurations field, select the File type for USMF company.
- In the Job archive, Temporary, Baseline, and Others fields, select the File type.
Activate the Electronic Reporting configuration provider
Every ER configuration that's added is marked as owned by an ER configuration provider. You would use the ER configuration provider that's activated in the Electronic Reporting workspace for this purpose. Therefore, you'll need to activate an ER configuration provider in the Electronic Reporting workspace before you start adding or editing ER configurations.
To set up the ER configuration provider, follow these steps:
- Go to Organization administration > Workspaces > Electronic reporting.
- On the Localization configurations page, in the Configuration providers section, select the Microsoft tile and then select the Set active button to activate the selected ER provider.
Import the standard Electronic Reporting format configurations
To add the standard ER configurations to your current instance of Finance, you'll need to import them from the ER repository that was set up for that instance.
To import the standard ER format, follow these steps:
- Go to Organization administration > Workspaces > Electronic reporting.
- On the Localization configurations page, in the Configuration providers section, select the Microsoft tile and then select Repositories to view the list of repositories for the Microsoft provider.
- On the Configuration repositories page, select the repository of the Global type, and then select Open. If you're prompted for authorization to connect to the Regulatory Configuration Service, follow the authorization instructions.
- On the Configuration repository page, in the configuration tree on the left pane, select the ISO20022 Credit transfer format configuration.
- Select Import to download the latest version from the Global repository to the current Finance instance.

Now, you can access a list of standard electronic payment formats among the list of different electronic report formats (such as ISO20022 Credit transfer per countries/regions or SWIFT). On the Methods of payment page, in the Accounts payable and Accounts receivable modules, you can select the payment formats according to your business requirements.
Set up a method of payment for the Electronic Reporting file format
Electronic reporting gives you the option to import files from the global repository and then use these formats in the method of payment. In this method, you need to select the value of Generic electronic export format as true, which will enable the Select format configuration field.
To set up a new method of payment for an ER-based format, complete the following steps on the Methods of payment page under the Payment setup menu in the Accounts payable module:
- Create a new method of payment for the desired format of ISO20022 Credit transfer.
- In the Method of payment field, enter the ISO20022 identifier to make payments by using Generic ISO20022 credit transfers.
- In the Payment type field, select the Electronic payment option.
- Under the General FastTab, specify the Account type and Payment account to define the bank that makes the electronic payment.
- Select the File formats FastTab, and then in the Export format field, select ISO20022 Credit transfer.

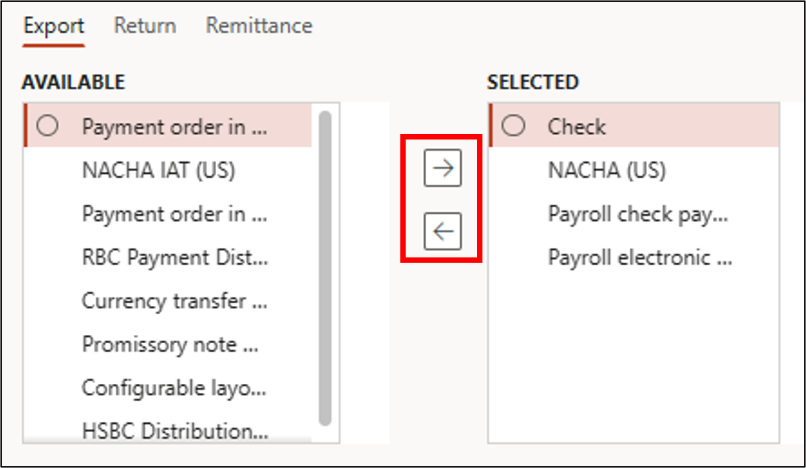
When you set up a method of payment for a customer or vendor, you'll need to indicate which file formats and standards should be used for payment processing. You can select from the following types of formats:
- Export
- Return
- Remittance
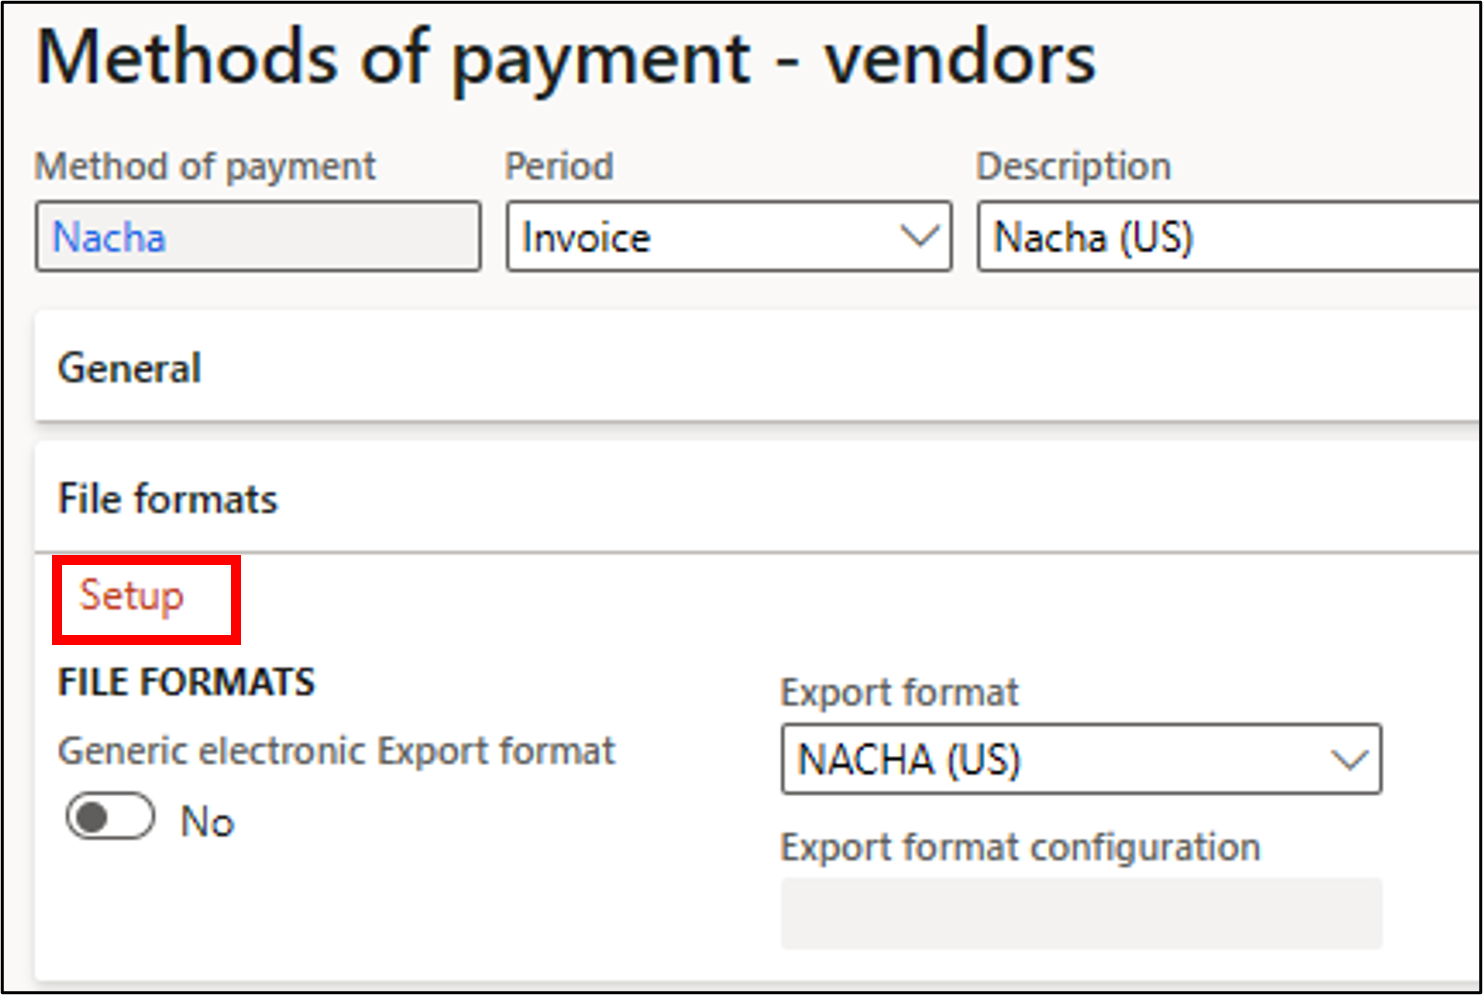
Set up a method of payment for the built-in export file format
The built-in export file format method helps you select file formats that are based on X++ code. Select the Setup button on the File formats FastTab on the Methods of payment - vendor page.
The list of available file formats in the system will display, where you can select formats that you want to use.
Select the Payment specification tab above Methods of payment - vendors, fill out the following information, and then select Save when you're finished:
- Payment specification - CCD
- Description - CCD
- Export format - Standard NACHA – CCD
These formats are code-based formats that have been created by developing X++ code. You can add more file formats by extending CustOutPaym or VendOutPaym classes by using Visual Studio.
When you select the code-based formats, set the value of the Generic electronic export format field as false. In the Export format field, a lookup will appear that shows all selected formats from which you can select the one that you need.
Add bank information for a vendor account
Follow these steps to add bank information for a vendor account that's referenced later in a registered payment:
- Go to Accounts payable > Vendors > All vendors.
- On the All vendors page, select the 1001 vendor account. Then, on the Action Pane, on the Vendor tab, in the Setup group, select Bank accounts.
- On the Vendor bank accounts page, select New and then enter the following information:
- In the Bank account field, enter USD_OPER.
- In the Bank account number field, enter 1425345345.
- In the SWIFT code field, enter USBKUS44222.

- On the All vendors page, open the 1001 Vendor Account.
- On the Vendor details page, select Edit to make the page editable, if necessary.
- On the Payment FastTab, in the Bank account field, select USD_OPER.
- On the Payment FastTab, in the Payment group of fields, select the following default values:
- Method of payment - Nacha
- Payment specification - CCD

Process a vendor payment with the generic Electronic Reporting format
You can create a payment in the vendor payment journal by using a payment proposal or by manually entering a one-off payment and then selecting a method of payment that supports electronic payment. The vendor payment is done primarily from the Vendor payment journal page under the Payments menu in the Accounts payable module (scenario with Payment proposal):
- On the Vendor payment journal page, select New. Select the Payment journal name and then select Lines.
- Select Payment proposal > Create payment proposal.
- On the Vendor payment proposal dialog, specify criteria to filter for records for the desired vendor account and then select OK.
- Select the line for the required invoice and then select Create payment.
- Verify that the payment that's entered is set up to use the appropriate ISO20022 method of payment.
- On the Vendor payments page, on the Action Pane, select Generate payments.
- On the Generate payments dialog, enter the following information:
- In the Method of payment field, select ISO20022.
- In the Bank account field, select the related bank account.
- On the Electronic report parameters dialog, set the parameters that might vary depending on the format that's used (for example, set Format and Print control report options) and then select OK.
- The electronic payment file is generated to share for raising the payment transactions. Download the zip file and then extract the following files from it:
- Control report in Excel format (if an option)
- Payment file in XML format
Process a vendor payment with the built-in X++ format
To process vendor payments by using the built-in X++ format, follow these steps:
- Create a payment line that's set up to use the appropriate Nacha method of payment.
- On the Vendor payments page, on the Action Pane, select Generate payments.
- On the Generate payments dialog, enter the following information:
- In the Method of payment field, select Nacha.
- In the Bank account field, select the related bank account.
- On the Format dialog, set the parameters that might vary depending on the format that's used and then select OK.
- The payment file is generated to share for raising the payment transactions. Download the payment file in TXT format.