Set up accounts receivables for credit and collections
You can configure accounts receivable for credit and collections to track invoices and incoming payments from customers. It is important to keep in mind that the configuration of the Accounts receivable module has direct impact on the configuration of the Credit and collection module.
Let's review the overall business flow of managing credit and collections.
- Billing and credit information received by seller.
- Seller approves credit terms, and begins shipments to customer.
- Customer is invoiced.
- Customer fails to pay within terms.
- Invoice is referred to collections.
- Collections process begins.
Credit and collections components
In addition to setting up accounts receivable for credit and collections, there are several components that need to be set up to use the functionality within Finance. The following components must be set up to prepare to use credit and collections.
- Aging period definitions
- Aging snapshot
- Customer pools (optional)
- Collections team (optional)
- Collections case category
- Journal names
- Reason code for write-off transactions
- Folder for e-mail attachments
- Email templates
- Accounts receivable (AR) parameters for collections
- Collections agents (optional)
- Write-off account
- Outlook settings for collections form users
- Email settings for customer contacts for collections
- Email settings for sales people
By using customer pools, you easily can manage collections for customers with shared characteristics. You can create and maintain groups of customers who share key parameters. These include terms of payment, settle periods, inventory posting ledger accounts, sales tax group, and default account setup.
By setting up the posting profiles that control the posting of customer transactions to the general ledger, you can manage what interest and collection letter sequence can be assigned to a customer, group of customers, or all customers.
Another consideration for the Credit and collection module is to make sure the customers’ methods of payment, terms of payment, charges codes, payment days, and payment fees are correctly set up to get the most accurate information about delinquent customers prior to processing the collection.
During the collection process, you often need to record Not sufficient funds (NSF) or perhaps suggest a write-off when delinquent customers decline to pay their debts. You would then create journals, for example, one for NSF and the other for Write-off.
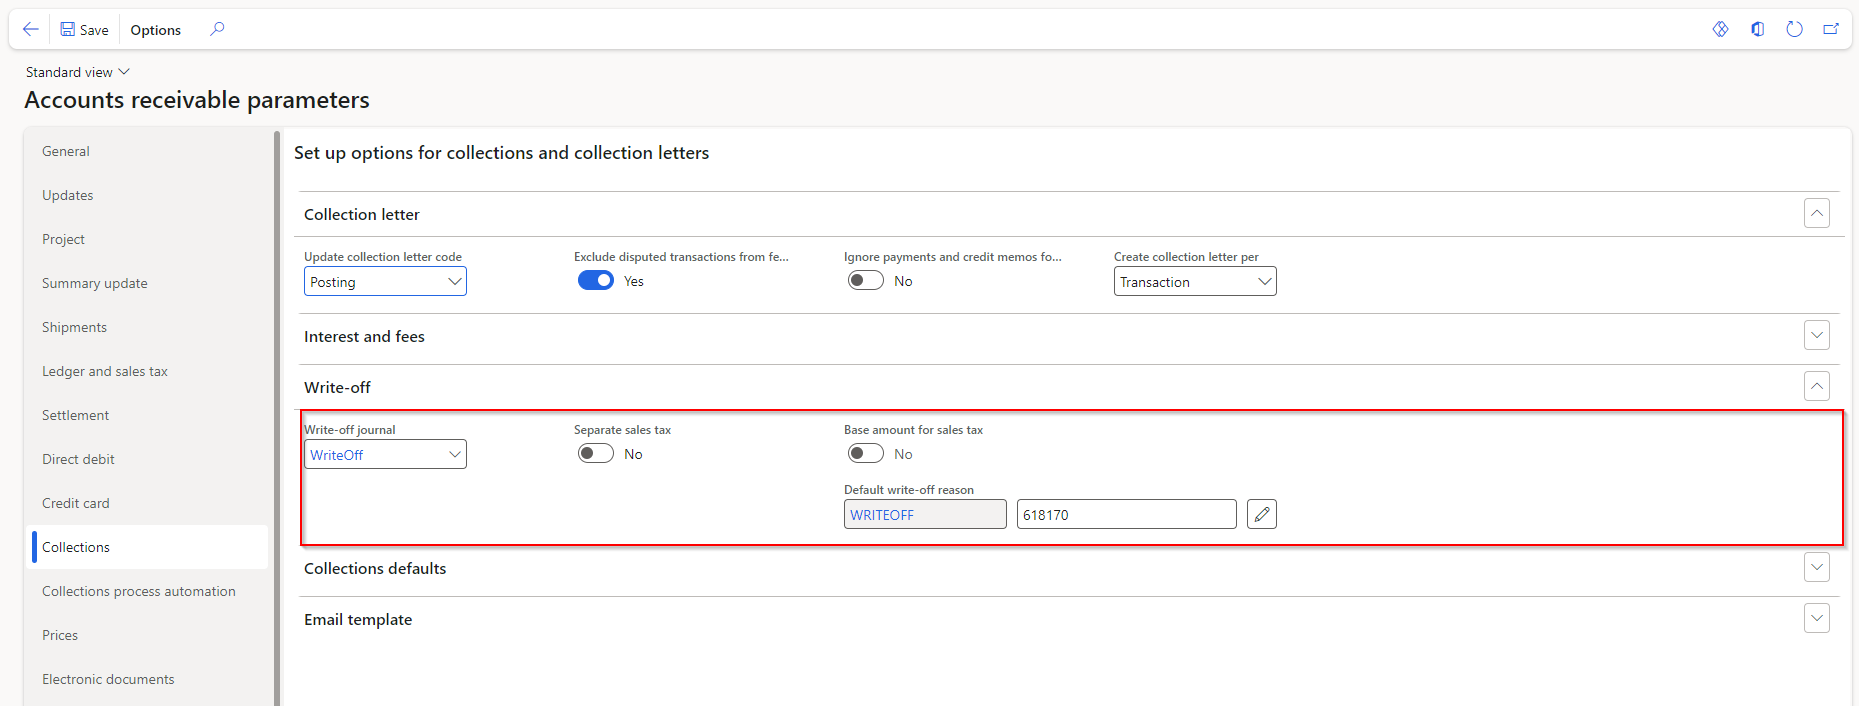
The following procedure shows how to set up the parameters for write-offs and then write off transactions from the Collections tab of the Accounts receivable parameters, the Open customer invoices page, and the Customer page.
Go to Accounts receivable > Setup > Accounts receivable parameters.
Select the Collections tab.
Expand or collapse the Write-off section. The Write-off journal is the general journal that will hold the write-off transactions that you create. You can attach a reason code to every write-off. You can override this default at the time of the write-off.
Set the selection to Yes if you want to separate the sales tax from the original transaction in the write-off.
Close the page.

Set up an automatic collection task
The Automatic collection task feature allows you to set up a collections process strategy that automatically identifies customer invoices that require an email reminder, collection activity (such as a phone call), or a collection letter to be sent to the customer.
In the Accounts receivable parameters, you can also specify the percentage of customers that get checked per batch task when the aging snapshot is run for customer invoices.
To create an automated collection process, go to Credit and collections > Setup > Collections process setup. The process steps are based on the oldest open invoice for a specific customer, this invoice will determine what type of communication or activity should take place.
First, you will configure the Process Hierarchy, which is an order of which the processes are run and when. Each level of the Hierarchy is linked to a customer pool, and if a customer belongs to multiple pools, the hierarchy will determine which process takes precedence.
The Quiet days are used to ensure that the customer is not contacted too often by an automated process. To exclude customers from the process, select the invoices or customer aging balance amounts are used to exclude a customer from the automated process and the Amount for the threshold. To learn more about customer pools, see Review collections information.

On the Process details FastTab, you configure what type of communication will go out to the Collections process setup line that is highlighted. The fields are:
- Description - Used to identify the purpose or name of the step in the hierarchy.
- Action type- Defines if the step will create an activity, send an email, or create a collection letter.
- Business document - Defines the template used to create the action type. This can be an activity template, an email template, or a collection letter per customer.
- The action types can be created on either before or after the invoice due date, based on the setting that's displayed in the Days in relation to the invoice due date column.
- When you select an email action type, the recipient will be used to define if that is a customer, sales group, or collections agent contact. The value in the Business purpose contact field will then determine which contact from that customer's account will receive the communication.
On the Business document details FastTab, the configuration will vary based on the Action type that's selected in the Process details FastTab.
When the Action type is an activity, the activity template details will be shown. These details include the activity template name, the type of activity that will be created, the purpose of the activity, the number of days scheduled to complete the activity, and the details of the activity.
When the Action type is Email in the Process details FastTab, this section will contain two FastTabs.
- The Process details: General process FastTab is used to define the template ID, email description, default language, the username that will be assigned to email messages that are automatically sent, and the associated senders email address.
- The Business document email template details: General process FastTab allows the body of the email to be created after the values in the Language and Subject fields are saved by selecting Edit. This will open a window that allows HTML content to be uploaded.
Set up journal names (settlement, write-off, and NSF)
You can set up the journal names that are used when transactions are processed on the Collections page. This process includes settlement of a transaction, write-off of a transaction, and processing of an NSF payment.
The following are journal types to use for transactions.
- Settlements – use the Customer payment journal type.
- Write-offs – use the Daily journal type.
- NSF – use the Customer payment journal type.
Set up a reason code for write-off transactions
You use default reason codes when transactions are written off on the Collections tab of the Accounts receivable parameters to specify the reason for a write-off. You can change the code during the write-off process.
You can manage customer write-off reason codes from Accounts receivable > Setup > Customer write-off reason codes.
Set up NSF information for bank accounts
Update bank accounts so that they have the correct journal when NSF payments are identified on the Collections FastTab on a bank account.

On the Payment management tab, in the NSF payment journal field, select a payment journal.