Lab - configure ledger and journal setup
Read this first - before you start the lab!
Important
For this lab, you CANNOT sign in with your own credentials. Use the following steps to sign in to your lab environment with the correct credentials.
Ensure that you are signed in to Microsoft Learn.
Select Launch VM mode or Sign in to launch VM mode in this unit.
In the Resources tab on the lab side bar, select the T icon next to Password in the MININT box, to have the administrator password for the Virtual Machine entered for you.
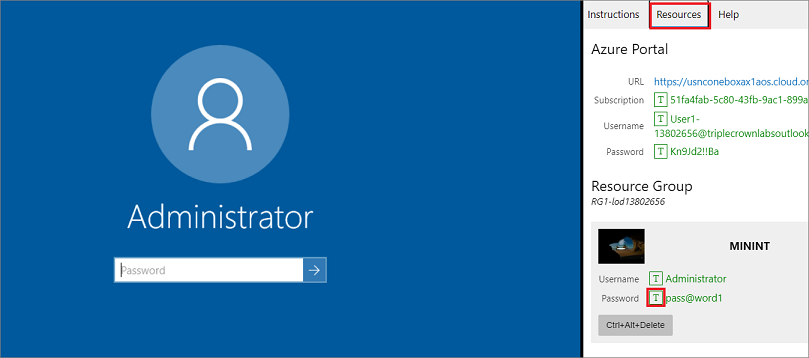
Select Enter.
Microsoft Edge will open. Wait for it to navigate to the Sign in page for finance and operations.
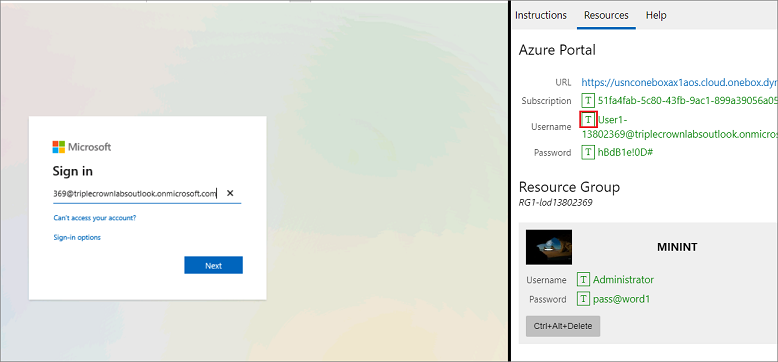
On the Microsoft Sign in page in finance and operations, place your mouse cursor into the Username field.
On the Resources tab of the lab side bar, below the Azure portal heading, select the T icon next to Username, then press Enter.
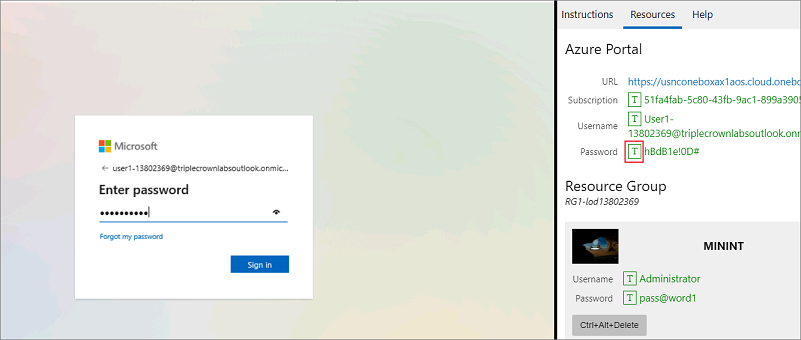
Your mouse cursor will now be in the Password page.
On the Resources tab of the lab side bar, below the Azure portal heading, select the T icon next to select Password, then press Enter.
Don't stay signed in or store the password on the virtual machine.
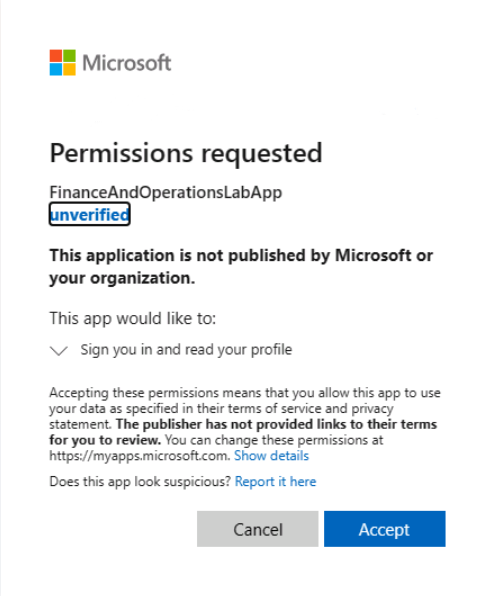
Select Accept in the Permissions requested page.
To see the lab instructions, select the Instructions tab on the lab side bar.
You can now begin your work on this lab.
Scenario
You are the functional consultant for the USMF Company, setting up the journal names, journal descriptions and default descriptions for your business users to use when posting journals.
Create Journal names
Journal names are defined for a specific task according to its type and purpose. Once you have set this up, they can then choose the journal they want to use by the name you have defined here. Let's walk through creating a new Journal name.
- Go to General Ledger > Journal setup > Journal names.
- In the Action Pane, select New.
- Enter the new journal Name as Transport.
- Enter the Description as Transportation Expenses.
- Select the Journal type from the drop-down menu. Select Project - expenses.
- Select a value in the Voucher series field.
- Select Save.
Create Journal descriptions
Journal descriptions help the business to ensure they are selecting the correct journal for their need. Let's set up a Journal description.
- Go to General Ledger > Journal setup > Journal descriptions.
- In the Action Pane, select New.
- In the Identification field, enter cc.
- In the Search name field, enter cc.
- In the Description field, enter Credit card.
- Select Save.
Create Default descriptions used for automatic postings to the general ledger
Default descriptions are created to facilitate automatic postings to the general ledger, such as vendor payments. Let's create a new Default description for your users.
- Go to General Ledger > Journal setup > Default descriptions.
- In the Action Pane, select New to create a new default description.
- Use the drop-down menu on the Description field and select Ledger - generated allocation.
- Select en-us from the Language drop-down menu.
- In the Text field, you can use fixed variables. These are called out in the Reference field at the bottom of the screen. For example, enter Invoice%2.
- Select Save.
Close the lab environment
- Select Done in the Instructions pane in the lab side bar.
- In the Lab is complete window, select Continue, and then select Leave to return to the next unit in the module.